MacDon M155 User manual

M155
Self-Propelled Windrower
Unloading and Assembly Instructions (Container Shipments)
262320 Revision A
Original Instruction
The Harvesting Specialists.

M155 Self-Propelled Windrower, featuring Dual Direction®and Ultra Glide®suspension.
1000141
Published in August 2023
© 2023 MacDon Industries, Ltd.
The information in this publication is based on the information available and in effect at the time of printing. MacDon
Industries, Ltd. makes no representation or warranty of any kind, whether expressed or implied, with respect to the
information in this publication. MacDon Industries, Ltd. reserves the right to make changes at any time without notice.

Declaration of Conformity –Windrower Lift Sling (B9063)
MacDon Industries Ltd.
680 Moray Street,
Winnipeg, Manitoba, Canada
R3J 3S3
[1]
[2]
[3] Part 306489
[4] Not Applicable
[5] May 4, 2023
[6] _____________________________
Adrienne Tankeu
Product Integrity
EN
We, [1]
Declare, that the product:
Machine Type: [2]
Name & Model: [3]
Serial Number(s): [4]
2006/42/EC.
7(2):
EN ISO 4254-1:2013
EN ISO 4254-7:2009
Name and address of the person authorized to
compile the technical file:
Benedikt von Riedesel
General Manager, MacDon Europe GmbH
Hagenauer Straße 59
65203 Wiesbaden (Germany)
BG
Ние, [1]
декларираме, че следният продукт:
Тип машина: [2]
Наименование имодел: [3]
Сериен номер(а) [4]
отговаря на всички приложими разпоредби на
директива 2006/42/EO.
Използвани са следните хармонизирани
стандарти според чл. 7(2):
EN ISO 4254-1:2013
EN ISO 4254-7:2009
Място идата на декларацията: [5]
Име иподпис на лицето, упълномощено да
изготви декларацията: [6]
Име иадрес на лицето, упълномощено да
състави техническия файл:
Бенедикт фон Рийдезел
Управител, MacDon Europe GmbH
Hagenauer Straße 59
65203 Wiesbaden (Германия)
DA
Vi, [1]
erklærer, at prduktet:
Maskintype [2]
Navn og model: [3]
Serienummer (-numre): [4]
2006/42/EF.
Anvendte harmoniserede standarder, som henvist
7(2):
EN ISO 4254-1:2013
EN ISO 4254-7:2009
Sted og dato for erklæringen: [5]
udarbejde erklæringen: [6]
Navn og adresse på den person, som er bemyndiget
udarbejde den tekniske fil:
Benedikt von Riedesel
Direktør, MacDon Europe GmbH
Hagenauer Straße 59
D-65203 Wiesbaden (Tyskland)
DE
Wir, [1]
Erklären hiermit, dass das Produkt:
Maschinentyp: [2]
Name & Modell: [3]
Seriennummer (n): [4]
2006/42/EG erfüllt.
Harmonisierte Standards wurden, wie in folgenden
7(2):
EN ISO 4254-1:2013
EN ISO 4254-7:2009
Ort und Datum der Erklärung: [5]
ist, die Erklärung auszustellen: [6]
ist, die technischen Unterlagen zu erstellen:
Benedikt von Riedesel
General Manager, MacDon Europe GmbH
Hagenauer Straße 59
65203 Wiesbaden
ES
Nosotros [1]
declaramos que el producto:
Tipo de máquina: [2]
Nombre y modelo: [3]
Números de serie: [4]
directriz 2006/42/EC.
7(2):
EN ISO 4254-1:2013
EN ISO 4254-7:2009
Lugar y fecha de la declaración: [5]
draw
redactar la declaración: [6]
Nombre y dirección de la persona autorizada para
elaborar el expediente técnico:
Benedikt von Riedesel
Gerente general - MacDon Europe GmbH
Hagenauer Straße 59
65203 Wiesbaden (Alemania)
ET
Meie, [1]
deklareerime, et toode
Seadme tüüp: [2]
Nimi ja mudel: [3]
Seerianumbrid: [4]
sätetele.
Kasutatud on järgnevaid harmoniseeritud stand-
ardeid, millele on
EN ISO 4254-1:2013
EN ISO 4254-7:2009
Deklaratsiooni koht ja kuupäev: [5]
Deklaratsiooni koostamiseks volitatud isiku nimi ja
allkiri: [6]
Tehnilise dokumendi koostamiseks volitatud isiku
nimi ja aadress:
Benedikt von Riedesel
Peadirektor, MacDon Europe GmbH
Hagenauer Straße 59
65203 Wiesbaden (Saksamaa)
CZ
My, [1]
Prohlašujeme, že produkt:
Typ zařízení: [2]
Název a model: [3]
Sériové(á) číslo)a): [4]
splňuje všechna relevantní ustanovení směrnice
2006/42/EC.
Byly použity harmonizované standardy, jak je uve-
deno v článku 7(2):
EN ISO 4254-1:2013
EN ISO 4254-7:2009
Místo a datum prohlášení: [5]
k vydání
prohlášení: [6]
Jméno a adresa osoby oprávněné k vyplnění techni-
ckého souboru:
Benedikt von Riedesel
generální ředitel, MacDon Europe GmbH
Hagenauer Straße 59
65203 Wiesbaden (Německo)
FR
Nous soussignés, [1]
Déclarons que le produit :
Type de machine : [2]
Nom et modèle : [3]
Numéro(s) de série : [4]
2006/42/EC.
7(2):
EN ISO 4254-1:2013
EN ISO 4254-7:2009
pouvoir de
Nom et adresse de la personne autorisée à
tuer le dossier technique :
Benedikt von Riedesel
Directeur général, MacDon Europe GmbH
Hagenauer Straße 59
65203 Wiesbaden (Allemagne)
262320 iRevision A

HU
Mi, [1]
Ezennel kijelentjük, hogy a következőtermék:
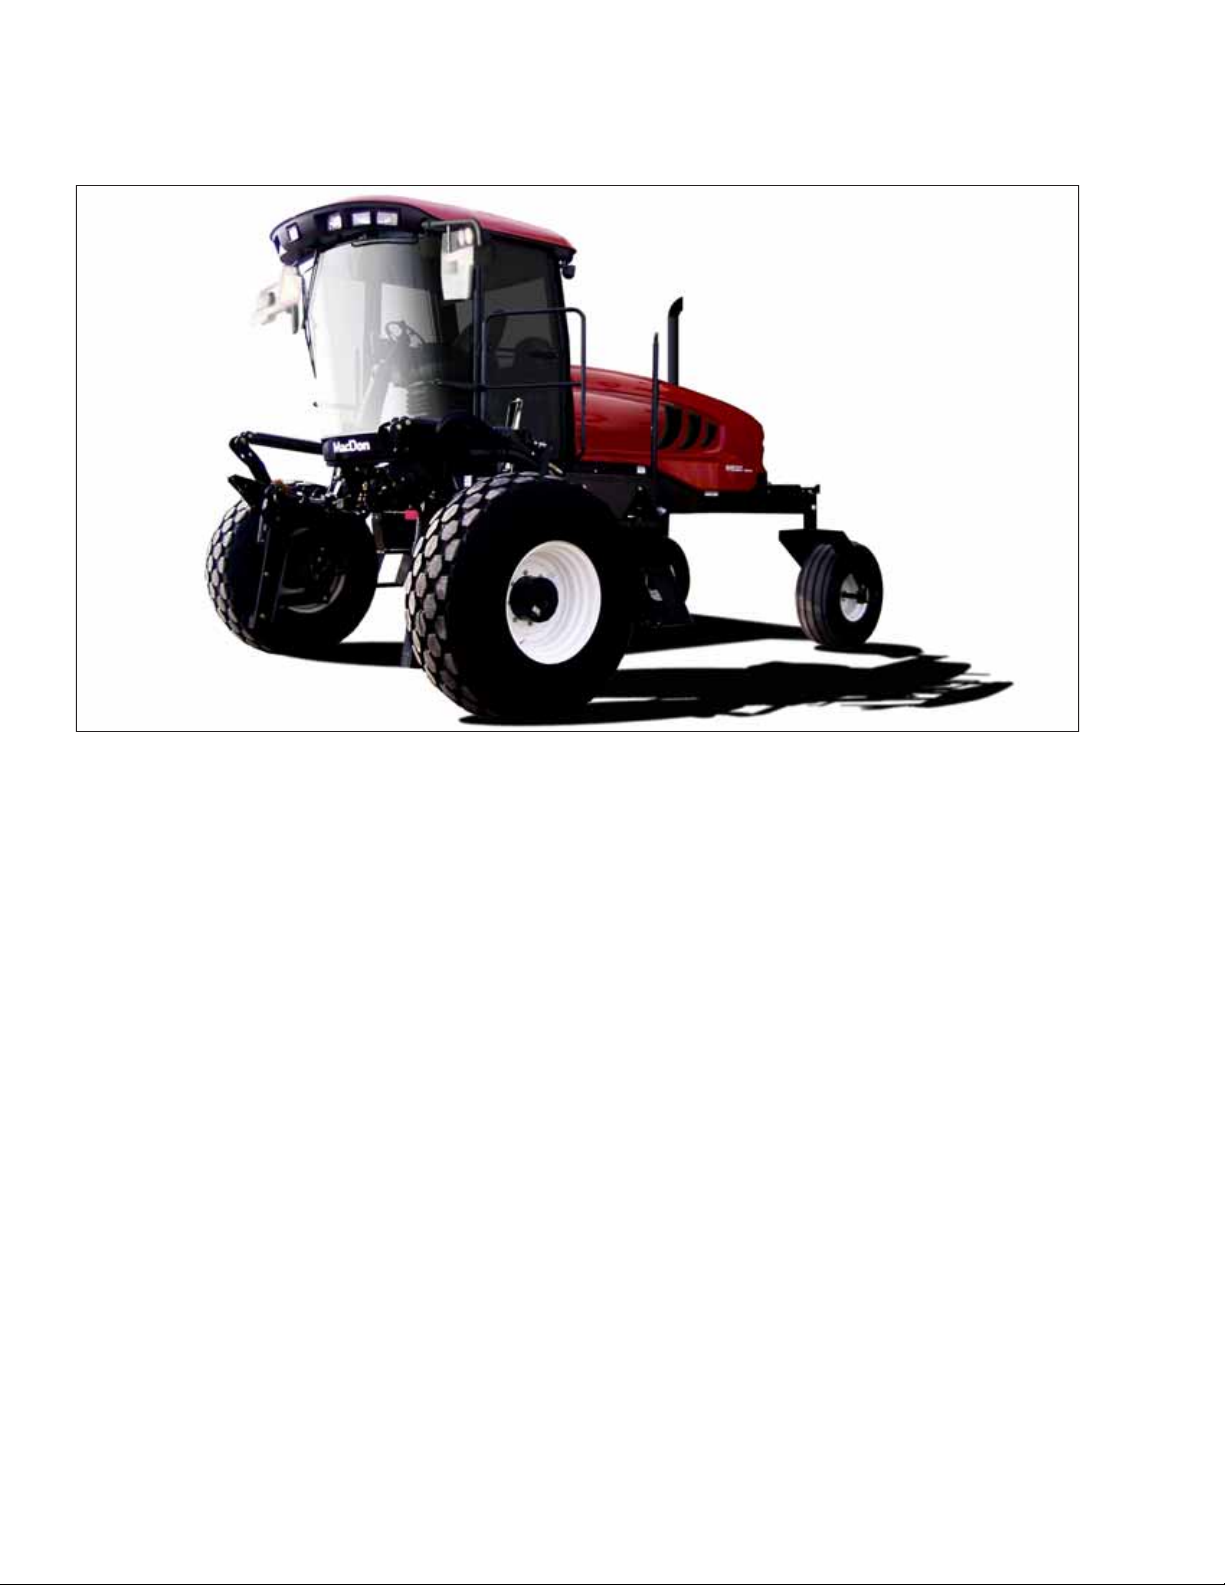
Név és modell: [3]
Szériaszám(ok): [4]
előírásait: 2006/42/EK.
Az alábbi harmonizált szabványok kerültek
alkalmazásra a 7(2) cikkely szerint:
EN ISO 4254-1:2013
EN ISO 4254-7:2009
Azon személy kiléte és aláírása, aki jogosult a
nyilatkozat elkészítésére: [6]
a
műszaki dokumentáció összeállítására:
Benedikt von Riedesel
Vezérigazgató, MacDon Europe GmbH
Hagenauer Straße 59
65203 Wiesbaden (Németország)
LT
Mes, [1]
Pareiškiame, kad šis produktas:
Pavadinimas ir modelis: [3]
Serijos numeris (-iai): [4]
2006/42/EB.
straipsnyje 7(2):
EN ISO 4254-1:2013
EN ISO 4254-7:2009
Deklaracijos vieta ir data: [5]
Asmens tapatybės duomenys ir parašas asmens,
įgalioto
Vardas ir pavardėasmens, kuris įgaliotas
techninįfailą:
Benedikt von Riedesel
Generalinis direktorius, MacDon Europe GmbH
Hagenauer Straße 59
bvonriedes[email protected]
LV
Mēs, [1]
Deklarējam, ka produkts:
Nosaukums un modelis: [3]
Sērijas numurs(-i): [4]
2006/42/EK
prasībām.
7. panta 2. punktā:
EN ISO 4254-1:2013
EN ISO 4254-7:2009
Tās personas vārds, uzvārds un paraksts, kas ir
pilnvarota sagatavot šo deklarāciju: [6]
Tās personas vārds, uzvārds un adrese, kas ir
pilnvarota sastādīt tehnisko dokumentāciju:
Benedikts fon Rīdīzels
Ģenerāldirektors, MacDon Europe GmbH
Hagenauer Straße 59
65203 Wiesbaden (Vācija)
bvonriedesel@macdon.com
NL
Wij, [1]
Verklaren dat het product:
Machinetype: [2]
Naam en model: [3]
Serienummer(s): [4]
voldoet aan alle relevante bepalingen van de
Richtlijn 2006/42/EC.
Geharmoniseerde normen toegepast, zoals vermeld
7(2):
EN ISO 4254-1:2013
EN ISO 4254-7:2009
Plaats en datum van verklaring: [5]
Naam en handtekening van de bevoegde persoon om
de verklaring op te stellen: [6]
Naam en adres van de geautoriseerde persoon om
het technisch dossier samen te stellen:
Benedikt von Riedesel
Algemeen directeur, MacDon Europe GmbH
Hagenauer Straße 59
65203 Wiesbaden (Duitsland)
PO
My niżej podpisani, [1]
Oświadczamy, że produkt:
Typ urządzenia: [2]
Nazwa i model: [3]
Numer seryjny/numery seryjne: [4]
spełnia wszystkie odpowiednie przepisy dyrektywy
2006/42/WE.
Zastosowaliśmy następujące (zharmonizowane)
normy zgodnie z artykułem 7(2):
EN ISO 4254-1:2013
EN ISO 4254-7:2009
Data i miejsce oświadczenia: [5]
Imięi nazwisko oraz podpis osoby upoważnionej do
przygotowania deklaracji: [6]
Imięi nazwisko oraz adres osoby upoważnionej do
przygotowania dokumentacji technicznej:
Benedikt von Riedesel
Dyrektor generalny, MacDon Europe GmbH
Hagenauer Straße 59
65203 Wiesbaden (Niemcy)
RO
Noi, [1]
Declarăm, căurmătorul produs:
Tipul mașinii: [2]
Denumirea și modelul: [3]
Număr (numere) serie: [4]
corespunde tuturor dispozițiilor esențiale ale
2006/42/EC.
Au fost aplicate următoarele standarde armonizate
7(2):
EN ISO 4254-1:2013
EN ISO 4254-7:2009
Data și locul declarației: [5]
pentru întocmirea declarației: [6]
Numele și semnătura persoanei autorizate pentru
întocmirea cărții tehnice:
Benedikt von Riedesel
Manager General, MacDon Europe GmbH
Hagenauer Straße 59
65203 Wiesbaden (Germania)
SV
Vi, [1]
Maskintyp: [2]
Namn och modell: [3]
Serienummer: [4]
2006/42/EG.
Harmonierade standarder används, såsom anges i
7(2):
EN ISO 4254-1:2013
EN ISO 4254-7:2009
Plats och datum för intyget: [5]
Benedikt von Riedesel
Hagenauer Straße 59
65203 Wiesbaden (Tyskland)
bvonriedes[email protected]
SL
Mi, [1]
izjavljamo, da izdelek:
Vrsta stroja: [2]
Ime in model: [3]
Serijska/-e številka/-e: [4]
2006/42/ES.
Uporabljeni usklajeni standardi, kot je navedeno v
členu 7(2):
EN ISO 4254-1:2013
EN ISO 4254-7:2009
Kraj in datum izjave: [5]
Istovetnost in podpis osebe, opolnomočene za
pripravo izjave: [6]
Ime in naslov osebe, pooblaščene za pripravo
tehnične datoteke:
Benedikt von Riedesel
Generalni direktor, MacDon Europe GmbH
Hagenauer Straße 59
65203 Wiesbaden (Nemčija)
bvonriedes[email protected]
SK
My, [1]
týmto prehlasujeme, že tento výrobok:
Typ zariadenia: [2]
Názov a model: [3]
Výrobné číslo: [4]
spĺňa príslušné ustanovenia a základné požiadavky
smernice č. 2006/42/ES.
Použité harmonizované normy, ktoré sa uvádzajú v
Článku č. 7(2):
EN ISO 4254-1:2013
EN ISO 4254-7:2009
Miesto a dátum prehlásenia: [5]
Meno a podpis osoby oprávnenej vypracovaťtoto
prehlásenie: [6]
Meno a adresa osoby oprávnenej zostaviťtechnický
súbor:
Benedikt von Riedesel
Generálny riaditeľMacDon Europe GmbH
Hagenauer Straße 59
65203 Wiesbaden (Nemecko)
bvonriedes[email protected]
IT
Noi, [1]
Tipo di macchina: [2]
Nome e modello: [3]
Numero(i) di serie: [4]
2006/42/CE.
7(2):
EN ISO 4254-1:2013
EN ISO 4254-7:2009
Luogo e data della dichiarazione: [5]
Nome e firma della persona autorizzata a redigere la
dichiarazione: [6]
Nome e persona autorizzata a compilare il file
tecnico:
Benedikt von Riedesel
General Manager, MacDon Europe GmbH
Hagenauer Straße 59
65203 Wiesbaden (Germania)
PT
Nós, [1]
Declaramos, que o produto:
Tipo de máquina: [2]
Nome e Modelo: [3]
Número(s) de Série: [4]
2006/42/CE.
Normas harmonizadas aplicadas, conforme referido
7(2):
EN ISO 4254-1:2013
EN ISO 4254-7:2009
Local e data da declaração: [5]
elaborar a declaração: [6]
Nome e endereço da pessoa autorizada a compilar o
ficheiro técnico:
Benedikt von Riedesel
Gerente Geral, MacDon Europa Ltda.
Hagenauer Straße 59
65203 Wiesbaden (Alemanha)
SR
Mi, [1]
Izjavljujemo da proizvod
Tip mašine: [2]
Naziv i model: [3]
Serijski broj(evi): [4]
2006/42/EC.
Korišæeni su usklaðeni standardi kao što je navedeno
u èlanu 7(2):
EN ISO 4254-1:2013
EN ISO 4254-7:2009
Datum i mesto izdavanja deklaracije: [5]
sastavljanje
deklaracije: [6]
Ime i adresa osobe ovlašæene za sastavljanje teh-
nièke datoteke:
Benedikt von Riedesel
Generalni direktor, MacDon Europe GmbH
Hagenauer Straße 59
65203 Wiesbaden (Nemačka)
bvonriedes[email protected]
262320 ii Revision A

[4] Not Applicable
[5] May 4, 2023
[6] _____________________________
Adrienne Tankeu
Product Integrity
We, [1]
Declare, that the product:
Machine Type: [2]
Name & Model: [3]
Serial Number(s): [4]
Designated standards used are :
EN ISO 4254-1:2015
EN ISO 4254-7:2017
[1]
MacDon Industries Ltd.
680 Moray Street,
Winnipeg, Manitoba, Canada
R3J 3S3
[2]
[3] Part 306489
262320 iii Revision A

Introduction
This instruction manual describes the unloading, setup, and predelivery requirements for the MacDon M155 Self-Propelled
Windrowers shipped in containers.
Carefully read all the material provided before attempting to unload, assemble, or use the machine.
Retain this instruction for future reference.
Conventions
The following conventions are used in this document:
•The windrower is Dual Direction®and can be driven in cab-forward or engine-forward mode.
•Right and left designations are determined by the operator’s position facing the direction of travel. This manual uses
the terms right cab-forward, left cab-forward, right engine-forward, and left engine-forward when referencing specific
locations on the machine.
•Unless otherwise noted, use the standard torque values provided in Chapter 8.1 Torque Specifications, page 273 of this
document.
NOTE:
Keep your MacDon publications up-to-date. The most current version can be downloaded from our Dealer-only site
(https://portal.macdon.com) (login required).
This instruction is available in English and Russian and can be downloaded from our Dealer-only site.
If the shipment is damaged or is missing parts, contact the following according to your region:
•Australia: [email protected]
•Brazil: [email protected]
•Europe (except Russia): [email protected]
•Russia: [email protected]
262320 iv Revision A

Summary of Changes
The following list provides an account of major changes from the previous version of this document.
Section Summary of Change Internal Use Only
Declaration of Conformity –Windrower Lift
Sling (B9063), page i
Updated the Declaration of Conformity. Technical
Publications
2.3 Removing Wheel and Step Assembly,
page 18
The following illustrations and associated steps
were revised to clarify which parts are retained or
discarded:
•1042463 replaces 1005932 to clarify which
parts are retained.
•1042462 replaces 1005933 to clarify which
parts are discarded.
•1042464 replaces 1005937 to add callouts.
•1042465 replaces 1005943 to clarify which
parts are retrieved.
Technical
Publications
2.5 Removing Platforms, page 24 Added step about laying cardboard onto the
ground. Moved the associated NOTE to this
location as well.
Technical
Publications
3.3 Installing Drive Wheels, page 41 Added step to remove and discard the shipping
plate under each drive leg. Accordingly, 1042494
replaces 1005590 to add callouts for the bottom
shipping plate.
Technical
Publications
3.15.1 Lubrication Procedure, page 73 Removed the DANGER only because the engine is
considered to be off at this point in the unloading
and assembly process.
Technical
Publications
4.2.2 Adding Tire Ballast, page 83 Changed the tire ballast information as follows:
•The information is now consistent with the
operator’s manual, specifically:
–Removed the table previously titled
“Maximum Fluid per Tire”.
–The recommended ballast for D/D1 SP
Series Headers, 9.1 m (30 ft.) and 10.7 m
was corrected to match the capacities of
the recommended tire sizes.
•Added D2 SP Series Draper Header
specifications.
Technical
Publications
3.16 Installing AM/FM Radio, page 75 Removed the step for shutting the engine off only
because the engine is considered to be off at this
point in the unloading and assembly process.
Technical
Publications
3.17 Removing Windrower from Assembly
Stands, page 80
Moved topic to before the pre-delivery checks
begin.
Technical
Publications
4.8 Checking Engine Coolant, page 90 Revised the procedure so that the temperature
rating of the coolant is checked before coolant is
added to the recovery tank.
Technical
Publications
4.11 Priming Hydraulic System, page 95 Illustration 1042495 replaced 1006065 to show
the correct engine.
Technical
Publications
262320 vRevision A

Section Summary of Change Internal Use Only
6 Attaching Headers, page 123 Reordered attaching topics alphabetically. Technical
Publications
6.1.1 Attaching A Series Auger Header –
Hydraulic Center-Link with Self-Alignment,
page 123
Revised DANGER to mention safety props. Technical
Publications
6.1.2 Attaching A Series Auger Header –
Hydraulic Center-Link without Self-Alignment,
page 129
Revised DANGER to mention safety props. Technical
Publications
6.1.3 Attaching A Series Auger Header –
Mechanical Center-Link, page 135 •Revised DANGER to mention safety props.
•Added two steps (lower the header, and shut
the engine off) near the end of the procedure.
Technical
Publications
6.2.1 Attaching Draper Header Supports,
page 141 •Added DANGER.
•Added "Shut engine off..." step.
•Added illustration 1042433 and associated
IMPORTANT.
•Moved the step (removing float) associated
with illustration 1029714 to the attaching
header procedures.
Product Support
Technical
Publications
6.2.2 Attaching D or D1 SP Series Draper
Header –Hydraulic Center-Link with Self-
Alignment, page 142
•Revised DANGER to mention safety props.
•Replaced the NOTE (concerning header
supports) with illustration 1042469 and the
associated step.
•Added illustration 1036885 and associated
step (removing forming shield bracket).
•Added illustration 1029714 and
associated step.
Technical
Publications
6.2.3 Attaching D or D1 SP Series Draper
Header –Hydraulic Center-Link without Self-
Alignment, page 149
•Revised DANGER to mention safety props.
•Replaced the NOTE (concerning header
supports) with illustration 1042469 and the
associated step.
•Added illustration 1036885 and associated
step (removing forming shield bracket).
•Added illustration 1029714 and
associated step.
Technical
Publications
6.2.4 Attaching D or D1 SP Series Draper
Header –Mechanical Center-Link, page 155 •Revised DANGER to mention safety props.
•Replaced the NOTE (concerning header
supports) with illustration 1042469 and the
associated step.
•Added illustration 1036885 and associated
step (removing forming shield bracket).
•Added illustration 1029714 and
associated step.
Technical
Publications
262320 vi Revision A

Section Summary of Change Internal Use Only
6.3 Attaching D2 SP Series Draper Header,
page 161
Added topic. Technical
Publications
6.3.1 Attaching Draper Header Supports,
page 161
Added topic. Technical
Publications
6.3.2 Attaching D2 SP Series Draper Header –
Hydraulic Center-Link with Self-Alignment,
page 162
Added topic. Technical
Publications
6.3.3 Attaching D2 SP Series Draper Header –
Hydraulic Center-Link without Self-Alignment,
page 169
Added topic. Technical
Publications
6.3.4 Attaching D2 SP Series Draper Header –
Mechanical Center-Link, page 177
Added topic. Technical
Publications
6.4.1 Attaching R or R1 Series Rotary Disc
Header –Hydraulic Center-Link with
Self-Alignment, page 185
Revised DANGER to mention safety props. Technical
Publications
6.4.2 Attaching R or R1 Series Rotary Disc
Header –Hydraulic Center-Link without Self-
Alignment, page 191
Revised DANGER to mention safety props. Technical
Publications
6.4.3 Attaching R or R1 Series Rotary Disc
Header –Mechanical Center-Link, page 198
Revised DANGER to mention safety props. Technical
Publications
7 Cab Display Module, page 203 Moved this chapter.
8.1.6 O-Ring Boss Hydraulic Fittings –Non-
Adjustable, page 280
Updated torque values in the table. ECN 64539
8.1.5 O-Ring Boss Hydraulic Fittings –
Adjustable, page 278
Updated torque values in the table. ECN 64539
8.1.7 O-Ring Face Seal Hydraulic Fittings,
page 280
Minor corrections in the table of torque values:
•Size -6: rounded lbf-ft from 29 up to 30.
•Size -24: corrected "Thread Size" from 1-2 to 2
Technical
Publications
8.4 Lubricants, Fluids, and System Capacities,
page 286
Corrected the metric fuel tank capacity to 367 L
(was 378 L).
Technical
Publications
262320 vii Revision A


262320 ix Revision A
Declaration of Conformity –Windrower Lift Sling (B9063) ...................................................................................i
Introduction .............................................................................................................................................. iv
Summary of Changes....................................................................................................................................v
Chapter 1: Safety ........................................................................................................................................ 1
1.1 Safety Alert Symbols ...............................................................................................................................1
1.2 Signal Words .........................................................................................................................................2
1.3 General Safety .......................................................................................................................................3
1.4 Hydraulic Safety .....................................................................................................................................5
1.5 Tire Safety.............................................................................................................................................6
1.6 Battery Safety ........................................................................................................................................7
1.7 Welding Precautions ...............................................................................................................................8
1.8 Engine Safety.........................................................................................................................................9
1.8.1 High-Pressure Rail ..........................................................................................................................9
1.8.2 Engine Electronics ........................................................................................................................ 10
1.9 Safety Signs ......................................................................................................................................... 11
Chapter 2: Unloading Windrower............................................................................................................ 13
2.1 Unloading Container ............................................................................................................................. 13
2.2 Moving Windrower to Assembly Area ...................................................................................................... 14
2.2.1 Moving Windrower to Assembly Area –Crane Method....................................................................... 14
2.2.2 Moving Windrower to Assembly Area –Forklift Method ..................................................................... 16
2.3 Removing Wheel and Step Assembly........................................................................................................ 18
2.4 Removing Drive Wheels......................................................................................................................... 22
2.5 Removing Platforms.............................................................................................................................. 24
2.6 Removing Hand Rails and Exhaust Stack ................................................................................................... 26
2.7 Removing Leg Assemblies ...................................................................................................................... 29
2.8 Removing Wheel and Platform Support.................................................................................................... 32
Chapter 3: Assembling Windrower.......................................................................................................... 35
3.1 Lifting Windrower onto Assembly Stand (B9064)........................................................................................ 35
3.2 Installing Legs ...................................................................................................................................... 38
3.3 Installing Drive Wheels .......................................................................................................................... 41
3.4 Installing Caster Wheels......................................................................................................................... 43
3.5 Installing Hydraulics .............................................................................................................................. 50
3.6 Removing Battery Shipping Shield ........................................................................................................... 58
3.7 Unpacking Ignition Keys......................................................................................................................... 59
3.8 Installing Platforms ............................................................................................................................... 61
3.9 Installing Steps..................................................................................................................................... 65
3.10 Installing Exhaust Stack ........................................................................................................................ 66
3.11 Positioning Light and Mirror Assemblies ................................................................................................. 68
TABLE OF CONTENTS

262320 xRevision A
3.12 Installing Beacons ............................................................................................................................... 69
3.13 Installing Slow Moving Vehicle Sign........................................................................................................ 71
3.14 Connecting Batteries ........................................................................................................................... 72
3.15 Lubrication ........................................................................................................................................ 73
3.15.1 Lubrication Procedure ................................................................................................................. 73
3.15.2 Lubrication Points ...................................................................................................................... 74
3.16 Installing AM/FM Radio ....................................................................................................................... 75
3.17 Removing Windrower from Assembly Stands........................................................................................... 80
Chapter 4: Predelivery Checks ................................................................................................................. 81
4.1 Recording Serial Numbers ...................................................................................................................... 81
4.2 Checking Tire Pressures and Adding Tire Ballast ......................................................................................... 83
4.2.1 Checking Tire Pressure .................................................................................................................. 83
4.2.2 Adding Tire Ballast ....................................................................................................................... 83
4.3 Checking Engine Air Intake ..................................................................................................................... 85
4.4 Checking Hydraulic Oil Level ................................................................................................................... 86
4.5 Checking Fuel Separator ........................................................................................................................ 87
4.6 Checking Engine Oil Level....................................................................................................................... 88
4.7 Checking Gearbox Lubricant Level ........................................................................................................... 89
4.8 Checking Engine Coolant........................................................................................................................ 90
4.9 Checking Air Conditioning Compressor Belt ............................................................................................... 91
4.10 Starting Engine ................................................................................................................................... 92
4.11 Priming Hydraulic System..................................................................................................................... 95
4.12 Checking and Adding Wheel Drive Lubricant .......................................................................................... 100
4.13 Checking Traction Drive ..................................................................................................................... 101
Chapter 5: Performing Operational Checks........................................................................................... 103
5.1 Checking Safety System ....................................................................................................................... 103
5.2 Checking Engine Warning Lights ............................................................................................................ 106
5.3 Checking Windrower Startup ................................................................................................................ 107
5.4 Checking Engine Speed........................................................................................................................ 108
5.5 Checking Gauges and Cab Display Module Display.................................................................................... 109
5.6 Checking Electrical System ................................................................................................................... 110
5.7 Checking Operator Presence System ...................................................................................................... 111
5.8 Checking Exterior Lights....................................................................................................................... 113
5.9 Checking Horn ................................................................................................................................... 117
5.10 Checking Interior Lights...................................................................................................................... 118
5.11 Checking Air Conditioning and Heater .................................................................................................. 119
5.12 Checking Manuals............................................................................................................................. 120
5.13 Performing Final Steps....................................................................................................................... 121
TABLE OF CONTENTS

262320 xi Revision A
Chapter 6: Attaching Headers ................................................................................................................ 123
6.1 Attaching A Series Auger Header ........................................................................................................... 123
6.1.1 Attaching A Series Auger Header –Hydraulic Center-Link with Self-Alignment ...................................... 123
6.1.2 Attaching A Series Auger Header –Hydraulic Center-Link without Self-Alignment.................................. 129
6.1.3 Attaching A Series Auger Header –Mechanical Center-Link ............................................................... 135
6.2 Attaching D or D1 SP Series Draper Header ............................................................................................. 141
6.2.1 Attaching Draper Header Supports................................................................................................ 141
6.2.2 Attaching D or D1 SP Series Draper Header –Hydraulic Center-Link with Self-Alignment ........................ 142
6.2.3 Attaching D or D1 SP Series Draper Header –Hydraulic Center-Link without Self-Alignment.................... 149
6.2.4 Attaching D or D1 SP Series Draper Header –Mechanical Center-Link ................................................. 155
6.3 Attaching D2 SP Series Draper Header.................................................................................................... 161
6.3.1 Attaching Draper Header Supports................................................................................................ 161
6.3.2 Attaching D2 SP Series Draper Header –Hydraulic Center-Link with Self-Alignment ............................... 162
6.3.3 Attaching D2 SP Series Draper Header –Hydraulic Center-Link without Self-Alignment .......................... 169
6.3.4 Attaching D2 SP Series Draper Header –Mechanical Center-Link ........................................................ 177
6.4 Attaching R Series or R1 Series Rotary Disc Header................................................................................... 185
6.4.1 Attaching R or R1 Series Rotary Disc Header –Hydraulic Center-Link with Self-Alignment ....................... 185
6.4.2 Attaching R or R1 Series Rotary Disc Header –Hydraulic Center-Link without Self-Alignment .................. 191
6.4.3 Attaching R or R1 Series Rotary Disc Header –Mechanical Center-Link ................................................ 198
Chapter 7: Cab Display Module ............................................................................................................. 203
7.1 Cab Display Module –Configuration Functions ........................................................................................ 203
7.2 Cab Display Options ............................................................................................................................ 205
7.2.1 Setting Cab Display Language ....................................................................................................... 205
7.2.2 Changing Windrower Display Units ............................................................................................... 206
7.2.3 Adjusting Cab Display Buzzer Volume ............................................................................................ 207
7.2.4 Adjusting Cab Display Backlighting ................................................................................................ 208
7.2.5 Adjusting Cab Display Contrast ..................................................................................................... 209
7.3 Configuring Windrower ....................................................................................................................... 211
7.3.1 Setting Header Knife Speed.......................................................................................................... 211
7.3.2 Setting Knife Overload Speed ....................................................................................................... 212
7.3.3 Setting Rotary Disc Overload Speed............................................................................................... 213
7.3.4 Setting Hydraulic Overload Pressure.............................................................................................. 214
7.3.5 Setting Header Index Mode ......................................................................................................... 215
7.3.6 Setting Return to Cut Mode ......................................................................................................... 215
7.3.7 Setting Auto Raise Height ............................................................................................................ 216
7.3.8 Configuring Double Windrow Attachment Controls .......................................................................... 217
7.3.9 Activating Hydraulic Center-Link ................................................................................................... 219
7.3.10 Activating Rotary Disc Header Drive Hydraulics.............................................................................. 220
7.3.11 Setting Header Cut Width .......................................................................................................... 221
7.3.12 Activating Swath Compressor ..................................................................................................... 222
7.3.13 Activating Hay Conditioner......................................................................................................... 224
7.3.14 Setting Reel Speed Display Units ................................................................................................. 225
TABLE OF CONTENTS

262320 xii Revision A
7.3.15 Setting Tire Size ....................................................................................................................... 226
7.3.16 Setting Engine Intermediate Speed Control ................................................................................... 227
7.3.17 Clearing Sub-Acres.................................................................................................................... 228
7.4 Activating Cab Display Lockouts ............................................................................................................ 229
7.4.1 Activating Header Tilt Control Lockout ........................................................................................... 229
7.4.2 Activating Header Float Control Lockout ........................................................................................ 230
7.4.3 Activating Reel Fore-Aft Control Lockout ........................................................................................ 231
7.4.4 Activating Draper Speed Control Lockout ....................................................................................... 233
7.4.5 Activating Auger Speed Control Lockout......................................................................................... 234
7.4.6 Activating Knife Speed Control Lockout.......................................................................................... 235
7.4.7 Activating Rotary Disc Speed Control Lockout ................................................................................. 237
7.4.8 Activating Reel Speed Control Lockout........................................................................................... 238
7.5 Displaying Active Cab Display Lockouts................................................................................................... 240
7.6 Calibrating Header Sensors................................................................................................................... 242
7.6.1 Calibrating Header Height Sensor.................................................................................................. 242
7.6.2 Calibrating Header Tilt Sensor ...................................................................................................... 244
7.6.3 Calibrating Header Float Sensors .................................................................................................. 246
7.7 Calibrating Swath Compressor Sensor .................................................................................................... 248
7.8 Troubleshooting Windrower Problems ................................................................................................... 250
7.8.1 Displaying Windrower and Engine Error Codes ................................................................................ 250
7.8.2 Enabling or Disabling Header Sensors ............................................................................................ 251
7.8.3 Displaying Header Sensor Input Signals .......................................................................................... 253
7.8.4 Forcing Header Identification ....................................................................................................... 254
7.9 Troubleshooting Header Problems......................................................................................................... 256
7.9.1 Testing Header Up/Down Activate Function Using Cab Display Module ............................................... 256
7.9.2 Testing Reel Up/Down Activate Function Using Cab Display Module ................................................... 257
7.9.3 Testing Header Tilt Activate Function Using Cab Display Module ........................................................ 259
7.9.4 Testing Knife Drive Circuit Using Cab Display Module ....................................................................... 261
7.9.5 Testing Draper Drive Circuit Activate Function Using Cab Display Module ............................................ 262
7.9.6 Testing Reel Drive Circuit Activate Function Using Cab Display Module................................................ 264
7.9.7 Testing Rotary Disc Drive Circuit Activate Function Using Cab Display Module ...................................... 266
7.9.8 Testing Double Windrow Attachment Drive Activate Function Using Cab Display Module ....................... 267
7.9.9 Testing Reel Fore-Aft Activate Function Using Cab Display Module ..................................................... 269
7.9.10 Activating Hydraulic Purge Using Cab Display Module ..................................................................... 271
Chapter 8: Reference .............................................................................................................................. 273
8.1 Torque Specifications .......................................................................................................................... 273
8.1.1 SAE Bolt Torque Specifications ..................................................................................................... 273
8.1.2 Metric Bolt Specifications ............................................................................................................ 275
8.1.3 Metric Bolt Specifications –Cast Aluminum .................................................................................... 276
8.1.4 Flare-Type Hydraulic Fittings ........................................................................................................ 277
8.1.5 O-Ring Boss Hydraulic Fittings –Adjustable .................................................................................... 278
8.1.6 O-Ring Boss Hydraulic Fittings –Non-Adjustable.............................................................................. 280
TABLE OF CONTENTS

262320 xiii Revision A
8.1.7 O-Ring Face Seal Hydraulic Fittings................................................................................................ 280
8.1.8 Tapered Pipe Thread Fittings........................................................................................................ 282
8.2 Conversion Chart................................................................................................................................ 283
8.3 Definitions ........................................................................................................................................ 284
8.4 Lubricants, Fluids, and System Capacities................................................................................................ 286
8.5 Fuel Specifications .............................................................................................................................. 288
Predelivery Checklist .............................................................................................................................. 289
TABLE OF CONTENTS


262320 1Revision A
Chapter 1: Safety
Understanding and consistently following these safety procedures will help to ensure the safety of those operating the
machine and of bystanders.
1.1 Safety Alert Symbols
The safety alert symbol indicates important safety messages in this manual and on safety signs on the machine.
1000915
Figure 1.1: Safety Symbol
This symbol means:
•ATTENTION!
•BECOME ALERT!
•YOUR SAFETY IS INVOLVED!
Carefully read and follow the safety message accompanying this
symbol.
Why is safety important to you?
•Accidents disable and kill
•Accidents cost
•Accidents can be avoided

262320 2Revision A
1.2 Signal Words
Three signal words, DANGER,WARNING, and CAUTION, are used to alert you to hazardous situations. Two signal words,
IMPORTANT and NOTE, identify non-safety related information.
Signal words are selected using the following guidelines:
DANGER
Indicates an imminently hazardous situation that, if it is not prevented, will result in death or serious injury.
WARNING
Indicates a potentially hazardous situation that, if it is not prevented, could result in death or serious injury. It may also
be used to alert you to unsafe practices.
CAUTION
Indicates a potentially hazardous situation that, if it is not prevented, may result in minor or moderate injury. It may
also be used to alert you to unsafe practices.
IMPORTANT:
Indicates a situation that, if not prevented, could result in a malfunction or damage to the machine.
NOTE:
Provides additional information or advice.
SAFETY

262320 3Revision A
1.3 General Safety
Operating, servicing, and assembling machinery presents several safety risks. These risks can be reduced or eliminated by
following the relevant safety procedures and wearing the appropriate personal protective equipment.
1000004
Figure 1.2: Safety Equipment
CAUTION
The following general farm safety precautions should be part of
your operating procedure for all types of machinery.
Wear all protective clothing and personal safety devices that
could be necessary for the job at hand. Do NOT take chances.
You may need the following:
•Hard hat
•Protective footwear with slip-resistant soles
•Protective glasses or goggles
•Heavy gloves
•Wet weather gear
•Respirator or filter mask
1000005
Figure 1.3: Safety Equipment
In addition, take the following precautions:
•Be aware that exposure to loud noises can cause hearing
impairment. Wear suitable hearing protection devices such
as earmuffs or earplugs to help protect against loud noises.
1010391
Figure 1.4: Safety Equipment
•Provide a first aid kit in case of emergencies.
•Keep a properly maintained fire extinguisher on the
machine. Familiarize yourself with its use.
•Keep young children away from machinery at all times.
•Be aware that accidents often happen when Operators are
fatigued or in a hurry. Take time to consider the safest way
to accomplish a task. NEVER ignore the signs of fatigue.
SAFETY

262320 4Revision A
1000007
Figure 1.5: Safety around Equipment
•Wear close-fitting clothing and cover long hair. NEVER wear
dangling items such as hoodies, scarves, or bracelets.
•Keep all shields in place. NEVER alter or remove safety
equipment. Ensure that the driveline guards can rotate
independently of their shaft, and that they can telescope
freely.
•Use only service and repair parts made or approved by the
equipment manufacturer. Parts from other manufacturers
may not meet the correct strength, design, or safety
requirements.
1000008
Figure 1.6: Safety around Equipment
•Keep hands, feet, clothing, and hair away from moving
parts. NEVER attempt to clear obstructions or objects from a
machine while the engine is running.
•Do NOT modify the machine. Unauthorized modifications
may impair the functionality and/or safety of the machine. It
may also shorten the machine’s service life.
•To avoid injury or death from the unexpected startup of the
machine, ALWAYS stop the engine and remove the key from
the ignition before leaving the operator’s seat for any
reason.
1000009
Figure 1.7: Safety around Equipment
•Keep the machine service area clean and dry. Wet and/or
oily floors are slippery. Wet spots can be dangerous when
working with electrical equipment. Ensure that all electrical
outlets and tools are properly grounded.
•Keep the work area well-lit.
•Keep machinery clean. Straw and chaff on a hot engine are
fire hazards. Do NOT allow oil or grease to accumulate on
service platforms, ladders, or controls. Clean machines
before they are stored.
•NEVER use gasoline, naphtha, or any volatile material for
cleaning purposes. These materials may be toxic and/or
flammable.
•When storing machinery, cover any sharp or extending
components to prevent injury from accidental contact.
SAFETY
Other manuals for M155
11
Table of contents
Other MacDon Farm Equipment manuals

MacDon
MacDon R113 User manual

MacDon
MacDon R116 User manual

MacDon
MacDon M1170NT5 User manual

MacDon
MacDon FlexDraper FD1 Series User manual

MacDon
MacDon M205 2010 User manual

MacDon
MacDon C Series User manual

MacDon
MacDon M2170 User manual

MacDon
MacDon M Series User manual

MacDon
MacDon R113 User manual

MacDon
MacDon D60 User manual