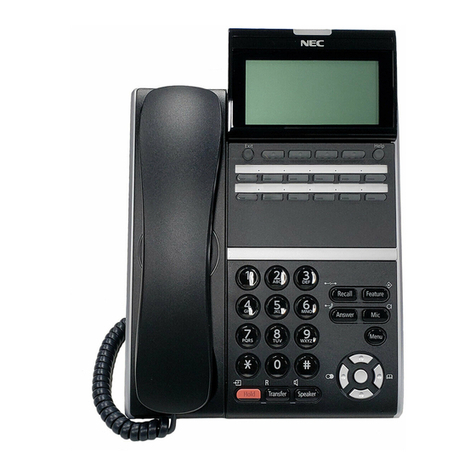
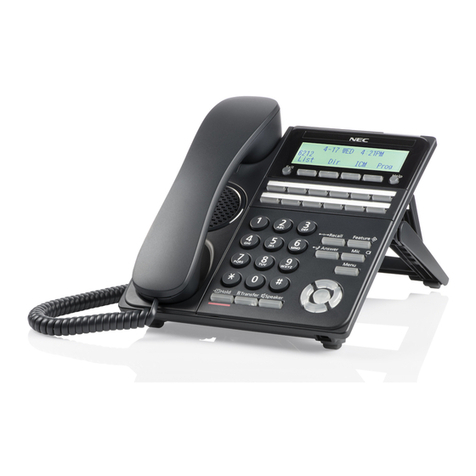
NEC UNIVERGE SL2100 User manual

The SL2100
Quick Install Guide:
Music on Hold and
External Audio
www.nec-enterprise.com

NEC SL2100 Communication System
Quick Install Guide –SL2100 MOH and External Audio rev 1.1 2
This guide explains the installation and configuration of Music on Hold, Background Music and External Paging
including the audio and relay connections of the interface cards.
Further information is available on BusinessNet.
Please keep all information supplied for future reference.
Regulatory Notice.
Refer to the Declaration of Conformity, Regulatory and Safety Considerations shown in the SL2100 Hardware
Manual.
Warning: This is a class A product. In a domestic environment this product may cause radio interference in
which case the user may be required to take adequate measures.

NEC SL2100 Communication System
Quick Install Guide –SL2100 MOH and External Audio rev 1.1 3
Contents
Music on Hold and External Audio .......................................................................................................................4
Parts available for the SL2100...........................................................................................................................4
1- IP7WW-308U-A1 / IP7WW-082U-B1 Interface Card .........................................................................................5
2- Unpack the IP7WW-308U-A1 / IP7WW-082U-B1 Card.....................................................................................6
3a- IP7WW-082U-B1: Connect the External Music on Hold / BGM Device .......................................................7
3b- IP7WW-308U-A1: Connect the External Music on Hold / BGM Device .......................................................7
4a- IP7WW-082U-B1: Connect the External Paging Device................................................................................8
4b- IP7WW-308U-A1: Connect the External Paging Device ...............................................................................8
5- Controlling External Devices ............................................................................................................................9
Connecting the external device to the IP7WW-082U-B1 card...........................................................................9
Connecting the external device to the IP7WW-308U-A1 card...........................................................................9
6- Connecting to the RJ45 sockets of the IP7WW-308U-A1 & IP7WW-082U-B1 card....................................11
Use the cable assembly or adapter available from NEC .................................................................................11
Terminate cables on site with RJ45 plugs........................................................................................................12
Use pre-terminated RJ45 patch cables............................................................................................................12
7- Configure the SL2100.......................................................................................................................................13
Connecting PCPro to the SL2100....................................................................................................................13
Change your PC IP Address............................................................................................................................14
SL2100 PCPro..................................................................................................................................................15
PCPro Initial Setup Wizard...............................................................................................................................15
Setup Audio Interfaces.....................................................................................................................................16
Music on Hold...................................................................................................................................................17
Background Music............................................................................................................................................18
External Paging................................................................................................................................................19
Relay Contacts.................................................................................................................................................20
Upload VRS Messages for MOH......................................................................................................................21
What to do if you make errors within the SL2100 Configuration......................................................................22

NEC SL2100 Communication System
Music on Hold and External Audio
The SL2100 system supports the connection of external audio devices that can be
used for Music on Hold tone and Background music.
Audio outputs can be used for connection to External Paging systems.
There are also solid state relays that can be used to control the external devices.
The external audio interfaces are located on the IP7WW-308U-A1 or IP7WW-
082U-B1 cards. A system would not typically have both types of these cards
installed, ensure you use the instructions within this guide for the correct card
installed in your system.
Music on Hold can also use a pre-recorded file uploaded to the SL2100 CPU card.
Parts available for the SL2100
Not all parts are included within this guide, please refer to the other SL2100 Quick Install Guides or the SL2100
Hardware Manual for a full description and installation instructions of all parts available.
IP7WW-4KSU-C1
SL1100 Chassis unit
IP7EU-CPU-C1
SL2100 CPU card
IP7EU-CPU-C1-A
SL2100 CPU card with pre-
installed IP licenses and 2hour
InMail
IP7WW-308U-A1
3 Analogue trunks and 8 Hybrid
Extensions card for digital
(4wire) extensions or SLT
extension
3 Analogue trunks and 8 digital or SLT
extension interfaces, max 4 per unit
With audio interfaces
IP7WW-082U-B1
8 Digital Extension (2wire) and 2
SLT extension card
8 digital and 2 SLT extension interfaces, max
3 per unit
With audio interfaces
Refer to Prophix for all parts and licenses available in your region.

SL2100 Interface Cards
1- IP7WW-308U-A1 / IP7WW-082U-B1 Interface Card
Audio interfaces can be connected to either the IP7WW-308U-A1 or the IP7WW-008U-C1 extension interface
cards.
SL2100 chassis showing the CPU card with an extension interface card installed.
Extension Interface card
IP7WW-308U-A1
IP7WW-082U-B1
Analogue trunks
3
0
Hybrid extensions
8
0
Digital extensions
0
8
Analogue extensions
0
2
External Music/BGM input
1
1
External Paging output
1
1
Relay contacts
2
2
Trunk daughter card supported
No
Yes
The interface cards can be installed into any of the universal slots S1~S3.
Note –Slot S4 does not support digital extensions, an IP7WW-308U-A1 or IP7WW-008U-C1 card can be
installed but will only support analogue extensions.
Note –Slot S4 does not support External MOH/BGM or paging interfaces
SL2100 Capacity
Item
Maximum
capacity in a
single chassis
External Music on Hold
1
External Background Music
1
External Paging
3
Relays
6
Extension
Interface card
SL2100 CPU card

Unpack the Interface Cards
2- Unpack the IP7WW-308U-A1 / IP7WW-082U-B1 Card
IP7WW-308U-A1 - SL2100 Hybrid Extension Interface card
1 x Interface card
IP7WW-082U-B1 - SL2100 Extension Interface card
1 x Interface card
Additional Items Required:
Cross head screwdriver.
Utility knife or small cutters to remove the plastic knockouts

Connecting MOH and BGM to the Interface card
Quick Install Guide –SL2100 MOH and External Audio rev 1.1 7
3a- IP7WW-082U-B1: Connect the External Music on Hold / BGM Device
The SL2100 supports external music on hold (EXMOH) or Background music (BGM) input via the Audio In port
of an IP7WW-082U-B1 card.
Each IP7WW-082U-B1 card supports one
audio input, if both EXMOH & BGM are
required then two IP7WW-082U-B1 cards are
required.
The EXMOH/BGM mode selection of the Audio
In port is setup within system configuration.
3b- IP7WW-308U-A1: Connect the External Music on Hold / BGM Device
The SL2100 supports external music on hold (EXMOH) or Background music (BGM) input via the Audio In port
of an IP7WW-308U-A1 card.
Each IP7WW-308U-A1 card supports one
audio input, if both EXMOH & BGM are
required then two IP7WW-308U-A1 cards
are required.
The EXMOH/BGM mode selection of the
Audio In port is setup within system
configuration.
Connecting to the RJ45 socket can be done using the adapters, cables or direct termination as shown in this
guide.
Audio In for EXMOH/BGM uses pins 2 & 7 of the RJ45 socket.
The external device should conform to this specification.
Description
Specification
External
MOH/BGM
input
High Impedance (>10 KOhm)
Nominal input level: 250mV (-10dBm)
Maximum input level: 1V RMS

Connecting External Paging to the Interface card
Quick Install Guide –SL2100 MOH and External Audio rev 1.1 8
4a- IP7WW-082U-B1: Connect the External Paging Device
The SL2100 supports External Paging via the Audio Out port of the IP7WW-082U-B1 card.
The SL2100 supports up to three External Paging outputs.
Each IP7WW-082U-B1 card supports one
audio output, additional IP7WW-082U-B1
cards are required for additional audio outputs.
The audio output ports are setup within the
system configuration.
4b- IP7WW-308U-A1: Connect the External Paging Device
The SL2100 supports External Paging via the Audio Out port of the IP7WW-308U-A1 card.
The SL2100 supports up to three External
Paging outputs.
Each IP7WW-308U-A1 card supports one
audio output, additional IP7WW-308U-A1
cards are required for additional audio
outputs.
The audio output ports are setup within the
system configuration.
Connecting to the RJ45 socket can be done using the adapters, cables or direct termination as shown in this
guide.
Audio Out for Paging uses pins 1 & 8 of the RJ45 socket.
The external device should conform to this specification.
Description
Specification
External
Paging output
Impedance: 600Ohm @ 1kHz
Nominal output level: 250mV (-10dBm)
Maximum output level: 1V RMS

Controlling External Devices
Quick Install Guide –SL2100 MOH and External Audio rev 1.1 9
5- Controlling External Devices
The SL2100 has solid-state relay contacts that can be used to control the external audio devices.
The SL2100 supports up to eleven relays.
Relays are assigned to one of the external devices (EXMOH, BGM, External Paging or Doorphone) within the
system configuration.
Connecting the external device to the IP7WW-082U-B1 card
Each IP7WW-082U-B1 card supports two relays,
additional IP7WW-082U-B1 cards are required for
additional relays
Connecting the external device to the IP7WW-308U-A1 card
Each IP7WW-308U-A1 card supports two
relays, additional IP7WW-308U-A1 cards
are required for additional relays.
Connecting to the RJ45 socket can be done using the adapters, cables or direct termination as shown in this
guide.
Relay 1 uses pins 4 & 5, Relay 2 uses pins 3 & 6 of the RJ45 socket.
The external device must conform to this specification.
Description
Specification
Relay contacts
Rated voltage: DC 48V maximum
Rated current: DC 320mA maximum
Contacts: normally open (Form A)

Controlling External Devices
Quick Install Guide –SL2100 MOH and External Audio rev 1.1 10
Note –Exceeding the rated maximum current will damage the solid state relay within the SL2100.
If you need to control an external device that requires more than 320mA then an external relay should be used
with the correct rated contacts.
External relays can also be used to provide a normally closed (Form B) contact.

Connecting to the RJ45 Sockets
Quick Install Guide –SL2100 MOH and External Audio rev 1.1 11
6- Connecting to the RJ45 sockets of the IP7WW-308U-A1 & IP7WW-082U-
B1 card
The are several methods available to connect these interfaces into the customer’s building infrastructure.
Use the cable assembly or adapter available from NEC
Cable LPNEC4 –2m length, converts a four port RJ45 socket to four RJ45 plugs, one port per plug.
Can be used to plug into RJ45 face plates if IDC termination is required.
Cable colour: black
One cable is required for each RJ45 RL/Audio socket of the IP7WW-308U-A1
or IP7WW-082U-B1 card.
Adapter ADNEC14 –Converts a four port RJ45 socket to four RJ45 sockets, one port per socket.
Can be used to plug into RJ45 face plates if IDC termination is required or you can terminate your own cables on
site.
Colour: black
Supplied with an adhesive pad.
One adapter is required for each RJ45 RL/Audio socket of the IP7WW-308U-A1 or IP7WW-082U-B1 card.
RJ45
plug
Pin
Function
Port 1
4
Relay 1
5
Port 2
4
Relay 2
5
Port 3
4
Audio in
EXMOH/BGM
5
Port 4
4
Audio out
Paging
5
RJ45
socket
Pin
Function
Port 1
4
Relay 1
5
Port 2
4
Relay 2
5
Port 3
4
Audio in
EXMOH/BGM
5
Port 4
4
Audio out
Paging
5

Connecting to the RJ45 Sockets
Quick Install Guide –SL2100 MOH and External Audio rev 1.1 12
Terminate cables on site with RJ45 plugs
Connect directly to the RJ45 sockets of the IP7WW-082U-B1 card.
RL/Audio
Pin No.
Function
1
Paging
2
EXMOH/BGM
3
Relay 2
4
Relay 1
5
Relay 1
6
Relay 2
7
EXMOH/BGM
8
Paging
Use pre-terminated RJ45 patch cables
Connect directly to the RJ45 RL/Audio socket of the IP7WW-308U-A1 or P7WW-082U-B1 card.
Use the following cable colours when using a straight through RJ45 patch cable directly into the RJ45 RL/Audio
socket.
Using an RJ45 patch
cable into the RJ45
connectors
RL/Audio
Pin
No.
Port
RJ45 Colour code
1
Paging
White/Orange
2
EXMOH/BGM
Orange/White
3
Relay 2
White/Green
4
Relay 1
Blue/White
5
Relay 1
White/Blue
6
Relay 2
Green/White
7
EXMOH/BGM
White/Brown
8
Paging
Brown/White
87654321
87654321

Configure the SL2100
Quick Install Guide –SL2100 MOH and External Audio rev 1.1 13
7- Configure the SL2100
This Quick Install guide will cover the most frequently used configuration options. For advanced configuration
please refer to the SL2100 Features and Specifications manual.
You must have SL2100 PCPro installed to your laptop/PC, this can be downloaded from BusinessNet, refer to
the Quick Install Guide –SL2100 PCpro.
The SL2100 can also be configured via an SL2100 System phone or via a WebPro interface, these are not
included within this guide.
Before you configure your system it is important that you:
Have a diagram of your exchange lines and telephones.
Plan your requirements before you start.
While you configure your system it is advised that you:
Make a record of your configuration as you make each change.
Make small changes, upload to the SL2100 and test the changes. Avoid making all your changes at
once as this can make testing more difficult.
Connecting PCPro to the SL2100
CPU Default IP Address: 192.168.0.10 / 255.255.255.0
VOIP Default IP Address: 172.16.0.10 / 255.255.255.0
(The VOIP IP address is for either built-in VOP or the VOIPDB card)
You can check the IP address at any SL2100 system phone:
Press the centre Navigation Key and dial 841
Direct to Ethernet connector on the SL2100 CPU card.
Via the customer’s LAN.

Configure the SL2100
Quick Install Guide –SL2100 MOH and External Audio rev 1.1 14
Change your PC IP Address
You will need to reconfigure your PC to have an IP address in the same subnet as the SL2100 during system
commissioning. You will be able to change the IP address of the SL2100 during this process.
Your IP Address is adjusted in Windows Control Panel, select ‘View network status and tasks’
Edit the properties of your Ethernet adaptor
You will need to define an IP address in the same network as the SL2100. Recommended values are
172.16.0.100 / 255.255.0.0
Gateway and DNS addresses are not necessary. Once commissioning of the SL2100 is completed you can
return to this area and reconfigure your network adaptor to the previous values.

Configure the SL2100
Quick Install Guide –SL2100 MOH and External Audio rev 1.1 15
SL2100 PCPro
Installer level access:
User Name: tech
Password: 12345678
On first install you may need to setup the default sliding panes if you wish to use these.
Select View tab and click Default
PCPro Initial Setup Wizard
Refer to the Quick Install Guide for the trunks installed for details of PCPro Initial Setup Wizard, this guide
contains only the configuration items for MOH/BGM, external paging and relay contacts.

Configure the SL2100
Quick Install Guide –SL2100 MOH and External Audio rev 1.1 16
Setup Audio Interfaces
There are two audio interfaces on the IP7WW-082U-B1 and IP7WW-308U-A1 cards:
MOH interface can be assigned to External MOH or External BGM
External Paging can be assigned to paging zones 1~3
Within the Chassis View you can setup the audio interfaces.
IP7WW-082U-B1:
IP7WW-308U-A1:
To set the interface, right click the mouse over each audio interface and select the mode from the list.

Configure the SL2100
Quick Install Guide –SL2100 MOH and External Audio rev 1.1 17
Music on Hold
There are several options available:
Internal music tune
Internal service tone (this is the PCPro wizard default setting)
Internal VRS message
Connect an external music device (External MOH)
Within the Chassis View click the MOH interface.
The Properties pane will show the source selection.
The Properties pane will then show the configuration options for each of the selections:
Internal music tone –Tone Selection = pre-recorded tune 1
External music device –External MOH slot = Universal slots 1~12, select the slot that has the IP7WW-082U-
B1 or IP7WW-308U-A1 card installed that you want to use for External MOH input.
Internal service tone –Uses Service tone 64 (beep-beep comfort tone)
VRS Message –Tone Selection = VRS message 001~100 which can be a recorded announcement by a user
(Refer to the Multi-Line Telephone User Guide for instructions to record the VRS message).
Note –the VRS selection has further options available (eg upload of professionally recorded announcements).
Select the MOH
source
Select the MOH
interface

Configure the SL2100
Quick Install Guide –SL2100 MOH and External Audio rev 1.1 18
Background Music
BGM can be played from the speaker of each terminal while the phone is idle, the user turns the feature on/off
with a service code.
BGM can also be used as a second source for external Music on Hold, you can select the source for each trunk
on the system.
Within the Chassis View click the BGM interface.
The Properties pane will show the BGM options.
Select the MOH source for each trunk
This option allows up to two external MOH
devices, choose the MOH to be played for
each trunk.
Selecting ‘Internal/External MOH’ will use
the MOH source you selected within the
MOH option
Select the BGM
interface
Service code used at each terminals
to turn on/off Background music

Configure the SL2100
Quick Install Guide –SL2100 MOH and External Audio rev 1.1 19
External Paging
External Paging equipment can be connected to the audio paging output of the IP7WW-082U-B1 or IP7WW-
308U-A1 card.
Within the Chassis View click the Paging interface.
The Properties pane will show the source selection.
Select the Paging interface.
The page zone 1~3 is
indicated by PG1~PG3
Shows the slot that the IP7WW-082U-B1 or
IP7WW-308U-A1 card is installed in
Setup for each paging zone 1~3
Assign a relay contact, if required to
control/activate the external paging device
Service code to make an external page
announcement

Configure the SL2100
Quick Install Guide –SL2100 MOH and External Audio rev 1.1 20
Relay Contacts
There are two solid state relay contacts on the IP7WW-082U-B1 and IP7WW-308U-A1 cards; each contact can
be assigned to External MOH, External BGM, Doorphone 1~6 or External Paging 1~3.
The contact activates when the assigned device is in use/active.
Within the Chassis View you can setup the relay contacts by clicking audio interface 2.
IP7WW-082U-B1:
IP7WW-308U-A1:
The Properties pane will show the Relay assignment.
Door Lock Relay Contacts
The relay will operate (make contact) when the user is in conversation with the doorphone and they press the
FLASH key on their phone to activate the door lock.
Select the device assigned to
Relay 1:
No setting
External MOH
BGM
External Speaker/Page
Doorphone
Select the device port:
For External MOH and BGM this value is
not used and should be set to 0
For External Speaker/Page enter the page
zone 1~3
For Doorphone enter the Doorphone port
1~6
Other manuals for UNIVERGE SL2100
29
Table of contents
Other NEC IP Phone manuals

NEC
NEC ITK-32TGCG-1 User manual

NEC
NEC SV Series User manual

NEC
NEC SV8500 User manual

NEC
NEC UX5000 Quick start guide

NEC
NEC DT750 Reference guide

NEC
NEC i-Series User manual

NEC
NEC UNIVERGE SL2100 Instruction manual

NEC
NEC MH110 Instruction Manual

NEC
NEC Univerge SV8100 User manual

NEC
NEC DT750 User manual

NEC
NEC DT430 Series Reference guide

NEC
NEC ML440 User manual

NEC
NEC UNIVERGE SV9100 DT820 User manual

NEC
NEC UNIVERGE SV7000 User manual

NEC
NEC IP3AT-8WV(AUSTRALIA) User manual

NEC
NEC SV8500 User manual

NEC
NEC UNIVERGE User manual

NEC
NEC UNIVERGE SL2100 User manual

NEC
NEC ITK-6DGS-1 User manual

NEC
NEC Univerge SV8100 User manual