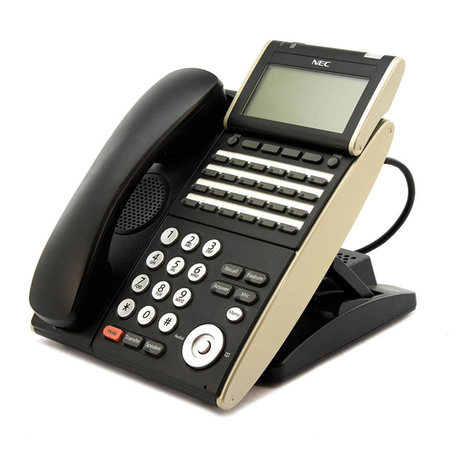
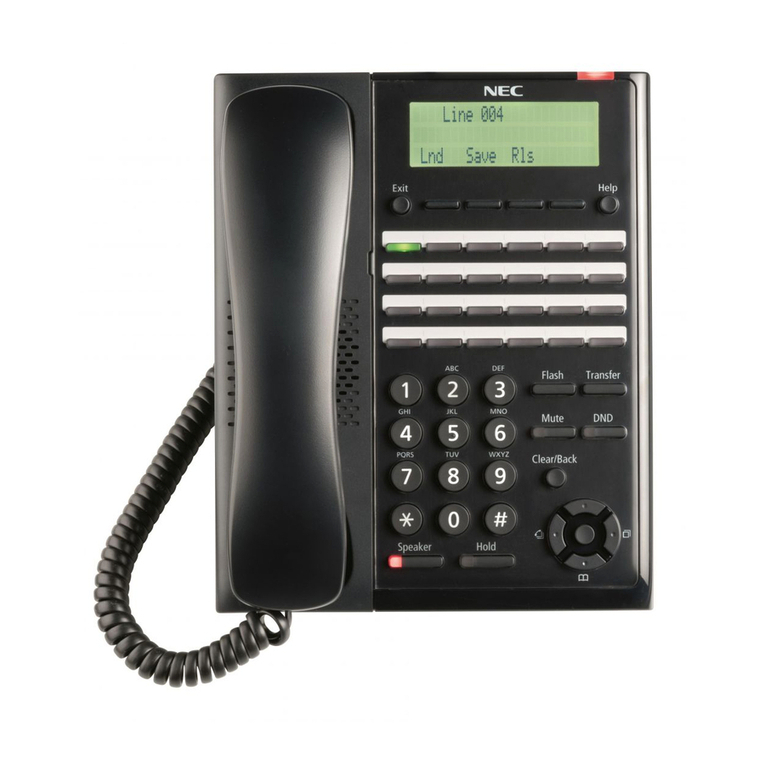
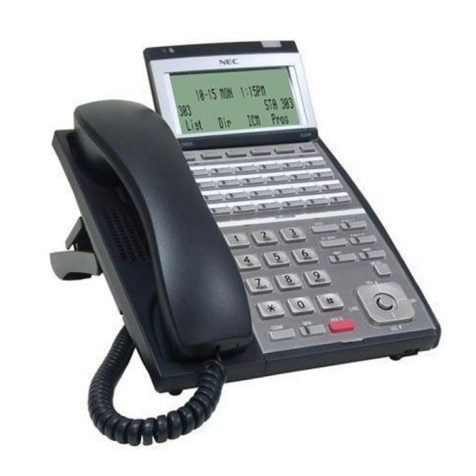
NEC UNIVERGE MH240 User manual

MH240 Wireless IP Telephone
SETUP GUIDE
A50-017159-001 Issue 1.2, January 2009


LIABILITY DISCLAIMER
NEC Infrontia Corporation reserves the right to change the specifications,
functions, or features, at any time, without notice.
NEC Infrontia Corporation has prepared this document for use by its
employees and customers. The information contained herein is the property
of NEC Infrontia Corporation and shall not be reproduced without prior
written approval from NEC Infrontia Corporation. All brand names and
product names on this document are trademarks or registered trademarks of
their respective companies.
Copyright 2009
NEC Infrontia Corporation


i
TABLE OF CONTENTS
1.INTRODUCTION
• What is MH240?...........................................................................................1
• System Configuration................................................................................1
• Keys and Parts ............................................................................................2
• Icons on the display...................................................................................3
• Technical Specifications ..........................................................................4
• LED Specifications.....................................................................................5
• Soft Key Operation.....................................................................................6
• Character Code List...................................................................................7
2SETUP OF THE PHONE
• BEFORE SETUP..........................................................................................9
• HOW TO INSERT THE BATTERY..........................................................10
• HOW TO CHARGE THE BATTERY.......................................................11
By using the Cradle:.................................................................................................................11
By using the AC Adapter:....................................................................................................... 12
• MH240 SETUP PROCEDURE.................................................................13
• SETUP FROM MH240...............................................................................14
• SETUP CHECK POINT.............................................................................15
• POWER ON MH240...................................................................................16
• INITIALIZE MH240.....................................................................................17
• PLACE THE PHONE IN CONFIG MODE..............................................18
• NETWORK SETTINGS .............................................................................19
Set the Profile Name:............................................................................................................... 19
Set the ESSID (Manual):.......................................................................................................... 20
Set the ESSID (AP Scan):....................................................................................................... 21
Set the Security (OPEN): ........................................................................................................ 22
Set the Security (WEP):........................................................................................................... 23
Set the Security (WPA-PSK):................................................................................................. 24
Set the Security (WPA2-PSK):............................................................................................... 25
Set the Security (WPA: PEAP):............................................................................................. 26
Set the Security (WPA: TLS): ................................................................................................ 28
Set the Security (WPA2: PEAP):........................................................................................... 30
Set the Security (WPA2: TLS):.............................................................................................. 32
Set the DHCP (IP): .................................................................................................................... 34
Set the IP Address:.................................................................................................................. 34
Set the Net Mask:...................................................................................................................... 35
Set the Gateway:....................................................................................................................... 36
Set the DNS Primary:............................................................................................................... 37
Set the DNS Secondary:......................................................................................................... 38
Set the SIP Profile:................................................................................................................... 39
Set the Hand-off List:............................................................................................................... 40
Set the 1st Connect: ................................................................................................................ 41

ii
• SIP SETTINGS............................................................................................42
Set the Profile Name:............................................................................................................... 42
Set the SIP Proxy: .................................................................................................................... 43
Set the SIP Port:........................................................................................................................ 44
Set the Registrar:...................................................................................................................... 45
Set the Registrar Port:............................................................................................................. 46
Set the User ID:......................................................................................................................... 47
Set the User Password: .......................................................................................................... 48
Set the Phone No.: ................................................................................................................... 49
Set the I-SIP Port:..................................................................................................................... 50
• CONFIG PASSWORD SETTINGS..........................................................51
Set the New Config Password:............................................................................................. 51
Change the Config Password:.............................................................................................. 51
• WIRELESS ADVANCED SETTINGS.....................................................52
Set the Channel: ....................................................................................................................... 53
Set the Data Rate:..................................................................................................................... 54
Set the TX Power (Transmission Power):.......................................................................... 55
Set the H.O. Start:..................................................................................................................... 56
Set the H.O. Delta:.................................................................................................................... 57
Set the Nprobes:....................................................................................................................... 58
Set the Scan Start: ................................................................................................................... 59
Set the Packet Los Count: ..................................................................................................... 60
Set the Active Time:................................................................................................................. 61
Set the Home Time:.................................................................................................................. 62
Set the CAC Mode:................................................................................................................... 63
Set the WLC Address:............................................................................................................. 64
• SIP ADVANCED SETTINGS....................................................................65
Set the Register Timer:........................................................................................................... 66
Set the Codec:........................................................................................................................... 67
Set the Payload Size:............................................................................................................... 68
Set the DTMF Mode:................................................................................................................. 69
Set the Jitter Buffer:................................................................................................................. 70
Set the VM Number:................................................................................................................. 71
3.SITE SURVEY MODE 73
• General ........................................................................................................73
• Enable Debug Monitor Mode.................................................................74
• Debug Monitor Mode ...............................................................................75
• AP Scan Mode ...........................................................................................76
• QoS Monitor Mode....................................................................................77
4.MENU LIST 79
• CONFIG MENU LIST.................................................................................79
5.TROUBLE SHOOTING 83
• MESSAGE MEANINGS AND SUGGESTIONS....................................83
• TROUBLES AND SUGGESTIONS.........................................................84

1
1.INTRODUCTION
• What is MH240?
MH240 is a wireless VoIP phone that complies with IEEE 802.11b/g specifications. MH240 has the
following features:
-MH240 dedicated features are available such as Call History, Directory,
Password Lock, Favorites, Speed Dial, Speaker monitor and Courtesy Mode.
-Easy maintenance by using a suite of GUI based tools is also available. For
example, the firmware of MH240 can be updated by using one of the tools, IP
Phone Manager for MH240. You can run the tools on your PC, which is
connected to the phone via a USB cable or via WLAN.
MH240
• System Configuration
The following shows a system configuration that is composed of MH240 and the related equipment.
To use MH240, the related equipment must be installed and configured properly in advance. For
easy maintenance, a suite of useful maintenance tools are also available. Note that the tools can be
used either via WLAN or via USB.
Note: The tools consist of “IP Phone Manager for MH240” and “Certificate Convert Tool”.
MH240 System Configuration Example

2
• Keys and Parts
The phone has the following keys and parts.
No. PARTS REMARK
(1) Info LED Display charging status
and receiving a call
(2) Ear Speaker -
(3) USB Connector Charge the power via AC
adapter
(4) Display Monochrome LCD,
120×90 pixels
(5) Soft Keys Display soft keys depend
on the phone status
(6) Multi Function Keys Assign various function
by System
(7) OK Key *Note Select Middle soft key
(8) UP Key
(9) DOWN Key
(10) LEFT Key
(11) RIGHT Key
Select a value from the
list and move the cursor
in edit mode
(12) TRANSFER Key
*Note Transfer the ongoing call
or select Left soft key
(13) HOLD/CLEAR Key
*Note Place the ongoing call in
hold, return to the
previous screen, delete
input character/digit or
select Right soft key
(14) CONFERENCE Key
*Note Enter the conference
mode (3-way call)
(15) MENU Key *Note Display Menu screen
(16) OFF HOOK Key
*Note Terminate an active call
(17) POWER/ON HOOK
Key Terminate an active call,
power on/off the phone or
exit a menu without
making changes
(18) Headset Connector Connect headset had
JEITA RC-5240 plug or
conversion cable
(19) Dial Pad *Note Input dial number or
characters
(20) Microphone -
(21) Strap Hole Attach hand strap
(22) Speaker Ring when receiving a
call or listen to voice
when speaker monitor
(23) Battery Cover -
* Note In case that key touch tone is
enabled, you hear key touch
tone twice when you press and
hold the key for about 2
seconds.
(1)Info LED
(2)Ear Speaker(3)USB Connector
(4)Display
(6)Multi Function Keys
(7)OK Key
(8)UP Key
(13)HOLD/
CLEAR Ke
y
(12)TRANSFER Key
(11)RIGHT Key
(10)LEFT Key
(15)MENU Key
(9)DOWN Key
(14)CONFERENCE Key
(16)OFF HOOK Key (17)POWER/
ON HOOK Key
(
19
)
Dial Pad
(
18
)
Headset Connecto
r
(
20
)
Micro
p
hone
(
21
)
Stra
p
Hole
(
22
)
S
p
eake
r
(
23
)
Batter
y
Cove
r
Delete Save Back
(5)Soft Keys

3
• Icons on the display
The phone has the following icons.
-Power icon ( ): indicates the battery
charge level.
Icon Battery Charge Level
Full
Empty
Charging
-Antenna icon ( ): indicates the radio
signal strength by your phone.
Icon Radio Signal Strength
Strong
Weak
Out of service area
-Volume icon ( ): indicates the ring
volume when Standby mode.
Icon Ring Volume
Loud
Medium
Soft
Increasing Ring
Off
-Volume icon ( ): indicates the call
volume in the receiver.
Icon Call Volume
Loud
Medium
Soft
-Missed call icon ( ): indicates your
missed call(s).
-VM icon ( ): indicates you have voice
mail(s).
-Courtesy icon ( ): indicates your phone
is in courtesy mode
-Lock icon ( ): indicates your phone is
locked.
-I-SIP icon ( ): indicates NEC Enhanced
SIP is enabled.
-Cursor icon ( ): indicates active direction
keys (UP, DOWN, LEFT or RIGHT)
depend on the phone status.
-Line icon ( ): indicates line key status.
-Vibration setting icon ( ): indicates your
phone is vibration setting mode.
1/ 1 Tue 12:00AM
240 MH240

4
• Technical Specifications
The following shows the technical specifications of MH240.
Item Specifications
Wireless Interface IEEE802.11b/g
Codec G.711u-Law, G.711A-Law, G.729A, G.729B, G.729AB
Payload Size: 20 to 80 ms
Control Protocol NEC Enhanced SIP, SIP (RFC3261)*Note
Authentication IEEE802.1X (EAP-TLS, PEAP)
Encryption WEP (64 bit / 128 bit), TKIP,AES
LCD Monochrome LCD, 120 × 82 pixels
Main Feature Call History, Directory, Speed Dial, Courtesy Mode
Ringer Ring Tone : selectable from 16 kinds
Ring Volume : selectable from 5 levels
Battery Lithium Ion Battery, 3.7 V - 850 mAh
Battery Life Talk Time : up to 3 hours
Standby Time : up to 80 hours
AC Adapter INPUT : AC 100 V to 240 V, 50/60 Hz, 0.25 A
OUTPUT : DC 5 V, 1 A
DC Plug : miniUSB (typeB) plug
Operation Temperature 0 to 40 oC (Under charging : 0 to 35 oC)
Operating Humidity 10 to 90 %
Dimension 135.0 × 48.0 × 17.8 mm
Weight 94.36 g
Certification and
Compliance <USA / Industry Canada>
CSA60950-1
FCC Part 15 Class B
RSS-210
HAC
<Europe>
Directive 1999/5/EC
EN 60950-1
EN 300 328
EN 301 489-17
EN 50360
<Australia / New Zealand>
AS/NZS 60950.1
AS/NZS 4268
AS/ACIF S004
AS/NZS CISPR 22 2006
PTC220
Radiocommunications (Electromagnetic Radiation-Human
Exposure) Standard 2003
NZS 2772.1:1999
*Note In case of using a SIP server except SIP servers recommended by NEC, a
connection test is required.

5
• LED Specifications
The following shows the LED specifications of MH240 and Cradle.
Condition LED Status
MH240
Power ON Status *Note1
1.Power OFF Blink all color
2.Receiving a call *Note2 Blink Green (100ms ON – 100ms OFF)
3.Holding a call *Note2 Blink Orange (500ms ON – 500ms OFF)
4.You have a voice mail *Note2 Blink Orange (50ms ON – 2000ms OFF)
5.Charge Status
Not charging Light Off
Charging Light Red
Charging is completed Light Green
Any abnormality is found in the battery Blink Red (500ms ON – 500ms OFF)
Power OFF Status *Note1
1.Power ON Blink all color
2.Charge Status
Not charging Light Off
Charging Light Red
Charging an empty battery Blink Orange (50ms ON – 950ms OFF)
Charging is completed Light Green
Any abnormality is found in the battery Blink Red (500ms ON – 500ms OFF)
Cradle
1.Charge Status
Charging Light Red
Charging an empty battery Light Orange
Charging is completed Light Green
Any abnormality is found in the battery Light Off
*Note1 LED status depends on the order in above table when MH240 is in more than 2
conditions.
*Note2 LED status depend on your system when MH240 displays I-SIP icon.

6
• Soft Key Operation
You will often use soft keys when you operate this phone. You can use soft keys as follows.
9/ 1 22:00 Eric
Incoming
8/31 10:03 Tom
Delete Save Back
8/31 10:12 Tom
9/ 1 9:25 222

7
• Character Code List
The following shows character code list when your phone is in edit mode.
Character Code List
1st 2nd 3rd 4th 5th 6th 7th 8th 9th 10th 11th 12th 13th
? ! * # ”
A B C a b c
D E F d e f
G H I g h i
J K L j k l
M N O m n o
P Q R S p q r s
T U V t u v
W X Y Z w x y z
space
. @ / ( ) , - _ : ’ ~ & \

8
This page is for your notes.

9
2SETUP OF THE PHONE
• BEFORE SETUP
Make sure that you have all before using the phone.
MH240 handset
Cradle
AC adapter
Battery
Setup Guide (this manual)
MH240 handset Cradle ACadapter Battery

10
• HOW TO INSERT THE BATTERY
Insert the battery into the unit as follows.
(1) Remove the battery cover from the phone.
(2) Place the battery into the unit so that the label faces toward you.
(3) Attach the battery cover again.
Note: If the phone is not used for a long period of time, remove the battery from the phone, and store
it in a well ventilated and cool place avoiding direct sunlight.

11
• HOW TO CHARGE THE BATTERY
Be sure to charge the battery before using the phone for the first time. Use one of the following:
●Cradle
●AC Adapter (direct connection)
Note: The empty battery can be fully charged in about 4 hours.
Note: Even if the phone is not used for a long period of time, charge the battery biannually at least
because it is discharged little by little spontaneously. If the battery is discharged too much, it
will be deteriorated and might be unavailable for the recharge.
By using the Cradle:
The phone can be charged by using the cradle. You can also charge the battery by inserting the battery
pack alone in the slot on the cradle. This is useful when you have a spare battery.
(1) Insert the AC adapter plug (mini USB) into the USB connector in the back of the cradle.
(2) Plug in the AC adapter into an appropriate AC outlet.
(3) Place the phone and/or the spare battery pack as shown above. When placing a battery pack into
the slot, insert it so that the label faces downward.
(4) The LED on the cradle lights red, indicating the battery is being charged. When the phone battery
is not being charged the Info LED turns off.
(5) The LED on the cradle lights green when the spare battery is fully charged. After this, charging to
the phone battery will start and the Info LED lights red.
(6) The Info LED lights green when the phone battery is fully charged.
Note: If any abnormality is found to the battery, the LED on the cradle lights off.
AC outlet
AC Adapter
AC adapter plug
Spare Battery (optional)
Info LED
Indicate charge status
Cradle (Battery Charger)
USB connector

12
Note: Please insert the spare battery in the slot on the cradle or remove it as following figure.
By using the AC Adapter:
To charge the phone using the AC adapter:
(1) Insert the AC adapter into an appropriate AC outlet.
(2) Insert the AC adapter plug (mini USB) into USB connector of the phone.
(3) Info LED lights red, indicating the battery is being charged.
(4) Info LED lights green when the battery has been fully charged.
(5) Disconnect the AC adapter.
AC outlet
AC Adapter
AC adapter plug
USB connector
: Light red (Charging)
: Light green (Charging is completed)
Info LED

13
• MH240 SETUP PROCEDURE
MH240 can be setup by one of the following procedures.
1. From MH240 main unit Note
2. Using IP Phone Manager for MH240 via USB cable
3. Using IP Phone Manager for MH240 via WLAN connection
Note: To set certificate for WLAN authentication, be sure to use IP Phone Manager for MH240. The
data can not be set from MH240.

14
• SETUP FROM MH240
Follow the procedure below to setup MH240 from the phone. Be sure to change the battery before
this setup procedure.
START
1 Power on MH240.
2 Initialize MH240 data as required.
3 Place MH240 in configuration mode.
4 Setup the config data.
WLAN authentication related certificate copy
is not available. Use IP Phone Manager for
MH240.
5 Make sure that the assigned data has been
reflected on the MH240.
END
6 Post Installation Test
Other manuals for UNIVERGE MH240
5
Table of contents
Other NEC IP Phone manuals

NEC
NEC Univerge SV9100 User manual

NEC
NEC Inaset R2 User manual

NEC
NEC NEAXMail AD-120 User manual

NEC
NEC Univerge SV9300 User manual

NEC
NEC D-Term IP-32 User manual

NEC
NEC Dterm DTL-8R-1 User manual

NEC
NEC Univerge SV9100 User manual

NEC
NEC G355 User manual

NEC
NEC Univerge DT820 User manual

NEC
NEC Univerge MH250 User manual

NEC
NEC Univerge DT820 Instruction manual

NEC
NEC UNIVERGE MH240 User manual

NEC
NEC Univerge DT820 User manual

NEC
NEC MH110 Instruction Manual

NEC
NEC DT730 User manual

NEC
NEC UNIVERGE SV7000 User manual

NEC
NEC Univerge SV8100 User manual

NEC
NEC UX5000 Quick start guide

NEC
NEC Univerge SV8100 User manual

NEC
NEC Dterm DTZ-8R-1 User manual