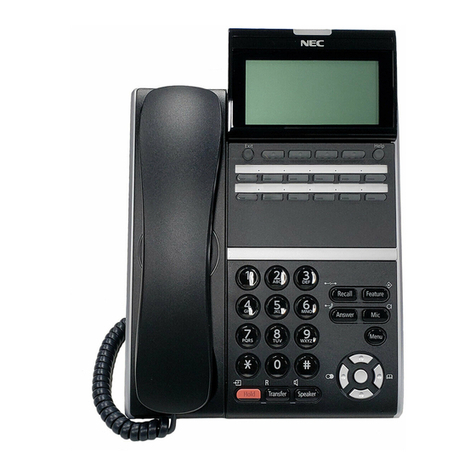
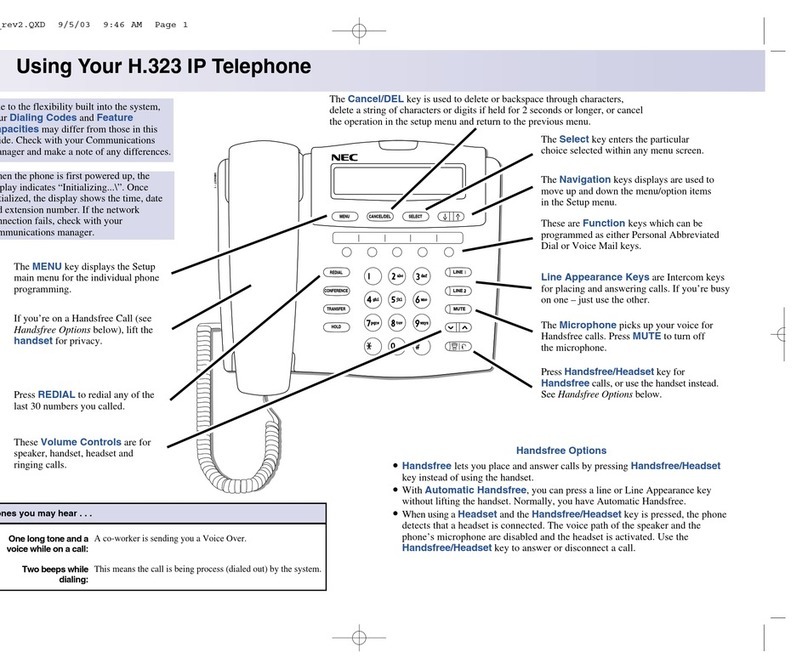
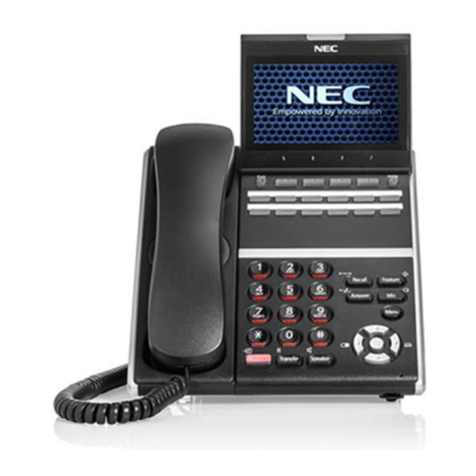
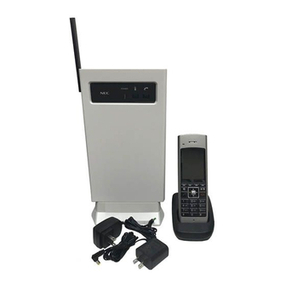
NEC UX5000 Quick start guide

Empowered by Innovation
MH240 Easy Setup Guide
P/N 0913105
Rev 1, April 2009
Printed in U.S.A.
Technical Support Web Site:
http://www.necux5000.com

This manual has been developed by NEC Unified Solutions, Inc. It is intended for the use of its customers and
service personnel, and should be read in its entirety before attempting to install or program the system. Any
comments or suggestions for improving this manual would be appreciated. Forward your remarks to:
NEC Unified Solutions, Inc.
4 Forest Parkway
Shelton, CT 06484
necunifiedsolutions.com
Nothing contained in this manual shall be deemed to be, and this manual does not constitute, a warranty of, or
representation with respect to, any of the equipment covered. This manual is subject to change without notice and
NEC Unified Solutions, Inc. has no obligation to provide any updates or corrections to this manual. Further, NEC
Unified Solutions, Inc. also reserves the right, without prior notice, to make changes in equipment design or
components as it deems appropriate. No representation is made that this manual is complete or accurate in all
respects and NEC Unified Solutions, Inc. shall not be liable for any errors or omissions. In no event shall NEC Unified
Solutions, Inc. be liable for any incidental or consequential damages in connection with the use of this manual. This
document contains proprietary information that is protected by copyright. All rights are reserved. No part of this
document may be photocopied or reproduced without prior written consent of NEC Unified Solutions, Inc.
©2009 by NEC Unified Solutions, Inc. All Rights Reserved.
Printed in U.S.A.

Table of Contents
Table of Contents
✦
i
WL1700 Setup. . . . . . . . . . . . . . . . . . . . . . . . . . . . . . . . . . . . . . . 1-1
Introduction. . . . . . . . . . . . . . . . . . . . . . . . . . . . . . . . . . . . . . . . . . . . . .1-1
Installation Overview . . . . . . . . . . . . . . . . . . . . . . . . . . . . . . . . . . . . . .1-2
Setup Preparation. . . . . . . . . . . . . . . . . . . . . . . . . . . . . . . . . . . . . . . . .1-3
WL1700-MS Setup . . . . . . . . . . . . . . . . . . . . . . . . . . . . . . . . . . . . . . . .1-6
Initial Configuration for WL1700-MS. . . . . . . . . . . . . . . . . . . . . . . . . . . . . . . 1-6
Upgrade the WL1700-WS Software . . . . . . . . . . . . . . . . . . . . . . . . . . . . . . . 1-14
Move the WL1700-MS and PC to Customer’s Network . . . . . . . . . . . . . . . 1-17
UX5000 Setup . . . . . . . . . . . . . . . . . . . . . . . . . . . . . . . . . . . . . . . . . . .1-18
Configure the Internal DHCP Server . . . . . . . . . . . . . . . . . . . . . . . . . . . . . . 1-18
Check the System. . . . . . . . . . . . . . . . . . . . . . . . . . . . . . . . . . . . . . . .1-20
Confirm the System is Running. . . . . . . . . . . . . . . . . . . . . . . . . . . . . . . . . . 1-20
MH240 Setup . . . . . . . . . . . . . . . . . . . . . . . . . . . . . . . . . . . . . . . . 2-1
Setting Up the MH240. . . . . . . . . . . . . . . . . . . . . . . . . . . . . . . . . . . . . .2-1
Quick Configure of the MH240 . . . . . . . . . . . . . . . . . . . . . . . . . . . . . . . . . . . 2-1
Power on the MH240 . . . . . . . . . . . . . . . . . . . . . . . . . . . . . . . . . . . . . . . . . . . . . . . . 2-1
INITIALIZE MH240. . . . . . . . . . . . . . . . . . . . . . . . . . . . . . . . . . . . . . . . . . . . . . . . . . 2-1
Place the MH240 in Config Mode . . . . . . . . . . . . . . . . . . . . . . . . . . . . . . . . . . . . . . 2-2
Keypad Character List . . . . . . . . . . . . . . . . . . . . . . . . . . . . . . . . . . . . . . . . . . . . . . . 2-2
Soft Key Entry . . . . . . . . . . . . . . . . . . . . . . . . . . . . . . . . . . . . . . . . . . . . . . . . . . . . .2-2
Enter the Network Settings . . . . . . . . . . . . . . . . . . . . . . . . . . . . . . . . . . . . . . . . . . .2-3
Set the Profile Name: . . . . . . . . . . . . . . . . . . . . . . . . . . . . . . . . . . . . . . . .2-3
Set the ESSID (Manual):. . . . . . . . . . . . . . . . . . . . . . . . . . . . . . . . . . . . . .2-3
Set the ESSID (AP Scan):. . . . . . . . . . . . . . . . . . . . . . . . . . . . . . . . . . . . .2-3
Set the Security: . . . . . . . . . . . . . . . . . . . . . . . . . . . . . . . . . . . . . . . . . . . .2-4
Set the DHCP (IP): . . . . . . . . . . . . . . . . . . . . . . . . . . . . . . . . . . . . . . . . . .2-8
Set the Fixed IPAddress: . . . . . . . . . . . . . . . . . . . . . . . . . . . . . . . . . . . . .2-8
Set the Net Mask: . . . . . . . . . . . . . . . . . . . . . . . . . . . . . . . . . . . . . . . . . . .2-8
Set the Gateway:. . . . . . . . . . . . . . . . . . . . . . . . . . . . . . . . . . . . . . . . . . . .2-9
Set the DNS Primary: . . . . . . . . . . . . . . . . . . . . . . . . . . . . . . . . . . . . . . . .2-9
Set the DNS Secondary: . . . . . . . . . . . . . . . . . . . . . . . . . . . . . . . . . . . . . .2-9
Set the SIP Profile: . . . . . . . . . . . . . . . . . . . . . . . . . . . . . . . . . . . . . . . . .2-10
Set the Hand-off List:. . . . . . . . . . . . . . . . . . . . . . . . . . . . . . . . . . . . . . . .2-10
Set the 1st Connect: . . . . . . . . . . . . . . . . . . . . . . . . . . . . . . . . . . . . . . . .2-10
SIP Settings for the MH240 . . . . . . . . . . . . . . . . . . . . . . . . . . . . . . . . . . . . . . . . . . 2-11
Set the Profile Name: . . . . . . . . . . . . . . . . . . . . . . . . . . . . . . . . . . . . . . .2-11
Set the SIP Proxy: . . . . . . . . . . . . . . . . . . . . . . . . . . . . . . . . . . . . . . . . . . 2-11
Set the SIP Port: . . . . . . . . . . . . . . . . . . . . . . . . . . . . . . . . . . . . . . . . . . .2-11
Set the Registrar:. . . . . . . . . . . . . . . . . . . . . . . . . . . . . . . . . . . . . . . . . . .2-12
Set the Registrar Port:. . . . . . . . . . . . . . . . . . . . . . . . . . . . . . . . . . . . . . .2-12
Set the User ID:. . . . . . . . . . . . . . . . * Optional for MH240 registration *2-12
Set the User Password:. . . . . . . . . . * Optional for MH240 registration *2-12
Set the Phone No.: . . . . . . . . . . . . . * Optional for MH240 registration *2-13
Set the I-SIP Port: . . . . . . . . . . . . . . . . . . . . . . . . . . . . . . . . . . . . . . . . . .2-13

✦
ii Table of Contents
Table of Contents
Saving Settings and Registering the MH240. . . . . . . . . . . . . . . . . . . . . . . . . . . . . 2-13
SIP Advanced Settings . . . . . . . . . . . . . . * Do Not Change from Default Setting *2-14
Set the Register Timer:. . . . . . . . . . . . . . . . . . . . . . . . . . . . . . . . . . . . . . 2-14
Set the Codec: . . . . . . . . . . . . . . . . . . . . . . . . . . . . . . . . . . . . . . . . . . . . 2-14
Set the Payload Size: . . . . . . . . . . . . . . . . . . . . . . . . . . . . . . . . . . . . . . . 2-15
Set the DTMF Mode: . . . . . . . . . . . . . . . . . . . . . . . . . . . . . . . . . . . . . . . 2-15
Set the Jitter Buffer: . . . . . . . . . . . . . . . . . . . . . . . . . . . . . . . . . . . . . . . . 2-15
Set the VM Number:. . . . . . . . . . . . . . . . . . . . . . . . . . . . . . . . . . . . . . . . 2-15
Modifying the IP Addresses . . . . . . . . . . . . . . . . . . . . . . . . . . . 3-1
Changing IP Addresses With WL1700-MS and MH240 . . . . . . . . . . .3-1
Modifying the WL1700-MS IP Address. . . . . . . . . . . . . . . . . . . . . . . . . . . . . . 3-1
Move the WL1700-MS and WL1500 to the Customer’s Network. . . . . . . . . 3-8
Change the IP Address and DHCP Options. . . . . . . . . . . . . . . . . . . . . . . . . . 3-9
Move the UX to the Customer’s Network . . . . . . . . . . . . . . . . . . . . . . . . . . 3-11
Check the MH240 Handset . . . . . . . . . . . . . . . . . . . . . . . . . . . . . . . . . . . . . . 3-11
Troubleshooting . . . . . . . . . . . . . . . . . . . . . . . . . . . . . . . . . . . . . 4-1
Troubleshooting the MH240 Setup . . . . . . . . . . . . . . . . . . . . . . . . . . .4-1
Case 1: I can’t make/receive a call. Why? . . . . . . . . . . . . . . . . . . . . . . . . . . . 4-1
Case 2: I can’t activate Easy Startup Mode. Why?. . . . . . . . . . . . . . . . . . . . 4-1
Troubleshooting the WL1700-MS Setup/Operation. . . . . . . . . . . . . .4-2
What’s Needed for Troubleshooting? . . . . . . . . . . . . . . . . . . . . . . . . . . . . . . 4-2
Field Trouble Form . . . . . . . . . . . . . . . . . . . . . . . . . . . . . . . . . . . . . . . . . . . . . . . . . 4-3
How to Telnet . . . . . . . . . . . . . . . . . . . . . . . . . . . . . . . . . . . . . . . . . . . . . . . . . . . . . 4-6
WL Controller Information (CLI Only) [Mandatory] . . . . . . . . . . . . . . . . . . . . . . . . . 4-7
Core File (CLI Only) (*Mandatory whenever controller has restarted) . . . . . . . . . . 4-8
WL Controller Configuration Information . . . . . . . . . . . . . . . . . . . . . . . . . . . . . . . . . 4-9
WL Controller Configuration Information (CLI) . . . . . . . . . . . . . . . . . . . . . . . . . . . . 4-9
Log Buffer (CLI Only). . . . . . . . . . . . . . . . . . . . . . . . . . . . . . . . . . . . . . . . . . . . . . . 4-10
FDB (CLI Only) . . . . . . . . . . . . . . . . . . . . . . . . . . . . . . . . . . . . . . . . . . . . . . . . . . . 4-10
ARP (CLI Only) . . . . . . . . . . . . . . . . . . . . . . . . . . . . . . . . . . . . . . . . . . . . . . . . . . . 4-11
Sessions Network (CLI Only) . . . . . . . . . . . . . . . . . . . . . . . . . . . . . . . . . . . . . . . . 4-11
VoIP (CLI Only) . . . . . . . . . . . . . . . . . . . . . . . . . . . . . . . . . . . . . . . . . . . . . . . . . . . 4-12
Log Trace (Debug Log) . . . . . . . . . . . . . . . . . . . . . . . . . . . . . . . . . . . . . . . . . . . . . 4-12

Chapter 1 1 - 1
Chapter 1 - WL1700 Setup
S
ECTION
1-1 Introduction
This setup guide will provide the
basic
required settings for the installation of the WL1700 Access Point and
MH240 Wireless IPTelephone. For more detailed information on program options for these units, refer to the
following manuals (available on the NEC technical support web site:
http://www.necux5000.com
) :
• MH240 Wireless IP Telephone Setup Guide
• MH240 Wireless IP Telephone User Guide
• MH240 IP Phone Manager Operation Manual
• WL1700 Access Point Installation Guide
• WL1700 Access Point Configuration Guide
• WL1700 Access Point Command Reference

1 - 2 Chapter 1
Chapter 1 - WL1700 Setup
S
ECTION
1-2 Installation Overview
In order to keep the initial setup easy, you may wish to keep the network scaled to a maximum number of
100 MH240 handsets.
Some manual modification of the initial configuration is required in order to adjust the IP addressing to the
customer’s network.
Network Layout

Chapter 1 - WL1700 Setup
Chapter 1 1 - 3
S
ECTION
1-3 Setup Preparation
Copy the following files to the computer before going onto the setup:
• TFTP server program
• “Initial configuration” files for the MH240
• Latest WL1700-MS software file

1 - 4 Chapter 1
Chapter 1 - WL1700 Setup
TFTP Root Directory Files
Configure TFTP Server

Chapter 1 - WL1700 Setup
Chapter 1 1 - 5
Set TFTP Root Directory

1 - 6 Chapter 1
Chapter 1 - WL1700 Setup
S
ECTION
1-4 WL1700-MS Setup
1.4.1
Initial Configuration for WL1700-MS
Assign the IP address to 192.168.100.100/24 on the console computer. Access the WebView of the WL1700-
MS (IP address: 192.168.100.10) from the browser, using Internet Explorer 6 or later, and then enter the initial
configuration.

Chapter 1 - WL1700 Setup
Chapter 1 1 - 7

1 - 8 Chapter 1
Chapter 1 - WL1700 Setup

Chapter 1 - WL1700 Setup
Chapter 1 1 - 9

1 - 10 Chapter 1
Chapter 1 - WL1700 Setup
Copy the following “initial configuration” to the clipboard (Acrobat:
Select Text
tool + highlight the text + press Ctrl+C).
set dot1x timeout supplicant 3
set dot1x quiet-period 0
set system ip-address 172.16.254.10
set system countrycode US
set service-profile setup-sp ssid-name NEC-setup
set service-profile setup-sp short-retry-count 3
set service-profile setup-sp long-retry-count 3
set service-profile setup-sp auth-fallthru last-resort
set service-profile setup-sp user-idle-timeout 3600
set service-profile setup-sp keep-initial-vlan enable
set service-profile setup-sp cipher-tkip disable
set service-profile setup-sp cipher-ccmp enable
set service-profile setup-sp rsn-ie enable
set service-profile setup-sp psk-phrase SUMIDA786432
set service-profile setup-sp auth-psk enable
set service-profile setup-sp auth-dot1x disable
set service-profile setup-sp load-balancing-exempt enable
set service-profile setup-sp attr vlan-name default
set service-profile sp1 ssid-name NEC-Voice
set service-profile sp1 no-broadcast enable
set service-profile sp1 short-retry-count 3
set service-profile sp1 long-retry-count 3
set service-profile sp1 auth-fallthru last-resort
set service-profile sp1 static-cos enable
set service-profile sp1 cos 7
set service-profile sp1 cac-mode voice-multiline
set service-profile sp1 user-idle-timeout 3600
set service-profile sp1 active-call-idle-timeout 300
set service-profile sp1 keep-initial-vlan enable
set service-profile sp1 cipher-tkip disable
set service-profile sp1 cipher-ccmp enable
set service-profile sp1 rsn-ie enable
set service-profile sp1 psk-phrase 0246802197531
set service-profile sp1 auth-psk enable
set service-profile sp1 auth-dot1x disable
set service-profile sp1 load-balancing-exempt enable
set service-profile sp1 cac-bw-call 1229
set service-profile sp1 transmit-rate 11g mandatory 18.0,24.0 disabled 1.0,2.0,5.5,6.0,9.0,11.0,12.0,36.0,48.0,54.0
set service-profile sp1 attr vlan-name default
set service-profile sp2 ssid-name NEC-Data
set service-profile sp2 short-retry-count 3
set service-profile sp2 long-retry-count 3
set service-profile sp2 auth-fallthru last-resort
set service-profile sp2 user-idle-timeout 3600
set service-profile sp2 keep-initial-vlan enable
set service-profile sp2 cipher-tkip disable
set service-profile sp2 cipher-ccmp enable
set service-profile sp2 rsn-ie enable
set service-profile sp2 psk-phrase 0246802197531
set service-profile sp2 auth-psk enable
set service-profile sp2 auth-dot1x disable
set service-profile sp2 load-balancing-exempt enable
set service-profile sp2 attr vlan-name default
set enablepass password b6b706525e1814394621eeb2a1c4d5803fcf
set user nec password encrypted 082f494d
set radio-profile rp1 dtim-interval 5
set radio-profile rp1 auto-tune channel-config disable
set radio-profile rp1 active-scan disable
set radio-profile rp1 qos-mode voice-extension
set radio-profile rp1 max-voip-bw 1229
set radio-profile rp1 service-profile sp1
set radio-profile rp1 service-profile sp2
set radio-profile rp1 service-profile setup-sp
set radio-profile default active-scan disable
set ap auto mode disable
set ap 1 serial-id h3tzf0017 model WL1700-MS(AP)
set ap 1 radio 1 channel 1 tx-power 13 radio-profile rp1 mode enable
set ap 2 serial-id h2tzub0301 model WL1500-AP-A
set ap 2 radio 1 channel 6 tx-power 10 radio-profile rp1 mode enable
set ap 3 serial-id h3tzub1036 model WL1500-AP-A
set ap 3 radio 1 channel 11 tx-power 10 radio-profile rp1 mode enable
set ap 4 serial-id h2tzub1527 model WL1500-AP-A
set ap 4 radio 1 channel 1 tx-power 10 radio-profile rp1 mode enable
set ip telnet server enable
set load-balancing mode disable
set vlan 1 port 1
set interface 1 ip 172.16.254.10 255.255.0.0
set ip route default 172.16.254.1 0
Define the circled items
to the customer’s
site requirements.

Chapter 1 - WL1700 Setup
Chapter 1 1 - 11

1 - 12 Chapter 1
Chapter 1 - WL1700 Setup

Chapter 1 - WL1700 Setup
Chapter 1 1 - 13

1 - 14 Chapter 1
Chapter 1 - WL1700 Setup
1.4.2
Upgrade the WL1700-WS Software
To be sure the unit is up to date, upgrade the software in the WL1700-WS using the WebView.

Chapter 1 - WL1700 Setup
Chapter 1 1 - 15

1 - 16 Chapter 1
Chapter 1 - WL1700 Setup
Reset the WL1700-MS by clicking the Reset menu option. Click OK in the following screen to confirm the
reset. A window will appear prompting you to save the configuration or to reset without saving. Click the save
and reset button. .
Wait while the WL1700-MS boots up. Once the WL1700-MS has rebooted, the IP address for connecting to
the unit will be the entry defined in the Initial Configuration file modified on page page 1-10. The WebView
access should be closed out, and if needed, reopened using the new IP address.
Other manuals for UX5000
17
Table of contents
Other NEC IP Phone manuals

NEC
NEC Univerge SV8100 User manual

NEC
NEC G355 User manual

NEC
NEC UNIVERGE Aspire UX Assembly instructions

NEC
NEC Dterm DTL-8R-1 User manual

NEC
NEC Univerge MH250 User manual

NEC
NEC DT330 Reference guide

NEC
NEC DT750 Reference guide

NEC
NEC Univerge SV9100 User manual

NEC
NEC Univerge SV9100 User manual

NEC
NEC UNIVERGE MH240 User manual

NEC
NEC UX5000 User manual

NEC
NEC UNIVERGE MH240 User manual

NEC
NEC ITK-32TGCG-1 User manual

NEC
NEC Univerge SV9300 User manual

NEC
NEC Univerge SV8100 User manual

NEC
NEC Univerge SV9100 User manual

NEC
NEC Aspire Technical specifications

NEC
NEC Dterm Series i User manual

NEC
NEC DT310 Reference guide

NEC
NEC ITK-6DGS-1 User manual