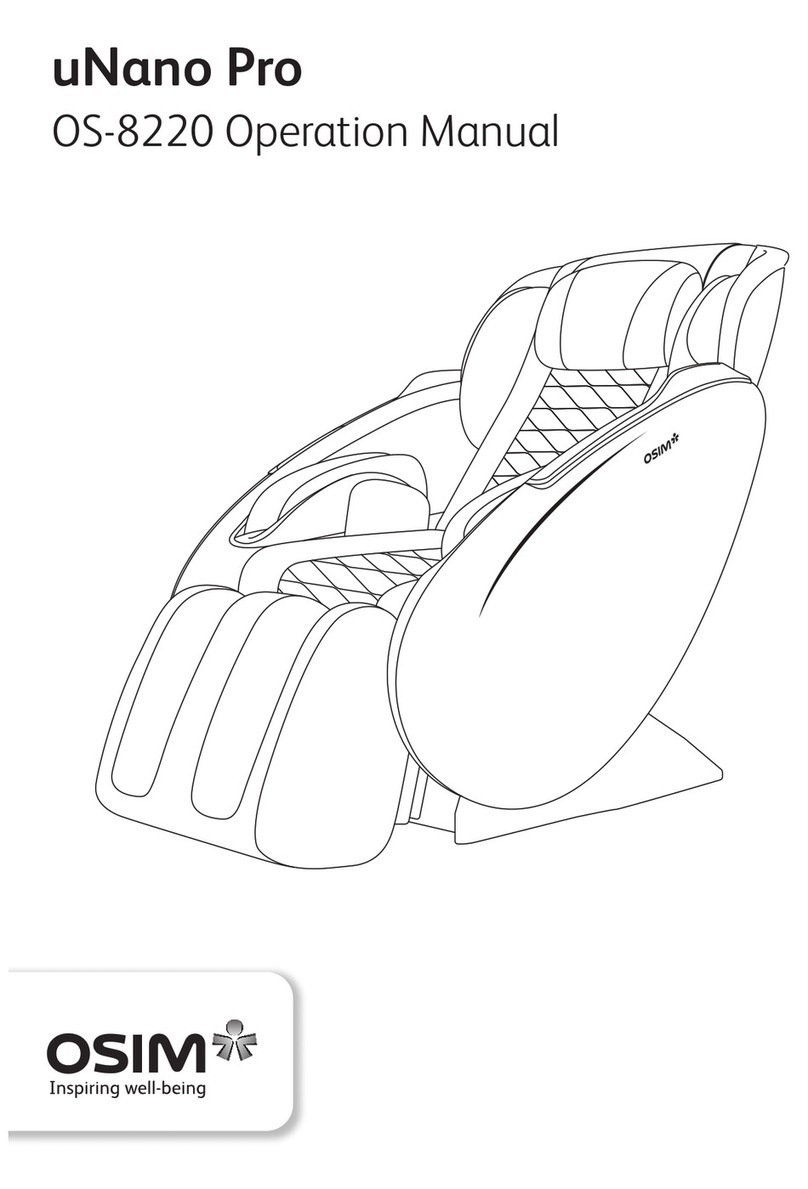
OSIM uNano Series User manual

uNano Series
OS-8223 Operation Manual

1
Contents
OS-8223 uNano Series
Thank you for purchasing the OSIM uNano Series massage chair. Before you start using the
massage chair, please read the operation manual thoroughly for the correct methods of
usage, and pay special attention to the section on safety.
This manual should be kept on hand for easy reference. It is your guide to a safe and efficient
operation.
ENGLISH
Safety 2
Names of parts and functions 5
Preparation before use 7
Massage programs and selections 13
Product care and storage 19
Troubleshooting 20
Specifications 22

2
IMPORTANT SAFETY INSTRUCTIONS
When using the product, please take special notice of the following basic precautions:
Read all instructions before using this product.
DANGER – To reduce the risk of electric shock:
Always unplug this product from the electrical outlet immediately after use and before
cleaning.
WARNING– To reduce the risk of burns, fire, electric shock, or injury to persons:
1) Use this product only for its intended use as described in this manual. Do not use
attachments not recommended by the manufacturer.
2) The product should never be left unattended when plugged in. Unplug from electrical
outlet/power source when it is not in use, and before putting on or taking off parts.
3) Do not operate the product under the blanket or pillow. Excessive heating can occur and
cause fire, electric shock, or injury to persons.
4) Do not use the product if the electrical outlet/power source is loose.
5) Do not connect or disconnect the power plug/USB cable from the electrical outlet /power
source with wet hands.
6) When disconnecting the power plug/USB cable, pull it out by holding the plug/USB cable
head, not the cord/cable.
7) Do not operate the product if it has a damaged cord or plug/USB cable, a malfunction,
a power failure, or it is dropped into the water. Injury may occur when power is restored
unexpectedly. Return the product to OSIM Service Center for examination and repair.
8) If the power plug/USB cable or power cord is damaged, it must be replaced by OSIM
Service Center or its authorized service agents.
9) Do not carry this product by the power cord/USB cable or use the power cord/USB
cable as a handle.
10) Keep the product power cord/USB cable away from heated surfaces.
11) Do not place the power cord/USB cable under the product or any other heavy objects.
12) Do not wind the power cord/USB cable around the product.
13) Do not operate the product with the air openings blocked. Keep the air openings free of
lint, hair, and the likes.
14) Remove power plug/USB cable from the electrical outlet /power source immediately
should liquid be accidentally spilled onto the product as this may result in electric shock.
15) Do not operate where aerosol (spray) products are being used or where oxygen is being
administered.
16) To disconnect, turn off all controls and remove the power plug/USB cable from the
electrical outlet/power source.
17) Do not drop or insert any object or flammable material into any openings of the
product. This may result in electric shock, malfunction or risk of fire.

3
18) Children should be supervised to ensure that they do not play with the product.
19) This product can be used by children aged from 8 years and above and persons
with reduced physical, sensory or mental capabilities or lack of experience and
knowledge if they have been given supervision or instruction concerning use of
the appliance in a safe way and understand the hazards involved. Keep children
away when the product is in operation.
20) Cleaning and user maintenance of the product shall not be made by children.
21) Do not use or operate the product when your body or hands are wet.
22) Do not use this product outdoors.
23) Do not use the product in an excessively humid or dusty environment as it may result in
malfunction.
24) Do not use the product in temperatures higher than 40˚C.
25) Do not expose the product to heaters, stoves or direct sunlight.
26) Do not cover the product during operation. This may result in a rise in motor temperature
and subsequent malfunction or fire.
27) Do not use the product in the event of a lightning storm.
28) If you should use the product in a cold room, do not increase the room temperature
abruptly. It is recommended that you increase the temperature gradually to a normal
level.
29) If the product is brought into a warm environment from a cold place where it was stored,
wait for an hour before use as there may be water droplets on mechanical parts due to
condensation. Using the product under such condition may result in malfunction.
30) When first using the product, please be careful and test it out using a low intensity/or
use within a short period of time to understand how the different motors work and your
preferred intensity.
31) Be sure to start on the gentle massage program if using the product for the first time.
32) If your legs slip off the footrest during massage, do not force them back in when the
kneading discs are clamped as this may result in injury.
33) Do not stand on or in product. Use only while seated.
34) Place and use the product on an even, non-slip floor.
35) Do not use the product if the fabric of the footrest is torn and the internal components
are exposed.
36) Do not disassemble the fabric cover of the product. Touching the internal components of
the product may result in malfunction or an electric shock.
37) Do not dismantle, drop, or subject the product to shock or vibration.
38) Do not use the product in combination with other therapeutic equipment or electric
blanket, etc, as this may result in ineffectiveness or injury.
39) Do not rest or place heavy objects on the product as this may result in malfunction.
40) The product must only be serviced or repaired by the OSIM Service Center. Users must
not attempt to disassemble or repair the product.
41) Some noise may be heard coming from the product while in use. This is due to the
structure of the product and is normal.

4
42) Please do not use the product if you are not feeling well or under the influence of
alcohol.
43) Stop using immediately should you experience discomfort and consult your doctor if you
experience any abnormal or severe pain.
44) The product has a heated surface. People who are insensitive to heat must be careful
when using the product.
45) This product is not intended for self-diagnosis or self-treatment of conditions
that should be managed by a qualified health care provider.
46) If you are under any medication of have any medical conditions, please consult
your health care provider first before use.
47) The suggested usage duration is 15 minutes. Ensure that the product rests for 10
minutes before it is being used again as continuous usage over a long period may
activate the overheat protection device.
48) It is recommended that your usage do not exceed a total of 30 minutes per day as this
may result in excessive stimulation and adverse effects.
49) Do not use the product when the upholstery or seat is removed. This may cause injury or
malfunction.
50) Do not exert excessive force on the back of your neck while using massager.
51) Do not insert your hand or foot along the paths of the massage rollers during usage as
this may cause injury.
SAVE THESE INSTRUCTIONS
This product is intended for household use only
Warranty is subjected to cancellation if the product is used for
commercial purposes.

5
13
1. Headrest pad
2. Upper arm massage unit
3. Backrest pad
4. Lower arm massage unit
5. Hip massage unit
6. Seat
7. Footrest massage unit
8. Controller
Names of parts and functions
9. Pocket for controller
10. Backrest casing
11. Bottom casing
12. Casters
13. Power cord and power plug*
14. Main power switch
15. Power inlet
16. Controller inlet
Massage chair
*Power plug will vary according to country
8
9
10
11
12
1
3
2
6
4
7
5
16 15
ON
14

6
Names of parts and functions
• Do not sit, step or place heavy objects on the controller.
• Do not exert excessive force on the controller.
• Do not operate the controller with wet hands.
• Do not operate the controller using sharp-edged or hard objects.
Controller
Caution
To stop chair operation
immediately.
To adjust warm air.
To adjust 3D roller protrusion level
during manual massage.
To raise or recline the backrest to
desired angle.
To adjust shoulder position.
To adjust roller position during
manual massage.
Illuminates when power in ON.
Safety Stop button
Warm air button
3D roller adjustment
button
Backrest adjustment
button
Shoulder Position
adjustment button
Roller adjustment
button
Power Indicator
To activate seat and hip airbag
massage during manual massage.
Seat and hip airbag
massage button
To activate airbag massage
during manual massage.
Airbag Massage
buttons
Return backrest/footrest
to default upright position.
Upright button
To adjust tapping speed during
manual massage (Hi/Lo).
Tapping speed
adjustment button
To stop massage program. Rollers
will return to its default position.
Refer to page 13 for details.
To activate arm airbag massage
during manual massage.
To raise or lower the footrest
to desired height/length.
Reset button
Auto massage
Program button
Manual massage
program button
Roller width
adjustment button
Full/Partial roller
adjustment button
Arm airbag massage
button
Footrest adjustment
buttons
Refer to page 15 for details.
To adjust width of rollers
(Wide, Mid, Narrow).
To select full or partial rolling
for your back.
To adjust 3D shoulder roller protrusion
level during manual massage.
3D shoulder
adjustment button
To adjust 3D back roller protrusion
level during manual massage.
3D back adjustment
button

7
Backrest pad
Preparation before use
Setting up the uNano Series
• The uNano Series is packaged with its
backrest in its reclined position.
• Before use, ensure that the backrest is
raised fully to its upright position, as
shown.
Placing the headrest pad
• Insert the loose end of the headrest
pad under the strap and flip down the
headrest pad as shown.
Caution
• Do not remove the backrest pad.
Backrest
in upright
position
Headrest pad Zipper
Strap
Loose end of
the headrest pad

8
• As the uNano Series is heavy, please
exercise extra care to not damage floor
surfaces when positioning it.
• It is recommended that a carpet be placed
under the uNano Series to reduce noise
level during operation.
Caution
•Make sure all switches are turned off
(including the main switch) before the
power plug is connected to an electrical
outlet.
Preparation before use
Note
•If the rollers are located in the middle
of the backrest when operation is
terminated, they will return to the default
position when the main switch is turned
on again.
Placing the uNano Series
• Ensure that there is a minimum clearance
of 15 cm behind and 60 cm in front of
the uNano Series (as shown) to allow it to
recline and extend the footrest without
obstruction during operation.
• Maintain a minimum distance of 1 meter
from AV devices such as television sets or
radio to prevent signal interference.
Power ON/OFF
• Connect the power cord to the uNano
Series power inlet.
• Connect the power plug to the electrical
outlet.
•Push the main switch located at the back
of the uNano Series to turn it on or off.
15 cm
60 cm
Power inlet
ON/OFF main switch
ON

9
Preparation before use
• Do not move the uNano Series with
someone on it. This will cause the uNano
Series to tip over and cause accident and
injury.
Moving the uNano Series
The uNano Series is fitted with casters for easy
maneuvering over a short distance.
• Raise the backrest fully to its upright
position and retract the footrest fully.
• Turn off the main power switch and
disconnect the power plug.
Moving method (1)
• Lift up the front of the uNano Series as
shown and wheel it to the desired location.
Moving method (2)
• Move the uNano Series by lifting it as
shown.
Caution
Casters
Casters

10
Preparation before use
Adjusting the upper arm
massage units
• Press the button as shown to open out the
upper arm massage unit. Repeat for the
other side of the upper arm massage unit.
• Slightly push the upper arm massage units
inwards to narrow the positions.
• In order to enjoy a balanced massage
experience, it is advisable to have both
upper arm massage units at the same
width position.
Adjusting the lower arm massage
units
• Raise both sides of the lower arm massage
unit fully as shown.
Lower arm massage unit
Upper arm
massage unit
Raising/reclining the backrest
To raise the backrest
• Press and hold the backrest raising button
[ ] until the backrest is lifted to the
desired angle.
To recline the backrest
• Press and hold the backrest reclining
button [ ] until the backrest is lowered
to the desired angle.
Raising/lowering the footrest
To raise the footrest
• Press and hold the footrest raising button
[ ] until the footrest is raised to the
desired height or length.
To lower the footrest
• Press and hold the footrest lowering
button [ ] until the footrest is lowered
to the desired height or length.

11
In the event of power failure
• Support two arms on the side frames, lift
and move your butt to the edge of the
seat.
• Lift your knees upwards and ease them
out.
• Turn off the main switch and disconnect
the power cord to prevent any sudden
operation if the power is restored
unexpectedly.
Preparation before use
Note
• Backrest will only start raising/reclining
after the massage rollers stop moving.
Caution
• When adjusting the backrest and
footrest, always ensure there is no
object under/near the footrest/seat
and keep children or pets away to
prevent injury.
• Do not sit on the footrest when it is raised.
Any sudden heavy weight on the footrest
could cause damage to the mechanism,
accident or injury if the uNano Series tips
over.
• Ensure that the backrest returns to its
most upright position before sitting on
the uNano Series, and reclining it
according to your preference.
• Do not place fingers or objects in the
gap between the seat and the backrest/
footrest.
Upright position
• Press and hold the Upright button [ ]
on the controller to return the backrest
and footrest to the default upright
position.

12
• A ‘click’ sound can be heard to indicate
that it is fixed in footrest position.
• Release the lever and the footrest will be
fixed in the ottoman position.
Note
• Footrest can only be fully retracted in
ottoman position.
Footrest/Ottoman function
The ottoman can be rotated into footrest
position.
• Extend the footrest until it is fully
extended out from the seat.
• Lift the ottoman lever before rotating the
footrest in the direction as shown.
Preparation before use
Ottoman lever
Pull the ottoman slightly
and lift up the lever.
Ottoman lever
Footrest position
Ottoman position

13
Massage programs and selections
1. Select any of the 8 automatic massage programs (Neck & Shoulders, Lumbar & Butt, Relax,
Energize, Deep Tissue, Sleep, After Work, Sports Recovery).
2. The auto shoulder detection function begin. You may want to adjust your desired roller position
for shoulder position by pressing the Shoulder position adjustment button [ ] (7 levels, refer
to page 15).
3. The selected auto massage program will begin.
4. By default, all functions on Arm / Seat & Hips / Foot will turn on with the lower intensity setting.
You may want to increase intensity or turn off the function for a particular area by pressing the
buttons respectively.
5. By default, the 3D rollers on Shoulders / Back / Lumbar are set at ‘Middle’ protrusion level. You
may want to adjust the rollers protrusion to your preference level by pressing the respective
buttons (refer to page 15).
6. After the massage is completed, the rollers will return to its default position.
Auto massage programs
uNano Series auto massage programs
Neck & Shoulder Quick relief from aches and tension on neck & shoulders
Lumbar & Butt Loosen tension at lumbar & butt to maintain a healthy lower back
Relax Head-to-toe pampering to unwind and relax the body & mind
Energize Invigorating massage to refresh and stimulate the body & mind
Deep Tissue Intense massage pressure to relieve body tension & knots
Sleep Relaxes the body & mind for a restful good night’s sleep
Happy Hour De-stress the body & mind and raise your mood
Sports Recovery Promote relaxation and recovery of muscles used in sports

14
Massage programs and selections
Manual massage programs
1. Select any of the 3 manual massage programs (Knead, Tap or Dual).
2. The selected manual massage program will begin.
3. By selecting or combining functions from ‘Adjustments’ and ‘Manual Airbag massage’, you can
customize according to your preference (refer to page 16).
4. After the massage is completed, the rollers will return to its default position.
•In the event of any emergency or malfunction, press the Safety Stop button [ ] (refer to page
6) to stop massage immediately. Press the Reset button [ ] for rollers to return to its default
position. Turn off the Main Switch.
•You can change programs or adjust settings during the massage, however this will not reset the
timer.
Note
uNano Series manual massage programs
Knead
• Simulates the thumb-
kneading action and
circular motion of a
massage therapist to relax
stiff muscles and relieve
tension.
Tap
• The percussive massage
works like the rolled-up fists
of a skilled masseuse, giving
you instant relief while
improving circulation.
Dual
• Combines the synergy of
Tapping and Kneading to
bring about a deeper and
more effective massage.
• Adjustments
- Roller position
- 3D roller protrusion
• Adjustments
- Tapping speed
- Roller position
- Roller width
- 3D roller protrusion
• Adjustments
- Tapping speed
- Roller position
- 3D roller protrusion

15
Massage programs and selections
Manual massage adjustments
1. Full/Partial Rolling
Full rolling
Rollers move up and down the entire back.
Partial rolling
Rollers move up and down a targeted part of the back.
•Press [ ] to select Full or Partial rolling massage. The LED indicator will light up.
•Adjust roller width by pressing the [ ] button (Wide, Mid, Narrow).
Note: Roller width cannot be adjusted with ‘Kneading’ massage program.
•Adjust roller position by pressing and holding the [ ] or [ ] button.
Note: Roller position can only be adjusted in ‘Partial Rolling’ mode.
•Adjust tapping speed by pressing the [ ] button (Hi, Lo).
Note: Tapping speed can only be adjusted in ‘Tapping’ or ‘Dual’ massage program.
2. Roller width adjustment
3. Roller position adjustment
4. Tapping speed
•Press [ ] or [ ] to adjust rollers protrusion level for your shoulders and lumbar
respectively (5 levels). The specific pattern of the LED light indicator is as below.
•Press [ ] to adjust rollers protrusion level for your back (Hi, Mid, Lo).
5. 3D Rollers for back, shoulders and lumbar
High Low

16
•Adjust rollers position on your shoulders by pressing the [ ] button (7 levels).
The specific pattern of the LED light indicator is as below.
6. Shoulder position adjustment
High Low
Massage programs and selections
Manual massage adjustments
•You can adjust the intensity of the warm air between Hi and Lo by
pressing the [ ] button.
7. Warm air adjustment

17
Massage programs and selections
Manual airbag massage
Suggested combined massage programs
•You can combine any or all of the following airbag or vibration massage according to your
preference.
•You can combine different massages with the rolling features to give you a more effective and
personalized massage.
Arm airbag massage
•Press [ ] button and the LED indicator will light up.
•Press the same button to switch between Hi or Lo intensity.
Seat & hips airbag massage
•Press [ ] button and the LED indicator will light up.
•Press the same button to switch between Hi or Lo intensity.
Foot airbag massage
•Press [ ] button and the LED indicator will light up.
•Press the same button to switch between Hi or Lo intensity.
Tapping with full rolling or partial rolling
•Press the [ ] button to select ‘Tapping’, followed by the [ ] button to select your desired
rolling massage during tapping massage.
•Press the [ ] button to adjust the width of the rollers (Wide, Mid, Narrow).
Kneading with full rolling or partial rolling
•Press the [ ] button to select ‘Kneading’, followed by the [ ] button to select your
desired rolling massage during kneading massage.
Dual with full rolling or partial rolling
•Press the [ ] button to select ‘Dual’, followed by the [ ] button to select your desired
rolling massage during kneading and tapping massage.
Overall massage
•Combine any of the following manual massage programs.
•[ ] (Kneading, Tapping, Dual) + [ ] (Full, Partial rolling) + [ ] (Arm) +
[ ] (Seat & Hips) + [ ] (Foot) + [ ] (Warm Air) button

18
Massage programs and selections
To start a massage session
• Turn on the main switch located at the
back of the uNano Series.
•The LED Power indicator on the controller
will light up.
To stop a massage session
• Press the Stop button [ ], then press the
Reset button [ ] on the controller. This
will bring the rollers back to the default
position and all airbags will deflate.
After using the uNano Series
•Return the backrest to the upright position
and lower the footrest completely
after use.
•In the event of any emergency or
malfunction, press the Safety Stop
button [ ] (refer to page 6) to stop
massage immediately.
Note
To switch off the uNano Series
•To switch off, press the Reset button [ ]
to return the rollers to its default position,
and turn off the main switch.
Lower arm massage unit
•Push down the lower arm massage unit
until it returns to its default position.
Push down
• While lowering the footrest, do not fully
extend your legs to avoid abrasion with
the floor.
Caution
Lower arm massage unit
This manual suits for next models
1
Table of contents
Other OSIM Massager manuals

OSIM
OSIM uZap Foot User manual

OSIM
OSIM uCrown Smart User manual

OSIM
OSIM uNano Pro User manual

OSIM
OSIM uZap Tummy User manual

OSIM
OSIM OS-158 uCrown 3 User manual

OSIM
OSIM uDivine V2 User manual

OSIM
OSIM uJolly 2 User manual

OSIM
OSIM uCozy 3D User manual

OSIM
OSIM uSqueez Arm User manual

OSIM
OSIM uSqueez 2 User manual

OSIM
OSIM uJolly 2 Smart User manual

OSIM
OSIM uZap Body User manual

OSIM
OSIM uCozy 3D Plus User manual

OSIM
OSIM uSqueez 2 Smart User manual

OSIM
OSIM uZap Gun Mini User manual

OSIM
OSIM uDream OS-8208 User manual

OSIM
OSIM uMoby Smart User manual

OSIM
OSIM uThrone OS-8201 User manual

OSIM
OSIM uMoby Mini User manual

OSIM
OSIM uLumbar OS-2211 User manual