manuals.online logo
Brands
  1. Home
  2. •
  3. Brands
  4. •
  5. Pitney Bowes
  6. •
  7. Postal Equipment
  8. •
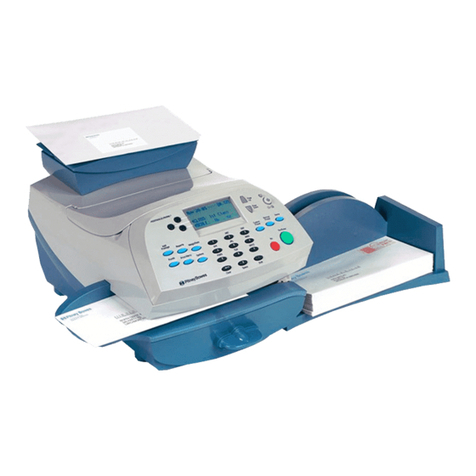
  9. Pitney Bowes DM50 Series User manual

Pitney Bowes DM50 Series User manual

Sometimes you might need a little help with the installation of your franking
machine, here’s a few of the more common problems and resolutions for them.
Envelope messaging not available
See the Envelope Messaging section on the left.
Error 11
You have tried to install your franking machine before your Postal Authority have
fully approved your licence. Please wait 24 hours and try the installation again.
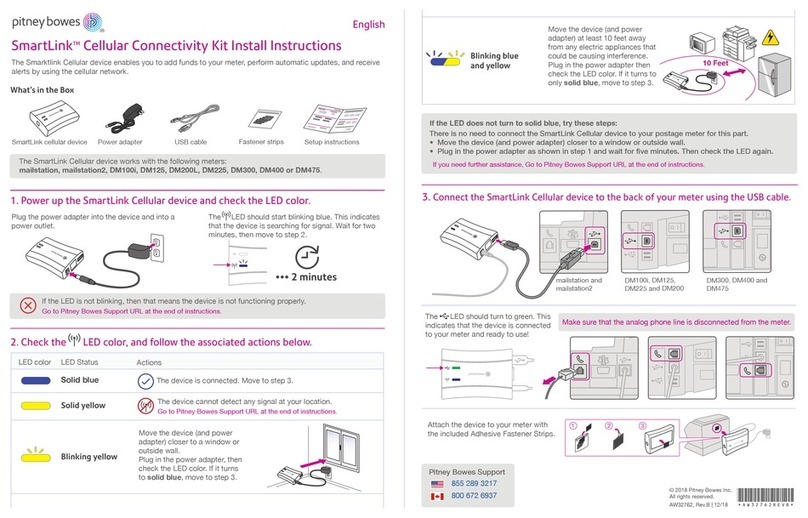
Problems connecting when using SmartLink™
• When establishing a wired connection, make sure that the SmartLink™ is
physically and securely connected as described in Step 4a of this instruction
(overleaf).
• If the USB Network light is not blinking green a network connection is
not established. You may be able to rectify this issue by restarting your
SmartLink™ and Meter.
1. Power down the meter by removing the power cable from the back of
the machine.
2. Power down the SmartLink™ device by removing the power cable from
the back of the box.
3. Wait 10 seconds, then restart the meter only by plugging the power
lead back in. Ignore any messages to make a connection.
4. Power up the SmartLink™ device and wait for the top USB light to go
steady green and the bottom internet light flashing green.
5. Once the SmartLink™ device’s lights are as above, you can attempt a
connection.
If you continue to experience problems please visit-
pitneybowes.com/uk/smartlinkhelp for further assistance.
Problems connecting when using PC Meter Connect™
• Make sure the USB cable is connected between the franking machine and the PC.
• Check that your PC is running and has an internet connection.
Pre-setting options
Troubleshooting About Pitney Bowes products and services
Ordering consumable supplies
Whether it’s ink or envelopes for your franking machine, or the more day-to-
day routine items like pens and pads to help you manage your oce we’re here
to help. Thousands of our customers have found that we can provide excellent
quality goods at very aordable prices, and backed by our fantastic quality
guarantee you can’t go far wrong.
To find out more about what we can oer just visit our online shop at
(UK) www.pitneybowes.co.uk/shop or (ROI) www.pbdirect.ie. However, if you
would like to speak to someone or have any queries about your consumable
supplies just give us a call on (UK) 0844 844 8101 or (ROI) 01-4608700.
My Account
An online site where you can access most of the information to manage your
business with Pitney Bowes:
• Display account information and invoices.
• Review the status of your orders and track their progress.
• Manage your contact and account information.
• Access technical support.
To access My Account, go to (UK) www.pitneybowes.com/uk or
(ROI) www.pitneybowes.com/ie and click Your Account (at the bottom of the
page, under Customer Service).
For your first visit only, register. To register, you will need your Account Number
which can be found on a recent invoice or statement (not Purchase Power).
You can save settings on your franking machine so that you do not have to make
the same selections every time you use the machine. These settings are called pre-
set options.
Having pre-sets saved on your franking machine can save time and errors when
using your franking machine. Your franking machine will remember these presets
even after being turned o or entering a sleep cycle.
We suggest that you pre-set options for Envelope Messaging and Postal Class, but
this is entirely up to you.
To store your preset...
• Press Menu/Options.
• Use the Review ▼▲ keys to scroll to ‘Change Setup?’ then press Enter/yes.
• Scroll to ‘Use Preset Setup?’ then press Enter/yes.
• If the ‘Turn Preset on? Y/N’ prompt appears, press Enter/yes.
• If the ‘New postal rates since preset created’ prompt appears, press Enter/yes.
• Scroll to ‘Store new preset?’, then press Enter/yes.
• When the system displays ‘Review settings to be stored?’ press No.
• When you see ‘Confirm store new preset’, press Enter/yes.
• Press No when you see ‘View new preset?’ and ‘Stay in setup?’.
Your new preset is now stored.
To recall your preset at any time...
Press Menu/Options. Use the Review ▼▲ keys to scroll to ‘Recall Preset?’, then
press Enter/yes.
Envelope messaging
Safety information
Follow normal safety precautions for all oce equipment:
• Use only Pitney Bowes approved supplies, in particular aerosol dusters.
Improper storage and use of aerosol dusters or flammable aerosol dusters can
cause an explosive-like condition that could result in personal injury and/or
property damage. Never use aerosol dusters labelled flammable and always
read instructions and safety precautions on the duster label.
• To obtain supplies, please contact our Supply Line™to place orders
• Material Safety Data Sheets can be obtained through the web or from our
Supply Line™. Refer to the Contact Information List for more information.
• Use the power cord supplied with the machine and plug it into a properly
grounded wall outlet located near the machine and easily accessible. Failure to
properly ground the machine can result in severe personal injury and/or fire.
• Avoid touching moving parts or materials while the machine is in use. Keep
hands, loose clothing, jewellery and long hair away from all moving parts.
• Do not remove covers or defeat safety interlock switches. Covers enclose
hazardous parts that should only be accessed by properly trained service
personnel. Immediately report to service any damaged or non-functioning
components that renders the unit unsafe.
• Place the unit in an accessible location to allow for proper venting of the
equipment and to facilitate servicing.
• The power cord wall plug is the primary means of disconnecting the machine
from the AC supply.
• Do not use an adapter plug on the line cord or wall outlet.
• Do not remove the ground pin from the line cord.
• Avoid using wall outlets that are controlled by wall switches, or shared with other
equipment.
• Do not route the power cord over sharp edges or trap between furniture.
• Ensure there is no strain on the power cord and that it does not become
jammed between the equipment, walls or furniture.
• Be certain the area in front of the wall receptacle into which the machine is
plugged is free from obstruction.
• Before clearing a stoppage, be sure machine mechanisms come to a stop.
• When removing stalled material, avoid using too much force to protect against
minor personal injury and damaging equipment.
• To prevent overheating, do not cover any vent openings.
• Operation of this equipment without periodic maintenance will inhibit
optimum operating performance and could cause the equipment to
malfunction. Contact your machine supplier for required service schedule.
• Read all instructions before attempting to operate the equipment.
• Use this equipment only for its intended purpose.
• Always follow the specific occupational safety and health standards for your
workplace.
An Envelope Message is a personalised and preordered message/advert that can
print alongside your frank when franking mail.
It can take up to about 10 days to create your personalised Envelope Message.
If it is not available for download during the installation process you may email
envelopemessagingqueries@pb.com to see when it is going to be ready.
When it becomes available, carry out a software update as described below to
download it into your franking machine.
If at any time you would like a new Envelope Message for your franking machine,
just visit our website at:
www.pitneybowes.com/uk/support/envelope-messaging
Alternatively, log-in to MyAccount and click on the Envelope Messaging link at the
right hand side of the MyAccount home screen.
Software Update
You can carry out a software update at any time, which automatically downloads
any new Envelope Messaging or software updates allocated to your account. To do
this:
• Press Menu/Options.
• Use the Review ▼▲ keys to scroll to ‘Connect to Pitney Bowes’ then press Enter/
yes.
• Your franking machine connects with the Pitney Bowes Data Centre and indicates
if any updates are available. Follow the prompts on the screen to start the
download.
• Press Enter/yes when complete.
To make your franking machine automatically select your preferred Envelope
Messaging when you frank mail, see ‘Pre-setting options’ below.
You will have processed a simple mail piece in Step 9 of this instruction but now
that you’ve installed your franking machine, you’ll probably want to learn more
about its many features.
A Quick Reference Guide providing more information can be
found in the slide out tray underneath your franking machine.
This gives more detail of how your franking machine works, and
how you can use it to process your post.
We also provide an in-depth Operating Guide that covers all
aspects of your franking machine in detail. To downloaded the guide,
go to (UK) www.pitneybowes.com/uk/support/products/dm50-dm55
and under the Getting Started tab you will see the Operator Guide.
or (ROI) www.pitneybowes.com/ie/support and then select
Products, Meters and Mailing Systems, DM50/55 and under the
Getting Started tab you will see the Operator Guide.
Using your franking machine
DM50 Series Digital Mailing System
(K700 series)
Operator Guide
UK and ROI Version
5
6
7
8
9
If you’re still having trouble in the UK, then visit
www.pitneybowes.com/uk/support/products/dm50-dm55
or give us a call on 08444 992992.
If you’re still having trouble in the Republic of Ireland, then
visit
www.pitneybowes.com/ie/support and select Products,
Meters and Mailing Systems and then DM50/55
or give us a call on 01 4808700.
You cannot meet the requirements of SmartLink™ or PC Meter Connect™
connection
If you do not have a SmartLink™ device or an internet enabled PC available to
allow your franking machine to connect to the Pitney Bowes Data Centre, please
give us a call on (UK) 08444 992992 or (ROI) 01 4808700 to discuss other
possible options.
Poor Print Quality
If you are experiencing poor print quality, perform a test print
1. Press the Menu / Options key
2. Press Review (down) to scroll and select “Use ink functions?”
3. Press Review (down) to scroll and select “Print test pattern?”
Now follow the instructions in Step 6 overleaf. Select No- poor print when
prompted and the printer nozzles will be cleaned.
If you continue to experience print quality issues you can clean the print head.
Visit (UK) www.pitneybowes.com/uk/support or
(ROI) www.pitneybowes.com/ie/support
and search ‘How to clean the print head on DM50/DM55 and DM60’.
Adding Postage
1. Select Funds. The display shows the postage funds available in the
meter.
2. Press Review (down) to scroll to “Refill Postage?”
3. Press Yes/Enter. The meter displays the last amount refilled.
4. Follow the prompts to complete your ‘top up’.
Error (0)104
You have tried to refill with an amount that is not a multiple of £10/€10. Please try
again with an amount that is a multiple (£10/ €10, £20/ €20, etc.)
Continue reading below
Franking machine
installation guide -
DM50/55 series
Read Now BEFORE you unpack your equipment
Mailing and Shipping
Franking Machines
Form no: SDC668H (5-18)
*SDC668H*
© 2018 Pitney Bowes Ltd.
Pitney Bowes Limited
Building 5, Trident Place
Mosquito Way, Hatfield AL10 9UJ
T: 08444 992 992
F: 08702 415 249
First Check
1. You need-
• The box containing your new franking machine.
• A letter from your Postal Authority titled ‘Your Licence’.
If you have not received the letter from your Postal Authority, do not go
any further with this installation.
Please call Royal Mail Customer Services on 08457 950950 or
An Post Customer Services on 01-7057600.
If they ask you for the franking machine Serial Number, it can be found
on a label on the outside of the box.
2. Check that the serial numbers on your box and the letter from your
Postal Authority are identical.
If they are then continue to work through this set-up.
If not, call Pitney Bowes on (UK) 08444 992 992 or (ROI) 01 4808700.
Important-
Installation requires contact with our Data Centre. Please only attempt
installation during the opening hours of 7am to 8pm Monday to Saturday.
Right, let’s get your franking
machine up and running quickly…
Please unfold this poster fully and
carefully follow the installation
instructions (Steps 1-9) on the reverse.
Creating a preset
You don’t have to program the values into the preset memory. Instead, the
franking machine memory takes a “snapshot” of the current values on your
franking machine. For example, if the machine is set up to print a certain Envelope
Message and Second Class is selected, these will be used to define the preset.
To create a preset, ensure that the display shows the values that you would like to
save, then follow the instructions below. Please note that this document contains installation information
for both the UK and Republic of Ireland.
Please select the relevant information for your location.
3. Connect to the outside world
Follow the relevant section below for the connection method you‘ve chosen:
4a. SmartLink™ device connection
Note- If you are installing your SmartLink™ using a wireless connection you should
connect your power cord to the back of your franking machine and power up now
before proceeding to the connection instructions below.
Wired? or Wireless?
6. Carry out a test print
When prompted, insert a spare envelope or tape/
label strip for a test print. Insert the item into the
franking machine from the front, making sure it
is pushed up to the right registration wall. The
franking machine automatically begins printing. Do
not remove the item until the printing has finished.
Review the quality of the test print.
Good quality – press Enter/Yes.
Poor quality – press No, the franking machine goes through another set-up cycle
and will clean the print nozzles. When this is complete you should try the test print
again.
8. Check for updates
Your franking machine now automatically checks and installs any new software,
including any new Envelope Messages associated with your account. The display
shows the status of the update.
Once the updates have been completed, your franking machine requires a final
connection. Press Enter/Yes when you see ‘Connection Required - Press Enter’.
Once complete, the Home Screen displays and your franking machine is ready to
be used.
7. Add postage funds
You need to add funds to your franking machine before you can use it.
Connect to Pitney Bowes Data Centre
The franking machine automatically connects with the Data Centre and, after a
short delay, displays your account balance:
Adding funds
You now need to add postage to your franking machine.
• Press Enter/Yes - an amount will be suggested. To accept this amount, press
Enter/Yes or press Clear/Back to change it.
• If you pressed Clear/Back you will be prompted to enter a new amount. Enter the
amount and then press Enter/yes.
Important- This new refill amount must be in increments of £10 / €10.
• Confirm the amount to add by pressing Enter/yes again.
• The franking machine communicates with the Data Centre to add postage and
confirms when complete. Press Enter/yes.
• The display asks if you would like a receipt. Press Enter/Yes and print an envelope
or label as you did for the test print at step 6.
Get Started-
Franking an envelope
Let’s now create your first piece of franked mail...
• Place your item of mail on the scale and the display will show the cost, weight,
class and date.
• If you want to change the Class, press the Class button and scroll to highlight the
Class you wish to use and then press Enter/yes.
• Envelope Messaging (advert or message) prints alongside your frank. To select
your preferred Envelope Message, press the down Review ▼key until ‘Ad’
displays, then press Enter/yes. Scroll to the required Envelope Message using the
Review ▼▲ keys, then press Enter/yes. (To ensure your Envelope Message prints
automatically in future, see Pre-setting Options, overleaf).
• Insert the item of mail into the franking machine (exactly as you did at step 6- test
print) to create your first piece of franked mail.
Problems?
• Can’t see the personalised Envelope Message (advert) you ordered? See Envelope
Messaging overleaf.
• Want to pre-set the franking machine to automatically print your preferred
Envelope Message? See Pre-setting Options overleaf.
• Want to learn more about using you new franking machine? See Using your
franking machine overleaf.
Prepaid: £xxxxx.xx
x.xx 0 g
postal class date
IMPORTANT
Once you have printed the receipt, check the Postage by Phone account
number on the receipt and ensure it matches the account number on the
dispatch note received with the franking machine. If the numbers do NOT
match, do not go any further with this installation and contact Pitney Bowes
on (UK) 08444 992992 or (ROI) 01 4808700 .
IMPORTANT
It is very important that the print from your franking machine is of a good
quality. If you do not have a good quality print, your Postal Authority may refuse
or be unable to read the information automatically, this might result in a delay in
delivering your post.
Right Registration Wall
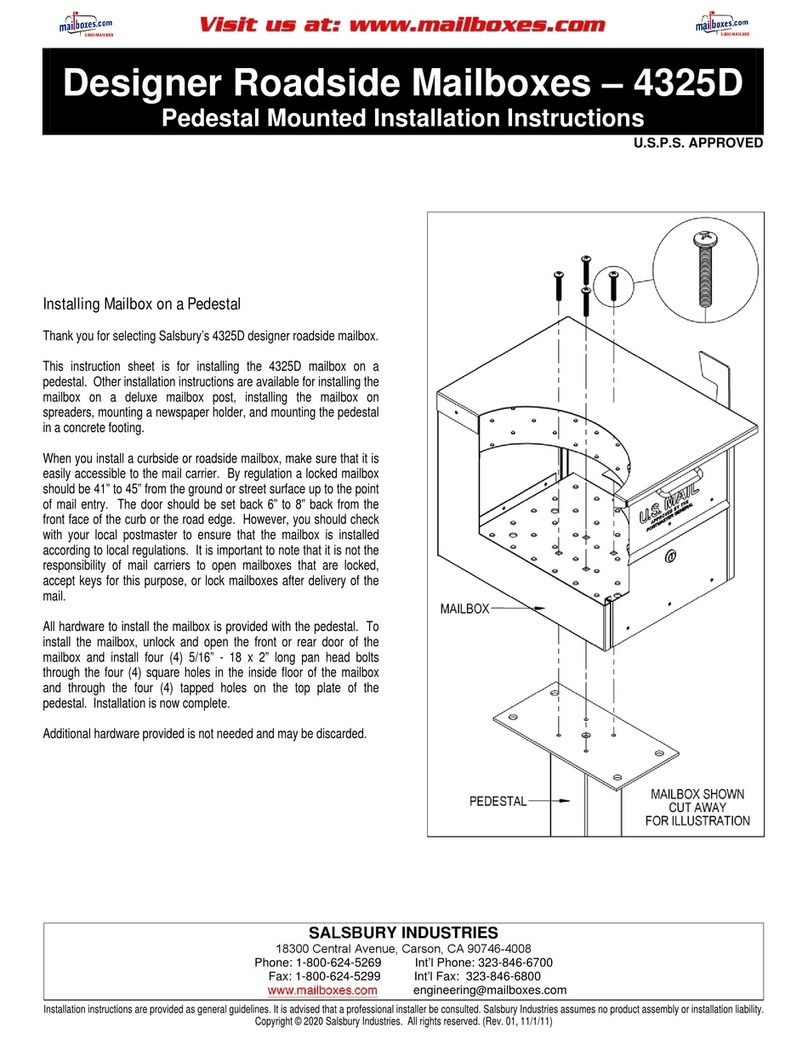
1 Open the box and unpack
Here’s a diagram and explanation of the items you should find in your box, if
anything is missing give us a call on (UK) 08444 992992 or (ROI) 01 4808700.
Depending on how you install your franking machine, you might not need all of
these items.
If you have any problems during this installation, refer to ‘Troubleshooting’ overleaf.
Franking Machine Scale Ink Cartridge
Postage Meter
Labels
USB Cables
(1 short, 1 long)
Network Cable
Velcro Pads
Power Cord
SmartLink™
17
8
9
6
Good print - no broken lines in the
centre of the test print
Bad print - broken lines in the centre
of the test print
3. Fit the Scale
Remove all shipping tape from the machine, including
the tape on the underside of the machine which holds
the slide-out tray in position.
Position the scale on the franking machine and plug in
the scale connector as shown in the diagram. Tighten
the connector screws.
3
4
Decide where to site your
system and how to connect it
Please DO NOT connect power until instructed.
You must ensure that the franking machine is located on a sturdy and flat surface,
has a constant power supply and that you have space around it to work.
Your franking machine has to connect to the Pitney Bowes Data Centre to add
postage funds, get software updates, and carry out the required Postal Authority
inspections.
SmartLink™
Connection is made via the internet. If you are connecting via a SmartLink™
device please go straight to Step 3 to install your scale and then proceed to Step
4a and follow the instructions to continue your SmartLink™ setup.
2
PCMC Connection (Internet connection via your PC)
If you have a PC with an internet connection nearby, you can install the free Pitney Bowes
PC Meter Connect™ (PCMC) software and use the PC’s internet connection (see step 4b).
Benefits Requirements
Backup
connection
method if
LAN not
possible.
Requires a PC with an active internet connection to be nearby and turned
on.
The PC must run Windows Vista or 7 and have Pitney Bowes PCMC software
installed.
PCMC is not available for Mac.
As a backup and only if you cannot provide a direct connection to your network,
you can use the free Pitney Bowes PC Meter Connect™ (PCMC) software to
connect via any PC with an internet connection.
If you cannot meet the requirements of any connection method described above,
give us a call on (UK) 08444 992992 or (ROI) 01 4808700 .
Communication Device
For Pitney Bowes Digital
Mailing System
5 . Install the ink cartridge
123
4
56
789
C0
.
Sperren
Versandarten
Zählerstände
Einstellungen Eingabe
blättern vor/zurück
Nein
Ja
*#_ ABC DEF
GHI JKL MNO
PQRS TUV WXYZ
zurück Leertaste Eingabe
123
4
56
789
C0
.
Lock
Class
Funds
Options Enter
Review
no
yes
*#_ ABC DEF
GHI JKL MNO
PQRS TUV WXYZ
Clear/Back Space Shift
PitneyBowes
5.2 When prompted, lift the top cover
and press the unlock symbol on
the cartridge latch. Remove and
discard the yellow packaging
material.
5.3 Open the packaging for the ink
cartridge and take o the protective
tape from the bottom.
5.6 Close the top cover and press
Enter/yes. When you see
‘IMPORTANT – is the ink cartridge
installed?’ displayed, press Enter/
yes again.
The franking machine will now
go through a set-up cycle which
takes up to 2 minutes.
5
5.1 When the display shows ‘Add ink
cartridge’, press Enter/yes.
5.4 Insert the ink cartridge. Insert the
base of the cartridge first before
pushing the top back.
5.5 Press the ink cartridge latch down
until it clicks and holds the cartridge in
place.
Turn over for further information on Envelope Messaging,
Pre-setting Options, Troubleshooting and Using your
Franking Machine.,
4b. PCMC Connection (Internet connection via your PC)
Before you connect your franking machine to your PC, you need to install our
FREE PC Meter Connect™software. To do this, you must have administrator rights
on your PC which may require you to contact your IT department. Please note that
the software is not Mac compatible.
To install, visit pitneybowes.com/uk/setup-pcmc and choose the ‘Run’ option.
Select ‘English (United Kingdom)’ as your installation language and follow the
on-screen instructions. This process installs the software and powers up and tests
your franking machine connection. When complete, you are asked to return to this
guide to complete the franking machine installation.
• Installation takes about 10 minutes.
• Requires an available internet port
and power socket.
• Follow the instructions below to
connect.
• Installation takes about 15 minutes.
• Requires a computer and access to a
wireless network.
• For wireless connection please go to
pitneybowes.com/uk/smartlinksetup
Do not proceed with the below
instructions.
• Please see note above.
• Once installed return to step 5 on this
instruction.
Wired instructions
1. Connect the SmartLink™device to either a wall internet port or a router with
the included internet cable.
Inte rnet jac k Route r
Note- Lights on the device will remain o.
2. Plug the power adapter into the into the SmartLink™ device. Now connect the
power lead to the wall socket.
• The SmartLink™device’s lights will change colour.
• Once the device has connected to the internet the connectivity light will flash green.
• Also the SmartLink™Device Ethernet port light will show green for successful
connection and yellow for network activity.
3. Plug the USB cable into your SmartLink™ Device and into the back of your
Franking machine.
4. Now connect the power cord to your Franking machine and connect to power.
5. Attach the SmartLink™ device to your meter with the included adhesive
fastener strips.
• The USB cable is the short cable.
• The SmartLink™device’s lights will again change colour.
• Once a network connection has been established the SmartLink™ device’s USB
Connectivity light will turn green and it’s Network Connectivity light will blink green.
1 2 3
Now your SmartLink™ connection is established, please proceed to Step 5.
Congratulations! Your Franking machine is now ready to use.
Internet port Router
Prepaid: € xxxxx.xx

Other manuals for DM50 Series

5

This manual suits for next models

1

Other Pitney Bowes Postal Equipment manuals

Pitney Bowes SendPro 1E42 User manual

Pitney Bowes

Pitney Bowes SendPro 1E42 User manual

Pitney Bowes dm60 series Technical manual

Pitney Bowes

Pitney Bowes dm60 series Technical manual

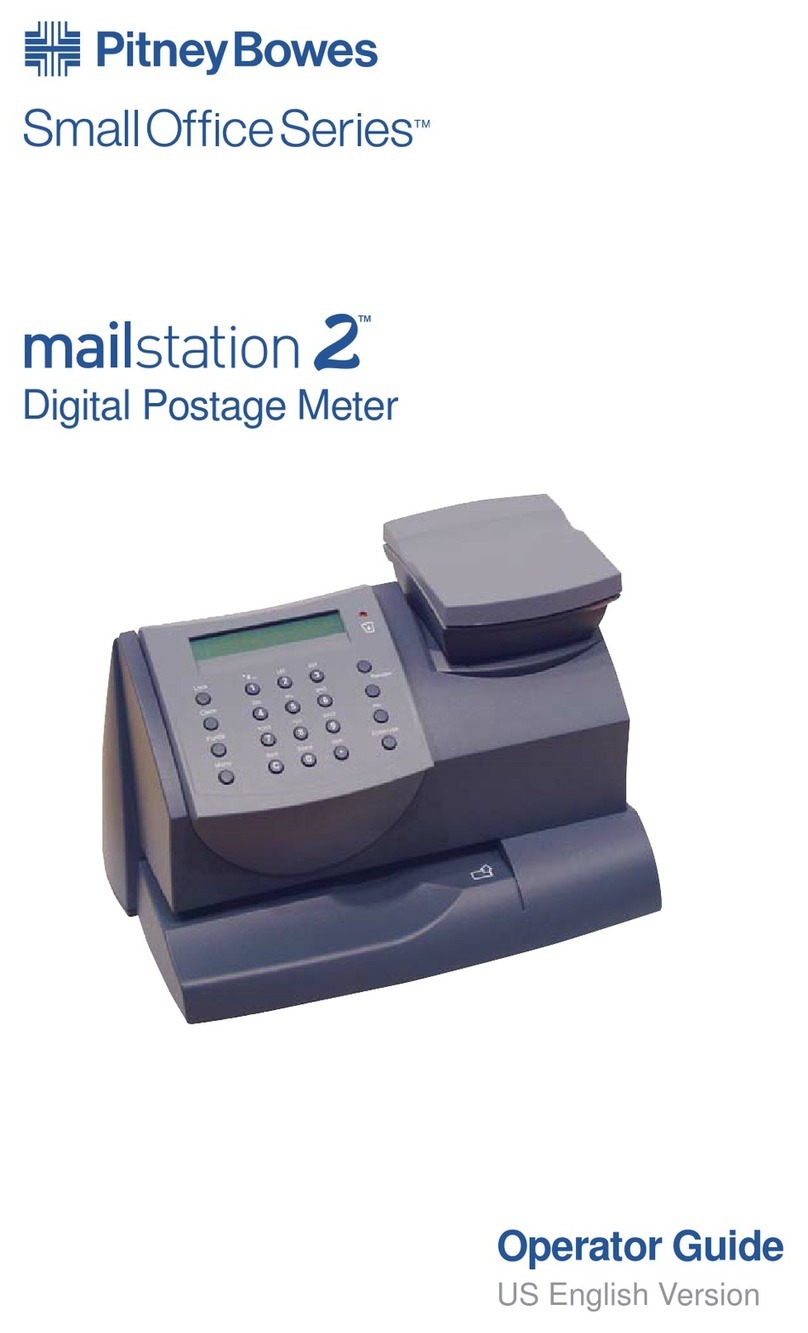
Pitney Bowes Small Office Series Mailstation 2 User manual

Pitney Bowes

Pitney Bowes Small Office Series Mailstation 2 User manual

Pitney Bowes SendPro C Auto User manual

Pitney Bowes

Pitney Bowes SendPro C Auto User manual

Pitney Bowes DL50 Manual

Pitney Bowes

Pitney Bowes DL50 Manual

Pitney Bowes DM300c series Technical manual

Pitney Bowes

Pitney Bowes DM300c series Technical manual

Pitney Bowes DM100i Series Guide

Pitney Bowes

Pitney Bowes DM100i Series Guide

Pitney Bowes mailstation User manual

Pitney Bowes

Pitney Bowes mailstation User manual

Pitney Bowes PersonalPost User manual

Pitney Bowes

Pitney Bowes PersonalPost User manual

Pitney Bowes F612 User manual

Pitney Bowes

Pitney Bowes F612 User manual

Pitney Bowes 3307 User manual

Pitney Bowes

Pitney Bowes 3307 User manual

Pitney Bowes 1E42/W1110 SendKit User manual

Pitney Bowes

Pitney Bowes 1E42/W1110 SendKit User manual

Pitney Bowes DM110i Series Technical manual

Pitney Bowes

Pitney Bowes DM110i Series Technical manual

Pitney Bowes DM100i Series User manual

Pitney Bowes

Pitney Bowes DM100i Series User manual

Pitney Bowes DM100 Series Technical manual

Pitney Bowes

Pitney Bowes DM100 Series Technical manual

Pitney Bowes POSTPERFECT B702 Setup guide

Pitney Bowes

Pitney Bowes POSTPERFECT B702 Setup guide

Pitney Bowes DM300c series User manual

Pitney Bowes

Pitney Bowes DM300c series User manual

Pitney Bowes SendPro C Auto Manual

Pitney Bowes

Pitney Bowes SendPro C Auto Manual

Pitney Bowes SendPro C User manual

Pitney Bowes

Pitney Bowes SendPro C User manual

Pitney Bowes Horizontal Belt Stacker Manual

Pitney Bowes

Pitney Bowes Horizontal Belt Stacker Manual

Pitney Bowes SendPro C Lite Manual

Pitney Bowes

Pitney Bowes SendPro C Lite Manual

Pitney Bowes DM125 User manual

Pitney Bowes

Pitney Bowes DM125 User manual

Pitney Bowes DM500 User manual

Pitney Bowes

Pitney Bowes DM500 User manual

Pitney Bowes F601 User manual

Pitney Bowes

Pitney Bowes F601 User manual

Popular Postal Equipment manuals by other brands

Aesh Design Mailbox Post instructions

Aesh Design

Aesh Design Mailbox Post instructions

Opex Envelopener Omation 2100 Operator instructions

Opex

Opex Envelopener Omation 2100 Operator instructions

FP myMail Quick reference guide

FP

FP myMail Quick reference guide

Opex 51 Operator's manual

Opex

Opex 51 Operator's manual

Postal Pro Piedmont PP3411BL installation instructions

Postal Pro

Postal Pro Piedmont PP3411BL installation instructions

Martin Yale Industries 1616 operating instructions

Martin Yale Industries

Martin Yale Industries 1616 operating instructions

Architectural Mailboxes 6200 Series Mounting instructions

Architectural Mailboxes

Architectural Mailboxes 6200 Series Mounting instructions

Salsbury Industries 3700 Series manual

Salsbury Industries

Salsbury Industries 3700 Series manual

Gaines Janzer Double Post Installation & Assembly

Gaines

Gaines Janzer Double Post Installation & Assembly

quadient iX-5 Series Quick installation guide

quadient

quadient iX-5 Series Quick installation guide

MSL JET PLUS 400 Getting started

MSL

MSL JET PLUS 400 Getting started

Neopost IN-360 Safety guide

Neopost

Neopost IN-360 Safety guide

Labelmate UCAT-S user manual

Labelmate

Labelmate UCAT-S user manual

Asgard Parcel Delivery Box Assembly instructions

Asgard

Asgard Parcel Delivery Box Assembly instructions

Radius LETTERMAN M manual

Radius

Radius LETTERMAN M manual

Frama EcoMail operating instructions

Frama

Frama EcoMail operating instructions

Martin Yale Industries 62001 manual

Martin Yale Industries

Martin Yale Industries 62001 manual

Neopost POSTMASTER 6000 Operation manual

Neopost

Neopost POSTMASTER 6000 Operation manual

manuals.online logo
manuals.online logoBrands
  • About & Mission
  • Contact us
  • Privacy Policy
  • Terms and Conditions

Copyright 2025 Manuals.Online. All Rights Reserved.