manuals.online logo
Brands
  1. Home
  2. •
  3. Brands
  4. •
  5. Rollos
  6. •
  7. Window Blind
  8. •
  9. Rollos Doppelrollo User manual

Rollos Doppelrollo User manual

Montage- und
Bedienungsanleitung
subject to technical change
sous réserve de modications techniques
technische Änderungen vorbehalten
9 / 2014
Assembly and operating instructions
Notice de montage et mode d’emploi
Rollos
Doppelrollo
Kassette
CRollo demontieren
• Nase des Deckenclips nach innen drücken, bis sich das Rollo aus der Halte-
rung löst
• Rollo mit der hinteren Befestigungsnut aushängen und nach unten
wegnehmen
• Deckenclips abschrauben
• bei Wandmontage:
Wandwinkel abschrauben Nase
Nose – Nez
Entspricht EN 13120
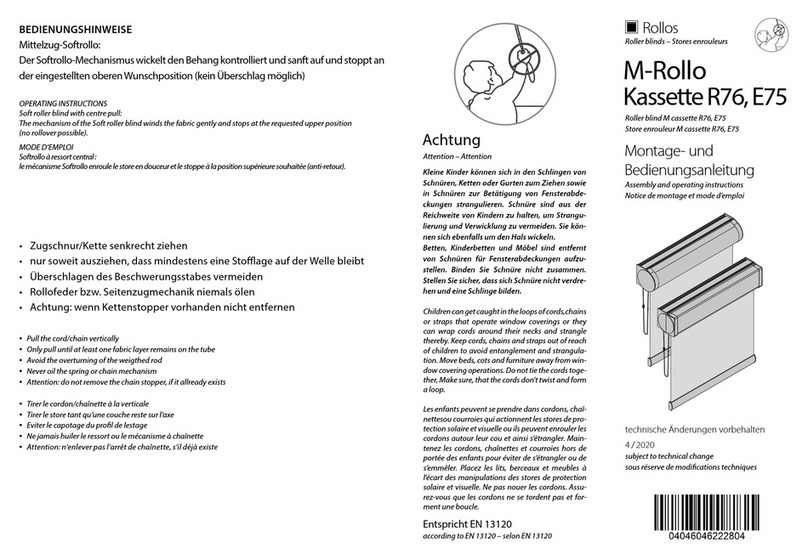
Achtung
Kleine Kinder können sich in den Schlingen von
Schnüren, Ketten oder Gurten zum Ziehen sowie
in Schnüren zur Betätigung von Fensterabde-
ckungen strangulieren. Schnüre sind aus der
Reichweite von Kindern zu halten, um Strangu-
lierung und Verwicklung zu vermeiden. Sie kön-
nen sich ebenfalls um den Hals wickeln.
Betten, Kinderbetten und Möbel sind entfernt
von Schnüren für Fensterabdeckungen aufzu-
stellen. Binden Sie Schnüre nicht zusammen.
Stellen Sie sicher, dass sich Schnüre nicht verdre-
hen und eine Schlinge bilden.
Attention – Attention
Children can get caught in the loops of cords,chains
or straps that operate window coverings or they
can wrap cords around their necks and strangle
thereby. Keep cords, chains and straps out of reach
of children to avoid entanglement and strangula-
tion. Move beds, cots and furniture away from win-
dow covering operations. Do not tie the cords toge-
ther, Make sure, that the cords don’t twist and form
a loop.
Les enfants peuvent se prendre dans cordons, chaî-
nettesou courroies qui actionnent les stores de pro-
tection solaire et visuelle ou ils peuvent enrouler les
cordons autour leur cou et ainsi s’étrangler. Main-
tenez les cordons, chaînettes et courroies hors de
portée des enfants pour éviter de s’étrangler ou de
s’emmêler. Placez les lits, berceaux et meubles à
l’écart des manipulations des stores de protection
solaire et visuelle. Ne pas nouer les cordons. Assu-
rez-vous que les cordons ne se tordent pas et for-
ment une boucle.
according to EN 13120 – selon EN 13120
Double roller blinds
Stores enrouleur doubles
Double roller blind – Cassette
Stores enrouleur doubles – Cassette
Dismantle the roller blind – Demonter le store enrouleur
• Push the nose of the ceiling clips to the inside
until the roller blind loose from the frame
• Hang the roller together with the rear xation
nut out and take it away downwards
• Unscrew the ceiling clips
• Until wall xation: Unscrew the wall xing
brackets
• Pousser le nez de clip plafond à l‘intérieur
jusqu‘au le store enrouleur se libérer de support
• Accrocher le store enrouleur avec la rainure de
xation en arrière et la enlever vers le bas
• Dévisser les clips plafond
• Chez xation murale: Dévisser les supports
murals
7
50–150
50–150
A Allgemeine Hinweise
MONTAGEHINWEISE
Bei der Montage der Deckenclips bitte beachten, dass der Abstand zwischen Clip
und Rollo-Ende 50–150 mm beträgt.
MOUNTING ADVICES
Respect a distance of 50-100 mm between clip and roller blind end, while mounting the ceiling clip.
INDICATIONS DE MONTAGE
Respecter une distance du 50-100 cm entre clip et n du store enrouleur pendant la montage du clip plafond.
BEDIENUNGSHINWEISE
Das Rollo wird über eine Endloskette bedient. Dadurch kann die Transparenz
jederzeit ganz individuell reguliert werden. Eine Arretierung des Rollostoes ist
nicht notwendig.
OPERATION INSTRUCTIONS
The roller blind is operated with endless chain. Thus, the transparence can be adjusted individually.
A locking of the roller blind fabric isn‘t necessary.
INDICATIONS DE LA MANIPULATION
Le store enrouleur est manipulé par chaînette sans n. La transparence peut régler individuellement par là.
Une blocage de tissu pour store enrouleur est pas nécessaire.
12
General advices – Indication génerales
HINWEIS
Ab 200 cm Breite kann es bei der Bedienung zu Geräuschen des Unterprols
kommen. Es wird empfohlen ein schnelles, ruckartiges Bedienen zu vermeiden
oder eine innenliegende Variante nachzubestellen!
ADVICE
Noise may occur until the operation with heights of at least 200 cm.
It is recommended to avoid a fast and jolty operation or to reorder an integrated type.
INDICATIONS
De bruit peut se produire pendant la manipulation avec une largeur minimum de 200 cm.
Il est recommandé d‘éviter une manipulation brusque et vite ou de commande une type intégrée à la place.
1
2
3
1
2
3
2
3
12
3
1
1
2
3
BMontagevarianten
WANDBEFESTIGUNG
• Wandwinkel an der Wand befestigen
• Deckenclips mit den Wandwinkeln verschrauben
• Rollo mit hinterer Befestigungsnut in
beide Deckenclips einhängen
• danach das Rollo nach oben in die
Deckenclips einclippen
3 4
Installation options – Options de montage
DECKENMONTAGE
• Deckenclips befestigen
• das Rollo anschließend mit der hinteren Befesti-
gungsnut in beide Deckenclips einhängen
• danach das Rollo nach oben in die Deckenclips
einclippen
Bei Deckenmontage auf Wandabstand für das Ein- und Aushängen achten.
einhängen
einclippen
CEILING FIXATION
• Fix the ceiling clips
• Afterwards, hang the roller blind with the nut into the two ceiling clips
• Afterwards, clip the roller blind upwards into to the ceiling clips
FIXATION AU PLAFOND
• Visser les clips plafond
• Après, accrocher la rainure de xation de derrière dans les deux clips
de xation
• Après, clipser le store enrouleur vers le haute au clips plafond
Respect, on ceiling xation, a sucient distance for the mounting and dismantling,
Respecter, pendant la montage au plafond, une distance susant pour la montage et démontage.
hang in – accrocher
clip in – clipser
einhängen
einclippen
hang in – accrocher
clip in – clipser
WALL FIXATION
• Fix the wall xing bracket on the wall
• Screw the ceiling clips with the wall xing brackets
• Fit the roller blind with the rear xing nut into the two ceiling clips
• Afterwards, clip the roller blind upwards into to the ceiling clips
FIXATION MURALE
• Fixer les supports mural sur le mur
• Visser les clips plafond à supports murals
• Accrocher la rainure de xation de derrière dans les deux clips de xation
• Après, clipser le store enrouleur vers le haute au clips plafond
1
2
3
1
2
3
1
2
3
1
2
1
2
1 2
2
1
CBehang ausrichten
Der Sto ist sowohl am Aluminiumrohr als auch an der Kopeiste befestigt und
rollt über die zweiteilige Unterleiste mit Rolle und Beschwerung auf oder ab.
Adjust the fabric – Ajuster le tissu
Transportbedingt kann es jedoch zu Verschiebungen des Stoes kommen.
Überprüfen Sie deshalb nach der Montage, ob die vordere und die hintere
Stoage parallel zueinander verlaufen.
The fabric is not only xed in the aluminium tube, but also on the head rail.
It rolls or unrolls, together with the weigth and roll, over the two-piece bottom prole.
Le tissu est non seulement xé sur le tube d‘alu, mais aussi sur le boîtier supérieur.
Il roule our déroule, ensemble avec le rouleau et lestage, par le prolé inférieur.
There could be a moving of the fabric due to the transport.
Check therefore after the mounting, if the front and rear ply are running parallel to each other.
Il peut un movement de tissu en raison du transport.
Vérier, dans ce cas, après la montage, si le pli de devant et de l‘arrière sont parallèles.
5 6
Ist das nicht der Fall, gehen Sie wie folgt vor:
• Rollo zuerst ganz nach unten lassen
• die vordere Stoage im Aluminiumrohr horizontal so verschieben,
dass links und rechts ein gleicher Abstand zum Wellenende entsteht
If this is not the case, proceed as follows:
• Lower the roller blind at rst
• Move the front ply in the aluminium tube
horizontally in a way, that there are on the
left and right as equal distance to the end
of the tube.
Si tel n‘est pas le cas, procédez de la manière:
• D‘abord, baisser le store enrouleur
• Déplacer la nappe avant dans le tube en
aluminium horizontalement dans un sens,
qu‘il ya à gauche et à droite d‘une distance
égale à l‘extrémité du tube.
• Afterwards, move the ply on the rear horizon-
tally in the head rail until the stripes on the
rear are running in parralel with the stripes
on the front.
• Après, déplacer la pli en arrière horizontale-
ment dans le boîtier supérieur jusqu‘à les ray-
ures en arrière se déroulent en parrallèle avec
les rayures de devant.
• danach die hintere Stoage in der Kopeiste horizontal verschieben
bis die hinteren Streifen parallel zu den vorderen verlaufen

Other Rollos Window Blind manuals

Rollos XL Basis User manual

Rollos

Rollos XL Basis User manual

Rollos Midirollo Basis User manual

Rollos

Rollos Midirollo Basis User manual

Rollos XL Cassette User manual

Rollos

Rollos XL Cassette User manual

Rollos Basis-DF-Rollo User manual

Rollos

Rollos Basis-DF-Rollo User manual

Rollos M User manual

Rollos

Rollos M User manual

Rollos Comfort DF-Rollo User manual

Rollos

Rollos Comfort DF-Rollo User manual

Rollos DF-Rollo User manual

Rollos

Rollos DF-Rollo User manual

Rollos Medium Plus User manual

Rollos

Rollos Medium Plus User manual

Rollos Comfort DF-Rollo User manual

Rollos

Rollos Comfort DF-Rollo User manual

Rollos Basis-DF-Rollo User manual

Rollos

Rollos Basis-DF-Rollo User manual

Rollos M-Rollo User manual

Rollos

Rollos M-Rollo User manual

Rollos Roller blind M cassette R76 User manual

Rollos

Rollos Roller blind M cassette R76 User manual

Rollos Medium Plus User manual

Rollos

Rollos Medium Plus User manual

Rollos Medium Plus Basis User manual

Rollos

Rollos Medium Plus Basis User manual

Rollos Roller blind S with cassette E46 Planning guide

Rollos

Rollos Roller blind S with cassette E46 Planning guide

Rollos S-Nanorollo V2 Planning guide

Rollos

Rollos S-Nanorollo V2 Planning guide

Popular Window Blind manuals by other brands

Velux INTEGRA FMK manual

Velux

Velux INTEGRA FMK manual

Hella TERRA SIDE Installation instructions and instructions for use

Hella

Hella TERRA SIDE Installation instructions and instructions for use

SKILTEC 5A Product information manual

SKILTEC

SKILTEC 5A Product information manual

Cosiflor F Slope 1 manual

Cosiflor

Cosiflor F Slope 1 manual

KWANTUM Vertical Blinds Assembly manual

KWANTUM

KWANTUM Vertical Blinds Assembly manual

3 Day Blinds Cornice Box Installation instructions manual

3 Day Blinds

3 Day Blinds Cornice Box Installation instructions manual

Riva Roman Blinds Installation instructions manual

Riva

Riva Roman Blinds Installation instructions manual

Graywind 58511 user guide

Graywind

Graywind 58511 user guide

Windoware HONEYCOMB Installation operation care

Windoware

Windoware HONEYCOMB Installation operation care

Victoria M RAFFROLLO installation instructions

Victoria M

Victoria M RAFFROLLO installation instructions

MHZ s-onro operating instructions

MHZ

MHZ s-onro operating instructions

Dometic SKYSCREEN POWERED Series Installation and operating manual

Dometic

Dometic SKYSCREEN POWERED Series Installation and operating manual

Sonevo RD11 manual

Sonevo

Sonevo RD11 manual

Guthrie Douglas TESS 140 instruction manual

Guthrie Douglas

Guthrie Douglas TESS 140 instruction manual

Kirsch Alternative Wood Blinds installation instructions

Kirsch

Kirsch Alternative Wood Blinds installation instructions

SOMFY Sunea RTS CMO reference guide

SOMFY

SOMFY Sunea RTS CMO reference guide

Velux RHL manual

Velux

Velux RHL manual

Draper LightBloc FlexShade installation instructions

Draper

Draper LightBloc FlexShade installation instructions

manuals.online logo
manuals.online logoBrands
  • About & Mission
  • Contact us
  • Privacy Policy
  • Terms and Conditions

Copyright 2025 Manuals.Online. All Rights Reserved.