manuals.online logo
Brands
  1. Home
  2. •
  3. Brands
  4. •
  5. Saxby Lighting
  6. •
  7. Lighting Equipment
  8. •
  9. Saxby Lighting 79192 User manual

Saxby Lighting 79192 User manual

www.saxbylighting.com
Instruction manual
79192, 99551
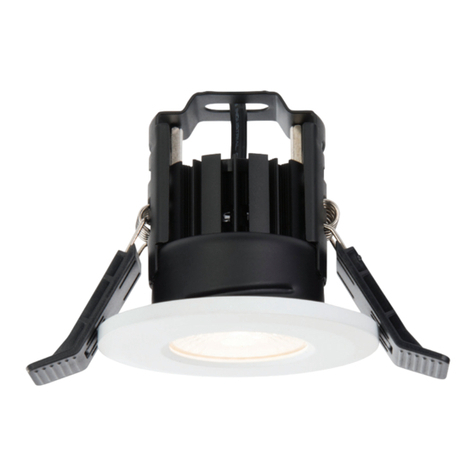
Lance Spike
V3 21/10/2021
EU Manufacturer: Brilliant AG,
Brilliantstrasse 1, D-27442 Gnarrenburg
UK Manufacturer: BH17 7BY
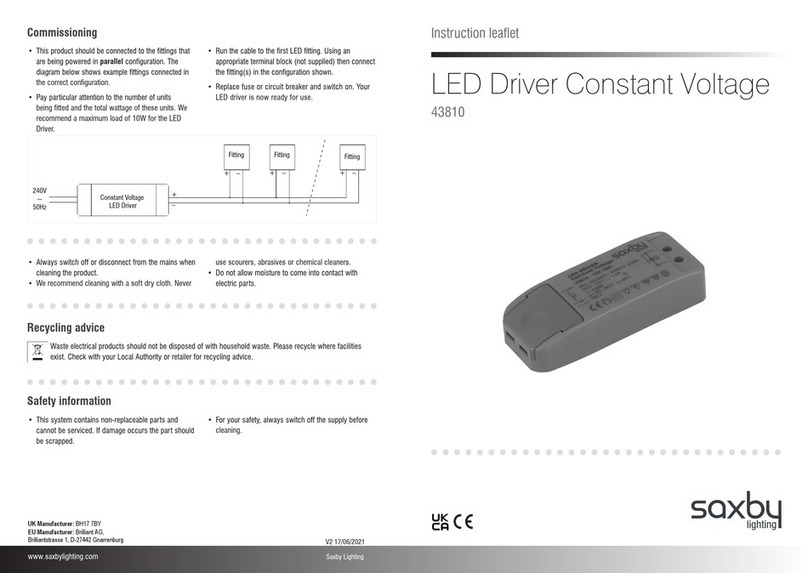
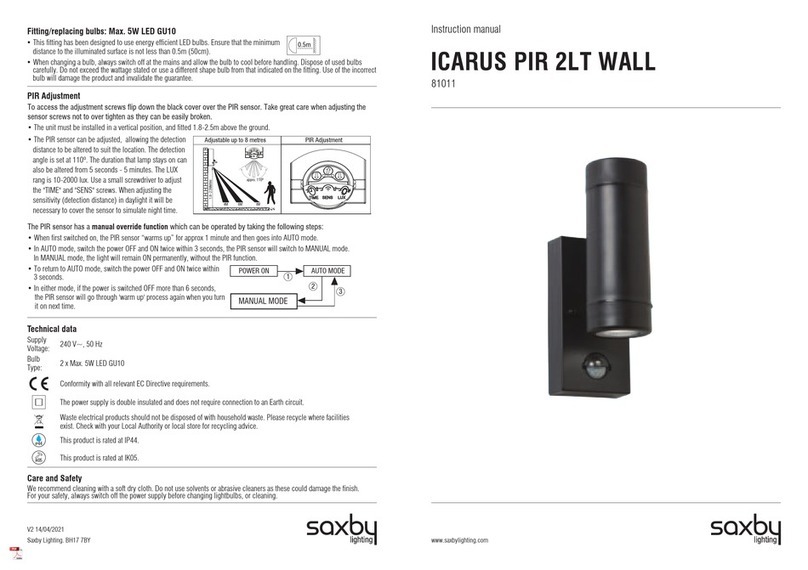
Technical data
220-240V~, 50Hz
Supply
Voltage:
Bulb
Type:
79192: 7W LED module (COB), 4000K
99551: 7W LED module (COB), 3000K
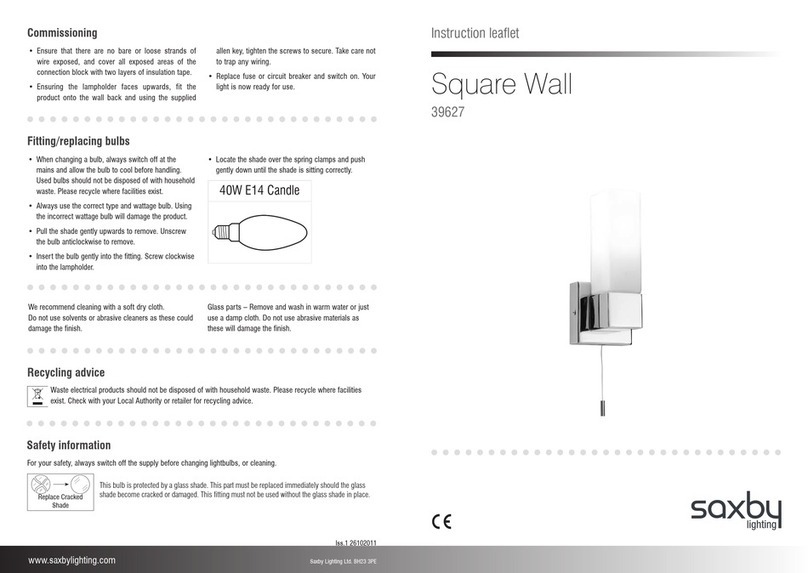
We recommend cleaning with a soft dry cloth. Do not use solvents or abrasive cleaners as these could damage the finish.
For your safety, always switch off the power supply before changing lightbulbs, or cleaning.
Care and Safety
This LED's are protected by a glass lens. The lens part must be replaced immediately should it
become cracked or damaged. This fitting must not be used without the glass lens in place.
Replace Cracked Shade
The light source of this luminaire is not replaceable; when the light source reaches its end of life the whole
luminaire shall be replaced.
Conformity with all relevant EC Directive requirements.
Waste electrical products should not be disposed of with household waste. Please recycle where facilities
exist. Check with your Local Authority or local store for recycling advice.
Conformity with all relevant UKCA Directive requirements.
This product is rated at IP65.
IP
65
This product is Class 1, must be connected to earth.
This product is not suitable for dimming.
This is a Class 1 product and must be earthed.
Please read these instructions carefully before commencing any work.
This unit must be fitted by a competent and qualified electrician.
Install in accordance with the IEE Wiring regulations and current Building Regulations.
Check the pack and make sure you have all the parts listed.
To prevent electrocution switch off at the mains supply before installing or maintaining this fitting. Ensure other persons cannot
restore the electrical supply without your knowledge.
If you are in any doubt, please consult a qualified electrician.
If replacing an existing fitting, make a careful note of the connections.
This light should be connected to a fused circuit.
The mains plug must be situated indoors (e.g. house, garage, shed) in order to protect it from the elements.
This product is not suitable for location in or near a marine environment.
The product will not withstand long periods of immersion in water.
Never put anything on the product or hang anything on any part of this product.
This system contains non-replaceable parts and cannot be serviced. If damage occurs the part should be scrapped.
Waste electrical products should not be disposed of with household waste. Please recycle where facilities exist. Check with
your local authority or retailer for recycling advice.
Warning
Thank you for purchasing this light fitting. Please read the instructions carefully before use to ensure safe and satisfactory
operation of this product. Please retain these instructions for future reference.
• Take care not to drill into any pipes or mains cables beneath the surface during mounting holes preparation.
Installation
Existing fittings must be completely removed before installation of a new product. Before removing the existing fitting,
carefully note the position of each set of wires.
• Plan the desired layout of these fittings carefully, ensuring the cables will reach the distances between the junction box and
the each light fitting.
• Decide on the position of the luminaire. Depending on the location, an approved outdoor rated plug and socket may be
required. Alternatively an approved outdoor rated external terminal block may be used. We recommend item 90131/90132
(outdoor rated terminal block).
• Ensure that the ground is suitable for pushing the spike into, and can support the luminaire. Do not install in very wet or
boggy areas.
Note that the switch is turned off before installation.
Ensure that the screws and cable entry points are sealed to maintain the IP rating of the product.
• Avoid locating any cables in positions that would cause a hazard. Position cables and connector block away from areas
where they may be at risk from being cut, trapped or damaged.
• Attach the spike to the fitting using the supplied screw and tighten securely.
• Cables that are to be in walls and concealed underground must be protected using suitable conduit or plastic trunking.
• The mains supply cable must have a minimum cross sectional area of 1.0mm2.
• We recommend that you use H05RN-F specification cable (not supplied) which is an outdoor grade, rubber sheathed cable.
• The distance between the cable entry and the ground surface should be at least 10cm when installing the spike.
See Wiring
diagram
• Replace fuse or circuit breaker and switch on. Your light is now ready for use.
The appliance must be connected to a 240 volts AC supply.
The appliance can be fitted to a rewireable 3 pin plug fitted with a 3 amp fuse.
Should the fuse require replacement, it must be replaced with a fuse rated at
3 amp and approved to BS1362.
The wires in the mains lead on this appliance are coloured in accordance
with the following code:
Wiring - Plug
Blue – Neutral
Green / Yellow - Earth
Brown – Live
E
BROWN
Live
L
N
GREEN / YELLOW
Earth
BLUE
Neutral
FUSE
3 Amps
CORD
Clamp
Wiring - Terminal Block
Check that...
• You have correctly identified the wires.
• The connections are tight.
• No loose strands have been left out of the
connection block.
• When completed, ensure that there are no
bare or loose strands of wire exposed, and
cover all exposed areas of the connection
block with 2 layers of insulation tape.
SUPPLY
NEUTRAL
EARTH (GREEN/YELLOW)
SWITCHED LIVE
LIGHT FITTING
BLUE (N)
BROWN (L)
GREEN/YELLOW
If the mains plug is unsuitable for the socket outlet or is removed for any other reason, then the cut off plug should be
disposed of safely to prevent the hazard of electric shock.
There is a danger of electric shock if the cut off plug is inserted into any 13 amp socket outlet.
Having correctly identified the wiring from your existing light fitting, connect to the approved outdoor rated or
approved double insulated terminal block (not supplied) in the following way:
If not fitting to a plug then the product must be wired to a IP68 outdoor rated terminal block. We recommend item
90131/ 90132 (ourtdoor rated terminal block).

This manual suits for next models

1

Other Saxby Lighting Lighting Equipment manuals

Saxby Lighting 75430 User manual

Saxby Lighting

Saxby Lighting 75430 User manual

Saxby Lighting 103253 User manual

Saxby Lighting

Saxby Lighting 103253 User manual

Saxby Lighting Reeve 2 Manual

Saxby Lighting

Saxby Lighting Reeve 2 Manual

Saxby Lighting Reeve Connect Batten Series Manual

Saxby Lighting

Saxby Lighting Reeve Connect Batten Series Manual

Saxby Lighting Tribeca Wall Manual

Saxby Lighting

Saxby Lighting Tribeca Wall Manual

Saxby Lighting E27 LED GLS Manual

Saxby Lighting

Saxby Lighting E27 LED GLS Manual

Saxby Lighting Severus CCT User manual

Saxby Lighting

Saxby Lighting Severus CCT User manual

Saxby Lighting 14008 User manual

Saxby Lighting

Saxby Lighting 14008 User manual

Saxby Lighting Pillo Plus CCT User manual

Saxby Lighting

Saxby Lighting Pillo Plus CCT User manual

Saxby Lighting 73796 User manual

Saxby Lighting

Saxby Lighting 73796 User manual

Saxby Lighting Odyssey Spike User manual

Saxby Lighting

Saxby Lighting Odyssey Spike User manual

Saxby Lighting IkonPRO CCT User manual

Saxby Lighting

Saxby Lighting IkonPRO CCT User manual

Saxby Lighting 73666 Manual

Saxby Lighting

Saxby Lighting 73666 Manual

Saxby Lighting IkonPRO RGB LED Kit User manual

Saxby Lighting

Saxby Lighting IkonPRO RGB LED Kit User manual

Saxby Lighting 81572 User manual

Saxby Lighting

Saxby Lighting 81572 User manual

Saxby Lighting Lucca Wall 67176 Manual

Saxby Lighting

Saxby Lighting Lucca Wall 67176 Manual

Saxby Lighting 67360 User manual

Saxby Lighting

Saxby Lighting 67360 User manual

Saxby Lighting 75272 Manual

Saxby Lighting

Saxby Lighting 75272 Manual

Saxby Lighting Albus CCT User manual

Saxby Lighting

Saxby Lighting Albus CCT User manual

Saxby Lighting 13801 User manual

Saxby Lighting

Saxby Lighting 13801 User manual

Saxby Lighting 74824 Manual

Saxby Lighting

Saxby Lighting 74824 Manual

Saxby Lighting Sight Plus User manual

Saxby Lighting

Saxby Lighting Sight Plus User manual

Saxby Lighting Odyssey Spike Manual

Saxby Lighting

Saxby Lighting Odyssey Spike Manual

Saxby Lighting 73721 Manual

Saxby Lighting

Saxby Lighting 73721 Manual

Popular Lighting Equipment manuals by other brands

ITL IFH-1900-0IR Installation and operation manual

ITL

ITL IFH-1900-0IR Installation and operation manual

Philips Lightolier Solution Series Specifications

Philips

Philips Lightolier Solution Series Specifications

Chauvet COLORado 1 IP user manual

Chauvet

Chauvet COLORado 1 IP user manual

Q-Optics Radiant Instructions & Care

Q-Optics

Q-Optics Radiant Instructions & Care

Envy ENV00301 Parts list and instruction manual

Envy

Envy ENV00301 Parts list and instruction manual

GRILL MEISTER 360468 2007 Operation?and safety

GRILL MEISTER

GRILL MEISTER 360468 2007 Operation?and safety

Tala Echo installation guide

Tala

Tala Echo installation guide

Sirona LEDview operating instructions

Sirona

Sirona LEDview operating instructions

Rocky's Eazy Roller Senior Commercial instructions

Rocky's

Rocky's Eazy Roller Senior Commercial instructions

Rondish ILB-21-FSK user manual

Rondish

Rondish ILB-21-FSK user manual

Conrad 1492692 operating instructions

Conrad

Conrad 1492692 operating instructions

involight LEDPAR SlimPAR1266 user manual

involight

involight LEDPAR SlimPAR1266 user manual

Dialighting IB50-MH user manual

Dialighting

Dialighting IB50-MH user manual

Flint & Walling NightBright Operating instructions & parts manual

Flint & Walling

Flint & Walling NightBright Operating instructions & parts manual

FRC BRYTTE DAY Series manual

FRC

FRC BRYTTE DAY Series manual

Beamz LCB216 LED Colorunit 12x18W 6-1 RGB instruction manual

Beamz

Beamz LCB216 LED Colorunit 12x18W 6-1 RGB instruction manual

Chauvet ColorAdo 2 Tour user manual

Chauvet

Chauvet ColorAdo 2 Tour user manual

Lutron Electronics Sunnata ST-PRO-N manual

Lutron Electronics

Lutron Electronics Sunnata ST-PRO-N manual

manuals.online logo
manuals.online logoBrands
  • About & Mission
  • Contact us
  • Privacy Policy
  • Terms and Conditions

Copyright 2025 Manuals.Online. All Rights Reserved.