manuals.online logo
Brands
  1. Home
  2. •
  3. Brands
  4. •
  5. Steelcase
  6. •
  7. Indoor Furnishing
  8. •
  9. Steelcase Avenir Series User manual

Steelcase Avenir Series User manual

Page 1 of 8
939503022 Rev D
Service Module Installation 2300, 3200, 3300, 5200 and Avenir®Series
®
If you have a problem, question, or request, call
your local dealer, or Steelcase Line 1 at
888.STEELCASE (888.783.3522)
for immediate action by people who want to help you.
(Outside the U.S.A., Canada, Mexico, Puerto Rico,
and the U.S. Virgin Islands, call: 1.616.247.2500)
Or visit our website: www.steelcase.com
©2000 Steelcase Inc.
Grand Rapids, MI 49501
U.S.A.
Printed in U.S.A.
1/8" Drill Bit
60SM35-A
use all steps
60SM35-B
use steps 1, 2, 3, 5, 7 & 9
60SM23-E
use steps 1, 2, 3, 5, 7 & 9
Page 2 of 8
939503022 Rev D
PARENT UNIT
ADJUST GLIDES
1
REMOVE TAPE ALONG
EDGE OF INNER PANEL
INNER PANEL
OR TACKBOARD
LARGE FLANGE AT BOTTOM FOR EASE OF REMOVAL
2
1. Level parent unit (Desk, Credenza or
Table).
2. Remove inner back panel or tackboard by
tipping outward at top and lifting up.
NOTE: Reverse Steps 2 & 3 if your tackboard
is shipped separate.
Page 3 of 8
939503022 Rev D
3
4
3. Attach sides to outer back panel, then re-
install inner back panel or tackboard.
4. Turn unit upside down and attach dust
covers and doors.
NOTE: Be sure dust cover (top) is even with
top edges of sides before tightening screws.
SHORT FLANGE TO BE AT BOTTOM AFTER ASSEMBLY
END PANEL LH
END PANELRH
#8-15 x 1/2” Screw
#8-15 x 1/2” PH
Screws
Foam shipping block
Page 4 of 8
939503022 Rev D
5
6
5. Locate pilot holes measured 15” down from
top of end panels. Insert screws halfway in on
both end panels. Install shelf on screws and
tighten.
CAUTION: If shelf location is changed, re-
insert screws into old hole locations for models
60SM35-B & 60SM23-E.
6. Remove foam shipping block and install
center brace. Be sure pivot pins are in tracks
on center brace.
Adjust glides
15"
#8-15 x 1/2” Screw
Use protective
screw covers here
Center brace
#8-15 x 1/2” Screw
#8-15 x 1/2” Screw
with star washer
Page 5 of 8
939503022 Rev D
Window in service module
Clip Bracket
Window in end panel or
pedestal side 5200
Press thumbs here
Remove plastic grommets
Parent Unit Attachment Clip
2300, 3200 & 3300 Series Desks  SMCL-1
3200 Tables w/2-1/2" aprons  SMCL-2
2300 & 3200 Credenzas  SMCL-3
5200 Series ( 24" Deep Unit)  SMCL-3
2900 Tables
800 Lateral File Tops  SMCL-3
5200 Series Desks (30” Deep Units)  SMCL-5
3200 Desks w/1 1/4” Thick Wood Tops w/o Reveal  SMCL-1W
2300 Series Desks  SMCL-6W
Avenir Desk and Credenzas W/1 1/2” Thick Tops  SMCL-8
Installation of SMCL-1 & SMCL-5 Clip
SMCL-1
Clip used to attach any service
module to 3200 & 3300 series
desks. No drilling required.
Package Contains:
1 - Service Module
2 - SMCL-1 Clips
4 - Screws, #8-1/2 Pan Hd
3 - Shelf Dividers
SMCL-5
Clip used to attach any service
module to 5200 series desk
tops. 30” deep no drilling
required.
Package Contains:
1 - Service Module
2 - SMCL-5 Clips
4 - Screws, #8-1/2 Pan Hd
3 - Shelf Dividers
Page 6 of 8
939503022 Rev D
Mark and drill here
SMCL-2
Clip used on all 3200 tables 2-
1/2" aprons
Package Contains:
1 - Service Module
2 - SMCL- 2 Clips
6 - Screws, #8-1/2 Pan Hd
SMCL-3
Clip used to attach any service
module to 2300, 3200 and
5200-24” deep series credenza
tops, 2900 tables and 800
lateral file tops. Drilling
required.
Package Contains:
1 - Service Module
2 - SMCL- 3 Clips
4 - Screws, #8-1/2 Pan Hd
4 - Screws, #6-3/4 Rh Ph
SMCL-8
Clip used to attach any service
module to Avenir series desks,
and credenza tops, W/ 1 1/2”
thick tops. Drilling required.
1 - Service Module
2 - SMCL-8 Clips
4 - Screws, #8-1/2 Pan Hd
4 - Screws, #6-3/4 Rh Ph
Mark And Drill Here
Installation of SMCL-2 Clip
1. Place service module in position on table top.
Align back and sides of service module with back
and sides of table top. Place clip (SMCL-2) under
apron of table and snap into position.
2. Center Punch and drill 1/8" hole throught slot
in bracket, under apron.
3. Attach with #8-1/2 Pan Hd screws.
1. Place service module in position on table top.
Align back and s ides of service module with
back and sides of table top.
2. Place clip into receptacle inside window of
service module. Using the holes in the clip, mark
the edge of the desk top for drilling.
3. Remove service module from top of unit,
center punch and drill holes. (No.38 - .101 Dia.)
4. Attach clip to service module with #8-1/2 Pan
Hd screws and attach clip to edge of desk top
with #6-3/4 Rh Ph screws
Installation of SMCL-3 & SMCL-8 Clip
Page 7 of 8
939503022 Rev D
Installation of SMCL-1W & SMCL-6W
Clip
1. Place service module on desk top.
2. Place flange of clip up against underside of
desk top. Using both thumbs, snap clip over
edge.
3. Align holes in clip with holes in service module.
Fasten service module to desk with (4) #8-1/2 Pan
Hd screws. Balance overhang of desk top equally
on both sides, tighten one clip slightly and then
the other until both are secure. Install (1) #10 x 1/2
Rh Ph screw through clip and into underside of top.
Task Light Wire Channel Installation
1. When installing a task light under a service
module, route the light cord through the wire
grommet as shown. Remove protective paper
from two-way tape. Route the light cord through
the wire windows in the service module and desk
end panel. Place wire channel tabs into wire
window hole, making sure the channel is straight
and press into place. Note dotted lines.
Remove
plastic
grommets
SMCL-1W
Clip used to attach any service
module to desks with 1-1/4"
thick wood tops without reveal.
Drilling required.
Package Contains:
1 - Service Module
2 - SMCL- 1W Clips
4 - Screws, #8-1/2 Pan Hd
2 - Screws, #10 x 3/4 Rh Ph
SMCL-6W
Clip used to attach any service
module to 2300 series desks.
Drilling required.
Package Contains:
1 - Service Module
2 - SMCL- 6W Clips
4 - Screws, #8-1/2 Pan Hd
2 - Screws, #10 x 3/4 Fh Ph
Window in
Service Module
Clip bracket
Press
thumbs
here
Grommet
Protective Paper
Two-Way Tape
Wire Channel
Wire Window
Hole (Service
Module)
Wire Window
Hole (Desk)
Wire Channel Tabs
Page 8 of 8
939503022 Rev D
Door Adjustment for Model 60SM35-A
8a. Up or down adjustment
Slightly rotate pivot pin on each side of binder bin
door to raise or lower door, being careful not to
use excessive force. There should be
approximately 1/16” gap between top of door and
dust cover. Rotate pivot pin forward to raise,
backward to lower.
8b. Left or right adjustment
Insert large screwdriver into slot at back of binder
bin and tap in the direction you want the door to
move.
8a
8b

This manual suits for next models

4

Other Steelcase Indoor Furnishing manuals
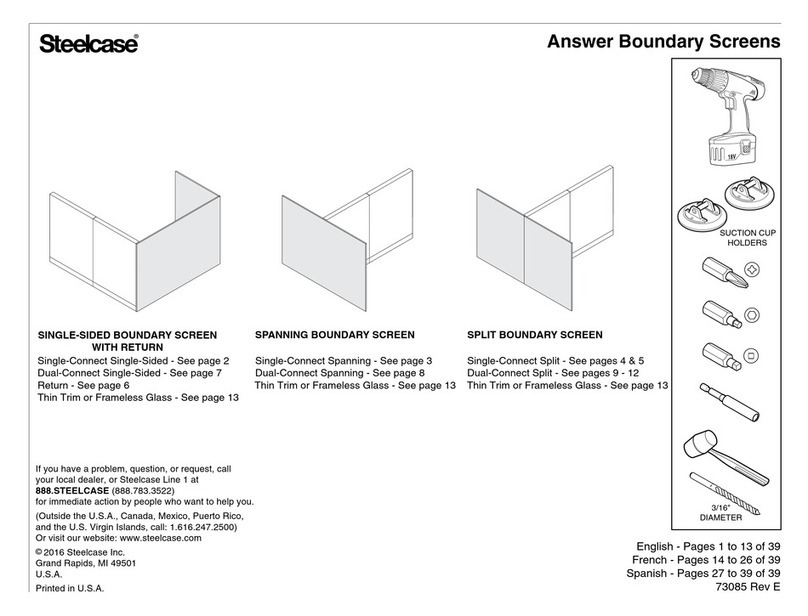
Steelcase 4.8 four point eight User manual

Steelcase

Steelcase 4.8 four point eight User manual

Steelcase Executive Elective Elements Table Desk Firmware update

Steelcase

Steelcase Executive Elective Elements Table Desk Firmware update

Steelcase Elective Elements Storage Firmware update

Steelcase

Steelcase Elective Elements Storage Firmware update

Steelcase Brody User manual

Steelcase

Steelcase Brody User manual

Steelcase Share It Series Firmware update

Steelcase

Steelcase Share It Series Firmware update

Steelcase Solo User manual

Steelcase

Steelcase Solo User manual
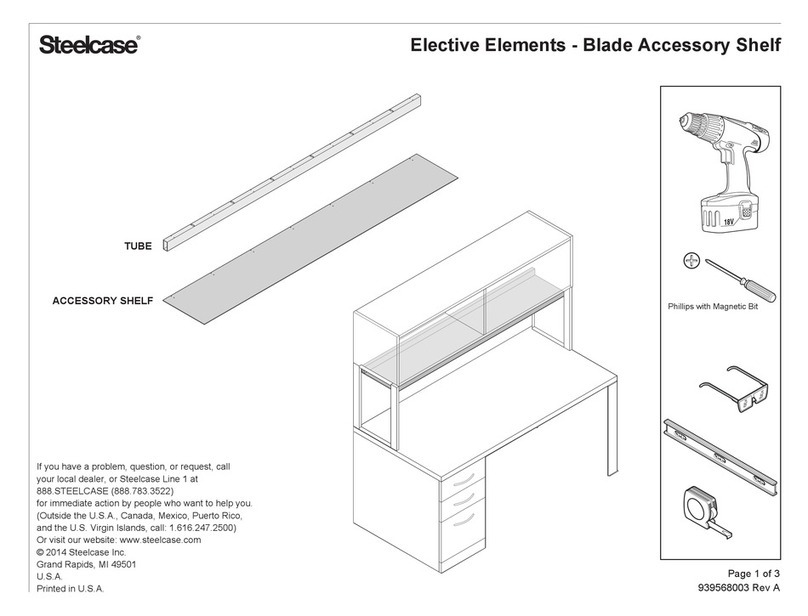
Steelcase Ellipse Conference Top User manual

Steelcase

Steelcase Ellipse Conference Top User manual

Steelcase Ology User manual

Steelcase

Steelcase Ology User manual

Steelcase Series 5 User manual

Steelcase

Steelcase Series 5 User manual

Steelcase Tableau-Run-offs Firmware update

Steelcase

Steelcase Tableau-Run-offs Firmware update

Steelcase Universal Hard Surface Screen User manual

Steelcase

Steelcase Universal Hard Surface Screen User manual

Steelcase Elective Elements Freestanding Desk Shell User manual

Steelcase

Steelcase Elective Elements Freestanding Desk Shell User manual

Steelcase Migration SE Pro User manual

Steelcase

Steelcase Migration SE Pro User manual

Steelcase c:scape User manual

Steelcase

Steelcase c:scape User manual

Steelcase Elective Elements End Panel Firmware update

Steelcase

Steelcase Elective Elements End Panel Firmware update

Steelcase TS Storage User manual

Steelcase

Steelcase TS Storage User manual

Steelcase Flex Acoustic Boundary User manual

Steelcase

Steelcase Flex Acoustic Boundary User manual

Steelcase CPRSLFO User manual

Steelcase

Steelcase CPRSLFO User manual

Steelcase Flex Active Frames User manual

Steelcase

Steelcase Flex Active Frames User manual

Steelcase Sarto Navi TeamIsland Cantilever Mount and Y-Bench... User manual

Steelcase

Steelcase Sarto Navi TeamIsland Cantilever Mount and Y-Bench... User manual

Steelcase 9000 Desk Adaptor Package Firmware update

Steelcase

Steelcase 9000 Desk Adaptor Package Firmware update

Steelcase Amia 482 Series Use and care manual

Steelcase

Steelcase Amia 482 Series Use and care manual

Steelcase Ottima Portico Desk User manual

Steelcase

Steelcase Ottima Portico Desk User manual

Steelcase FRAMEONE FE-3 User manual

Steelcase

Steelcase FRAMEONE FE-3 User manual

Popular Indoor Furnishing manuals by other brands

Better Homes and Gardens BH18-084-099-68 Assembly instructions

Better Homes and Gardens

Better Homes and Gardens BH18-084-099-68 Assembly instructions

Oeuf 4SPCK0 Series Instructions for safe use

Oeuf

Oeuf 4SPCK0 Series Instructions for safe use

EXPEDO KOLOREDO 137544 Assembly instruction

EXPEDO

EXPEDO KOLOREDO 137544 Assembly instruction

Four Seasons Courtyard 243332 manual

Four Seasons Courtyard

Four Seasons Courtyard 243332 manual

Sauder County Line 427719 manual

Sauder

Sauder County Line 427719 manual

Coaster 801134 Assembly instructions

Coaster

Coaster 801134 Assembly instructions

Bestar 93620-1139 manual

Bestar

Bestar 93620-1139 manual

American Woodcrafters 3910 Series Assembly instruction

American Woodcrafters

American Woodcrafters 3910 Series Assembly instruction

neighbor Haven 4-Piece Sectional Teak Arm Assembly guide

neighbor

neighbor Haven 4-Piece Sectional Teak Arm Assembly guide

Rona ART TRESTLE TABLE manual

Rona

Rona ART TRESTLE TABLE manual

Ameriwood HOME 2805354EBL manual

Ameriwood HOME

Ameriwood HOME 2805354EBL manual

burgbad Bel M1065 Fitting instructions

burgbad

burgbad Bel M1065 Fitting instructions

Geuther Cassini 1178WR Instructions for assembly and use

Geuther

Geuther Cassini 1178WR Instructions for assembly and use

RiverRidge Ashland Assembly instructions

RiverRidge

RiverRidge Ashland Assembly instructions

Costway HV10105 user manual

Costway

Costway HV10105 user manual

Allen + Roth L-DN2051SAL-B Assembly instructions

Allen + Roth

Allen + Roth L-DN2051SAL-B Assembly instructions

Forte MEGT122 Assembling Instruction

Forte

Forte MEGT122 Assembling Instruction

burgbad Sana M1153 Instructions and operating manual

burgbad

burgbad Sana M1153 Instructions and operating manual

manuals.online logo
manuals.online logoBrands
  • About & Mission
  • Contact us
  • Privacy Policy
  • Terms and Conditions

Copyright 2025 Manuals.Online. All Rights Reserved.