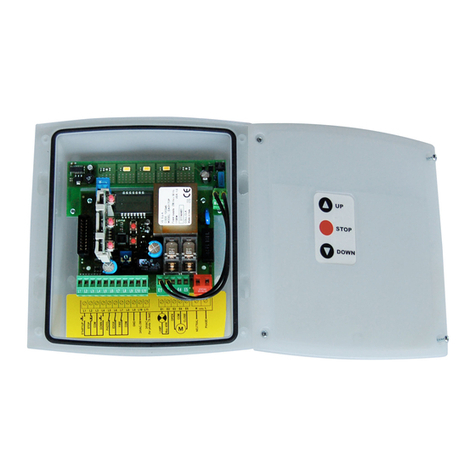
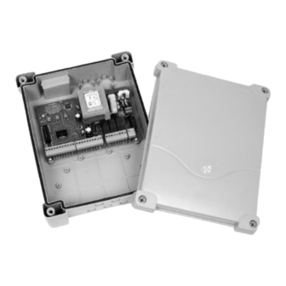
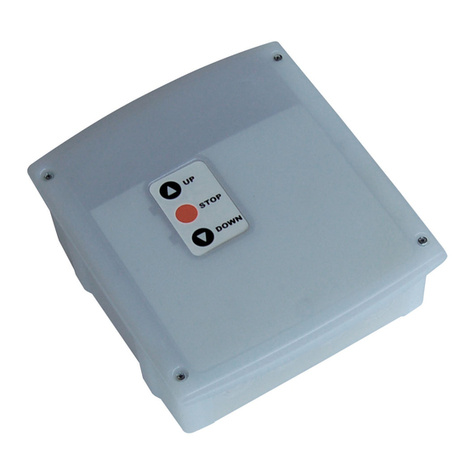
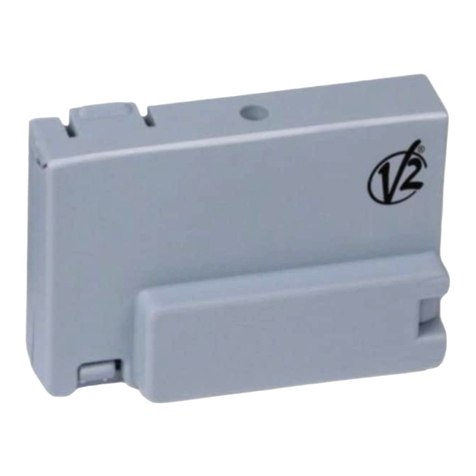
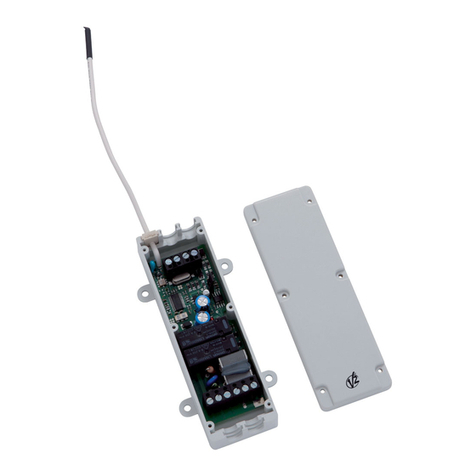
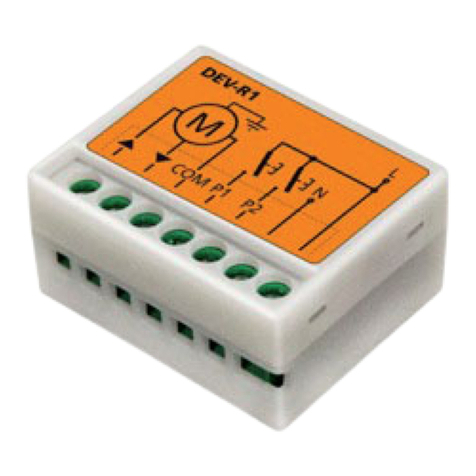
V2 CU1 User manual

CENTRALE PER TENDE DA S LE E TAPPARELLE PER
M T RE TUB LARE
C NTR L UNIT F R AWNING / R LLING SHUTTER
PR VIDED WITH TUB LAR GEARM T RS
ARM IRE P UR ST RE ET V LET R ULANTS AVEC
M TEUR TUBULAIRE
STEUERGEHÄUSE FÜR S NNENSCHUTZ UND
R LLLÄDEN FÜR R HRM T REN
CUADR DE MANI BRAS PARA T LD S Y
PERSIANAS D MESTICAS C N M T R TUBULAR
CENTRAL PARA T LD S DE PR TECÇÃ E
EST RES C M M T R TUBULAR
STUURKAST V R Z NWERING / R LLUIK MET
TUBULAIRE M T R
I
GB
F
D
E
P
NL
V2 S.p.A.
Corso Principi di Piemonte, 65/67
12035 RACCONIGI (CN) ITALY
tel. +39 01 72 81 24 11 - fax +39 01 72 84 050
CU1
IL n. 195
EDIZ. 10/05/2011

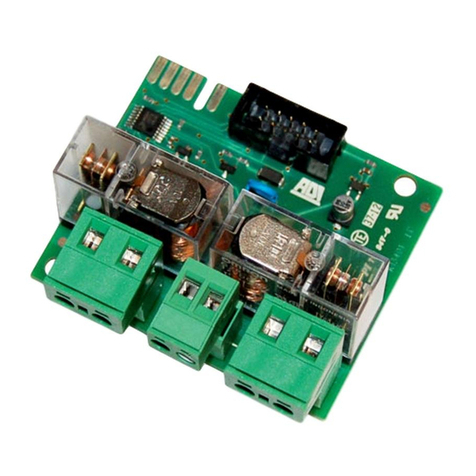
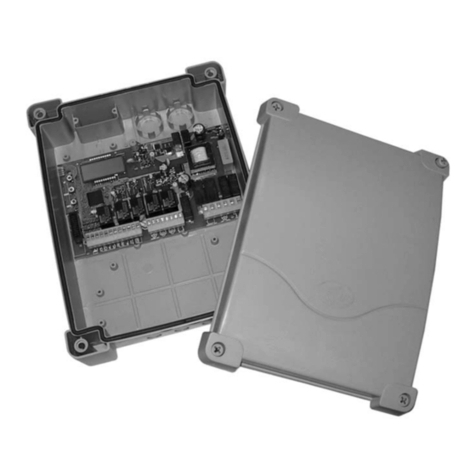
C LLEGAMENTI C NNECTI NS BRANCHEMENTS
1. GND cavo di terra GND earth wire GND cable de terre
2. Neutro alimentazione Neutre power supply Neutre alimentation
3. ase alimentazione Phase power supply Phase alimentation
4. Comune motore Motor common Commun moteur
5. Chiusura motore Motor closing ermeture moteur
6. Apertura motore Motor opening Ouverture moteur
7. - 8. Sensore di vento (WIND/MISTRAL) Wind sensor (WIND/MISTRAL) Capteur de vent (WIND/MISTRAL)
7. Sensore METEO/HURRICANE Sensor (METEO/HURRICANE) Capteur (METEO/HURRICANE)
9. -10. Pulsante esterno (Contatto N.A.) External switch (N.O. contact) Bouton externe (N.O. contact)
ANSCHLÜSSE C NEXI NES LIGAÇÕES AANSLUITINGEN
1. GND Erdungskabel GND cable de tierra GND cabo de terra GND aarding
2. Nullleiter Stromzufuhr Neutro alimentación Neutro alimentação Neutraal
3. Phase Stromzufuhr ase alimentación ase alimentação ase
4. Netz Motor Común motor Motor comum Motor
5. Schließen Motor Cierre motor echo motor Sluiting motor
6. Öffnen Motor Apertura motor Abertura motor Opening motor
7. - 8. Windsensor (WIND/MISTRAL) Sensor de viento (WIND/MISTRAL) Sensor de vento (WIND/MISTRAL) Windmeter (WIND/MISTRAL)
7. Sensor (METEO/HURRICANE) Sensor METEO/HURRICANE Sensor METEO/HURRICANE Sensor (METEO/HURRICANE)
9. -10. Externe Taste (Schließerkontakt) Pulsador exterior (Contacto N.A.) Botão externo (Contacto N.A.) Externe drukknop (N.O. contact)

ITALIAN
1
CENTRALE PER TENDE DA S LE E
TAPPARELLE PER M T RE TUB LARE
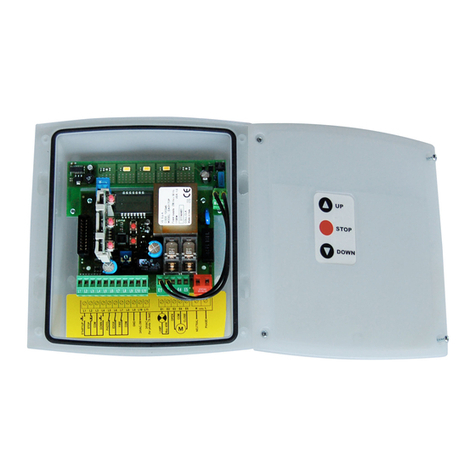
Questo sistema di apertura è costituito da una scheda elettronica
con le seguenti caratteristiche:
• È dotata di un ricevitore radio supereterodina 434.15 MHz.
• Il dispositivo è comandato da trasmettitori radio della serie
DU eADLER.
• È possibile comandare la tenda / tapparella anche tramite un
pulsante di comando esterno (del tipo Normalmente Aperto,
di qualsiasi serie o modello).
• La fase di programmazione è eseguibile via radio.
•L’installazione prevede l’utilizzo di un sensore modello
WIND / MISTRAL / METE / HURRICANE.
L GICA DI FUNZI NAMENT DEL PULSANTE
ESTERN
Ad ogni pressione del pulsante la centrale esegue in modo
sequenziale i comandi:
APRE STOP CHIUDE STOP APRE ...
L GICA TRASMETTIT RE
La logica di funzionamento ad ogni pressione dei tasti è la
seguente:
MEM RIZZAZI NE DEI TRASMETTIT RI
Sono memorizzabili fino a 48 canali diversi su ogni centrale.
Per memorizzare i trasmettitori leggere attentamente il paragrafo
“PROGRAMMAZIONE DELLE UNZIONI TRAMITE TRASMETTITORI
DELLA SERIE DUO” o “PROGRAMMAZIONE DELLE UNZIONI
TRAMITE TRASMETTITORI DELLA SERIE ADLER”
ATTIVAZI NE DEI SENS RI
Per attivare i sensori è necessario che ci sia almeno un
trasmettitore memorizzato.
IMP RTANTE:
• L’intervento dell’anemometro causa l’inibizione del
funzionamento del radiocomando e del pulsante esterno per
circa 8 minuti.
• Il sensore anemometrico deve essere installato nei pressi della
tenda per evitare che un eventuale eccesso di vento possa
danneggiarne la struttura.
TEMP DI LAV R DEL M T RE
La centrale di comando interrompe il movimento del motore
dopo 5 minuti: in caso di malfunzionamento del fine corsa,
questo “time out” evita il surriscaldamento del motore.
CARATTERISTICHE TECNICHE
Alimentazione: 230VAC - 50/60Hz / 120VAC - 60Hz
Portata contatti relè:10A
Sensibilità ricevitore:- 105 dBm per S/N = 17 dB con m = 100%
CHIUDE CHIUDE CHIUDE
STOP STOP STOP
APRE APRE APRE
AVVERTENZE IMP RTANTI
• Attenzione: è importante per la sicurezza delle persone seguire
queste istruzioni. Conservate le istruzioni.
• Importanti istruzioni di sicurezza per l'installazione.
Attenzione un'installazione incorretta può procurare seri
infortuni. Seguire tutte le istruzioni di installazione.
• Questo dispositivo deve essere installato unicamente da
personale qualificato.
•Il pulsante di comando deve avere caratteristiche di isolamento
idonee ad impianti elettrici a 230VAC-50Hz / 120VAC-60Hz.
• L’installatore deve provvedere alla protezione del dispositivo
per mezzo di interruttore magnetotermico differenziale (con
separazione tra i contatti di almeno 3 mm) che assicuri il
sezionamento onnipolare dalla rete elettrica in caso di guasto.
• Per garantire la tenuta stagna del contenitore è fondamentale
che i cavi utilizzati per il cablaggio vengano sguainati come da
figura:
DICHIARAZI NE DI C NF RMITÀ
V2 S.p.A. dichiara che i prodotti CU1 sono conformi ai requisiti
essenziali fissati dalle seguenti direttive:
- 2004/108/CEE (Direttiva EMC secondo le norme EN 61000-6-2,
EN 61000-6-3 + EN 50336)
- 2006/95/CEE (Direttiva Bassa Tensione secondo le norme
EN 60335-1 + EN 60335-2-97)
- 99/05/CEE (Direttiva Radio secondo le norme EN 301 489-3)
Racconigi, lì 28/01/2010
Il rappresentante legale della V2 SPA
Cosimo De Falco

ITALIAN
2
Switch 1: Memorizzazione dei trasmettitori
Per memorizzare un trasmettitore TX1 in una centrale vergine
procedere come segue:
ATTENZI NE: il primo trasmettitore che si memorizza determina
la direzione di movimento del motore.
1. Alimentare solo la centrale da programmare
2. Portare in posizione ON lo switch 1 del trasmettitore.
3. Solo DUO6 o DUO4: premere più volte il tasto il tasto SELC
del trasmettitore TX1 fino a quando viene visualizzato tramite
i led il canale memorizzato
4. Premere e tenere premuto (per circa 5 secondi) il tasto PROG
del telecomando TX1 fino a quando il motore comincia a
muoversi in una direzione
5. Rilasciare il tasto PROG: il motore si ferma
6. Premere i pulsanti UP o DOWN secondo la direzione in cui si
muoveva l'avvolgibile prima di fermarsi:
- se l'avvolgibile saliva premere il tasto UP; direzione acquisita:
tasto UP fa salire l'avvolgibile, tasto DOWN fa scendere
l'avvolgibile
- se l'avvolgibile scendeva premere il tasto DOWN; direzione
acquisita: tasto DOWN fa scendere l'avvolgibile, tasto UP fa
salire l'avvolgibile.
7. Portare in posizione O lo switch 1
Provare ad azionare l’avvolgibile e verificare che funzioni secondo
la logica sopra descritta. Se la logica è invertita è necessario
cancellare tutti i codici memorizzati (vedi Switch 3) e ripetere le
precedenti operazioni.
Per aggiungere un altro trasmettitore TX2 nella centrale è
necessario avere a disposizione un telecomando
precedentemente memorizzato (TX1) e procedere con i seguenti
punti:
1. Solo DUO6 o DUO4: premere più volte il tasto il tasto SELC
del trasmettitore TX1 fino a quando viene visualizzato tramite
i led il canale memorizzato
2. Solo DUO6 o DUO4: premere più volte il tasto SELC del nuovo
trasmettitore TX2 fino a quando viene visualizzato tramite i
led o sul display il canale che si vuole memorizzare
3. Portare l'avvolgibile a mezza altezza con il TX1
4. Portare in posizione ON lo switch 1 del trasmettitore TX1
5. Premere e tenere premuto, per circa 5 secondi, il tasto PROG
del TX1 fino a quando il motore comincia a muoversi
6. Rilasciare il tasto PROG, il motore si ferma
7. Premere il tasto UP o DOWN del TX2: il trasmettitore viene
memorizzato con la stessa logica del TX1
Switch 3: Cancellazione di tutti i
trasmettitori memorizzati
Per cancellare tutti i trasmettitori memorizzati nella centrale è
necessario avere a disposizione un telecomando
precedentemente memorizzato e procedere con i seguenti punti:
1. Alimentare solo la centrale da programmare
2. Solo DUO6 o DUO4: premere più volte il tasto il tasto SELC
del trasmettitore fino a quando viene visualizzato tramite
i led il canale memorizzato
3. Portare l'avvolgibile a mezza altezza
4. Portare in posizione ON lo switch 3 del trasmettitore
5. Premere e tenere premuto il tasto PROG del trasmettitore fino
a quando il motore si muove per circa un secondo in entrambi
i versi, indicando la fine della cancellazione
6. Rilasciare il tasto PROG e portare in posizione O lo switch 3
del trasmettitore
PR GRAMMAZI NE DELLE FUNZI NI
TRAMITE TRASMETTIT RI DELLA SERIE DU
Utilizzando un trasmettotorre della serie DUO è possibile
modificare le funzioni della centrale che pilota il motore tubolare.
DUO è dotato di un dip-switches con 10 interruttori grazie al
quale è possibile modificare le funzioni desiderate: portare in ON
l’interruttore corrispondente alla funzione che si desidera
programmare e seguirne attentamente la procedura dedicata.
ATTENZI NE: Tutti gli altri interruttori devono essere impostati
su O .
DIP FUNZI NE
1Memorizzazione dei trasmettitori
3Cancellazione di tutti i trasmettitori memorizzati
7Programmazione del livello di intervento del sensore
di vento
8Programmazione del livello di intervento del sensore
di sole
10 Programmazione del livello di temperatura
2 - 4 - 5
6 - 9 NON UTILIZZATO

ITALIAN
3
5. Il numero di scatti che il motore compie corrispondono al
livello attualmente impostato:
1 scatto = livello 1 = 2 klux
2 scatti = livello 2 = 5 klux
3 scatti = livello 3 = 10 klux (valore di default)
4 scatti = livello 4 = 20 klux
5 scatti = livello 5 = 40 klux
6. Per aumentare il livello premere il tasto UP e per diminuirlo
premere il tasto DOWN
7. Appena la centrale riceve il comando, visualizza il nuovo livello
azionando il motore con un numero di scatti corrispondente
8. Per uscire dalla programmazione premere STOP: il motore
visualizza nuovamente il livello impostato ed esce
Disabilitazione del sensore di sole
Per disabilitare il sensore di sole procedere come segue:
1. Solo DUO6 o DUO4: premere più volte il tasto il tasto SELC
del trasmettitore fino a quando viene visualizzato tramite
i led il canale memorizzato
2. Portare l'avvolgibile a mezza altezza
3. Premere il tasto STOP e immediatamente dopo il tasto DOWN
(mantenendo premuto il tasto STOP) fino a quando il motore
si muove per circa 1/2 secondo in entrambi i versi, indicando il
completamento della procedura
Per riabilitare il sensore di sole è sufficiente ripetere la procedura
sopra descritta utilizzando il tasto UP al posto del tasto DOWN.
Switch 10: Programmazione del livello di
temperatura
Questo funzione permette di regolare la temperatura a 5 livelli,
sotto i quali il sensore di sole non deve aprire la tenda, anche se
l'intensità della luce ha superato il livello impostato con
lo switch 8.
Questa funzione è particolarmente utile nei paesi con clima
rigido, dove sono frequenti le giornate soleggiate però molto
fredde. In queste situazioni non è necessario aprire le tende che
impedirebbero ai raggi solari di riscaldare l'ambiente interno.
Per impostare il livello di temperatura è necessario avere a
disposizione un telecomando precedentemente memorizzato e
procedere con i seguenti punti:
1. Solo DUO6 o DUO4: premere più volte il tasto il tasto SELC
del trasmettitore fino a quando viene visualizzato tramite
i led il canale memorizzato
2. Portare l'avvolgibile a mezza altezza
3. Portare in posizione ON lo switch 10 del trasmettitore
4. Premere e tenere premuto (per circa 5 secondi) il tasto PROG
del trasmettitore fino a quando il motore si muove a scatti in
entrambi i versi segnalando l'entrata in programmazione
5. Il numero di scatti che il motore compie corrispondono al
livello attualmente impostato:
1 scatto = livello 1 = sensore disabilitato (valore di default)
2 scatti = livello 2 = 0°C
3 scatti = livello 3 = 5°C
4 scatti = livello 4 = 10°C
5 scatti = livello 5 = 15°C
6. Per aumentare il livello premere il tasto UP e per diminuirlo
premere il tasto DOWN
7. Appena la centrale riceve il comando , visualizza il nuovo
livello azionando il motore con un numero di scatti
corrispondente
8. Per uscire dalla programmazione premere STOP: il motore
visualizza nuovamente il livello impostato ed esce
Per cancellare tutti i codici con un trasmettitore non memorizzato
procedere come segue:
1. Portare l'avvolgibile a mezza altezza
2. Disalimentare il sistema
3. Portare in posizione ON lo switch 3 di un trasmettitore
4. Premere e tenere premuto il tasto PROG
5. Alimentare solo la centrale su cui si vuole effettuare la
cancellazione: dopo circa 1 secondo il motore si muove in
entrambi i versi segnalando la corretta cancellazione
6. Rilasciare il tasto PROG e portare in posizione O lo switch 3
Switch 7: Programmazione del livello di
intervento del sensore di vento
Per impostare il livello di intervento del sensore di vento è
necessario avere a disposizione un telecomando
precedentemente memorizzato e procedere con i seguenti punti:
ATTENZI NE: per provocare la chiusura della tenda il
sensore di vento deve rilevare un valore SUPERIORE alla soglia
impostata per almeno 5 secondi. La chiusura della tenda causata
da vento forte provoca il blocco dell’automazione per 8 minuti.
1. Solo DUO6 o DUO4: premere più volte il tasto il tasto SELC
del trasmettitore fino a quando viene visualizzato tramite
i led il canale memorizzato
2. Portare l'avvolgibile a mezza altezza
3. Portare in posizione ON lo switch 7 del trasmettitore.
4. Premere e tenere premuto (per circa 5 secondi) il tasto PROG
del trasmettitore fino a quando il motore si muove a scatti in
entrambi i versi segnalando l'entrata in programmazione
5. Il numero di scatti che il motore compie corrispondono al
livello attualmente impostato:
1 scatto = livello 1 = 10 Km/h (valore di default)
2 scatti = livello 2 = 15 Km/h
3 scatti = livello 3 = 20 Km/h
4 scatti = livello 4 = 30 Km/h
5 scatti = livello 5 = 40 Km/h
6. Per aumentare il livello premere il tasto UP e per diminuirlo
premere il tasto DOWN
7. Appena la centrale riceve il comando, visualizza il nuovo livello
azionando il motore con un numero di scatti corrispondent
8. Per uscire dalla programmazione premere STOP: il motore
visualizza nuovamente il livello impostato ed esce
Switch 8: Programmazione del livello di
intervento del sensore di sole
Per impostare il livello di intervento del sensore di sole è
necessario avere a disposizione un telecomando
precedentemente memorizzato e procedere con i seguenti punti:
ATTENZI NE: per provocare l’apertura della tenda il
sensore di sole deve rilevare un valore SUPERIORE alla soglia
impostata per almeno 8 minuti. Per provocarne la chiusura il
sensore deve rilevare un valore IN ERIORE alla soglia impostata
per almeno 8 minuti.
Interruzioni di luce (causa nuvole) di durata inferiore a 1 minuto
non vengono rilevate, mentre se superano 1 minuto il timer di 8
minuti viene azzerato.
1. Solo DUO6 o DUO4: premere più volte il tasto il tasto SELC
del trasmettitore fino a quando viene visualizzato tramite
i led il canale memorizzato
2. Portare l'avvolgibile a mezza altezza
3. Portare in posizione ON lo switch 8 del trasmettitore
4. Premere e tenere premuto (per circa 5 secondi) il tasto PROG
del trasmettitore fino a quando il motore si muove a scatti in
entrambi i versi segnalando l'entrata in programmazione

ITALIAN
4
PR GRAMMAZI NE DELLE FUNZI NI
TRAMITE TRASMETTIT RI DELLA SERIE
ADLER
Utilizzando un trasmettotorre della serie ADLER è possibile
modificare le funzioni della centrale che pilota il motore tubolare.
Memorizzazione RAPIDA dei trasmettitori
Per memorizzare i telecomandi su una centrale vergine che pilota
una tapparella o una tenda (NON a cassonetto) procedere come
segue:
ATTENZI NE: il primo trasmettitore che si memorizza determina
la direzione di movimento del motore.
1. Alimentare solo la centrale da programmare
2. Premere e tenere premuti i tasti UP e DOWN fino a quando il
motore inizia a muoversi in una direzione
3. Rilasciare i tasti: il motore si ferma
4. Premere i pulsanti UP o DOWN secondo la direzione in cui si
muoveva l'avvolgibile prima di fermarsi:
- se l'avvolgibile saliva premere il tasto UP; direzione acquisita:
tasto UP fa salire l'avvolgibile, tasto DOWN fa scendere
l'avvolgibile
- se l'avvolgibile scendeva premere il tasto DOWN; direzione
acquisita: tasto DOWN fa scendere l'avvolgibile, tasto UP fa
salire l'avvolgibile.
5. Programmazione terminata
Per aggiungere altri telecomandi procedere come segue:
6. Premere e tenere premuti i tasti UP e DOWN di un
telecomando già memorizzato fino a quando il motore inizia a
muoversi in una direzione
7. Rilasciare i tasti: il motore si ferma
8. Premere il pulsante UP o DOWN del nuovo telecomando
ATTENZI NE: Se la tenda è a cassonetto eseguire la
memorizzazione del primo telecomando seguendo la procedura
“1. Memorizzazione dei trasmettitori e selezione della modalità
tenda”
Programmazione AVANZATA delle funzioni
Per eseguire la programmazione AVANZATA delle funzioni è
necessario togliere la maschera dal telecomando e seguire
attentamente le procedure dedicate alle diverse funzioni.
Ogni funzione è selezionabile digitando un codice durante la
procedura di programmazione; di seguito una tabella riassuntiva
delle funzioni con i vari codici di programmazione.
A: codice per attivare la programmazione
B: indica il canale 1 del telecomando; per il canale 2 le cifre sono
12, per il canale 3 sono 13 e così via fino al canale 6
C: codice della funzione da programmare
Nell’immagine che segue sono riportati i riferimenti dei tasti e dei
led utilizzati durante la fase di programmazione
UP
ST P
DWN
UP
ST P
D WN
PR G
C DICE FUNZI NE
A B C
12 11 11 Memorizzazione dei trasmettitori
12 11 13 Cancellazione di tutti i trasmettitori memorizzati
121117Programmazione del livello di intervento del
sensore di vento
12 11 18 Programmazione del livello di intervento del
sensore di sole
12 11 21 Programmazione del livello di temperatura

ITALIAN
5
Memorizzazione dei trasmettitori
Per memorizzare un trasmettitore TX1 in una centrale vergine
procedere come segue:
ATTENZI NE: il primo trasmettitore che si memorizza determina
la direzione di movimento del motore.
1. Alimentare solo la centrale da programmare
2. Attivare la programmazione di ADLER tenendo premuti i tasti
4 e 6 fino a quando i 6 led si accendono
3. Rilasciare i tasti e digitare il codice 12 11 11
Le due cifre evidenziate indicano il canale del telecomando da
memorizzare; per il canale 1 le cifre sono 11, per il canale 2
sono 12, per il canale 3 sono 13 e così via fino al canale 6.
Terminata la digitazione del codice il led del canale selezionato
lampeggia per 2 minuti trascorsi i quali esce dalla
programmazione.
4. Premere e tenere premuto il tasto PROG del telecomando TX1
fino a quando il motore comincia a muoversi in una direzione.
5. Rilasciare il tasto PROG: il motore si ferma.
6. Premere i pulsanti UP o DOWN secondo la direzione in cui si
muoveva l'avvolgibile prima di fermarsi:
- se l'avvolgibile saliva premere il tasto UP; direzione acquisita:
tasto UP fa salire l'avvolgibile, tasto DOWN fa scendere
l'avvolgibile
- se l'avvolgibile scendeva premere il tasto DOWN; direzione
acquisita: tasto DOWN fa scendere l'avvolgibile, tasto UP fa
salire l'avvolgibile.
7. Per uscire dalla programmazione attendere che il led si spenga
o premere il tasto 1 per uscire immediatamente.
Provare ad azionare l’avvolgibile e verificare che funzioni secondo
la logica sopra descritta. Se la logica è invertita è necessario
cancellare tutti i codici memorizzati (vedi procedura “3.
Cancellazione di tutti i trasmettitori memorizzati”) e ripetere le
precedenti operazioni.
Per aggiungere altri telecomandi seguire i punti 6,7,8 della
procedura “Memorizzazione RAPIDA dei trasmettitori”
Cancellazione di tutti i trasmettitori
memorizzati
Per cancellare tutti i trasmettitori memorizzati nella centrale è
necessario avere a disposizione un telecomando
precedentemente memorizzato e procedere con i seguenti punti:
1. Alimentare solo la centrale da programmare
2. Attivare la programmazione di ADLER tenendo premuti i tasti
4 e 6 fino a quando i 6 led si accendono
3. Rilasciare i tasti e digitare il codice 12 11 13
Le due cifre evidenziate indicano il canale del telecomando
memorizzato nella centrale; per il canale 1 le cifre sono 11,
per il canale 2 sono 12, per il canale 3 sono 13 e così via fino
al canale 6.
Terminata la digitazione del codice il led del canale selezionato
lampeggia per 2 minuti trascorsi i quali esce dalla
programmazione.
4. Portare l'avvolgibile a mezza altezza tramite i tasti
UP-STOP-DOWN
5. Premere e tenere premuto il tasto PROG del telecomando fino
a quando il motore comincia a muoversi in una direzione.
6. Rilasciare il tasto PROG: il motore si ferma
7. Per uscire dalla programmazione attendere che il led si spenga
o premere il tasto 1 per uscire immediatamente.
Per cancellare tutti i codici con un trasmettitore NON
memorizzato procedere come segue:
1. Disalimentare il sistema.
2. Attivare la programmazione di ADLER tenendo premuti i tasti
4 e 6 fino a quando i 6 led si accendono
3. Rilasciare i tasti e digitare il codice 12 11 13
4. Premere e tenere premuto il tasto PROG
5. Alimentare le centrali su cui si vuole effettuare la cancellazione
6. Mantenere premuto il tasto PROG fino a quando il motore si
muove per circa 1/2 secondo in entrambi i versi, indicando la
fine della cancellazione
7. Rilasciare il tasto PROG: il motore si ferma.
8. Per uscire dalla programmazione attendere che il led si spenga
o premere il tasto 1 per uscire immediatamente.
Programmazione del livello di intervento del
sensore di vento
Per impostare il livello di intervento del sensore di vento è
necessario avere a disposizione un telecomando
precedentemente memorizzato e procedere con i seguenti punti:
ATTENZI NE: per provocare la chiusura della tenda il
sensore di vento deve rilevare un valore SUPERIORE alla soglia
impostata per almeno 5 secondi. La chiusura della tenda causata
da vento forte provoca il blocco dell’automazione per 8 minuti.
1. Attivare la programmazione di ADLER tenendo premuti i tasti
4 e 6 fino a quando i 6 led si accendono
2. Rilasciare i tasti e digitare il codice 12 11 17
Le due cifre evidenziate indicano il canale del telecomando
memorizzato nella centrale; per il canale 1 le cifre sono 11,
per il canale 2 sono 12, per il canale 3 sono 13 e così via fino
al canale 6. Terminata la digitazione del codice il led del
canale selezionato lampeggia per 2 minuti trascorsi i quali
esce dalla programmazione;
3. Premere e tenere premuto (per circa 5 secondi) il tasto PROG
del trasmettitore fino a quando il motore si muove a scatti in
entrambi i versi segnalando l'entrata in programmazione
4. Il numero di scatti che il motore compie corrispondono al
livello attualmente impostato:
1 scatto = livello 1 = 10 Km/h (valore di default)
2 scatti = livello 2 = 15 Km/h
3 scatti = livello 3 = 20 Km/h
4 scatti = livello 4 = 30 Km/h
5 scatti = livello 5 = 40 Km/h
5. Rilasciare il tasto PROG
6. Per aumentare il livello premere il tasto UP e per diminuirlo
premere il tasto DOWN
7. Appena la centrale riceve il comando, visualizza il nuovo livello
azionando il motore con un numero di scatti corrispondente
8. Raggiunto il valore desiderato premere il tasto STOP: la
centrale per conferma visualizza ancora una volta il valore
impostato
9. Per uscire dalla programmazione attendere che il led si spenga
o premere il tasto 1 per uscire immediatamente.

ITALIAN
6
Programmazione del livello di intervento del
sensore di sole
Per impostare il livello di intervento del sensore di sole è
necessario avere a disposizione un telecomando
precedentemente memorizzato e procedere con i seguenti punti:
ATTENZI NE: per provocare l’apertura della tenda il
sensore di sole deve rilevare un valore SUPERIORE alla soglia
impostata per almeno 8 minuti. Per provocarne la chiusura il
sensore deve rilevare un valore IN ERIORE alla soglia impostata
per almeno 8 minuti.
Interruzioni di luce (causa nuvole) di durata inferiore a 1 minuto
non vengono rilevate, mentre se superano 1 minuto il timer di 8
minuti viene azzerato.
1. Attivare la programmazione di ADLER tenendo premuti i tasti
4 e 6 fino a quando i 6 led si accendono
2.Rilasciare i tasti e digitare il codice 12 11 18
Le due cifre evidenziate indicano il canale del telecomando
memorizzato nella centrale; per il canale 1 le cifre sono 11,
per il canale 2 sono 12, per il canale 3 sono 13 e così via fino
al canale 6. Terminata la digitazione del codice il led del
canale selezionato lampeggia per 2 minuti trascorsi i quali
esce dalla programmazione;
3. Premere e tenere premuto (per circa 5 secondi) il tasto PROG
del trasmettitore fino a quando il motore si muove a scatti in
entrambi i versi segnalando l'entrata in programmazione
4. Il numero di scatti che il motore compie corrispondono al
livello attualmente impostato:
1 scatto = livello 1 = 2 klux
2 scatti = livello 2 = 5 klux
3 scatti = livello 3 = 10 klux (valore di default)
4 scatti = livello 4 = 20 klux
5 scatti = livello 5 = 40 klux
5. Rilasciare il tasto PROG
6. Per aumentare il livello premere il tasto UP e per diminuirlo
premere il tasto DOWN
7. Appena la centrale riceve il comando, visualizza il nuovo livello
azionando il motore con un numero di scatti corrispondente
8. Raggiunto il valore desiderato premere il tasto STOP: la
centrale per conferma visualizza ancora una volta il valore
impostato
9. Per uscire dalla programmazione attendere che il led si spenga
o premere il tasto 1 per uscire immediatamente.
Programmazione del livello di temperatura
Questo funzione permette di regolare la temperatura a 5 livelli,
sotto i quali il sensore di sole non deve aprire la tenda, anche se
l'intensità della luce ha superato il livello impostato.
Questa funzione è particolarmente utile nei paesi con clima
rigido, dove sono frequenti le giornate soleggiate però molto
fredde. In queste situazioni non è necessario aprire le tende che
impedirebbero ai raggi solari di riscaldare l'ambiente interno.
Per impostare il livello di temperatura è necessario avere a
disposizione un telecomando precedentemente memorizzato e
procedere con i seguenti punti:
1. Attivare la programmazione di ADLER tenendo premuti i tasti
4 e 6 fino a quando i 6 led si accendono
2.Rilasciare i tasti e digitare il codice 12 11 21
Le due cifre evidenziate indicano il canale del telecomando
memorizzato nella centrale; per il canale 1 le cifre sono 11,
per il canale 2 sono 12, per il canale 3 sono 13 e così via fino
al canale 6.
Terminata la digitazione del codice il led del canale selezionato
lampeggia per 2 minuti trascorsi i quali esce dalla
programmazione.
3. Premere e tenere premuto (per circa 5 secondi) il tasto PROG
del trasmettitore fino a quando il motore si muove a scatti in
entrambi i versi segnalando l'entrata in programmazione
4. Il numero di scatti che il motore compie corrispondono al
livello attualmente impostato:
1 scatto = livello 1 = sensore disabilitato (valore di default)
2 scatti = livello 2 = 0°C
3 scatti = livello 3 = 5°C
4 scatti = livello 4 = 10°C
5 scatti = livello 5 = 15°C
5. Rilasciare il tasto PROG
6. Per aumentare il livello premere il tasto UP e per diminuirlo
premere il tasto DOWN
7. Appena la centrale riceve il comando, visualizza il nuovo livello
azionando il motore con un numero di scatti corrispondente
8. Raggiunto il valore desiderato premere il tasto STOP: la
centrale per conferma visualizza ancora una volta il valore
impostato
9. Per uscire dalla programmazione attendere che il led si spenga
o premere il tasto 1 per uscire immediatamente.

ENGLISH
CNTR L UNIT F R AWNING / R LLING
SHUTTER PR VIDED WITH TUB LAR
GEARM T RS
This automatic opening system consists of a control unit with the
following features:
• It is provided with a 434.15 MHz super-heterodyne radio
receiver
• It is driven by means of DUO / ADLER transmitters.
• It is possible to drive the awning / rolling shutter also by mean
of an external push-button (type: Normally Open, each series
or model).
• The programming phase can be effected via radio or by means
of an external switch.
•It is necessary to use a sesor model WIND / MISTRAL /
METE / HURRICANE.
FUNCTI NING WITH EXTERNAL WIRED
SWITCH
Pressing the external wired switch, the control unit has the
following functioning logic:
OPENS STOPS CLOSES STOPS OPENS ...
FUNCTI NING WITH TRANSMITTERS
At each push button pressure, the functioning logic is the
following.
TRANSMITTERS PR GRAMMING
Up to 48 different channel can be stored on each central unit.
To store the transmitters read carefully the paragraph
“PROGRAMMING O THE UNCTIONS BY MEANS O A
TRANSMITTER O THE DUO SERIES” or “PROGRAMMING O THE
UNCTIONS BY MEANS O A TRANSMITTER O THE ADLER
SERIES”
SENS R ACTIVATI N
To activate the sensors function, at least one transmitter must be
stored.
IMP RTANT:
• Anemometer causes inhibition of functioning of both radio
transmitter and external push button for ca. 8 minutes.
• The anemometrical sensor should be installed close to the
awnings, in order to avoid damages in case of very strong wind.
W RKING TIME F M T R
The control unit stops the motor movement after 5 minutes: in
case of limit switches malfunction this “time out” avoids the
motor overheating.
TECHNICAL SPECIFICATI NS
Power supply: 230VAC - 50/60Hz / 120VAC - 60Hz
Relay contact capacity: 10A
Sensitivity of receiver: - 105 dBm per S/N = 17dB m. = 100%
IMP RTANT REMARKS
• Attention: for people safety it is important to follow carefully
the instructions. Keep the instructions.
• Important safety instructions for the installation.
Attention: a wrong installation can cause serious accidents.
ollow carefully the installation instructions .
• This device can be installed only from qualified persons.
• As regards insulation, the features of push buttons must be
suitable for electrical installations (230VAC - 50Hz / 120VAC -
60Hz).
• In order to protect the device, the installer must provide for a
magnetotermical differential switch (separation among the
contacts: at least 3 mm), ensuring the omnipolar sectioning
from the power supply.
• In order to grant the tightness of the case it is necessary to
remove the protective sleeve of the cables used for wiring (see
the picture).
DECLARATI N F C NF RMITY
V2 S.p.A. hereby declare that CU1 products conform to the
essential requirements established in the following directives:
- 2004/108/CEE (EMC Directive in accordance with standards
EN 61000-6-2, EN 61000-6-3 + EN 50336)
- 2006/95/CEE (Low Voltage Directive in accordance with
standards EN 60335-1 + EN 60335-2-97)
- 99/05/CEE (Radio Directive in accordance with standard
EN 301 489-3)
Racconigi, lì 28/01/2010
V2 S.p.A. legal representative.
Cosimo De Falco
CLOSES CLOSES CLOSES
STOPS STOPS STOPS
OPENS OPENS OPENS
7

ENGLISH
8
Switch 1: Storage of the transmitters
To store a transmitter TX1 on a blank control unit proceed as
follows:
WARNING: the first transmitter stored fixes the direction of
motion of the motor.
1. Power only the control unit to be programmed
2. Set on ON the switch 1 of the transmitter.
3. DUO6 / DUO4 only: press several times the key SELC of the
transmitter TX1 until displayed the selected channel (by the
leds or on the display).
4. Press and keep pressed (for about 5 seconds) the key PROG of
the transmitter TX1 until the motor starts to move in one way.
5. Release the key PROG: the motor stops.
6. Press the keys UP or DOWN depending on the way of motion
of the roll-up shutter before stopping:
- if the roll-up shutter was going up, press the key UP;
direction acquired: the key UP moves the roll-up shutter
UPWARDS, the key DOWN moves the roll-up shutter
DOWNWARDS.
- if the roll-up shutter was going down, press the key DOWN;
direction acquired: the key DOWN moves the roll-up shutter
DOWNWARDS, the key UP moves the roll-up shutter
UPWARDS.
7. Set the switch 1 to O .
Try to operate the roll-up shutter and check that it works with the
logic above described. If the logic is reversed, it is necessary to
delete all the codes stored (read Switch 3) and start again the
above procedure.
To add another transmitter TX2 to the control unit it is necessary
to use a remote control previously stored (TX1) and proceed as
follows:
1. DUO6 / DUO4 only: press several times the key SELC of the
transmitter TX1 until displayed the channel stored (by the leds)
2. DUO6 / DUO4 only: press several times the key SELC of the
new transmitter TX2 until display the channel to be stored (by
the leds)
3. Take the roll-up shutter to half its way with TX1.
4. Set to ON the switch 1 of the transmitter TX1.
5. Press and keep pressed for about 5 seconds the key PROG of
the TX1 until the motor starts to move.
6. Release the key PROG, the motor stops.
7. Press the key UP or DOWN of the TX2: the transmitter is
stored with the same logic of the TX1.
Switch 3: deletion of all the stored
transmitters
To delete all the transmitters stored on the control unit it is
necessary using a remote control previously stored and proceed
as follows:
1. Power only the control unit to be programmed
2. DUO6 / DUO4 only: press several times the button SELC on
the transmitter until displayed the channel stored (by the leds)
3. Position the roll-up shutter at the mid-height.
4. Set on ON the switch 3 of the transmitter.
5. Press and keep pressed the button PROG of the transmitter
until the motor moves in both the ways for 1 second, showing
the end of deletion.
6. Release the button PROG and set on O the switch 3 of the
transmitter.
PR GRAMMING F THE FUNCI NTS BY
MEANS F TRANSMITTERS F THE RANGE
DU
Using a transmitter of the range DUO it is possible changing the
functions of the control unit controlling the tubular motor.
DUO is equipped with a 10 switches dip-switch thanks to which
it is possible to change the desired functions: set on ON the
switch corresponding to the function required and follow
carefully the dedicated procedure.
WARNING: all the other switches have to be set on O
DIP FUNCTI N
1Storage of the transmitters
3Deletion of all the stored transmitters
7Storing of the level of intervention of the wind
sensor
8Programming of the level of intervention of the sun
sensor
10 Programming of the level of temperature
2 - 4 - 5
6 - 9 NOT USED

ENGLISH
9
To delete all the codes by means of a transmitter non-stored,
proceed as follows:
1. Position the retractable at the mid-height.
2. Switch off power supply of the system.
3. Set on ON the switch 3 of a transmitter.
4. Press and keep pressed the button PROG.
5. Supply power only to the control unit on which to make the
deletion: after about 1 second the motor moves in both the
ways showing the correct deletion.
6. Release the button PROG and set on O the switch 3.
Switch 7: storing of the level of intervention
of the wind sensor
To set the level of intervention of the wind sensor it is necessary
to use a remote control previously stored and proceed as follows:
WARNING: to make the awning close, the wind sensor has
to detect a value higher then the set threshold value for at least 5
seconds. The automation is blocked for 8 minutes when the
awning is closed because of strong wind.
1. DUO6 / DUO4 only: press several times the button SELC of the
transmitter until shown by leds the channel stored.
2. Position the roll-up shutter at the mid-height
3. Set on ON the switch 7 of the transmitter.
4. Press and keep pressed (for 5 about seconds) the button PROG
of the transmitter until the motor moves jerkily in both the
ways showing that it enters the storing.
5. The number of jerks made by the motor corresponds to the
level currently set:
1 jerk = level 1 = 10 Km/h (default)
2 jerks = level 2 = 15 Km/h
3 jerks = level 3 = 20 Km/h
4 jerks = level 4 = 30 Km/h
5 jerks = level 5 = 40 Km/h
6. To increase the level press button UP, to decrease it press
button DOWN.
7. As soon as the control unit receives the control, it shows the
new level moving the motor with the corresponding number
of jerks.
8. To exit the programming press STOP: the motor displays again
the set level and exits.
Switch 8: programming of the level of
intervention of the sun sensor
To set the level of intervention of the sun sensor it is necessary to
use a remote control previously stored and proceed as follows:
WARNING: to make the awning open the sun sensor has to
detect a value higher then the set threshold value for at least 8
minutes. To make it close, the sensor has to detect a value lower
then the set threshold value for at least 8 minutes.
Interruptions of light (due to clouds) shorter than a minute are
not detected, while the 8-minute timer is set at zero when longer
than one minute.
1. DUO6 / DUO4 only: press several times the button SELC of the
transmitter until shown by leds the channel stored.
2. Position the roll-up shutter at the mid-height
3. Set on ON the switch 8 of the transmitter.
4. Press and keep pressed (for 5 about seconds) the button PROG
of the transmitter until the motor moves jerkily in both the
ways showing that it enters the storing.
5.The number of jerks made by the motor corresponds to the
level currently set:
1 jerk = level 1 = 2 Klux
2 jerks = level 2 = 5 Klux
3 jerks = level 3 = 10 Klux (default)
4 jerks = level 4 = 20 Klux
5 jerks = level 5 = 40 Klux
6. To increase the level press button UP, to decrease it press
button DOWN.
7. As soon as the control unit receives the control, it shows the
new level moving the motor with the corresponding number
of jerks.
8. To exit the programming press STOP: the motor displays again
the set level and exits.
Disabling of the sun sensor
To disabling the sun sensor proceed as follows:
1. DUO6 / DUO4 only: press several times the button SELC of the
transmitter until shown by leds the channel stored.
2. Position the roll-up shutter at the mid-height
3. Press the key STOP and immediately after the key DOWN
(keeping pressed the key STOP) until the motor moves for
about one second in both the ways, indicating that the
procedure has been finished.
To enable again the sun sensor it is enough to repeat the
procedure above using the key UP instead of the key DOWN.
Switch 10: Programming of the level of
temperature
The temperature can be set on 5 levels, under which the sun
sensor must not open the awning, even if the light intensity has
exceeded the level set by switch 8
This function is particularly useful in Countries with wintry
weather, where sunny but very cold days are frequent. In this
case, it is not necessary to open the awnings, to let the sun warm
the inner rooms.
To set the level of temperature it is necessary to use a remote
control previously stored and proceed as follows:
1. DUO6 / DUO4 only: press several times the button SELC of the
transmitter until shown by leds the channel stored.
2. Position the roll-up shutter at the mid-height
3. Set on ON the switch 10 of the transmitter.
4. Press and keep pressed (for 5 about seconds) the button PROG
of the transmitter until the motor moves jerkily in both the
ways showing that it enters the storing.
5. The number of jerks made by the motor corresponds to the
level currently set:
1 jerk = level 1 = sensor disabled (default)
2 jerks = level 2 = 0°C
3 jerks = level 3 = 5°C
4 jerks = level 4 = 10°C
5 jerks = level 5 = 15°C
6. To increase the level press button UP, to decrease it press
button DOWN.
7. As soon as the control unit receives the control, it shows the
new level moving the motor with the corresponding number
of jerks.
8. To exit the programming press STOP: the motor displays again
the set level and exits.

ENGLISH
10
PR GRAMMING F THE FUNCI NTS BY
MEANS F TRANSMITTERS F THE RANGE
ADLER
Using a transmitter of the range DUO it is possible changing the
functions of the control unit controlling the tubular motor.
QUICK transmitter recording
To record remote controls for a new control unit that drives a
shutter or a sunshade (NOT with casing) proceed as follows:
CAUTI N: the first transmitter recorded determines the direction
of the motor's movement.
1. Power only the control unit to be programmed
2. Press and hold down UP and DOWN until the motor starts to
move in a direction
3. Release the buttons: the motor will stop
4. Press UP or DOWN following the direction the roll-up shutter
moved prior to stopping:
- if the roll-up shutter was rising, press UP; direction
acquired: the UP button raises the roll-up shutter, the
DOWN button lowers the roll-up shutter
- if the roll-up shutter was lowering, press DOWN; direction
acquired: the DOWN button lowers the roll-up shutter, the
UP button raises the roll-up shutter
5. End of programming
To add other remote controls, proceed as follows:
6. Press and hold down the UP and DOWN buttons of a remote
control that is already recorded until the motor starts to move
in a direction
7. Release the buttons: the motor will stop
8. Press the UP or DOWN button on the new remote control
CAUTI N: If the sunshade has a casing, record the first remote
control by following the procedure "1. Record the transmitters
and select the sunshade mode"
ADVANCED programming
To perform ADVANCED programming it is necessary to remove
the cover plate of the remote control and carefully follow the
dedicated procedures for the various functions.
Each function can be selected by entering a code during the
programming procedure; following is a summary table of the
functions with their relative programming codes.
A: Code to activate programming
B: Indicates channel 1 of the remote control; for channel 2 the number
is 12, for channel 3 the number is 13, etc. up to channel 6
C: Code of the function to be programmed
The pictures that follow include references to the buttons and the
LEDs used during programming.
UP
ST P
DWN
CDE FUNCTI N
A B C
12 11 11 Storage of the transmitters
12 11 13 Deletion of all the stored transmitters
121117Storing of the level of intervention of the
wind sensor
121118Programming of the level of intervention of the
sun sensor
12 11 21 Programming of the level of temperature
UP
ST P
D WN
PR G

ENGLISH
11
Storage of the transmitters
To store a transmitter TX1 on a blank control unit proceed as
follows:
WARNING: the first transmitter stored fixes the direction of
motion of the motor.
1. Power only the control unit to be programmed
2. Activate ADLER programming by holding down buttons 4 and
6 until the 6 LEDs turn on
3. Release the buttons and enter the code 12 11 11
The two highlighted digits indicate the remote control channel
to be recorded; for channel 1 the digits are 11, for channel 2
the digits are 12, for channel 3 the digits are 13, etc up to
channel 6. Once the codes have been entered, the LED of the
selected channel will blink for 2 minutes after which it exits
programming.
4. Press and hold down the PROG button of the TX1 remote
control until the motor starts to move in a direction
5. Release the PROG button: the motor will stop
6. Press the keys UP or DOWN depending on the way of motion
of the roll-up shutter before stopping:
- if the roll-up shutter was going up, press the key UP;
direction acquired: the key UP moves the roll-up shutter
UPWARDS, the key DOWN moves the roll-up shutter
DOWNWARDS.
- if the roll-up shutter was going down, press the key DOWN;
direction acquired: the key DOWN moves the roll-up shutter
DOWNWARDS, the key UP moves the roll-up shutter
UPWARDS.
7. To exit the programming mode, wait for the led to switch off
or press key 1 to exit immediately.
Try to operate the roll-up shutter and check that it works with the
logic above described. If the logic is reversed, it is necessary to
delete all the codes stored (See procedure "3. Deleting all
recorded transmitters”) and start again the above procedure.
To add other remote controls, follow points 6, 7, and 8 of the
"QUICK transmitter recording"
Deletion of all the stored transmitters
To delete all the transmitters stored on the control unit it is
necessary using a remote control previously stored and proceed
as follows:
1. Power only the control unit to be programmed
2. Activate ADLER programming by holding down buttons 4 and
6 until the 6 LEDs turn on
3. Release the buttons and enter the code 12 11 13
The two highlighted digits indicate the remote control channel
recorded in the control unit; for channel 1 the digits are 11,
for channel 2 the digits are 12, for channel 3 the digits are 13,
etc up to channel 6. Once the codes have been entered, the
LED of the selected channel will blink for 2 minutes after
which it exits programming.
4. Position the roll-up shutter at mid-height using
UP-STOP-DOWN
5. Press and hold down the PROG button of the remote control
until the motor starts to move in a direction
6. Release the PROG button: the motor will stop
7. To exit the programming mode, wait for the led to switch off
or press key 1 to exit immediately.
To delete all the codes by means of a transmitter non-stored,
proceed as follows:
1. Switch off power supply of the system.
2. Activate ADLER programming by holding down buttons 4 and
6 until the 6 LEDs turn on
3. Release the buttons and enter the code 12 11 13
4. Press and keep pressed the button PROG
5. Power all control units where the deletion will be performed
6. Hold down the PROG button until the motor starts to move
for about 1/2 second in both directions, indicating that the
deletion has been completed.
7. Release the PROG button: the motor will stop
8. To exit the programming mode, wait for the led to switch off
or press key 1 to exit immediately.
Storing of the level of intervention of the
wind sensor
To set the level of intervention of the wind sensor it is necessary
to use a remote control previously stored and proceed as follows:
WARNING: to make the awning close, the wind sensor has
to detect a value higher then the set threshold value for at least 5
seconds. The automation is blocked for 8 minutes when the
awning is closed because of strong wind.
1. Activate ADLER programming by holding down buttons 4 and
6 until the 6 LEDs turn on
2. Release the buttons and enter the code 12 11 17
The two highlighted digits indicate the remote control channel
recorded in the control unit; for channel 1 the digits are 11,
for channel 2 the digits are 12, for channel 3 the digits are 13,
etc up to channel 6. Once the codes have been entered, the
LED of the selected channel will blink for 2 minutes after
which it exits programming.
3. Press and keep pressed (for 5 about seconds) the button PROG
of the transmitter until the motor moves jerkily in both the
ways showing that it enters the storing.
4. The number of jerks made by the motor corresponds to the
level currently set:
1 jerk = level 1 = 10 Km/h (default)
2 jerks = level 2 = 15 Km/h
3 jerks = level 3 = 20 Km/h
4 jerks = level 4 = 30 Km/h
5 jerks = level 5 = 40 Km/h
5. Release the key PROG
6. To increase the level press button UP, to decrease it press
button DOWN.
7. As soon as the control unit receives the control, it shows the
new level moving the motor with the corresponding number
of jerks.
8. To exit the programming press STOP: the motor displays again
the set level and exits.
9. To exit the programming mode, wait for the led to switch off
or press key 1 to exit immediately.

ENGLISH
12
Programming of the level of intervention of
the sun sensor
To set the level of intervention of the sun sensor it is necessary to
use a remote control previously stored and proceed as follows:
WARNING: to make the awning open the sun sensor has to
detect a value higher then the set threshold value for at least 8
minutes. To make it close, the sensor has to detect a value lower
then the set threshold value for at least 8 minutes.
Interruptions of light (due to clouds) shorter than a minute are
not detected, while the 8-minute timer is set at zero when longer
than one minute.
1. Activate ADLER programming by holding down buttons 4 and
6 until the 6 LEDs turn on
2. Release the buttons and enter the code 12 11 18
The two highlighted digits indicate the remote control channel
recorded in the control unit; for channel 1 the digits are 11,
for channel 2 the digits are 12, for channel 3 the digits are 13,
etc up to channel 6. Once the codes have been entered, the
LED of the selected channel will blink for 2 minutes after
which it exits programming.
3. Press and keep pressed (for 5 about seconds) the button PROG
of the transmitter until the motor moves jerkily in both the
ways showing that it enters the storing.
4. The number of jerks made by the motor corresponds to the
level currently set:
1 jerk = level 1 = 2 Klux
2 jerks = level 2 = 5 Klux
3 jerks = level 3 = 10 Klux (default)
4 jerks = level 4 = 20 Klux
5 jerks = level 5 = 40 Klux
5. Release the key PROG
6. To increase the level press button UP, to decrease it press
button DOWN.
7. As soon as the control unit receives the control, it shows the
new level moving the motor with the corresponding number
of jerks.
8. To exit the programming press STOP: the motor displays again
the set level and exits.
9. To exit the programming mode, wait for the led to switch off
or press key 1 to exit immediately.
Programming of the level of temperature
The temperature can be set on 5 levels, under which the sun
sensor must not open the awning, even if the light intensity has
exceeded the level set.
This function is particularly useful in Countries with wintry
weather, where sunny but very cold days are frequent. In this
case, it is not necessary to open the awnings, to let the sun warm
the inner rooms.
To set the level of temperature it is necessary to use a remote
control previously stored and proceed as follows:
1. Activate ADLER programming by holding down buttons 4 and
6 until the 6 LEDs turn on
2. Release the buttons and enter the code 12 11 21
The two highlighted digits indicate the remote control channel
recorded in the control unit; for channel 1 the digits are 11,
for channel 2 the digits are 12, for channel 3 the digits are 13,
etc up to channel 6. Once the codes have been entered, the
LED of the selected channel will blink for 2 minutes after
which it exits programming.
3. Press and keep pressed (for 5 about seconds) the button PROG
of the transmitter until the motor moves jerkily in both the
ways showing that it enters the storing.
4. The number of jerks made by the motor corresponds to the
level currently set:
1 jerk = level 1 = sensor disabled (default)
2 jerks = level 2 = 0°C
3 jerks = level 3 = 5°C
4 jerks = level 4 = 10°C
5 jerks = level 5 = 15°C
5. Release the key PROG
6. To increase the level press button UP, to decrease it press
button DOWN.
7. As soon as the control unit receives the control, it shows the
new level moving the motor with the corresponding number
of jerks.
8. To exit the programming press STOP: the motor displays again
the set level and exits.
9. To exit the programming mode, wait for the led to switch off
or press key 1 to exit immediately.

FRANÇAIS
ARM IRE P UR ST RE ET V LET R ULANTS
AVEC M TEUR TUBULAIRE
Ce système d’ouverture est constitué par une platine
électronique avec les caractéristiques suivantes :
• Récepteur radio super-héterodine incorporé 434.15 MHz.
• Le système est géré par émetteurs série DU /ADLER.
• Il est même possible gérer le store / volet roulant par un
bouton de commande externe (type Norm. Ouvert, de
n’importe quelle série).
• La programmation on peut la faire via radio ou par bouton de
commande externe.
•L’installation prévoit l’emploi d’un capteur model
WIND / MISTRAL / METE / HURRICANE
L GIQUE DI F NCTI NNEMENT DU
P USS IR EXTERNE
A chaque pression du poussoir la centrale exécute de façon
séquentielle le commande suivant:
OUVRE STOP ERME STOP OUVRE ...
L GIQUE EMETTEUR
La logique du fonctionnement à chaque pression des touches est
la suivante:
PR GRAMMATI N DES EMETTEURS
Il est possible mémoriser jusqu'à 48 canaux sur chaque centrale
de commande. Pour mémoriser les émetteurs lire avec attention
le paragraphe “PROGRAMMATION DES ONCTIONS A TRAVERS
DES EMETTEURS DE LA SERIE DUO” ou “PROGRAMMATION DES
ONCTIONS A TRAVERS DES EMETTEURS DE LA SERIE ADLER”.
ACTIVATI N DES CAPTEURS
Pour activer la fonction du capteurs il faut avoir au moins un
émetteur memorisé.
IMP RTANT:
• L’intervention de l’anémomètre cause l’inhibition du
fonctionnement de l’émetteur et de la touche externe pour
environ 8 min.
• Le capteur anémomètre doit être installé près du store pour
éviter qu’un vent trop violent puisse l’endommager.
TEMPS DE TRAVAIL DU M TEUR
La centrale arrête le mouvement du moteur après 2 minute. En
cas de mauvais fonctionnement du fin course, ce “time out”
évite le surchauffe du moteur.
CARACTERISTIQUES TECHNIQUES
Alimentation: 230VAC - 50/60Hz / 120VAC - 60Hz
Contact rélais: 10A
Sensibilità récepteur: - 105 dBm per S/N = 17 dB m = 100%
ERME ERME ERME
STOPS STOPS STOPS
OUVRE OUVRE OUVRE
13
C NSEILS IMP RTANTS
• Attention: il est important pour la sécurité suivre attentivement
ces instructions. Gardez les notices!
• Importantes notices de sécurité pour l'installation.
Attention: un'installation pas correcte peut provoquer des
accidents très serieux.Suivre attentivement toutes les
instructions d'installation.
• Ce dispositif doit être installé uniquement par personnel
compétent.
• Le poussoir de commande doit avoir caractéristiques
d’isolation idonee ad impianti elettrici a 230VAC - 50Hz /
120VAC - 60Hz.
• L’installateur doit s’occuper de la protection du dispositif par
un interrupteur magnétothermique différentiel (avec
séparation entre les contacts d’au moins 3 mm) que puisse
assurer la sélection onnipolaire de l’électricité en cas de panne.
•Pour garantir l'étanchéité de la boite, il faut imperativement
que les cables employés pour le cablage soient dégainés selon
l'illustration:
DÉCLARATI N DE C NF RMITÉ
V2 S.p.A. déclare que les produits CU1 sont conforment aux
qualités requises essentielles fixées par les directives suivantes :
- 2004/108/CEE (Directive EMC suivant les normes
EN 61000-6-2, EN 61000-6-3 + EN 50336)
- 2006/95/CEE (Directive Basse tension suivant les normes
EN 60335-1 + EN 60335-2-97)
- 99/05/CEE (Directive Radio suivant les normes
EN 301 489-3)
Racconigi, lì 28/01/2010
Le représentant dûment habilité V2 S.p.A.
Cosimo De Falco

FRANÇAIS
14
6.Appuyer les touches UP ou DOWN selon la direction dans
laquelle le moteur se bougeait avant de s'arrêter :
- si le store montait, appuyer sur la touche UP ; direction
acquise: la touche UP fait monter le store, la touche DOWN
fait descendre le store;
- si le store descendait, appuyer sur la touche DOWN; direction
acquise: la touche DOWN fait descendre le store, la touche UP
fait monter le store.
7. Régler en position O le switch 1.
Essayer d'actionner le store et vérifier qu'il marche selon la
logique décrite. Si la logique est inversée, il est nécessaire effacer
tous les codes mémorisés (voir Switch 3) et répéter les opérations
précédentes.
Pour ajouter un autre émetteur TX2 à la centrale il est nécessaire
avoir à disposition une télécommande précédemment mémorisée
et suivre ce procédé:
1. Seul DUO6/DUO4: appuyer plusieurs fois la touche SELC de
l'émetteur TX1 jusqu'à visualiser par les leds le canal désiré.
2. Seul DUO6/DUO4: appuyer plusieurs fois la touche SELC du
nouvel émetteur TX2 jusqu'à visualiser par les leds le canal à
mémoriser.
3. Positionner le store à mi-hauteur avec le TX1.
4. Régler en position ON le switch 1 de l'émetteur TX1.
5. Appuyer et maintenir appuyé, pour 5 secondes environs, la
touche PROG du TX1 jusqu'à quand le moteur bouge.
6. Relâcher la touche PROG, le moteur s'arrêt.
7. Appuyer la touche UP ou DOWN du TX2 : l'émetteur est
mémorisé avec la même logique du TX1.
Switch 3 : Effacement total de tous les
émetteurs mémorisés
Pour effacer tous les émetteurs mémorisés dans la centrale, il est
nécessaire avoir à disposition une télécommande précédemment
mémorisée et suivre ce procédé :
1. Alimenter seulement l’armoire de commande à
programmer
2. Seul DUO6 / DUO4: appuyer plusieurs fois la touche SELC de
l'émetteur jusqu'à visualiser par les leds le canal mémorisé.
3. Positionner le volet à mi-hauteur.
4. Régler le switch 3 de l'émetteur en position ON.
5. Appuyer et maintenir appuyé la touche PROG de l'émetteur
jusqu'à quand le moteur bouge dans les deux directions pour
1 sec., en indiquant la fin de l'effacement.
6. Relâcher la touche PROG et régler le switch 3 de l'émetteur en
position O .
Pour effacer tous les codes avec un émetteur non-mémorisé
suivre ce procédé :
1. Positionner le volet à mi-hauteur.
2. Enlever l'alimentation au système.
3. Régler le switch 3 d'un émetteur sur la position ON.
4. Appuyer et maintenir appuyée la touche PROG.
5. N'alimenter que la centrale sur laquelle on doit effectuer
l'effacement : après 1 seconde environ le moteur bouge dans
les deux directions en signalant le correct effacement.
6. Relâcher la touche PROG et régler le switch 3 en position O .
PR GRAMMATI N DES F NCTI NS A
TRAVERS DES EMETTEURS DE LA SERIE DU
En utilisant un émetteur de la série DUO, il est possible modifier
les fonctions de la centrale qui contrôle le moteur tubulaire.
DUO est équipé avec un dip-switch à 10 interrupteurs grâce
auquel il est possible modifier les fonctions désirées : mettre sur
ON l'interrupteur correspondant à la fonction qu'on veut
programmer et suivre attentivement le procédé dédié.
ATTENTI N: Tous les autres interrupteurs doivent être sur O .
Switch 1 : mémorisation des émetteurs
Pour mémoriser un émetteur TX1 dans une centrale vierge suivre
ce procédé :
ATTENTI N : le premier émetteur qu'on mémorise détermine la
direction de mouvement du moteur.
1. Alimenter seulement l’armoire de commande à
programmer.
2. Régler en position ON le switch 1 de l'émetteur TX1
3. Seul DUO6/DUO4: appuyer plusieurs fois la touche SELC de
l'émetteur TX1 jusqu'à visualiser par les leds le canal désiré.
4. Appuyer et maintenir appuyé (pour 5 secondes environs) la
touche PROG de l'émetteur TX1 jusqu'à quand le moteur
bouge dans une direction.
5. Relâcher la touche PROG : le moteur s'arrêt.
DIP FUNCTI N
1Mémorisation des émetteurs
3Effacement total de tous les émetteurs mémorisés
7Programmation du niveau d'intervention du capteur
de vent
8Programmation du niveau d'intervention du capteur
de soleil
10 Programmation du niveau de température
2 - 4 - 5
6 - 9 NON UTILISÉ

FRANÇAIS
15
Switch 7: programmation du niveau
d'intervention du capteur de vent
Pour régler le niveau d'intervention du capteur de vent, il faut
avoir à disposition une télécommande précédemment mémorisée
et suivre ce procédé :
ATTENTI N: pour provoquer la fermeture du store, le
capteur de vent doit détecter une valeur supérieure au seuil
donné pour au moins 5 secondes. La fermeture du store
provoquée par le vent fort bloque l'automatisation pour au moins
8 minutes.
1. Seul DUO6 / DUO4: appuyer plusieurs fois la touche SELC de
l'émetteur jusqu'à visualiser par les leds le canal mémorisé.
2. Positionner le volet à mi-hauteur.
3. Régler en position ON le switch 7 de l'émetteur.
4. Appuyer et maintenir appuyée (pour 5 secondes environs) la
touche PROG de l'émetteur jusqu'à quand le moteur bouge à
secousses dans les deux directions en signalant l'entrée en
programmation.
5. Le nombre des secousses du moteur correspond au niveau
actuel :
1 secousse = niveau 1 = 10 Km/h (valeur standard)
2 secousses= niveau 2 = 15 Km/h
3 secousses= niveau 3 = 20 Km/h
4 secousses= niveau 4 = 30 Km/h
5 secousses= niveau 5 = 40 Km/h
6. Pour augmenter le niveau appuyer la touche UP et pour la
réduire appuyer la touche DOWN.
7. Lorsque la centrale reçoit la commande, le nouveau niveau est
visualisé par actionnement du moteur avec le nombre de
secousses correspondantes.
8. Pour sortir de la programmation appuyer STOP : le moteur
visualise encore une fois le niveau réglé et sort de la modalité
programmation.
Switch 8: Programmation du niveau
d'intervention du capteur de soleil
Pour régler le niveau d'intervention du capteur de soleil, il est
nécessaire utiliser une télécommande précédemment mémorisée
et suivre ce procédé :
ATTENTI N: pour provoquer l'ouverture du store, le
capteur de soleil doit détecter une valeur supérieure au seuil
donné pour au moins 8 minutes. Pour en provoquer la fermeture,
le capteur doit détecter une valeur inférieure au seuil donné pour
au moins 8 minutes.
Interruptions de lumière (dues à nuages) de durée inférieure à 1
minute ne sont pas relevées, alors que le minuteur est mis à zéro
quand la durée est supérieure à 1 minute.
1. Seul DUO6 / DUO4: appuyer plusieurs fois la touche SELC de
l'émetteur jusqu'à visualiser par les leds le canal mémorisé.
2. Positionner le volet à mi-hauteur.
3. Régler en position ON le switch 8 de l'émetteur.
4. Appuyer et maintenir appuyée (pour 5 secondes environs) la
touche PROG de l'émetteur jusqu'à quand le moteur bouge à
secousses dans les deux directions en signalant l'entrée en
programmation.
5. Le nombre des secousses du moteur correspond au niveau
actuel :
1 secousse = niveau 1 = 2 Klux
2 secousses= niveau 2 = 5 Klux
3 secousses= niveau 3 = 10 Klux (valeur standard)
4 secousses= niveau 4 = 20 Klux
5 secousses= niveau 5 = 40 Klux
6.Pour augmenter le niveau appuyer la touche UP et pour la
réduire appuyer la touche DOWN.
7. Lorsque la centrale reçoit la commande, le nouveau niveau est
visualisé par actionnement du moteur avec le nombre de
secousses correspondantes.
8. Pour sortir de la programmation appuyer STOP : le moteur
visualise encore une fois le niveau réglé et sort de la modalité
programmation.
Déshabilitation du capteur de soleil
Pour déshabiliter le capteur de soleil suivre ce procédé:
1. Seul DUO6 / DUO4: appuyer plusieurs fois la touche SELC de
l'émetteur jusqu'à visualiser par les leds le canal mémorisé.
2. Positionner le volet à mi-hauteur.
3. Presser la touche STOP et immédiatement après la touche
DOWN (en maintenant pressée la touche STOP) jusqu'à quand
le moteur bouge pour environ une seconde dans les deux
directions, en indiquant l'achèvement du procédé.
Pour ré-habiliter le capteur du soleil il suffit de répéter le procédé
décrit ci-dessus en utilisant la touche UP au lieu de la touche
DOWN.
Switch 10 : Programmation du niveau de
température
La température peut être réglé sur 5 niveaux, sous lesquels le
capteur de soleil ne doit pas ouvrir le store, même si l'intensité de
la lumière a dépassé le niveau réglé par le switch 8.
Cette fonction est particulièrement utile dans les Pays avec climat
rigoureux, où les jours de soleil mais très froids sont fréquents.
Dans ces cas, il n'est pas nécessaire ouvrir les stores, afin de
permettre au soleil de chauffer l'intérieur de la maison.
Pour régler le niveau de température, il est nécessaire utiliser une
télécommande précédemment mémorisé et suivre ce procédé :
1. Seul DUO6 / DUO4: appuyer plusieurs fois la touche SELC de
l'émetteur jusqu'à visualiser par les leds le canal mémorisé.
2. Positionner le volet à mi-hauteur.
3. Régler en position ON le switch 10 de l'émetteur.
4. Appuyer et maintenir appuyée (pour 5 secondes environs) la
touche PROG de l'émetteur jusqu'à quand le moteur bouge à
secousses dans les deux directions en signalant l'entrée en
programmation.
5. Le nombre des secousses du moteur correspond au niveau
actuel :
1 secousse = niveau 1 = capteur déshabilité (valeur standard)
2 secousses= niveau 2 = 0°C
3 secousses= niveau 3 = 5°C
4 secousses= niveau 4 = 10°C
5 secousses= niveau 5 = 15°C
6. Pour augmenter le niveau appuyer la touche UP et pour la
réduire appuyer la touche DOWN.
7. Lorsque la centrale reçoit la commande, le nouveau niveau est
visualisé par actionnement du moteur avec le nombre de
secousses correspondantes.
8. Pour sortir de la programmation appuyer STOP : le moteur
visualise encore une fois le niveau réglé et sort de la modalité
programmation.

FRANÇAIS
16
PR GRAMMATI N DES F NCTI NS A
TRAVERS DES EMETTEURS DE LA SERIE ADLER
En utilisant un émetteur de la série ADLER il est possible de
modifier les fonctions de l’armoire de commande pilotant le
moteur tubulaire.
Mémorisation RAPIDE des émetteurs
Pour mémoriser les télécommandes sur une armoire de
commande vierge pilotant un volet roulant ou un store (NON
plissé), suivre la procédure ci-après :
ATTENTI N : le premier émetteur que l'on mémorise détermine
la direction de mouvement du moteur.
1. Alimenter seulement la armoire de commande à
programmer
2. Presser et maintenir enfoncées les touches UP et DOWN
jusqu’à ce que le moteur commence à démarrer en une
direction
3. Relâcher les touches : le moteur s’arrête
4. Presser sur les touches UP ou DOWN selon la direction dans
laquelle le roulant avançait avant de s’arrêter :
- si le roulant montait appuyer sur la touche UP ; direction
acquise : touche UP fait monter le roulant, touche DOWN
fait descendre le roulant
- si le roulant descendait appuyer sur la touche DOWN ;
direction acquise : touche DOWN fait descendre le roulant,
touche UP fait monter le roulant.
5. Programmation terminée
Pour ajouter d’autres télécommandes, suivre la procédure
suivante :
6. Presser et maintenir enfoncées sur les touches UP et DOWN
d’une télécommande déjà mémorisée jusqu’à ce que le
moteur commence à démarrer en une direction
7. Relâcher les touches : le moteur s’arrête
8. Presser sur la touche UP ou DOWN de la nouvelle
télécommande
ATTENTI N : Si le store est plissé, effectuer la mémorisation de
la première télécommande suivant la procédure « 1.
Mémorisation des émetteurs et sélection de la modalité store ».
Programmation AVANCÉE des fonctions
Pour effectuer la programmation AVANCÉE des fonctions, il est
nécessaire d’enlever le masque de la télécommande et de suivre
soigneusement les procédures dédiées aux différentes fonctions.
Chaque fonction est sélectionnable en tapant un code pendant la
procédure de programmation ; ci-après un tableau récapitulatif
des fonctions avec les différents codes de programmation.
A: code pour activer la programmation
B: indique le canal 1 de la télécommande ; pour le canal 2 les
chiffres sont 12, pour le canal 3 sont 13 et ainsi de suite
jusqu’au canal 6
C: code de la fonction à programmer
Dans l’image suivante on illustre les références des touches et des
DELs utilisées pendant la phase de programmation
UP
ST P
D WN
UP
ST P
D WN
PR G
C DE FNCTI N
A B C
12 11 11 Mémorisation des émetteurs
12 11 13 Effacement total de tous les émetteurs mémorisés
12 11 17 Programmation du niveau d'intervention du
capteur de vent
12 11 18 Programmation du niveau d'intervention du
capteur de soleil
12 11 21 Programmation du niveau de température

FRANÇAIS
17
Mémorisation des émetteurs
Pour mémoriser un émetteur TX1 dans une centrale vierge suivre
ce procédé :
ATTENTI N : le premier émetteur qu'on mémorise détermine la
direction de mouvement du moteur.
1. Alimenter seulement l’armoire de commande à
programmer.
2. Activer la programmation de ADLER en appuyant sur les
touches 4 et 6 jusqu’à ce que les 6 DELs ne s’allument
3. Relâcher les touches et taper le code 12 11 11
Les deux chiffres mis en évidence indiquent le canal de la
télécommande à mémoriser ; pour le canal 1 les chiffres sont
11, pour le canal 2 sont 12, pour le canal 3 sont 13 et ainsi de
suite jusqu’au canal 6.
Une fois le code tapé, la DEL du canal sélectionné clignote
pour 2 minutes après quoi elle sort de la programmation.
4. Presser et maintenir enfoncée la touche PROG de la
télécommande TX1 jusqu’à ce que le moteur ne commence à
démarrer vers une direction.
5. Relâcher la touche PROG : le moteur s’arrête.
6. Appuyer les touches UP ou DOWN selon la direction dans
laquelle le moteur se bougeait avant de s'arrêter :
- si le store montait, appuyer sur la touche UP ; direction
acquise: la touche UP fait monter le store, la touche DOWN fait
descendre le store;
- si le store descendait, appuyer sur la touche DOWN; direction
acquise: la touche DOWN fait descendre le store, la touche UP
fait monter le store.
7. Pour sortir de la programmation, attendre que le LED s’éteigne
ou appuyer sur la touche 1 pour sortir immédiatement.
Essayer d'actionner le store et vérifier qu'il marche selon la
logique décrite. Si la logique est inversée, il est nécessaire effacer
tous les codes mémorisés (voir procédure « 3. Effacement de tous
les émetteurs mémorisés ») et répéter les opérations précédentes.
Pour ajouter d’autres télécommandes suivre les points 6, 7, 8 de
la procédure « Mémorisation RAPIDE des émetteurs »
Effacement total de tous les émetteurs
mémorisés
Pour effacer tous les émetteurs mémorisés dans la centrale, il est
nécessaire avoir à disposition une télécommande précédemment
mémorisée et suivre ce procédé :
1. Alimenter seulement l’armoire de commande à
programmer
2. Activer la programmation de ADLER en appuyant sur les
touches 4 et 6 jusqu’à ce que les 6 DELs ne s’allument
3. Relâcher les touches et taper le code 12 11 13
Les deux chiffres mis en évidence indiquent le canal de la
télécommande mémorisé dans l’armoire de commande ; pour
le canal 1 les chiffres sont 11, pour le canal 2 sont 12, pour le
canal 3 sont 13 et ainsi de suite jusqu’au canal 6.
Une fois le code tapé, la DEL du canal sélectionné clignote
pour 2 minutes après quoi elle sort de la programmation.
4. Positionner le roulant à la mi-hauteur par les touches
UP-STOP-DOWN
5. Presser et maintenir enfoncée la touche PROG de la
télécommande jusqu’à ce que le moteur ne commence à
démarrer vers une direction.
6. Relâcher la touche PROG : le moteur s’arrête
7. Pour sortir de la programmation, attendre que le LED s’éteigne
ou appuyer sur la touche 1 pour sortir immédiatement.
Pour effacer tous les codes avec un émetteur non-mémorisé
suivre ce procédé :
1. Enlever l'alimentation au système.
2. Activer la programmation de ADLER en appuyant sur les
touches 4 et 6 jusqu’à ce que les 6 DELs ne s’allument
3. Relâcher les touches et taper le code 12 11 13
4. Appuyer et maintenir appuyée la touche PROG.
5. Alimenter les armoires de commande sur lesquelles on veut
effectuer l’effacement
6. Presser sur la touche PROG jusqu’à ce que le moteur ne
démarre pour environ 1/2 seconde dans les deux directions,
indiquant la fin de l’effacement
7. Relâcher la touche PROG : le moteur s’arrête
8. Pour sortir de la programmation, attendre que le LED s’éteigne
ou appuyer sur la touche 1 pour sortir immédiatement.
Programmation du niveau d'intervention du
capteur de vent
Pour régler le niveau d'intervention du capteur de vent, il faut
avoir à disposition une télécommande précédemment mémorisée
et suivre ce procédé :
ATTENTI N: pour provoquer la fermeture du store, le
capteur de vent doit détecter une valeur supérieure au seuil
donné pour au moins 5 secondes. La fermeture du store
provoquée par le vent fort bloque l'automatisation pour au moins
8 minutes.
1. Activer la programmation de ADLER en appuyant sur les
touches 4 et 6 jusqu’à ce que les 6 DELs ne s’allument
2. Relâcher les touches et taper le code 12 11 17
Les deux chiffres mis en évidence indiquent le canal de la
télécommande mémorisé dans l’armoire de commande ; pour
le canal 1 les chiffres sont 11, pour le canal 2 sont 12, pour le
canal 3 sont 13 et ainsi de suite jusqu’au canal 6.
Une fois le code tapé, la DEL du canal sélectionné clignote pour
2 minutes après quoi elle sort de la programmation.
3. Appuyer et maintenir appuyée (pour 5 secondes environs) la
touche PROG de l'émetteur jusqu'à quand le moteur bouge à
secousses dans les deux directions en signalant l'entrée en
programmation.
4. Le nombre des secousses du moteur correspond au niveau
actuel :
1 secousse = niveau 1 = 10 Km/h (valeur standard)
2 secousses= niveau 2 = 15 Km/h
3 secousses= niveau 3 = 20 Km/h
4 secousses= niveau 4 = 30 Km/h
5 secousses= niveau 5 = 40 Km/h
5. Relâcher la touche PROG.
6. Pour augmenter le niveau appuyer la touche UP et pour la
réduire appuyer la touche DOWN.
7. Lorsque la centrale reçoit la commande, le nouveau niveau est
visualisé par actionnement du moteur avec le nombre de
secousses correspondantes.
8. Pour sortir de la programmation appuyer STOP : le moteur
visualise encore une fois le niveau réglé et sort de la modalité
programmation.
9. Pour sortir de la programmation, attendre que le LED s’éteigne
ou appuyer sur la touche 1 pour sortir immédiatement.

FRANÇAIS
18
Programmation du niveau d'intervention du
capteur de soleil
Pour régler le niveau d'intervention du capteur de soleil, il est
nécessaire utiliser une télécommande précédemment mémorisée
et suivre ce procédé :
ATTENTI N: pour provoquer l'ouverture du store, le
capteur de soleil doit détecter une valeur supérieure au seuil
donné pour au moins 8 minutes. Pour en provoquer la fermeture,
le capteur doit détecter une valeur inférieure au seuil donné pour
au moins 8 minutes.
Interruptions de lumière (dues à nuages) de durée inférieure à 1
minute ne sont pas relevées, alors que le minuteur est mis à zéro
quand la durée est supérieure à 1 minute.
1. Activer la programmation de ADLER en appuyant sur les
touches 4 et 6 jusqu’à ce que les 6 DELs ne s’allument
2. Relâcher les touches et taper le code 12 11 18
Les deux chiffres mis en évidence indiquent le canal de la
télécommande mémorisé dans l’armoire de commande ; pour
le canal 1 les chiffres sont 11, pour le canal 2 sont 12, pour le
canal 3 sont 13 et ainsi de suite jusqu’au canal 6.
Une fois le code tapé, la DEL du canal sélectionné clignote
pour 2 minutes après quoi elle sort de la programmation.
3. Appuyer et maintenir appuyée (pour 5 secondes environs) la
touche PROG de l'émetteur jusqu'à quand le moteur bouge à
secousses dans les deux directions en signalant l'entrée en
programmation.
4. Le nombre des secousses du moteur correspond au niveau actuel:
1 secousse = niveau 1 = 2 Klux
2 secousses= niveau 2 = 5 Klux
3 secousses= niveau 3 = 10 Klux (valeur standard)
4 secousses= niveau 4 = 20 Klux
5 secousses= niveau 5 = 40 Klux
5. Relâcher la touche PROG.
6. Pour augmenter le niveau appuyer la touche UP et pour la
réduire appuyer la touche DOWN.
7. Lorsque la centrale reçoit la commande, le nouveau niveau est
visualisé par actionnement du moteur avec le nombre de
secousses correspondantes.
8. Pour sortir de la programmation appuyer STOP : le moteur
visualise encore une fois le niveau réglé et sort de la modalité
programmation.
9. Pour sortir de la programmation, attendre que le LED s’éteigne
ou appuyer sur la touche 1 pour sortir immédiatement.
Programmation du niveau de température
La température peut être réglé sur 5 niveaux, sous lesquels le
capteur de soleil ne doit pas ouvrir le store, même si l'intensité de
la lumière a dépassé le niveau réglé.
Cette fonction est particulièrement utile dans les Pays avec climat
rigoureux, où les jours de soleil mais très froids sont fréquents.
Dans ces cas, il n'est pas nécessaire ouvrir les stores, afin de
permettre au soleil de chauffer l'intérieur de la maison.
Pour régler le niveau de température, il est nécessaire utiliser une
télécommande précédemment mémorisé et suivre ce procédé :
1. Activer la programmation de ADLER en appuyant sur les
touches 4 et 6 jusqu’à ce que les 6 DELs ne s’allument
2. Relâcher les touches et taper le code 12 11 21
Les deux chiffres mis en évidence indiquent le canal de la
télécommande mémorisé dans l’armoire de commande ; pour
le canal 1 les chiffres sont 11, pour le canal 2 sont 12, pour le
canal 3 sont 13 et ainsi de suite jusqu’au canal 6.
Une fois le code tapé, la DEL du canal sélectionné clignote
pour 2 minutes après quoi elle sort de la programmation.
3. Appuyer et maintenir appuyée (pour 5 secondes environs) la
touche PROG de l'émetteur jusqu'à quand le moteur bouge à
secousses dans les deux directions en signalant l'entrée en
programmation.
4. Le nombre des secousses du moteur correspond au niveau
actuel:
1 secousse = niveau 1 = capteur déshabilité (valeur standard)
2 secousses= niveau 2 = 0°C
3 secousses= niveau 3 = 5°C
4 secousses= niveau 4 = 10°C
5 secousses= niveau 5 = 15°C
5. Relâcher la touche PROG.
6. Pour augmenter le niveau appuyer la touche UP et pour la
réduire appuyer la touche DOWN.
7. Lorsque la centrale reçoit la commande, le nouveau niveau est
visualisé par actionnement du moteur avec le nombre de
secousses correspondantes.
8. Pour sortir de la programmation appuyer STOP : le moteur
visualise encore une fois le niveau réglé et sort de la modalité
programmation.
7. Pour sortir de la programmation, attendre que le LED s’éteigne
ou appuyer sur la touche 1 pour sortir immédiatement.
Other manuals for CU1
1
Table of contents
Languages:
Other V2 Control Unit manuals