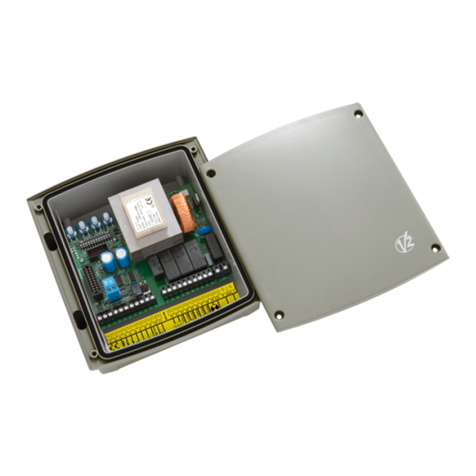
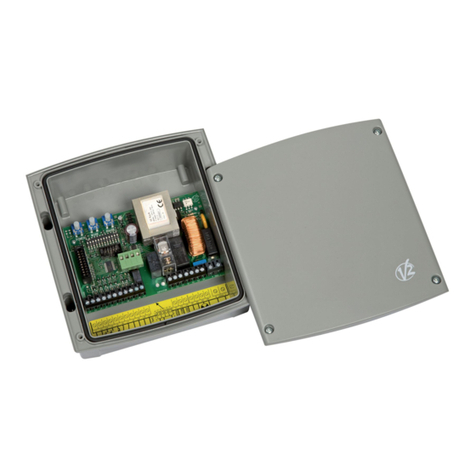
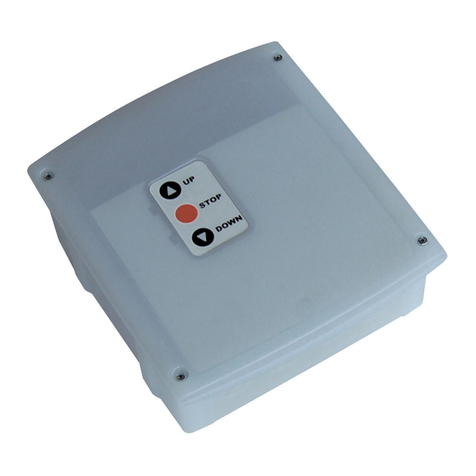
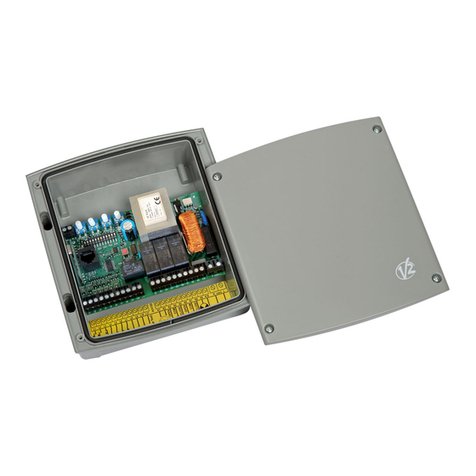
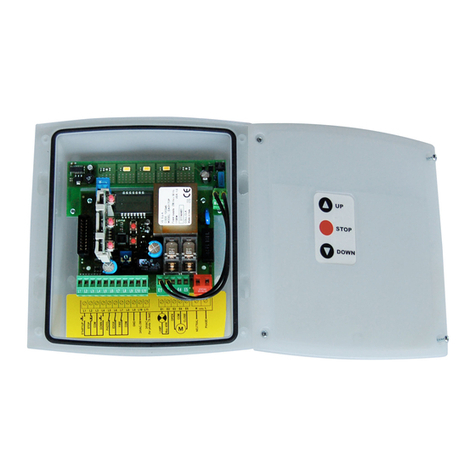
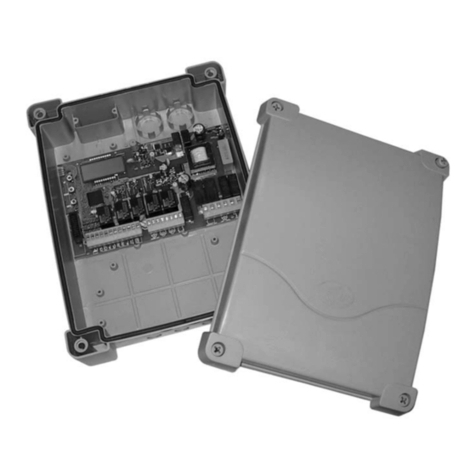
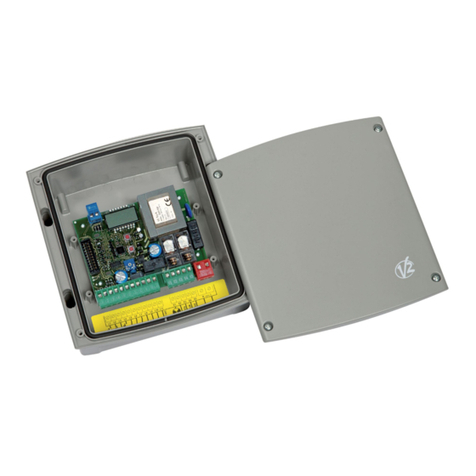
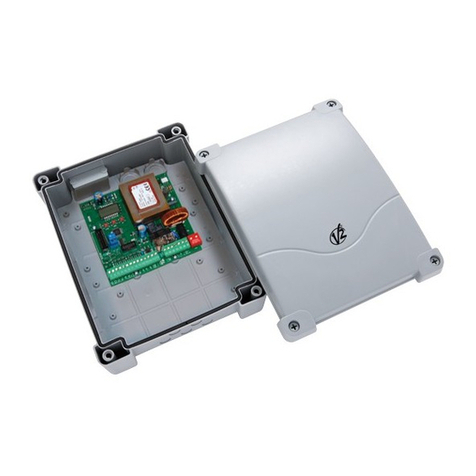
V2 CU3 User manual

Value moves the world
IL 238
EDIZ. 06/04/2017
CU3
I
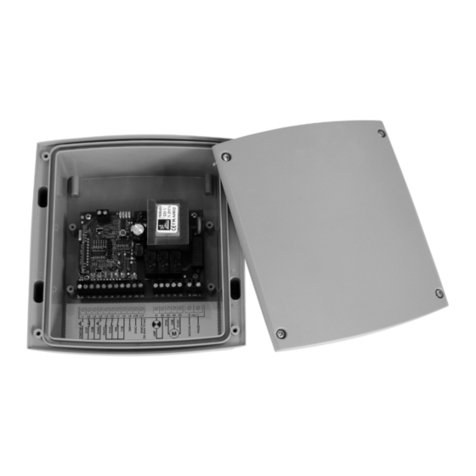
CENTRALE DI COMANDO DA
ESTERNO PER AUTOMAZIONI DI
TENDE O TAPPARELLE
GB
EXTERNAL CONTROL UNIT FOR
THE AUTOMATION OF AWNINGS
OR ROLLING SHUTTERS
F
ARMOIRE DE COMMANDE
D’EXTÉRIEUR POUR
L’AUTOMATISATION DE STORES
ET VOLETS ROULANTS
E
CUADRO DE MANIOBRAS
PARA TOLDOS Y PERSIANAS
DOMESTICAS CON MOTOR
TUBULAR
D
AUSSENSTEUERUNG ZUR
AUTOMATION VON MARKISEN
UND ROLLLÄDEN
NL
EXTERNE BESTURINGSEENHEID
VOOR DE AUTOMATISERING VAN
ZONWERINGEN OF ROLLUIKEN

ITALIANO
- 16 -

ENGLISH
- 17 -
mIMPORTANT REMARKS
• Attention: for people safety it is important to follow carefully
the instructions. Keep the instructions.
• Important safety instructions for the installation. Attention: a
wrong installation can cause serious accidents. Follow carefully
the installation instructions.
• This device can be installed only from qualified persons and
can be used only inside a tubular motor.
• As regards insulation, the features of push buttons must be
suitable for electrical installations (230VAC / 120VAC).
• In order to protect the device, the installer must provide for
a magnetotermical differential switch (separation among the
contacts: at least 3 mm), ensuring the omnipolar sectioning
from the power supply.
• In case of damages due to incorrect installation, the wiring
provided together with this device can be replaced only by the
manufacturer or a qualified person.
• For correct insertion of the (optional) radio receiver, please
refer to the figure shown on the electrical connections page.
EU DECLARATION OF CONFORMITY
V2 S.p.A. hereby declare that CU3 products conform to the
essential requirements established in the following directives:
• 2014/30/UE (EMC Directive)
• 2014/35/UE (Low Voltage Directive)
• 2014/53/UE (Radio Directive)
• ROHS2 2011/65/CE
Racconigi, lì 01/06/2016
V2 S.p.A. legal representative.
Giuseppe Pezzetto
DESCRIPTION
The unit can control one 230 VAC asynchronous motor used in
systems for screens or shades.
The motor can be operated by means of push buttons connected
to the terminal board, or by means of transmitters.
Main features:
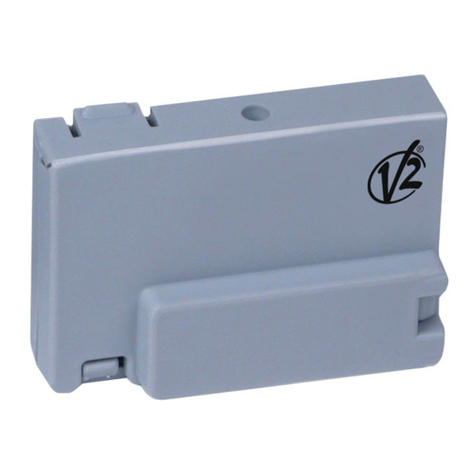
• Plug-in 434.15 MHz radio receiver (OPTIONAL cod. 11B037),
compatible with PROTEO / DUO / ARTEMIS / ADLER / DEV-T1
range transmitters.
• The ability to memorise up to 38 transmitters.
• The WIND, SUN and TEMPERATURE sensor levels can be
adjusted using a transmitter or the LEDs mounted on the card.
• Input for WIND / MISTRAL / METEO / HURRICANE sensors.
• Input for connecting a closure command generated by an
antitheft device
• Dip switches for setting the main functions.
• Input for sun sensor ON/OFF.
TECHNICAL CHARACTERISTICS:
Power supply: 230 VAC -50 Hz
Max. motor power: 500 W
Fuse rating: 5 A
Protection level: IP55
Working temperature: 20 ÷ +60 °C
DESCRIPTION OF THE PUSH BUTTONS
AND LEDS
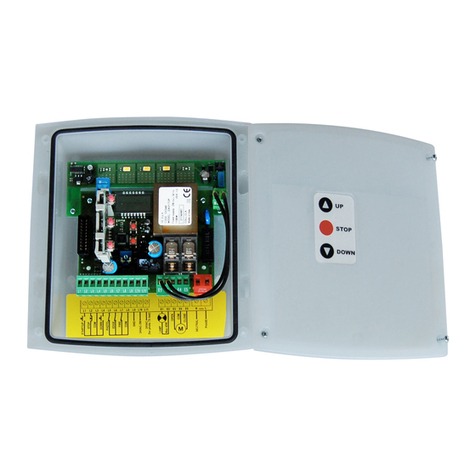
The card has 4 push buttons + 10 LEDs:
1 push button key for selecting the motor (MOT)
1 push button key for selecting the sensor (SENS)
2 push button keys for selecting the sensor level (+ and -)
1 LED (MOT1) indicates entering programming mode
4 LEDS for displaying sensor status (WIND, SUN, RAIN, TEMP)
5 LEDS for displaying sensor levels (1, 2, 3, 4, 5)
The MOT key: for activating programming mode.
SENS key: this is used to select the sensor for the levels to be
altered
The - button: this allows reducing the sensor level
The + key: this allows raising the sensor level
WORKING TIME OF MOTOR
The control unit stops the motor movement after 2 minutes: in
case of limit switches malfunction this “time out” avoids the
motor overheating.

ENGLISH
- 18 -
1 ANT -Antenna
2 COM - Common (-)
3 SUN ON/OFF - N.A. input for deactivating the sun sensor
• entry closed = sensor disabled
• entry open = sensor enabled
4 C1 - Motor 1 open WARNING: the operation of these
inputs depends on the operational
logic set. See the paragraph on
OPERATIONAL LOGIC
5 C2 - Motor 1 close
6 ALARM - N.A. input for connecting a closure control provided
by an antitheft device when activated.
PLEASE NOTE: If antitheft device activation controls an opening
phase, move this connection to terminal 7
8 SENSOR INPUT - WIND / MISTRAL /
METEO / HURRICANE sensor input
9Motor 1 open
10 Motor 1 common
11 Motor 1 close
NNeutral supply
LPhase supply
7 - 12 -
13 - 14
NOT USED
ELECTRICAL CONNECTIONS
123456789101112 13 14 NL
N
F = 5A
M1
L
SUN ON/OFF
COM
ANT
C1
C2
OPEN
SENSOR INPUT
COMMON
CLOSE
ALARM
1
WIND
+
-
SENS
MOT
SUN
RAIN
TEMP
SENSOR LEVEL
2
3
4
5
1
MOT1
2
DIP
8910 11 12 13 14 N
M1
L
OPEN
SENSOR INPUT
COMMON
CLOSE
L
METEO / HURRICANE
N
8910 11 12 13 14 N
M1
L
OPEN
SENSOR INPUT
COMMON
CLOSE
WIND / MISTRAL
WARNING: insert the
(optional) receiver as
shown in the figure.
Incorrect insertion can
seriously damage the
receiver.

ENGLISH
- 19 -
SETTING THE OPERATIONAL LOGIC
By simply altering the dip-switches located on the card. it is
possible for the control unit to use several different operational
logic states.
The functions associated with each dip-switch are described
below.
SENSOR LEVELS
The sensors may be set to different levels depending on the
specific needs of each installation. The sensor level may be
examined by means of the 5 dedicated LEDs located on the card.
The levels shown by means of the LEDs and the corresponding
real parameters are shown below (the default values are shown in
boxes):
SETTING SENSOR LEVELS USING THE
KEYS ON THE CONTROL UNIT
To alter the sensor level for motor 1, proceed as follows:
1. Press and release the MOT key: the MOT1 LED lights up
2. Press and release the SENS key until the LED relating to the
desired sensor lights up.
3. The 5 dedicated LEDs show the current sensor level.
4. Press the + key to increase the level
5. Press the - key to reduce the level
6. Press the SENS key to change sensors
7. To exit programming mode, press the SENS key once after
having set the temperature sensor level, or wait for 4 seconds
without pressing any of the keys: the LEDs indicating the
sensors and the levels are turned off.
WARNING: if no other buttons are pressed for 4 seconds, the
control unit exits from programming mode.
INTERVENTION OF THE WIND SENSOR
Whenever the wind speed exceeds the set threshold value for at
least 5 seconds, the control unit closes the shade and blocks the
controls (no further commands accepted) for 8 minutes.
INTERVENTION OF THE SUN SENSOR
If the light intensity exceeds the set threshold value for at least 8
minutes, the control unit opens the shade.
If the light intensity drops below the set threshold value for at
least 8 minutes, the control unit closes the shade. The keypad
or remote control commands have priority over the sun sensor.
Operation of the sun sensor may be disabled by means of a switch
connected to input 3 (SUN ON/OFF).
UP / DOWN operation
The commands subsequent to start on inputs C1 (open) and C2
(close) cause the following sequence of operations:
STEP by STEP operation
Successive start commands result in the following events, in order:
open - stop - close - stop...
Control inputs:
C1: motor 1 control
C2: NOT USED
Automation blocked with antitheft device activated
Activation of the antitheft device causes the closure of the ALARM
contact (terminal 6 or 7), causing the immediate closure of the
automation system.
Until the ALARM contact is opened, the control unit does not
respond to any commands and keeps the motor in the blocked
state.
Automation manoeuvrable with antitheft device activated
Activation of the antitheft device causes the closure of the ALARM
contact (terminal 6 or 7), causing the immediate closure of the
automation system.
It is possible to control the motor, even if the ALARM contact
remains closed.
DIP DESCRIPTION
1ON UP / DOWN operation
OFF STEP by STEP operation
2
ON Automation blocked with antitheft device
activated
OFF Automation manoeuvrable with antitheft device
activated
OPENING STOP
C1 C1
C1 C1
C2 C2
C2 C2
STOPCLOSING
STAND-BY
Leds ON Wind
sensor
Sun
sensor
Temperature
sensor
1 10 km/h 2 klux Disabled
2 15 km/h 5 klux 0° C
3 20 km/h 10 klux 5° C
4 30 km/h 20 klux 10° C
5 40 km/h 40 klux 15° C

ENGLISH
- 20 -
STORAGE OF THE TRANSMITTERS
PROTEO / DUO
Transmitters may be memorised in two different ways:
1. By means of the MOT push-button
2. By means of the transmitter (PROG push-button)
mWARNING: The first transmitter has to be memorized
following the procedure (storage by push-button MOT)
STORAGE BY MEANS OF THE
MOT PUSH-BUTTON
1. Set switch 1 on the transmitter to ON
2. Multichannel transmiter only: press the SELC button on the
transmitter several times until the LEDs show the desired
channel
3. Press and then release the MOT key on the control unit: the
MOT1 LED lights up.
4. Transmit using the PROG button of the remote control device
until the motor starts.
5. Release the button on the remote control device.
6. Press the UP button of the motor raised the shade, or the
DOWN button if the motor lowered the shade.
7. Programming completed.
mWARNING: The first transmitter memorised determines the
direction of movement of the motor. If the logic is altered, it is
necessary to delete all codes stored and repeat the previous steps
(see paragraph DELETING TRANSMITTERS).
STORAGE BY MEANS OF THE
PROG PUSH-BUTTON
To add another transmitter TX2 to the control unit it is
necessary to use a remote control previously stored (TX1)
and proceed as follows:
1. Multichannel transmiter only: press several times the key SELC
of the transmitter TX1 until displayed the channel stored (by
the leds).
2. Multichannel transmiter only: press several times the key SELC
of the new transmitter TX2 until display the channel to be
stored (by the leds).
3. Take the roll-up shutter to half its way with TX1.
4. Set to ON the switch 1 of the transmitter TX1.
5. Press and keep pressed for about 5 seconds the key PROG of
the TX1 until the motor starts to move.
6. Release the key PROG, the motor stops.
7. Press the key UP or DOWN of the TX2: the transmitter is
stored with the same logic of the TX1.
DIP-SWITCHES
PROG
TRANSMITTERS OF THE RANGE
PROTEO / DUO
Using a transmitter of the range PROTEO / DUO it is possible
changing the functions of the control unit controlling the tubular
motor.
The transmitter is equipped with a 10 switches dip-switch thanks
to which it is possible to change the desired functions: set on ON
the switch corresponding to the function required and follow
carefully the dedicated procedure.
WARNING: all the other switches have to be set on OFF
SWITCH FUNCTION
1Storage of the transmitters
3Deletion of all the stored transmitters
7Storing of the level of intervention of the wind
sensor
8Programming of the level of intervention of the sun
sensor
10 Programming of the level of temperature
2 - 4 - 5
6 - 9
NOT USED

ENGLISH
- 21 -
DELETING ALL TRANSMITTERS
MEMORISED
Transmitters may be deleted in two different ways:
1. By means of the MOT push-button
2. By means of the transmitter (PROG push-button)
DELETING BY MEANS OF THE
MOT PUSH-BUTTON
1. Remove the power supply to the control unit.
2. Press and hold the MOT key while power is restored to the
control unit.
3. After 2 seconds, release the MOT key: the MOT1 LED flash for
one second to indicate the delete process has been successful.
DELETING BY MEANS OF THE
PROG PUSH-BUTTON
To delete all the transmitters stored on the control unit it
is necessary using a remote control previously stored and
proceed as follows:
1. Power only the control unit to be programmed
2. Multichannel transmiter only: press several times the button
SELC on the transmitter until displayed the channel stored
(by the leds)
3. Position the roll-up shutter at the mid-height.
4. Set on ON the switch 3 of the transmitter.
5. Press and keep pressed the button PROG of the transmitter
until the motor moves in both the ways for 1 second, showing
the end of deletion.
6. Release the button PROG and set on OFF the switch 3 of the
transmitter.
To delete all the codes by means of a transmitter non-
stored, proceed as follows:
1. Position the retractable at the mid-height.
2. Switch off power supply of the system.
3. Set on ON the switch 3 of a transmitter.
4. Press and keep pressed the button PROG.
5. Supply power only to the control unit on which to make the
deletion: after about 1 second the motor moves in both the
ways showing the correct deletion.
6. Release the button PROG and set on OFF the switch 3.
STORING OF THE LEVEL OF
INTERVENTION OF THE WIND SENSOR
(SWITCH 7)
mWARNING: to make the awning close, the wind sensor has
to detect a value higher then the set threshold value for at least
5 seconds. The automation is blocked for 8 minutes when the
awning is closed because of strong wind.
To set the level of intervention of the wind sensor it is
necessary to use a remote control previously stored and
proceed as follows:
1. Multichannel transmiter only: press several times the button
SELC of the transmitter until shown by leds the channel
stored.
2. Position the roll-up shutter at the mid-height
3. Set on ON the switch 7 of the transmitter.
4. Press and keep pressed (for 5 about seconds) the button PROG
of the transmitter until the motor moves jerkily in both the
ways showing that it enters the storing.
5. The number of jerks made by the motor corresponds to the
level currently set:
1 jerk = level 1 = 10 Km/h
2 jerks = level 2 = 15 Km/h
3 jerks = level 3 = 20 Km/h
4 jerks = level 4 = 30 Km/h (default)
5 jerks = level 5 = 40 Km/h
6. To increase the level press button UP, to decrease it press
button DOWN.
7. As soon as the control unit receives the control, it shows the
new level moving the motor with the corresponding number
of jerks.
8. To exit the programming press STOP: the motor displays again
the set level and exits.

ENGLISH
- 22 -
PROGRAMMING OF THE LEVEL OF
INTERVENTION OF THE SUN SENSOR
(SWITCH 8)
mWARNING: to make the awning open the sun sensor has
to detect a value higher then the set threshold value for at least 8
minutes. To make it close, the sensor has to detect a value lower
then the set threshold value for at least 8 minutes.
Interruptions of light (due to clouds) shorter than a minute are
not detected, while the 8-minute timer is set at zero when longer
than one minute.
To set the level of intervention of the sun sensor it is
necessary to use a remote control previously stored and
proceed as follows:
1. Multichannel transmiter only: press several times the button
SELC of the transmitter until shown by leds the channel
stored.
2. Position the roll-up shutter at the mid-height
3. Set on ON the switch 8 of the transmitter.
4. Press and keep pressed (for 5 about seconds) the button PROG
of the transmitter until the motor moves jerkily in both the
ways showing that it enters the storing.
5. The number of jerks made by the motor corresponds to the
level currently set:
1 jerk = level 1 = 2 Klux
2 jerks = level 2 = 5 Klux
3 jerks = level 3 = 10 Klux (default)
4 jerks = level 4 = 20 Klux
5 jerks = level 5 = 40 Klux
6. To increase the level press button UP, to decrease it press
button DOWN.
7. As soon as the control unit receives the control, it shows the
new level moving the motor with the corresponding number
of jerks.
8. To exit the programming press STOP: the motor displays again
the set level and exits.
9. Set on OFF the switch 8
To disabling the sun sensor proceed as follows:
1. Multichannel transmiter only: press several times the button
SELC of the transmitter until shown by leds the channel
stored.
2. Position the roll-up shutter at the mid-height
3. Press the key STOP and immediately after the key DOWN
(keeping pressed the key STOP) until the motor moves for
about one second in both the ways, indicating that the
procedure has been finished.
To enable again the sun sensor it is enough to repeat
the procedure above using the key UP instead of the key
DOWN.
PROGRAMMING OF THE LEVEL OF
TEMPERATURE (SWITCH 10)
The temperature can be set on 5 levels, under which the sun
sensor must not open the awning, even if the light intensity has
exceeded the level set by switch 8.
This function is particularly useful in Countries with wintry
weather, where sunny but very cold days are frequent. In this case,
it is not necessary to open the awnings, to let the sun warm the
inner rooms.
To set the level of temperature it is necessary to use a
remote control previously stored and proceed as follows:
1. Multichannel transmiter only: press several times the button
SELC of the transmitter until shown by leds the channel
stored.
2. Position the roll-up shutter at the mid-height
3. Set on ON the switch 10 of the transmitter.
4. Press and keep pressed (for 5 about seconds) the button PROG
of the transmitter until the motor moves jerkily in both the
ways showing that it enters the storing.
5. The number of jerks made by the motor corresponds to the
level currently set:
1 jerk = level 1 = sensor disabled (default)
2 jerks = level 2 = 0°C
3 jerks = level 3 = 5°C
4 jerks = level 4 = 10°C
5 jerks = level 5 = 15°C
6. To increase the level press button UP, to decrease it press
button DOWN.
7. As soon as the control unit receives the control, it shows the
new level moving the motor with the corresponding number
of jerks.
8. To exit the programming press STOP: the motor displays again
the set level and exits.
9. Set on OFF the switch 10

ENGLISH
- 23 -
ARTEMIS SERIES TRANSMITTERS
Using a transmitter of the ARTEMIS series you can change the
functions of the control unit that drives the tubular motor.
L1
UP
STOP
DOWN
SUN ON
SUN OFF
C
UP
STOP
DOWN
UP
STOP
DOWN
UP
STOP
DOWN
L1 L2
L1 L2 L3 L4 L5 L6
FAST PROGRAMMING
RAPID TRANSMITTER DATA STORAGE
mCAUTION: The data storage of the first transmitter
determines the direction of motion of the motor.
mCAUTION: If the awning has a casing carry out the data
storage of the first remote control by following the procedure
“TRANSMITTER DATA STORAGE”
To store your remote controls on a virgin control unit which
drives a shutter or an awning (WITHOUT casing) proceed as
follows:
1. Supply power only to the control unit to be programmed
2. Activate the programming by following one of these
procedures
Artemis with 1 channel:
• Press and hold down the UP+DOWN keys until the motor
starts to move in one direction
Artemis with 2 channels:
• Press the UP+DOWN keys of one of the two channels until
the motor starts to move in one direction
Artemis with 6 channels:
• Select the channel to be programmed with the C key
• Press the UP+DOWN keys until the motor starts to move in
one direction
3. Release the keys: the motor stops
4. Press the UP or DOWN keys according to the direction in
which the roll-up shutter was moving before it stopped:
- if the roll-up shutter was being raised press the UP key;
direction obtained: the UP key raises the roll-up shutter,
the DOWN key lowers the roll-up shutter
- if the roll-up shutter was being lowered press the DOWN
key; direction obtained: the DOWN key lowers the roll-up
shutter, the UP key raises the roll-up shutter.
5. Programming is complete
To add additional remote controls, proceed as follows:
6. Press and hold down the UP+DOWN keys of a remote control
which has already been programmed until the motor starts to
move in one direction
7. Release the keys: the motor stops
8. Press the UP or DOWN key of the new remote control
ACTIVATION OF THE SUN SENSOR ON A
CONTROL UNIT
Press and hold down the STOP+UP keys until the motor confirms
the operation by moving in both directions.
DEACTIVATION OF THE SUN SENSOR ON A
CONTROL UNIT
Press and hold down the STOP+DOWN keys until the motor
confirms the operation by moving in both directions.

ENGLISH
- 24 -
TRANSMITTER DATA STORAGE
mCAUTION: The data storage of the first transmitter
determines the direction of motion of the motor.
To store a transmitter on a virgin control untit proceed as
follows:
1. Supply power only to the control unit to be programmed
2. Activate the ARTEMIS programming
3. Press the UP or DOWN key until the LED 1 lights up with solid
light and the others flash.
4. Press the UP+DOWN keys until the motor starts to move in
one direction
5. Release the keys, the motor stops
6. Press the UP or DOWN keys according to the direction in
which the roll-up shutter was moving before it stopped:
- if the roll-up shutter was being raised press the UP key;
direction obtained: the UP key raises the roll-up shutter,
the DOWN key lowers the roll-up shutter
- if the roll-up shutter was being lowered press the DOWN
key; direction obtained: the DOWN key lowers the roll-up
shutter, the UP key raises the roll-up shutter.
7. To exit the programming mode press the STOP key
8. Try to operate the roll-up shutter and verify that it works
according to the logic described above. If the logic is reversed
it is necessary to delete all the codes stored (see “DELETION
OF ALL MEMORIZED TRANSMITTERS”) and repeat the steps
above.
To add other remote controls follow steps 6, 7, 8 of the
procedure “RAPID TRANSMITTER DATA STORAGE”
DELETION OF ALL MEMORIZED
TRANSMITTERS
To delete all codes stored with an Artemis proceed as
follows:
1. Supply power only to the control unit to be programmed
2. Activate the ARTEMIS programming
3. Press the UP or DOWN keys until the LED 3 lights up with solid
light and the others flash
4. Press and hold down the UP+DOWN keys until the motor
moves in both directions which confirms the correct deletion
of the codes.
5. Release the keys
6. To exit the programming mode press the STOP key
To delete all codes NOT stored with an Artemis proceed as
follows:
1. Cut the power to the motor on which to delete all the codes
2. Activate the ARTEMIS programming
3. Press the UP or DOWN keys until the LED 3 lights up with solid
light
4. Press and hold down the UP+DOWN keys
5. Power the motor and wait until the motor moves in both
directions wich confirms the correct deletions of the codes
6. To exit the programming mode press the STOP key
ADVANCED PROGRAMMING
To perform ADVANCED programming it is necessary to activate
the programming by following one of the following procedures.
ACTIVATION OF PROGRAMMING
Artemis with 1 channel:
• Press the STOP+UP+DOWN keys until the 6 LEDs light up
• Release the keys: the programming remains active for 30
seconds during which the LEDs flash
Artemis with 2 channels:
• Press the STOP+UP+DOWN keys of the channel to be
programmed until the LEDs light up
• Release the keys: the programming remains active for 30
seconds during which the LEDs flash
Artemis with 6 channels:
• Select the channel to be programmed with the C key
• Press the STOP+UP+DOWN keys until the 6 LEDs light up
• Release the keys: the programming remains active for 30
seconds during which the LEDs flash
Note: this procedure will be the same for the programming
of all functions and will not be repeated in the following
paragraphs
List of available functions:
1. Transmitter memorization and sunshade/roll-up shutter mode
selection
2. Deletion of all memorized transmitters
3. Programming the wind sensor intervention threshold
4. Programming the sun sensor intervention threshold
5. Programming the temperature level

ENGLISH
- 25 -
PROGRAMMING THE WIND SENSOR
INTERVENTION THRESHOLD
mCAUTION: to trigger the closing of the sunshade, the wind
sensor must detect a value greater than the set threshold for at
least 5 seconds. The closure of the sunshade caused by strong
wind stops the automated system for 8 minutes.
To set the wind sensor intervention threshold, it is
necessary to use a remote control previously stored and
proceed as follows:
1. Supply power only to the control unit to be programmed
2. Activate the ARTEMIS programming
3. Press the UP or DOWN keys until the LEDs 1+2 light up with
solid light and the others flash
4. Press the UP+DOWN keys until the motor moves in jerks which
confirms it is entering the programming phase.
The number of jerks made by the motor corresponds to the
level currently set:
1 jerk = level 1 = 10 Km/h
2 jerks = level 2 = 15 Km/h
3 jerks = level 3 = 20 Km/h
4 jerks = level 4 = 30 km/h (default value)
5 jerks = level 5 = 40 Km/h
5. Release the keys
6. To increase the level press the UP key and to decrease it
press the DOWN key, as soon as the control unit receives the
command, it shows the new level by operating the motor with
a corresponding number of jerks
7. When the desired value is reached, press the STOP button: the
control unit will show the set value again to confirm
8. To exit the programming mode press the STOP key
PROGRAMMING THE SUN SENSOR
INTERVENTION THRESHOLD
mCAUTION: to trigger the opening of the sunshade, the sun
sensor must detect a value greater than the set threshold for at
least 8 minutes. To trigger the closing, the sensor must detect a
value below the set threshold for at least 8 minutes.
Interruptions of light (due to clouds) shorter than 1 minute are
not detected, while if they exceed 1 minute, the 8-minute timer is
reset.
To set the sun sensor intervention threshold, it is necessary
to use a remote control previously stored and proceed as
follows:
1. Supply power only to the control unit to be programmed
2. Activate the ARTEMIS programming
3. Press the UP or DOWN keys until the LEDs 1+2 light up with
solid light and the others flash
4. Press the UP+DOWN keys until the motor moves in jerks which
confirms it is entering the programming phase.
The number of jerks made by the motor corresponds to the
level currently set:
1 jerk = level 1 = 2 klux
2 jerks = level 2 = 5 klux
3 jerks = level 3 = 10 klux (default value)
4 jerks = level 4 = 20 klux
5 jerks = level 5 = 40 klux
5. Release the keys
6. To increase the level press the UP key and to decrease it
press the DOWN key, as soon as the control unit receives the
command, it shows the new level by operating the motor with
a corresponding number of jerks
7. When the desired value is reached, press the STOP button: the
control unit will show the set value again to confirm
8. To exit the programming mode press the STOP key
PROGRAMMING THE TEMPERATURE LEVEL
This function allows you to adjust the temperature to 5 levels,
below which the sun sensor must not open the sunshade, even if
the light intensity exceeds the level set.
This feature is particularly useful in countries with a cold climate,
where sunny dyas are frequent but very cold. In these situations,
it is not necessary to open the sunshade that would prevent the
sunlight from heating the indoor environment.
To set the temperature level, it is necessary to use a remote
control previously stored and proceed as follows:
1. Supply power only to the control unit to be programmed
2. Activate the ARTEMIS programming
3. Press the UP or DOWN keys until the LEDs 1+2 light up with
solid light and the others flash
4. Press the UP+DOWN keys until the motor moves in jerks which
confirms it is entering the programming phase.
The number of jerks made by the motor corresponds to the
level currently set:
1 click = level 1 = sensor disabled (default value)
2 clicks = level 2 = 0°C
3 clicks = level 3 = 5°C
4 clicks = level 4 = 10°C
5 clicks = level 5 = 15°C
5. Release the keys
6. To increase the level press the UP key and to decrease it
press the DOWN key, as soon as the control unit receives the
command, it shows the new level by operating the motor with
a corresponding number of jerks
7. When the desired value is reached, press the STOP button: the
control unit will show the set value again to confirm
8. To exit the programming mode press the STOP key

ENGLISH
- 26 -
TRANSMITTERS OF THE RANGE
ADLER
Using a transmitter of the range ADLER it is possible changing the
functions of the control unit controlling the tubular motor.
STORAGE OF THE TRANSMITTERS
ADLER
Transmitters may be memorised in two different ways:
1. By means of the MOT push-button
2. By means of the transmitter (PROG push-button)
mWARNING: The first transmitter has to be memorized
following the procedure (storage by push-button MOT)
STORAGE BY MEANS OF THE
MOT PUSH-BUTTON
1. Power only the control unit to be programmed
2. Activate ADLER programming by holding down buttons 4 and
6 until the 6 LEDs turn on
3. Release the buttons and enter the code 12 11 11
The two highlighted digits indicate the remote control channel
to be recorded; for channel 1 the digits are 11, for channel
2 the digits are 12, for channel 3 the digits are 13, etc up to
channel 6. Once the codes have been entered, the LED of the
selected channel will blink for 2 minutes after which it exits
programming.
4. Press and then release the MOT key on the control unit: the
MOT1 LED lights up.
5. Press and hold down the PROG button of the TX1 remote
control until the motor starts to move in a direction
6. Release the PROG button: the motor will stop
7. Press the UP button of the motor raised the shade, or the
DOWN button if the motor lowered the shade.
8. Programming completed.
mWARNING: The first transmitter memorised determines the
direction of movement of the motor. If the logic is altered, it is
necessary to delete all codes stored and repeat the previous steps
(see paragraph DELETING TRANSMITTERS).
STORAGE BY MEANS OF THE
PROG PUSH-BUTTON
To add other remote controls, proceed as follows:
1. Press and hold down the UP and DOWN buttons of a remote
control that is already recorded until the motor starts to move
in a direction
2. Release the buttons: the motor will stop
3. Press the UP or DOWN button on the new remote control
ADVANCED PROGRAMMING
To perform ADVANCED programming it is necessary to remove
the cover plate of the remote control and carefully follow the
dedicated procedures for the various functions.
Each function can be selected by entering a code during the
programming procedure; following is a summary table of the
functions with their relative programming codes.
A: Code to activate programming
B: Indicates channel 1 of the remote control; for channel 2 the
number is 12, for channel 3 the number is 13, etc. up to
channel 6
C: Code of the function to be programmed
The pictures that follow include references to the buttons and the
LEDs used during programming.
CODE FUNCTION
A B C
12 11 11 Storage of the transmitters
12 11 13 Deletion of all the stored transmitters
12 11 17 Storing of the level of intervention of the wind
sensor
12 11 18 Programming of the level of intervention of the
sun sensor
12 11 21 Programming of the level of temperature
L1 L2 L3 L4 L5 L6
UP
STOP
DOWN
PROG

ENGLISH
- 27 -
STORING OF THE LEVEL OF INTERVENTION
OF THE WIND SENSOR
mWARNING: to make the awning close, the wind sensor has
to detect a value higher then the set threshold value for at least
5 seconds. The automation is blocked for 8 minutes when the
awning is closed because of strong wind.
To set the level of intervention of the wind sensor it is
necessary to use a remote control previously stored and
proceed as follows:
1. Activate ADLER programming by holding down buttons 4 and
6 until the 6 LEDs turn on
2. Release the buttons and enter the code 12 11 17
The two highlighted digits indicate the remote control channel
recorded in the control unit; for channel 1 the digits are 11,
for channel 2 the digits are 12, for channel 3 the digits are
13, etc up to channel 6. Once the codes have been entered,
the LED of the selected channel will blink for 2 minutes after
which it exits programming.
3. Press and keep pressed (for 5 about seconds) the button PROG
of the transmitter until the motor moves jerkily in both the
ways showing that it enters the storing.
4. The number of jerks made by the motor corresponds to the
level currently set:
1 jerk = level 1 = 10 Km/h
2 jerks = level 2 = 15 Km/h
3 jerks = level 3 = 20 Km/h
4 jerks = level 4 = 30 Km/h (default)
5 jerks = level 5 = 40 Km/h
5. Release the key PROG
6. To increase the level press button UP, to decrease it press
button DOWN.
7. As soon as the control unit receives the control, it shows the
new level moving the motor with the corresponding number
of jerks.
8. To exit the programming press STOP: the motor displays again
the set level and exits.
9. To exit the programming mode, wait for the led to switch off
or press key 1 to exit immediately.
DELETING ALL TRANSMITTERS
MEMORISED
Transmitters may be deleted in two different ways:
1. By means of the MOT push-button
2. By means of the transmitter (PROG push-button)
DELETING BY MEANS OF THE
MOT PUSH-BUTTON
1. Remove the power supply to the control unit.
2. Press and hold the MOT key while power is restored to the
control unit.
3. After 2 seconds, release the MOT key: the MOT1 LED flash for
one second to indicate the delete process has been successful.
DELETING BY MEANS OF THE
PROG PUSH-BUTTON
To delete all the transmitters stored on the control unit it
is necessary using a remote control previously stored and
proceed as follows:
1. Power only the control unit to be programmed
2. Activate ADLER programming by holding down buttons 4 and
6 until the 6 LEDs turn on
3. Release the buttons and enter the code 12 11 13
The two highlighted digits indicate the remote control channel
recorded in the control unit; for channel 1 the digits are 11,
for channel 2 the digits are 12, for channel 3 the digits are
13, etc up to channel 6. Once the codes have been entered,
the LED of the selected channel will blink for 2 minutes after
which it exits programming.
4. Position the roll-up shutter at mid-height using
UP-STOP-DOWN
5. Press and hold down the PROG button of the remote control
until the motor starts to move in a direction
6. Release the PROG button: the motor will stop
7. To exit the programming mode, wait for the led to switch off
or press key 1 to exit immediately.
To delete all the codes by means of a transmitter non-
stored, proceed as follows:
1. Switch off power supply of the system.
2. Activate ADLER programming by holding down buttons 4 and
6 until the 6 LEDs turn on
3. Release the buttons and enter the code 12 11 13
4. Press and keep pressed the button PROG
5. Power all control units where the deletion will be performed
6. Hold down the PROG button until the motor starts to move
for about 1/2 second in both directions, indicating that the
deletion has been completed.
7. Release the PROG button: the motor will stop
8. To exit the programming mode, wait for the led to switch off
or press key 1 to exit immediately.

ENGLISH
- 28 -
PROGRAMMING OF THE LEVEL OF
INTERVENTION OF THE SUN SENSOR
mWARNING: to make the awning open the sun sensor has
to detect a value higher then the set threshold value for at least 8
minutes. To make it close, the sensor has to detect a value lower
then the set threshold value for at least 8 minutes.
Interruptions of light (due to clouds) shorter than a minute are
not detected, while the 8-minute timer is set at zero when longer
than one minute.
To set the level of intervention of the sun sensor it is
necessary to use a remote control previously stored and
proceed as follows:
1. Activate ADLER programming by holding down buttons 4 and
6 until the 6 LEDs turn on
2. Release the buttons and enter the code 12 11 18
The two highlighted digits indicate the remote control channel
recorded in the control unit; for channel 1 the digits are 11,
for channel 2 the digits are 12, for channel 3 the digits are
13, etc up to channel 6. Once the codes have been entered,
the LED of the selected channel will blink for 2 minutes after
which it exits programming.
3. Press and keep pressed (for 5 about seconds) the button PROG
of the transmitter until the motor moves jerkily in both the
ways showing that it enters the storing.
4. The number of jerks made by the motor corresponds to the
level currently set:
1 jerk = level 1 = 2 Klux
2 jerks = level 2 = 5 Klux
3 jerks = level 3 = 10 Klux (default)
4 jerks = level 4 = 20 Klux
5 jerks = level 5 = 40 Klux
5. Release the key PROG
6. To increase the level press button UP, to decrease it press
button DOWN.
7. As soon as the control unit receives the control, it shows the
new level moving the motor with the corresponding number
of jerks.
8. To exit the programming press STOP: the motor displays again
the set level and exits.
9. To exit the programming mode, wait for the led to switch off
or press key 1 to exit immediately.
PROGRAMMING OF THE LEVEL OF
TEMPERATURE
The temperature can be set on 5 levels, under which the sun
sensor must not open the awning, even if the light intensity has
exceeded the level set.
This function is particularly useful in Countries with wintry
weather, where sunny but very cold days are frequent. In this case,
it is not necessary to open the awnings, to let the sun warm the
inner rooms.
To set the level of temperature it is necessary to use a
remote control previously stored and proceed as follows:
1. Activate ADLER programming by holding down buttons 4 and
6 until the 6 LEDs turn on
2. Release the buttons and enter the code 12 11 21
The two highlighted digits indicate the remote control channel
recorded in the control unit; for channel 1 the digits are 11,
for channel 2 the digits are 12, for channel 3 the digits are
13, etc up to channel 6. Once the codes have been entered,
the LED of the selected channel will blink for 2 minutes after
which it exits programming.
3. Press and keep pressed (for 5 about seconds) the button PROG
of the transmitter until the motor moves jerkily in both the
ways showing that it enters the storing.
4. The number of jerks made by the motor corresponds to the
level currently set:
1 jerk = level 1 = sensor disabled (default)
2 jerks = level 2 = 0°C
3 jerks = level 3 = 5°C
4 jerks = level 4 = 10°C
5 jerks = level 5 = 15°C
5. Release the key PROG
6. To increase the level press button UP, to decrease it press
button DOWN.
7. As soon as the control unit receives the control, it shows the
new level moving the motor with the corresponding number
of jerks.
8. To exit the programming press STOP: the motor displays again
the set level and exits.
9. To exit the programming mode, wait for the led to switch off
or press key 1 to exit immediately.

ENGLISH
- 29 -
STORAGE OF THE TRANSMITTERS
DEV-T1
Transmitters may be memorised in two different ways:
1. By means of the MOT push-button
2. By means of the transmitter (P4 push-button)
mWARNING: The first transmitter has to be memorized
following the procedure (storage by push-button MOT)
STORAGE BY MEANS OF THE
MOT PUSH-BUTTON
1. Press and then release the MOT key on the control unit: the
MOT1 LED lights up.
2. Transmit using the P4 button of the remote control device
until the motor starts.
3. Release the button on the remote control device.
4. Press the UP button of the motor raised the shade, or the
DOWN button if the motor lowered the shade.
5. Programming completed.
mWARNING: The first transmitter memorised determines the
direction of movement of the motor. If the logic is altered, it is
necessary to delete all codes stored and repeat the previous steps
(see paragraph DELETING TRANSMITTERS).
STORAGE BY MEANS OF THE
P4 PUSH-BUTTON
To add another transmitter TX2 to the control unit it is
necessary to use a DEV-T1 previously stored (TX1) and
proceed as follows:
1. Press and keep pressed for about 5 seconds the key P4 of the
TX1 until the motor starts to move.
2. Release the key P4, the motor stops.
3. Press the key UP or DOWN of the TX2: the transmitter is
stored with the same logic of the TX1.
DELETING ALL TRANSMITTERS
MEMORISED
1. Remove the power supply to the control unit.
2. Press and hold the MOT key while power is restored to the
control unit.
3. After 2 seconds, release the MOT key: the MOT1 LED flash for
one second to indicate the delete process has been successful.
TRANSMITTERS OF THE RANGE
DEV-T1
Using a DEV-T1 series transmitter it is possible to activate the
transmitter storage.
N
L
P1 P2 P3 P4
P1 UP button input
P2 STOP button input
P3 DOWN button input
P4 Code storage stage activated
NPower supply neutral
LPower supply phase
Pressing the three buttons in combination allows to activate the
following functions on the control unit:
P2 + P1 - Sun sensor activated
P2 + P3 - Sun sensor disabled
P1 + P3 - STOP command
NOTE: you must hold the buttons pressed until the control unit
signals it has received the command by running the motor or
activating the relays.
Table of contents
Other V2 Control Unit manuals