manuals.online logo
Brands
  1. Home
  2. •
  3. Brands
  4. •
  5. dejavoo
  6. •
  7. Payment Terminal
  8. •
  9. dejavoo P1 User manual

dejavoo P1 User manual

QUICK REFERENCE GUIDE
P1 Payment Terminal with Cash Discount
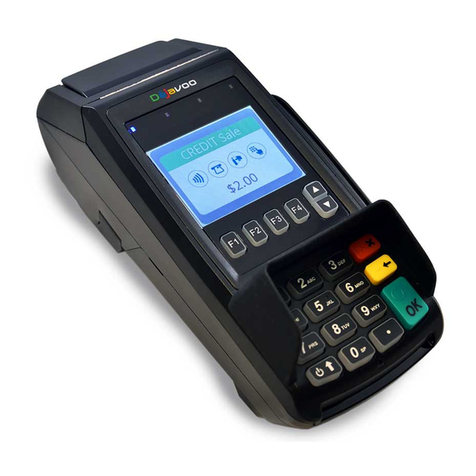
These steps have been provided to assist you with your Dejavoo P1 Terminal. As well
as the payment screen, the terminal’s idle prompt also displays the following icons:
Access to the FAVORITES menu
Access to other sales features
CALL ME feature (includes support tools for troubelshooting)
TAP OR CHIP CREDIT SALE
1. Enter the SALE AMOUNT and press OK.
2. Review the amount and tap on PROCEED.
3. Chose CASH PAYMENT or CARD PAYMENT by
tapping option. Pricing will be based on payment type.
4. Tap (contactless only), swipe or insert chip card.
5. Depending on TPN conguration, you will have the
option to send customer copy as SMS, email, paper
print or no receipt at all.
6. The transaction is processed. Sales receipts will print
with details of the transaction. Customer copy receipt
options will be prompted.
DEBIT SALE
1. Enter the SALE AMOUNT and press OK.
2. Review the amount and tap on PROCEED.
3. Tap on CASH PAYMENT or CARD PAYMENT. Pricing
will be based on payment type.
4. Tap on DEBIT icon and then tap (contactless only),
insert or swipe card.
5. Customer enters PIN on encrypted terminal PIN Pad or
encrypted external PIN Pad and presses OK.
6. The transaction is processed. Sales receipts will print
with details of the transaction and customer copy
receipt options will be prompted.
CREDIT CARD RETURN
1. Tap on the icon on your terminal home screen.
2. Tap on the REFUND icon. Input PASSWORD (default
password is last 4 digits of your TPN).
3. Input the RETURN AMOUNT and press OK.
4. Tap (contactless only) or insert chip card.
5. The transaction is processed. Return receipts will print
with details of the transaction. Customer copy receipt
options will be prompted.
VOID CREDIT TRANSACTION
1. Tap on the icon on your terminal home screen.
2. Tap on the VOID icon.
3. Input the TRANSACTION NUMBER or last 4 digits
of the card, choose transaction from the list and
tap Conrm prompt and tap YES.
4. If prompted, input PASSWORD (default password is last
4 digits of your TPN).
5. Void will be completed and receipt options will be prompted.
Note: Card doesn’t need to be present to complete
void successfully.
MANUALLY ENTERED SALE (card only)
1. Enter the SALE AMOUNT and press OK.
2. Review the amount and tap on PROCEED.
3. Choose CARD PAYMENT by tapping the option on the
screen. Pricing will be based on payment type.
4. Tap on ENTER CARD under other options.
5. Manually input CARD # and press OK as you move
along the cvv prompts.
6. The transaction is processed. Sales receipts will print
with details of the transaction. Customer copy receipt
options will be prompted.
This terminal uses the
QUICK REFERENCE GUIDE P1 terminal with Cash Discount
REPRINT RECEIPT
1. From the idle prompt, tap the icon to access the
FAVORITES menu.
2. Tap REPRINT RECEIPT.
3. If prompted, input PASSWORD (default password is
last 4 digits of your TPN).
4. Press and enter transaction # or last 4 digits of
card #, select transaction and tap.
5. Follow prompts and transaction receipt prints.
CALL ME FEATURE (must be enabled)
1. From the terminal main screen tap the icon.
2. Tap CALL ME, under the Support Menu and choose

reason. Enter your call back number.
3. The terminal sends notication to the help desk and
you will receive a call back from a representative with
assistance.
EDIT TIPS BY TRANSACTION #
1. From the idle prompt, tap the icon to access the
FAVORITES menu.
2. Tap ADJUST TIP.
3. If prompted, input PASSWORD (default password is
last 4 digits of your TPN).
4. Enter transaction #, scroll through transactions using
or swipe through transactions.
5. Tap TRANSACTION #.
6. Tap on button and a prompt will appear asking if
you want to submit tip adjust, tap YES. A screen will
appear conrming the success of the procedure.
SETTLE DAILY BATCH
1. From the idle prompt, tap the icon to access the
FAVORITES menu.
2. Tap SHOW/SETTLE DAILY BATCH.
3. If prompted, input PASSWORD (default password is
last 4 digits of your TPN).
4. The terminal will fetch and display a summary report.
Swipe left to view a detailed report.
5. Tap SETTLE button in the top right corner. A prompt
may appear if there are untipped transactions. Answer
YES or NO to continue to settle.
6. Settlement Report prints.
PRINTING REPORTS
1. From the idle prompt, tap the icon to access the
FAVORITES menu.
2. Choose OPEN BATCH or CLOSED BATCH.
3. Tap desired report type, select how you want the report
to group your transactions. For summary report or daily
report. Tap NEXT.
4. Swipe left to go from summary to details report and tap
on
5. REPORT prints.
TERMINAL POWER OFF / REBOOT
1. Press the button on the side of the terminal and
hold down until a menu appears on the screen, with the
following options: POWER OFF, REBOOT.
2. Select the option you desire by tapping the screen.
WIRELESS CAPABILITIES
Wi-Fi icon will blink when not connected.
It will remain static when connected
successfully.
Battery charge indicator.
To get an internet connection via ethernet, rst
plug the device into power and then use an
ethernet cable to plug into the ethernet port.
ipossystems.com
A DIVISION OF

Other dejavoo Payment Terminal manuals

dejavoo Z Series Product information sheet

dejavoo

dejavoo Z Series Product information sheet

dejavoo Z Series User manual

dejavoo

dejavoo Z Series User manual

dejavoo QD Terminal Line User manual

dejavoo

dejavoo QD Terminal Line User manual

dejavoo Z Series User manual

dejavoo

dejavoo Z Series User manual

dejavoo QD Terminal Line User manual

dejavoo

dejavoo QD Terminal Line User manual

dejavoo Z8 User manual

dejavoo

dejavoo Z8 User manual

dejavoo V5 User manual

dejavoo

dejavoo V5 User manual

dejavoo Z11 User manual

dejavoo

dejavoo Z11 User manual

dejavoo Z8 User manual

dejavoo

dejavoo Z8 User manual

dejavoo Z3 User manual

dejavoo

dejavoo Z3 User manual

dejavoo Z Series User manual

dejavoo

dejavoo Z Series User manual

dejavoo QD Terminal Line User manual

dejavoo

dejavoo QD Terminal Line User manual

dejavoo Z9 User manual

dejavoo

dejavoo Z9 User manual

dejavoo Z8 User manual

dejavoo

dejavoo Z8 User manual

dejavoo Z8 User manual

dejavoo

dejavoo Z8 User manual

dejavoo Z Series User manual

dejavoo

dejavoo Z Series User manual

dejavoo Z Series User manual

dejavoo

dejavoo Z Series User manual

dejavoo Z9 User manual

dejavoo

dejavoo Z9 User manual

dejavoo Z6 User manual

dejavoo

dejavoo Z6 User manual

dejavoo Z9 User manual

dejavoo

dejavoo Z9 User manual

dejavoo Z9 User manual

dejavoo

dejavoo Z9 User manual

dejavoo Z Series User manual

dejavoo

dejavoo Z Series User manual

dejavoo V9 User manual

dejavoo

dejavoo V9 User manual

dejavoo Z9 User manual

dejavoo

dejavoo Z9 User manual

Popular Payment Terminal manuals by other brands

Ingenico group EVO Move 3500 MIX Setup guide

Ingenico group

Ingenico group EVO Move 3500 MIX Setup guide

BURGER KING P400 Install manual

BURGER KING

BURGER KING P400 Install manual

Castles Technology UPT100F user manual

Castles Technology

Castles Technology UPT100F user manual

Magtek DynaWave Installation and operation

Magtek

Magtek DynaWave Installation and operation

Ingenico group Self/5000 quick start

Ingenico group

Ingenico group Self/5000 quick start

Axon POS System POS 460 Series manual

Axon POS System

Axon POS System POS 460 Series manual

Magtek kDynamo Air Quick installation guide

Magtek

Magtek kDynamo Air Quick installation guide

Ingenico iPP350 quick guide

Ingenico

Ingenico iPP350 quick guide

KanhaTech JioPay 2800 user manual

KanhaTech

KanhaTech JioPay 2800 user manual

Heartland WaveRider Speed Queen Installation

Heartland

Heartland WaveRider Speed Queen Installation

Ingenico ML30 Contactless Specifications

Ingenico

Ingenico ML30 Contactless Specifications

VeriFone VX805 CTLS manual

VeriFone

VeriFone VX805 CTLS manual

CCV Pad Next quick guide

CCV

CCV Pad Next quick guide

Ingenico Move2500 Quick reference guide

Ingenico

Ingenico Move2500 Quick reference guide

VeriFone PINpad 1000SE Setting up

VeriFone

VeriFone PINpad 1000SE Setting up

Ingenico 3300 user guide

Ingenico

Ingenico 3300 user guide

CCV Pad Next First steps

CCV

CCV Pad Next First steps

Ingenico iUP 250 Quick start and installation guide

Ingenico

Ingenico iUP 250 Quick start and installation guide

manuals.online logo
manuals.online logoBrands
  • About & Mission
  • Contact us
  • Privacy Policy
  • Terms and Conditions

Copyright 2025 Manuals.Online. All Rights Reserved.