DeLOCK 64098 User manual

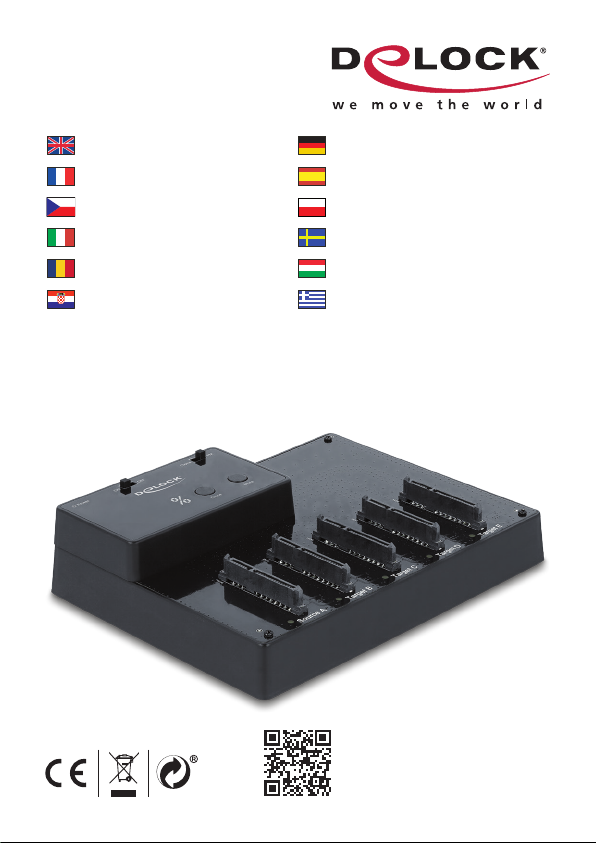
USB 5 Gbps Docking and Clone Station
for 5 x 2.5″ SATA HDD / SSD
Product-No: 64098
User manual no: 64098-a
www.delock.com
User manual
Mode d’emploi
Uživatelská příručka
Manuale utente
Manual de utilizare
Korisnički priručnik
Bedienungsanleitung
Manual del usuario
Instrukcja obsługi
Bruksanvisning
Használati utasítás
Εγχειρίδιο χρήστη

-2-
English
Description
This HDD / SSD docking station by Delock enables an external connection of up
to ve 2.5″ SATA HDDs / SSDs through the USB interface, as well as the simple
exchange of the drives by Hot Swap. This solution does not requires an external
enclosure since the HDD / SSD will be plugged into the docking station directly.
Specication
• Connectors:
5 x SATA 6 Gb/s 22 pin receptacle
1 x USB 5 Gbps Type-B female
1 x DC jack
• Chipset: JMicron JMS578, JMB391
• Function key:
1 x Clone button
1 x Mute button
1 x On / O switch
1 x switch for mode
• Suitable for 2.5″ SATA HDD / SSD
• Suitable for all SATA HDDs / SSDs up to SATA 6 Gb/s
• Data transfer rate up to 5 Gbps
• 6 x LED indicator
• LED indicator for power, access and copy status
• Bootable
• Dimensions (LxWxH): ca. 169 x 125 x 37 mm
• Hot Swap, Plug & Play
Power supply specication
• Input: AC 100 ~ 240 V / 50 ~ 60 Hz / 1.0 A
• Output: 12.0 V / 4.0 A
• Ground outside, plus inside
• Dimensions:
inside: ø ca. 2.1 mm
outside: ø ca. 5.5 mm
length: ca. 10 mm
System requirements
• Linux Kernel 3.3 or above
• Mac OS 10.14.6 or above
• Windows 7/7-64/8.1/8.1-64/10/10-64/11
• PC or laptop with a free USB Type-A port

-3-
English
Package content
• Docking station
• 1 x cable USB 5 Gbps A male to USB 5 Gbps B male, length ca. 75 cm
• External power supply
• User manual
Safety instructions
• Protect the product against moisture
• Protect the product against direct sunlight
• Avoid anti-static electricity when using the HDD
• Pay attention that the HDD can be hot when it is connected to the device.
Using on PC:
Installation of the Docking Station
1. Start your Computer.
2. Connect the power supply to the DC jack of the Docking Station and connect
the power supply to the socket-outlet.
3. Plug the USB cable to the Docking Station and to a free USB port of your
computer.
4. Insert your 2.5″ HDD / SSD into one of the slots of the docking station.
5. Switch on the Docking Station.
6. Turn the switch "PM/Clone" to position "PM".
7. The HDD will be recognized by your computer as a drive and is ready to use.
If necessary you may need to set or partition your drive through the data
manager.
Clone Function
Note:
Make sure that the hard drive to which you want to transfer the data has the
same or higher capacity than the hard drive from which you want to copy.
All data which are on the target HDD will be overwritten during the copy
procedure! Therefore we recommend to save the old data before or to use an
empty hard drive.

-4-
English
Clone Function without PC
1. Connect the power supply to the DC jack of the Docking Station and connect
the power supply to the socket-outlet.
2. Insert the HDD / SSD from which you want to copy the data into slot Source
A (Source).
3. Insert the HDD / SSD on which you want to save the data into slot Target B, C,
D or E (Target).
4. Turn the switch "PM/Clone" to position "Clone".
5. Switch on the Docking Station.
6. The blue LED on the appropriate slots lights up permanently.
7. Press the clone button twice in about 5 - 8 sec. in order to activate the clone
process. Thereupon a noise sounds three times.
8. The LED indicator shows the copy status.
9. The blue LED on the appropriate slots ashes.
10. The clone process is nished when the LED display shows 100 % and a
noise is heard three times.
Note
To stop copying press the clone button once, to continue press the clone button
again. If an inserted memory fails, a warning noise will sound. This can be
stopped by pressing the mute button.
Support Delock
If you have further questions, please contact our customer support
You can nd current product information on our homepage: www.delock.com
Final clause
Information and data contained in this manual are subject to change without
notice in advance. Errors and misprints excepted.
Copyright
No part of this user manual may be reproduced, or transmitted for any purpose,
regardless in which way or by any means, electronically or mechanically, without
explicit written approval of Delock.
Edition: 12/2023

-5-
Deutsch
Kurzbeschreibung
Diese HDD / SSD Dockingstation von Delock dient zum externen Anschluss
von bis zu fünf 2.5″ SATA HDDs / SSDs über die USB Schnittstelle, sowie das
einfache Austauschen der Laufwerke durch Hot Swap. Durch diese Lösung wird
kein externes Gehäuse benötigt, da die HDD / SSD direkt in die Dockingstation
eingesetzt wird.
Spezikation
• Anschlüsse:
5 x SATA 6 Gb/s 22 Pin Buchse
1 x USB 5 Gbps Typ-B Buchse
1 x DC Strombuchse
• Chipsatz: JMicron JMS578, JMB391
• Funktionstasten:
1 x Klontaste
1 x Stummtaste
1 x Ein-/ Ausschalter
1 x Schalter für Modus
• Für 2.5″ SATA HDD / SSD geeignet
• Für alle SATA HDDs / SSDs bis zu SATA 6 Gb/s geeignet
• Datentransferrate bis zu 5 Gbps
• 6 x LED Anzeige
• LED Anzeige für Power, Zugri und Kopierstatus
• Bootfähig
• Maße (LxBxH): ca. 169 x 125 x 37 mm
• Hot Swap, Plug & Play
Netzteilspezikation
• Eingang: AC 100 ~ 240 V / 50 ~ 60 Hz / 1,0 A
• Ausgang: 12,0 V / 4,0 A
• Masse außen, Plus innen
• Maße:
innen: ø ca. 2,1 mm
außen: ø ca. 5,5 mm
Länge: ca. 10 mm

-6-
Deutsch
Systemvoraussetzungen
• Linux Kernel 3.3 oder höher
• Mac OS 10.14.6 oder höher
• Windows 7/7-64/8.1/8.1-64/10/10-64/11
• PC oder Notebook mit einem freien USB Typ-A Port
Packungsinhalt
• Dockingstation
• 1 x Kabel USB 5 Gbps A Stecker zu USB 5 Gbps B Stecker, Länge ca. 75 cm
• Externes Netzteil
• Bedienungsanleitung
Sicherheitshinweise
• Produkt vor Feuchtigkeit schützen
• Produkt vor direkter Sonneneinstrahlung schützen
• Vermeiden Sie antistatische Auadung beim Benutzen der Festplatte
• Achten Sie darauf, dass die Festplatte am Gerät sehr heiß sein könnte.
Nutzung am PC:
Installation der Dockingstation
1. Starten Sie Ihren Computer.
2. Schließen Sie das Netzteil an die DC Buchse der Dockingstation an und
stecken Sie das Netzteil in die Steckdose.
3. Stecken Sie das USB Kabel an die Dockingstation und an einen freien USB
Port Ihres Computers.
4. Setzen Sie Ihre 2.5″ HDD / SSD einfach in den jeweiligen Schacht der
Dockingstation.
5. Schalten Sie die Docking Station ein.
6. Der Schalter "PM/Clone" muss auf die Stellung "PM" gestellt werden.
7. Die Festplatte wird von Ihrem Computer als Laufwerk erkannt und kann nun
verwendet werden. Gegebenenfalls müssen Sie Ihre Laufwerke über den
Datenträgermanager einrichten bzw. partitionieren.

-7-
Deutsch
Klon Funktion
Hinweis:
Achten Sie darauf das Ihre Festplatte, auf welche Sie die Daten kopieren
möchten mindestens die gleiche oder eine höhere Kapazität hat als die Festplatte
von der Sie kopieren möchten.
Alle Daten, die sich auf der Ziel-Festplatte benden, werden beim Kopiervorgang
überschrieben! Daher ist es empfehlenswert entweder eine leere Festplatte zu
verwenden oder die Daten vorher zu sichern.
Klon Funktion ohne PC
1. Schließen Sie das Netzteil an die DC Buchse der Dockingstation an und
stecken Sie das Netzteil in die Steckdose.
2. Stecken Sie die Festplatte / SSD von der Sie die Daten kopieren wollen in
den Schacht Source A (Quelle).
3. Stecken Sie die Festplatte / SSD auf welcher Sie die Daten speichern
möchten in den Schacht Target B, C, D oder E (Ziel).
4. Der Schalter "PM/Clone" muss auf die Stellung "Clone" gestellt werden.
5. Schalten Sie die Docking Station ein.
6. Die blaue LED an den entsprechenden Slots leuchtet dauerhaft.
7. Drücken Sie die Klon Taste innerhalb von ca. 5 - 8 Sekunden zweimal um
den Klon Vorgang zu aktivieren. Daraufhin ertönt dreimal ein Geräusch.
8. Die LED Anzeige zeigt nun den Kopierstatus an.
9. Die blaue LED an den entsprechenden Slots blinkt.
10. Der Klonvorgang ist beendet, wenn die LED Anzeige 100 % anzeigt und es
ertönt dreimal ein Geräusch.
Hinweise
Um den Kopiervorgang zu unterbrechen drücken Sie einmal die Klon Taste, um
den Prozess fortzuführen drücken Sie die Klon Taste erneut.
Falls ein eingesetzter Speicher ausfällt, ertönt ein Warngeräusch. Dieses kann
durch die Stummtaste beendet werden.

-8-
Deutsch
Support Delock
Bei weitergehenden Supportanfragen wenden Sie sich bitte an
Aktuelle Produktinformationen nden Sie auf unserer Homepage: www.delock.de
Schlussbestimmung
Die in diesem Handbuch enthaltenen Angaben und Daten können ohne vorherige
Ankündigung geändert werden. Irrtümer und Druckfehler vorbehalten.
Copyright
Ohne ausdrückliche schriftliche Erlaubnis von Delock darf kein Teil dieser
Bedienungsanleitung für irgendwelche Zwecke vervielfältigt oder übertragen
werden, unabhängig davon, auf welche Art und Weise oder mit welchen Mitteln,
elektronisch oder mechanisch, dies geschieht.
Stand: 12/2023

-9-
Français
Description
Cette station d’accueil HDD / SSD de Delock permet une connexion externe
jusqu’à cinq HDD / SSD SATA 2.5″ par le biais de l’interface USB, de même que
le simple échange des drives par Hot Swap. Cette solution ne demande pas
de boitier externe puisque le HDD / SSD peut être branché directement dans la
station d’accueil.
Spécications techniques
• Connecteurs :
5 x SATA 6 Gb/s à 22 broches femelle
1 x USB 5 Gbps Type-B femelle
1 x prise CC
• Chipset : JMicron JMS578, JMB391
• Touche de fonction :
1 x bouton Clonage
1 x touche de sourdine
1 x interrupteur Marche-/ Arrêt
1 x commutateur pour le mode
• Convient à 2.5″ SATA HDD / SSD
• Approprié pour tous les SATA HDD / SSD jusqu’à SATA 6 Gb/s
• Débit de données jusqu'à 5 Gbps
• 6 x Indicateur LED
• Indicateur LED pour l'alimentation, l'accès et l'état de la copie
• Amorçable
• Dimensions (LxlxH) : env. 169 x 125 x 37 mm
• Branchement à chaud, Plug & Play
Spécications de la source d'alimentation
• Entree : CA 100 ~ 240 V / 50 ~ 60 Hz / 1,0 A
• Sortie : 12,0 V / 4,0 A
• Mise à la terre à l'extérieur et à l'intérieur
• Dimensions : intérieur : ø env. 2,1 mm
extérieur : ø env. 5,5 mm
Longueur : env. 10 mm
Conguration système requise
• Linux Kernel 3.3 ou version ultérieure
• Mac OS 10.14.6 ou version ultérieure
• Windows 7/7-64/8.1/8.1-64/10/10-64/11
• PC ou portable avec un port USB Type-A disponible

-10-
Français
Contenu de l’emballage
• Station d’accueil de lecteur de disque dur
• 1 x câble USB 5 Gbps A mâle-USB 5 Gbps B mâle, longueur env. 75 cm
• Alimentation électrique externe
• Mode d’emploi
Instructions de sécurité
• Protéger le produit contre l’humidité
• Protéger le produit contre la lumière directe du soleil
• Eviter l'électricité statique lorsque vous utilisez le DD.
• Faites attention car le disque dur devient brûlant lorsqu’il est connecté à
l’appareil.
Utilisation sur un PC:
Installation de la station d'accueil
1. Allumez votre ordinateur.
2. Connectez l'alimentation électrique à la prise CC de la station d'accueil et
raccordez l'alimentation électrique à la prise de courant.
3. Branchez ensuite le câble USB sur la station d’accueil et sur un port USB de
votre ordinateur.
4. Insérez votre HDD / SSD 2.5″ dans une des fentes de la station d’accueil.
5. Allumez la station d'accueil.
6. Mettre l’interrupteur „PM/Clone“ en position „PM“.
7. Le DD sera détecté par votre ordinateur en tant que lecteur et sera prêt à
être utilisé. Si besoin, vous pouvez régler ou partitionner votre disque avec
le gestionnaire de données.
Fonction Clonage
Note :
Assurez-vous que le disque dur sur lequel vous voulez transférer les données a
une capacité égale ou supérieure à celle du disque dur que vous voulez copier.
Toutes les données présentes sur le disque dur cible seront écrasées pendant
la procédure de copie ! En conséquence, nous recommandons d’enregistrer les
anciennes données ou d’utiliser un disque dur vide.

-11-
Français
Fonction Clonage sans PC
1. Connectez l'alimentation électrique à la prise CC de la station d'accueil et
raccordez l'alimentation électrique à la prise de courant.
2. Insérer le HDD / SSD duquel vous voulez copier les données dans la prise
Source A (Source).
3. Insérer le HDD / SSD sur lequel vous voulez copier les données dans la
prise Target B, C, D ou E (cible).
4. Mettre l’interrupteur „PM/Clone“ en position „Clone“.
5. Allumez la station d'accueil.
6. La LED bleue sur les fentes appropriées s’allume en permanence.
7. Appuyer deux fois sur le bouton de clone en 5 à 8 secondes pour activer le
processus de clonage. Un son retentit ensuite trois fois.
8. L’indicateur LED montre le statut de copiage.
9. La LED bleue sur les fentes appropriées clignote.
10. Le processus de clonage est terminé quand l’achage à LED indique 100 %
et qu’un son est entendu 3 fois.
Remarque
Pour arrêter le copiage, appuyer une fois sur le bouton de clone, pour continuer
réappuyer sur le bouton.
Si une mémoire insérée est défectueuse, un son d’avertissement retentit. Il peut
être arrêté en appuyant sur la touche de sourdine.
Assistance Delock
Si vous avez d'autres questions, veuillez contacter notre assistance client :
Vous pouvez trouver les informations sur nos produits actuels sur notre page
d'accueil : www.delock.fr
Clause nale
Les informations et données contenues dans ce manuel sont sujettes à
modications sans préavis. Sont exclues les erreurs et les fautes d'impression.
Copyright
Aucune partie de ce manuel d'utilisation ne peut être reproduite ou transmise,
quel qu'en soit le but, et sous quelque moyen que ce soit, électronique ou
mécanique, sans l'approbation écrite expresse de Delock.
Version : 12/2023

-12-
Español
Descripción
Esta estación de acoplamiento y clonación HDD / SSD de Delock permite una
conexión externa de hasta cinco SATA HDD / SSD de 2.5″ a través de la interfaz
USB, así como el simple intercambio de las unidades por Hot Swap. Esta
solución no requiere un gabinete externo ya que el HDD / SSD se conectará
directamente a la estación de acoplamiento.
Especicación técnica
• Conectores:
5 x SATA 6 Gb/s de 22 pines hembra
1 x USB 5 Gbps Tipo-B hembra
1 x conector CC
• Conjunto de chips: JMicron JMS578, JMB391
• Botón de función:
1 x Botón Clonar
1 x Botón de silencio
1 x Conmutador de encendido y apagado
1 x interruptor para el modo
• Adecuado para unidades de estado sólido o unidades de DD SATA de 2.5″
• Adecuado para todos los HDD / SSD SATA hasta SATA 6 Gb/s
• Velocidades de transferencias de datos de hasta 5 Gbps
• 6 x Indicador LED
• Indicador LED para alimentación, acceso y copia
• Permite el reinicio
• Dimensiones (LAxANxAL): aprox. 169 x 125 x 37 mm
• Funciones Conexión en caliente y Conectar y listo
Especicaciones de la fuente de alimentación
• Entrada: 100 ~ 240 VCA / 50 ~ 60 Hz / 1,0 A
• Salida: 12,0 V / 4,0 A
• Tierra exterior, más interior
• Dimensiones: interior: ø aprox. 2,1 mm
exterior: ø aprox. 5,5 mm
Longitud: aprox. 10 mm
Requisitos del sistema
• Linux Kernel 3.3 o superior
• Mac OS 10.14.6 o superior
• Windows 7/7-64/8.1/8.1-64/10/10-64/11
• PC o equipo portátil con un puerto USB Tipo-A disponible

-13-
Español
Contenido del paquete
• Base de acoplamiento para HDD
• 1 x cable USB 5 Gbps A macho a USB 5 Gbps B macho, longitud aprox. 75 cm
• Fuente de alimentación externa
• Manual del usuario
Instrucciones de seguridad
• Proteja el producto contra el polvo
• Proteja el producto contra la luz solar directa
• Evite la electricidad estática cuando utilice el disco duro
• Preste atención, ya que la unidad de disco duro puede calentarse cuando esté
conectada al dispositivo.
Usar en PC:
Instalación de la base de conexiones
1. Encienda su PC.
2. Conecte la fuente de alimentación a la toma de CC de la base de conexiones
y enchufe la fuente de alimentación en una toma de corriente.
3. Conecte el cable USB a la Base de acoplamiento y a un puerto USB libre de
su ordenador.
4. Inserte su HDD / SSD de 2.5″ en una de las ranuras de la estación de
acoplamiento.
5. Encienda la base de conexiones.
6. Gire el interruptor "PM CL / Er" a la posición "PM".
7. El disco duro será reconocido por el equipo como una unidad y estará
listo para utilizarse. Puede que tenga que establecer la unidad o realizar
particiones en ella mediante el administrador de datos.
Función Clonar
Nota:
Asegúrese de que la unidad de disco duro a la que desea transferir los datos
tiene al menos la misma capacidad que la unidad de disco duro de la que desea
realizar la copia.
¡Todos los datos que se encuentren en la unidad de disco duro de destino se
sobrescribirán durante el proceso de copia! Por lo tanto, recomendamos guardar
los datos anteriores antes o usar un disco duro vacío.

-14-
Español
Función Clonar sin PC
1. Conecte la fuente de alimentación a la toma de CC de la base de conexiones
y enchufe la fuente de alimentación en una toma de corriente.
2. Inserte la HDD / SSD desde la que desea copiar los datos en la ranura
Source A (Fuente).
3. Inserte la HDD / SSD en la que desea guardar los datos en la ranura Target B,
C, D y E (Destino).
4. Gire el interruptor "PM CL / Er" a la posición "CL / Er".
5. Encienda la base de conexiones.
6. El LED azul de las ranuras correspondientes se ilumina de forma
permanente.
7. Presione el botón de clonar dos veces en aproximadamente 5 - 8 segundos
con el n de activar el proceso de clonación. Entonces un ruido suena tres
veces.
8. El indicador LED muestra el estado de la copia.
9. El LED azul de las ranuras correspondientes parpadea.
10. El proceso de clonación naliza cuando la pantalla LED muestra el 100 % y
se escucha un ruido tres veces.
Nota
Para detener la copia, presione el botón de clonar una vez, para continuar
presione el botón de clonar nuevamente.
Si una memoria insertada falla, sonará un ruido de advertencia. Esto puede
detenerse pulsando el botón de silencio.
Soporte técnico Delock
Si tiene alguna pregunta, póngase en contacto con nuestro servicio de atención
al cliente [email protected]
Puede encontrar información actual del producto en nuestra página Web:
www.delock.es
Cláusula nal
La información y los datos contenidos en este manual están sujetos a cambios
sin previo aviso. Exceptuando errores y erratas.
Copyright
Queda prohibida la reproducción o transmisión para cualquier n de parte alguna
de este manual del usuario, independientemente de la forma en que se realice,
ya sea, electrónicamente o mecánicamente, sin el consentimiento escrito de
Delock. Versión: 12/2023

-15-
České
Popis
Tato dokovací a klonovací stanice HDD / SSD značky Delock umožňuje externí
připojení až pěti HDD / SSD 2.5″ SATA pomocí rozhraní USB, jakož i prostou
výměnu disků technologií Hot Swap. Toto řešení nevyžaduje vnější kryt, protože
HDD / SSD bude připojen přímo k dokovací stanici.
Specikace
• Konektor:
5 x SATA 6 Gb/s 22 pin samice
1 x USB 5 Gbps Typ-B samice
1 x DC jack
• Chipset: JMicron JMS578, JMB391
• Funkční tlačítka:
1 x Klonovací tlačítko
1 x Tlačítko ztlumení
1 x On-/ O vypínač
1 x přepínač pro mód
• Vhodné pro 2.5″ SATA HDD / SSD
• Použitelný pro SATA HDDs / SSDs až do SATA 6 Gb/s
• Rychlost přenosu dat až 5 Gbps
• 6 x LED indikující
• LED indikátor napájení, přístupu a status kopírování
• Možnost bootování
• Rozměry (DxŠxV): cca. 169 x 125 x 37 mm
• Hot Swap, Plug & Play
Specikace napájecího zdroje
• Vstup: AC 100 ~ 240 V / 50 ~ 60 Hz / 1,0 A
• Výstup: 12,0 V / 4,0 A
• Zem vně, plus uvnitř
• Rozměry:
vnitřní: ø cca. 2,1 mm
venkovní: ø cca. 5,5 mm
délka: cca. 10 mm
Systémové požadavky
• Linux Kernel 3.3 nebo vyšší
• Mac OS 10.14.6 nebo vyšší
• Windows 7/7-64/8.1/8.1-64/10/10-64/11
• PC nebo notebook s volným USB Typ-A portem

-16-
České
Obsah balení
• Dokovací stanice
• 1 x kabel USB 5 Gbps A samec na USB 5 Gbps B samec, délka cca. 75 cm
• Externí napájecí zdroj
• Uživatelská příručka
Bezpečnostní pokyny
• Chraňte produkt před vlhkostí
• Chraňte produkt před přímým slunečním světlem
• Při manipulaci s HDD se vyhněte antistatické elektřině
• Dbejte na to, že když je HDD připojen k zařízení, může být horký.
Použití na PC:
Instalace dokovací stanice
1. Zapněte počítač.
2. Připojte konektor jack napájecího adaptéru k dokovací stanici a napájecí
adaptér do zásuvky.
3. Připojte USB kabel k dokovací stanici a k volnému USB rozhraní počítače.
4. Vložte svůj HDD / SSD 2.5″ do jednoho ze slotů dokovací stanice.
5. Zapněte dokovací stanici.
6. Přepněte přepínač "PM/Clone" do polohy "PM".
7. HDD bude rozpoznám jako další jednotka a ihned připraven k použití. V
případě potřeby můžete prostřednictvím správce dat (data managerem)
nastavit oddíl disku.
Funkce klonování
Poznámka:
Ujistěte se, že harddisk, na který chcete kopírovat je stejné capacity nebo vyšší,
než harddisk ze kterého chcete kopírovat.
Všechna data, která jsou na cílovém disku budou přepsána během procesu
kopírování! Proto doporučujeme před klonováním stará data zálohovat nebo
použít prázdný harddisk.

-17-
České
Funkce klonování bez PC
1. Připojte konektor jack napájecího adaptéru k dokovací stanici a napájecí
adaptér do zásuvky.
2. Vložte HDD / SSD, ze kterého chcete data kopírovat, do slotu Source A
(Zdroj).
3. Vložte HDD / SSD, na který chcete data ukládat, do slotu Target B, C, D
nebo E (Cíl).
4. Přepněte přepínač "PM/Clone" do polohy "Clone".
5. Zapněte dokovací stanici.
6. Modrá LED na příslušných slotech se trvale rozsvítí.
7. Chcete-li aktivovat proces klonování, stiskněte dvakrát přibližně 5 - 8 sekund
tlačítko klonování. Poté se třikrát ozve zvuk.
8. Indikátor LED zobrazí stav kopírování.
9. Modrá LED na příslušných slotech bliká.
10. Proces klonování bude dokončen, když LED displej zobrazí 100 % a třikrát
se ozve zvuk.
Poznámka
Chcete-li proces kopírování zastavit, stiskněte jedenkrát tlačítko klonování. Když
budete chtít pokračovat, stiskněte tlačítko klonování znovu.
Jestliže selže vložená paměť, rozezní se varovný zvuk. Zastavit jej lze stiskem
tlačítka ztlumení.
Podpora Delock
S dalšími technickými otázkami můžete kontaktovat naše středisko podpory:
Aktuální informace o produktu můžete nalézt i na našich webových stránkách:
www.delock.cz
Závěrečné upozornění
Informace a data obsažená v této příručce mohou být změněny bez předchozího
upozornění. Za tiskové chyby neručíme.
Copyright
Žádná část této uživatelské příručky nesmí být reprodukována, přenášena ani
pro jakýkoli účel, bez ohledu na to, jakým způsobem nebo jakými prostředky,
elektronicky nebo mechanicky, bez výslovného písemného souhlasu Delock.
verze: 12/2023

-18-
Polsku
Opis
Stacja dokująca HDD / SSD Delock umożliwia podłączenie do czterech SATA
HDD / SSD 2.5″ przez interfejs USB oraz wymianę dysków przez Hot Swap.
Rozwiązanie nie wymaga obudowy zewnętrznej, gdyż napęd HDD / SSD jest
wpinany do stacji dokującej.
Specykacja
• Złącze:
5 x 22-pinowe SATA 6 Gb/s żeński
1 x USB 5 Gbps Typ-B żeński
1 x gniazdo prądu sałego
• Chipset: JMicron JMS578, JMB391
• Przycisk funkcji:
1 x przycisk klonowania
1 x Przycisk Mute
1 x przełącznik Włączenie / Wyłączenie
1 x Przełącznik dla trybu
• Odpowiednia do 2.5″-calowego dysku twardego / SSD SATA
• Nadaje się do wszystkich SATA HDDs / SSDs aż do SATA 6 Gb/s
• Szybkość transmisji danych do 5 Gbps
• 6 x Wskaźnik LED
• Wskaźnik LED zasilania, dostępu i stan kopiowania
• Bootowalny
• Wymiary (DxSxW): ok. 169 x 125 x 37 mm
• Hot Swap, Plug & Play
Specykacje źródła zasilania
• Wejście: AC 100 ~ 240 V / 50 ~ 60 Hz / 1,0 A
• Wyjście: 12,0 V / 4,0 A
• Uziemienie na zewnątrz, biegun dodatni wewnątrz
• Wymiary:
wewnątrz: ø ok. 2,1 mm
na zewnątrz: ø ok. 5,5 mm
długość: ok. 10 mm
Wymagania systemowe
• Linux Kernel 3.3 lub nowszy
• Mac OS 10.14.6 lub nowszy
• Windows 7/7-64/8.1/8.1-64/10/10-64/11
• Komputer osobisty lub laptop z wolnym portem USB Typ-A

-19-
Polsku
Zawartość opakowania
• Stacja dokująca
• 1 x kabel USB 5 Gbps A męski do USB 5 Gbps B męski, długość ok. 75 cm
• Zewnętrzny zasilacz
• Instrukcja obsługi
Instrukcje bezpieczeństwa
• Produkt należy zabezpieczyć przed wilgocią
• Produkt należy zabezpieczyć przed bezpośrednim światłem słonecznym
• Podczas używania dysku twardego należy unikać elektryczności statycznej
• Podczas podłączania do urządzenia należy pamiętać, że dysk twardy może
być gorący.
Użytkowanie w komputerze osobistym:
Instalacja stacji dokującej
1. Wyłącz komputer.
2. Podłącz zasilanie do gniazda DC w stacji dokującej i zasilanie do gniazdka
elektrycznego.
3. Podłącz kabel USB do stacji dokującej i do wolnego portu USB komputera.
4. Wcisnąć SATA HDD / SSD 2.5″ do jednego ze slotów stacji dokującej.
5. Włącz stację dokującą.
6. Przełączyć przełącznik "PM/Clone" na położenie "PM".
7. Dysk twardy zostanie rozpoznany przez komputer jako napęd i będzie
gotowy do użycia. Jeśli to konieczne można ustawić lub podzielić dysk na
partycje, przez menedżera danych.
Funkcja klonowania
Uwaga:
Upewnij się, że dysk twardy na który ma być wykonany transfer danych, ma
taką samą lub większą pojemność niż dysk twardy, z którego mają zostać
przekopiowane dane.
Podczas kopiowania wszystkie dane zapisane na docelowym dysku twardym
zostaną nadpisane! Zlecamy wcześniejszy backup danych z dysku lub użycie
pustego dysku.

-20-
Polsku
Funkcja klonowania bez komputera PC
1. Podłącz zasilanie do gniazda DC w stacji dokującej i zasilanie do gniazdka
elektrycznego.
2. Wetknąć źródłowy HDD / SSD do slotu Source A (Source).
3. Wetknąć docelowy HDD / SSD do slotu Target B, C, D lub E (Target).
4. Przełączyć przełącznik "PM/Clone" na położenie "Clone".
5. Włącz stację dokującą.
6. Niebieska dioda na obu slotach pali się nieprzerwanie.
7. Nacisnąć dwukrotnie przycisk klonowania na 5 - 8 s aby włączyć proces
klonowania. Następnie trzykrotnie włącza się brzęczyk.
8. Dioda pokazuje stan kopiowania.
9. Niebieska dioda na na odpowiednich szczelinach świeci.
10. Proces klonowania kończy się, gdy ekran LED pokazuje 100 % i trzykrotnie
zabrzęczy.
Uwaga
Aby zatrzymać kopiowanie przycisnąć przycisk jednokrotnie, aby kontynuować
przycisnąć ponownie.
Jeżeli wciśnięta pamięć nie zadziała, będzie słychać dźwięk ostrzegawczy.
Można to zatrzymać przyciskając przycisk mute.
Wsparcie Delock
W przypadku dodatkowych pytań proszę skontaktować się z naszym obsługi
klienta pod adresem [email protected]
Aktualną informację o produktach można znaleźć na naszej stronie internetowej:
www.delock.pl
Zastrzeżenia końcowe
Zawarte w niniejszej instrukcji informacje i parametry mogą ulec zmianie bez
wcześniejszego uprzedzenia. Błędy i pomyłki w druku zastrzeżone.
Copyright
Żadna z części niniejszej instrukcji nie może być kopiowana lub przesyłana
do jakichkolwiek celów, niezależnie od tego jaką drogą lub w jakim znaczeniu,
elektronicznie lub mechanicznie, bez specjalnej pisemnej zgody rmy Delock.
Wydanie: 12/2023
Table of contents
Languages:
Other DeLOCK Docking Station manuals

DeLOCK
DeLOCK 87743 User manual

DeLOCK
DeLOCK 88050 User manual

DeLOCK
DeLOCK 87865 User manual

DeLOCK
DeLOCK 87742 User manual

DeLOCK
DeLOCK SuperSpeed 87728 User manual

DeLOCK
DeLOCK 87731 User manual

DeLOCK
DeLOCK 63958 User manual

DeLOCK
DeLOCK 63957 User manual

DeLOCK
DeLOCK 87771 User manual

DeLOCK
DeLOCK 87297 User manual

DeLOCK
DeLOCK Thunderbolt 3 User manual

DeLOCK
DeLOCK 64000 User manual

DeLOCK
DeLOCK 87895 User manual

DeLOCK
DeLOCK 87683 User manual

DeLOCK
DeLOCK 88017 User manual

DeLOCK
DeLOCK SuperSpeed 61858 User manual

DeLOCK
DeLOCK 87772 User manual

DeLOCK
DeLOCK 64177 User manual

DeLOCK
DeLOCK 64178 User manual

DeLOCK
DeLOCK 87721 User manual