Ebro GFX 393 User manual


®
Elektronisches Kontaktthermometer
Electronic Contact Thermometer
Thermomètre à contact électronique
GFX 393
°C

GFX 393/393B
2
Deutsch
© Copyright by ebro Electronic GmbH & Co. KG
Bitte lesen Sie diese Bedienungsanlei-
tung aufmerksam, bevor Sie Ihr neues
elektronisches Kontaktthermometer in
Betriebnehmen.
DieAnleitungführtSiemitklarenundein-
fachenAnweisungen in denUmgangmit
demThermometer ein.
Informationen, die für das Verständnis
derFunktionsweise nützlich und wichtig
sind,finden Sie im Anleitungstext durch
Balkenmarkiert.
Bittebeachten Sieim Interesseeinesge-
fahrlosenUmgangs mitdem Thermome-
ter die mit dem Zeichen versehenen
Sicherheitshinweise.
Sicherheitshinweise
Vorsicht beim Messen hoher Tempera-
turen!Fassen Sie unmittelbar nach einer
Messungden Temperaturfühler nichtmit
bloßenHänden an!Verbrennungsgefahr!
LegenSiedasThermometer währendder
Messung grundsätzlich nicht in die hei-
ßeZone. Explosionsgefahr der Lithium-
Batterie!
MessenSiemitdemThermometernicht
in explosionsgefährdeten Bereichen!
UnfallgefahrbeiExplosion!

3
English Français
1340 – 0300 – 2057 – 03/03 3010 – 0312
Pleasereadthismanualcarefullybefore
using your new electronic contact
thermometer.
The operating manual provides clear
and simple instructions for using the
thermometer.
Sections that are useful and important
for understanding how the device
works are highlighted by bars in the
instruction text.
For safe handling of the thermometer,
please follow the safety notes
highlighted with the symbol .
Saftey Notes
Proceed with caution when measuring
high temperatures! Do not touch the
temperature sensor with bare hands
immediately after measuring! Danger
of burn injuries! Never put the
thermometer in the hot zone during
measurement. Risk of explosion of the
lithium battery!
Do not use the thermometer in
explosion hazard areas! Risk of
accident in case of an explosion!
Veuillezlireattentivementleprésentmode
d’emploiavantd’utiliservotrethermomètre
àcontactélectronique.
Ce mode d’emploi vous donne des ins-
tructionsclairesetsimplesconcernantl’uti-
lisationduthermomètre.
Lesinformationsutilesetimportantespour
la compréhension du fonctionnement de
l’instrumentsontrepéréesparunebordure
à gauche du texte.
Pour un emploi sans risque du
thermomètre,respectezlesconsignesde
sécurité marquées du symbole .
Consignes de securité
Soyezprudentencasdemesuredehautes
températures!Ne touchez pas la sondeà
main nue aussitôt après la mesure! Dan-
gerdebrûlure!Neplacezjamaisl’instrument
danslazonechaudedurantlamesure.Dan-
gerd’explosion de la pile aulithium!
N’utilisezpaslethermomètreenatmosphère
explosive ! Risque d’accident en cas
d’explosion!

GFX 393/393B
4
Deutsch
Inhaltsverzeichnis
1 Beschreibung..................... 6
2 Lieferumfang...................... 8
3 Installation ........................ 10
4 Bedienung......................... 12
4.1 Einstellendes Sollwerts............12
4.2 Anzeigen der
Maximaltemperatur...................14
4.3 Ausschalten des Kontakt-
thermometers ...........................14
5 Fühlerwechsel ................. 16
6 Was tun, wenn? ................ 18
7 Kalibrierservice ............... 20
Anhang...................................... 20
I Zubehör ....................................20
II Technische Daten .....................22

5
English Français
Table of Contents
1 Description ......................... 7
2 Scope of Delivery .............. 9
3 Installation ........................ 11
4 Operation .......................... 13
4.1 Settingthe target temperature ..13
4.2 Display of
maximumtemperature..............15
4.3 Switching off the contact
thermometer .............................15
5 Changing the Sensor ...... 17
6 Troubleshooting............... 19
7 Calibration Service.......... 21
Appendix................................... 21
I Accessories..............................21
II TechnicalData ..........................23
Table des matières
1 Description ......................... 7
2 Contenu de l’emballage ... 9
3 Installation ........................ 11
4 Utilisation .......................... 13
4.1 Réglage de la valeur de référence 13
4.2 Affichage de la
températuremaximale ..............15
4.3 Arrêtdu thermomètre
àcontact.......................................15
5 Remplacement de la sonde 17
6 En cas de problèmes ...... 19
7 Kalibrierservice ............... 21
Annexe...................................... 21
I Accessoires..............................21
II Caractéristiquestechniques.....23

GFX 393/393B
6
Deutsch
CONTROLLER
GFX 393GFX 393
Pt 1000Pt 1000
-50... + 300°C-50... + 300°C
FUZZY-
SET
8
6
74
3
2
1
5
MAX
SET
CONTROL
1 Beschreibung
DaselektronischeKontakt-Thermometer
GFX393/GFX393BdientzurTemperatur-
regelung bei Heizplatten und ähnlichen
Laborgeräten.
DiemikroprozessorgesteuerteElektronik
garantierteinehoheMessgenauigkeitund
Linearität über den gesamten Mess-
bereich.Eine Fuzzy-Regelung stellt eine
optimierte Aufheizung ohne hohe
Temperaturüberschwingersicher.
DasGerät enthält einenSicherheits-und
Regelkreisnach DIN12878Klasse 1und
2, sowie eine Fühlerkurzschluss- und
brucherkennung.
1 ........... Display (LCD)
2 ........... Control-LED
3 ........... Taste MAX
4 ........... Taste SET
5 ........... Temperaturfühler
6 ........... Taste (Sollwert höher)
7 ........... Taste (Sollwert niedriger)
8 ........... 5-poligerDIN-Stecker

7
English Français
1 Description
Theelectronic contact thermometer GFX
393 / GFX 393 B is used for temperature
adjustment with heating plates and
similar laboratory equipment.
Its microprocessor-controlled elec-
tronics ensure high measuring precision
and linearity over the entire measuring
range. Fuzzy logic control guarantees
optimal heating with low overshoot.
Theunitfeaturesasafetyandcontrolcircuit
in accordance with DIN 12878 classes 1
and 2, as well as sensor short circuit and
breakage protection.
1 ........... Display (LCD)
2 ........... Control-LED
3 ........... MAX key
4 ........... SET key
5 ........... Temperature sensor
6 ........... Key (highertargettemperature)
7 ........... Key (lower target temperature)
8 ........... 5-pole DIN plug
1 Description
LethermomètreàcontactélectroniqueGFX
393/GFX393Bestdestinéàlarégulationde
la température des plaques chauffantes et
appareilsde laboratoire similaires.
La partie électronique est commandée par un
microprocesseurqui garantit des valeurs exac-
tesetlinéairessurtoutelaplagedemesures.Un
réglageFuzzypermetlechauffageoptimaldans
dépassementdetempérature.
L’appareil prévoit une circuitde sécurité et de
réglage conformes aux normes DIN 12878
classe 1 et 2 ainsi qu’une identification de
court-circuitducapteuretderupture.
1 ........... Affichage(LCD)
2 ........... ControlLED
3 ........... ToucheMAX
4 ........... ToucheSET
5 ........... Sonde de température
6 ........... Touche (valeur de référence plus
élévée)
7 ........... Touche (valeur de référence plus
basse)
8 ........... PriseDIN,5broches

GFX 393/393B
8
Deutsch
2 Lieferumfang
ÜberprüfenSiedenInhaltderVerpackung
auf Vollständigkeit und Unversehrtheit.
WennSie einen Schaden vorfinden oder
GrundzurBeanstandunghaben,wenden
Sie sich bitte an:
ebro Electronic GmbH & Co. KG
Peringerstr. 10
85055Ingolstadt
Tel.: (0841) 9 54 78–0
Fax: (0841)9 54 78 80
E-mail: [email protected]
Internet: http://www.ebro.de
Teileliste:
• Kontaktthermometer GFX 393 mit
Kalibrierzertifikat
oder
• KontaktthermometerGFX393 B mit
Kalibrierzertifikat
Jenach Bestellung und Anwendung:
• NetzadapterH37
• Relaisbox RB 1691
• Zubehör

9
English Français
2 Scope of Delivery
Check whether the contents of the
packaging are complete and
undamaged. If you discover any
damage or have any reason for
complaint, please contact:
ebro Electronic GmbH & Co. KG
Peringerstr. 10
85055 Ingolstadt
Phone: +49-(0)841-9 54 78-0
Fax: +49-(0)841- 9 54 78 80
E-mail: [email protected]
Internet: http://www.ebro.de
Parts List:
• Contact thermometer GFX 393 with
calibration certificate
or
• Contact thermometer GFX 393 B
with calibration certificate
Depending on order and application:
• Mains adaptor H 37
• Relay box RB RB 1691
• Accessories
2 Contenudel’emballage
Veuillez vérifier que le contenu de
l’emballage est complet et intact. Si vous
constatez un dommage ou si vous avez
un motif de réclamation, adressez-vous à
votre fournisseur ou à:
ebro Electronic GmbH & Co. KG
Peringerstr. 10
85055Ingolstadt
Tel.: +49-(0)841-9 54 78-0
Fax: +49-(0)841- 9 54 78 80
E-mail: [email protected]
Internet: http://www.ebro.de
Liste des pièces:
• Thermomètre à contact GFX 393
avec certificat de calibrage
ou
• Thermomètre à contact GFX 393 B
avec certificat de calibrage
Selon commande et usage prévu:
• Adaptateur au réseau H 37
• Boîte de relais RB 1691
• Accessoires

GFX 393/393B
10
Deutsch
GFX 393GFX 393
Sicherheitskreis
Regler
Masse
1
3
5
+9...+12 V+9...+12 V
3 Installation
Als Stromversorgung für das GFX 393/
393 B wird eine stabilisierte Gleich-
spannung von 9 ... 12V benötigt.
Die Anschlussbelegung des 5 poligen
DIN-Steckersstelltsichwiefolgtdar (sie-
heAbbildung).
Schließen Sie den DIN-Stecker an die
entsprechendeBuchse amverwendeten
Laborgerätan.
DasGFX 393/393B ist ausgelegt für den
direkten Anschluss an Heizplatten der
FirmaIKA.
Falls eine Heizplatte des Herstellers
Heidolph angeschlossen werden
soll, ist hierfür der optional erhältli-
cheNetzadapter H37 notwendig. Für
den Anschluss von Heizplatten oder
Heizpilzenohne DIN-Buchse benöti-
gen Sie die Relaisbox RB 1691.
Das Kontaktthermometer ist sofort be-
triebsbereit und führt einen Systemtest
durch. Hierbei sind alle Segmente des
Displays sichtbar.
Danachwird der Messkanal getestet. Im
Display wird „38.8“ dargestellt.
MAX

11
English Français
3 Installation
The power supply required for your
GFX 393/393 B is 9 … 12 V stabilised
DC.
The connections of the 5-pole DIN plug
are arranged as follows (see illu-
stration):
Insert the DIN plug into the appropriate
socket of the laboratory equipment.
The GFX 393/393B is designed for
direct connection to IKA heating plates.
For use with heating plates
manufactured by Heidolph, the mains
adaptor H 37 is available as an optio-
nal accessory. For connecting the
thermometer to heating plates or other
heaters without a DIN socket, the relay
boxRB 1691 will be required.
3 Installation
Le GFX 393/393 B a besoin d’un potentiel
continu stable de 9 12 V.
La connexion de la prise DIN à 5 broches
s’exécute de la façon suivante (voir
illustration).
Insérez la prise DIN sur la borne
correspondantedel’appareil delaboratoire
utilisé.
Le GFX 393/393B a été conçu pour être
raccordé directement sur les plaques
chauffantesdel’entrepriseIKA.
Si vous voulez raccorder une plaque
chauffantedufabricantHeidolph,vousavez
besoindel’adaptateurauréseauH37dis-
ponible en option.Pour le raccord de
plaqueschauffantesoud’autresappareils
dechauffagesanslaborneDIN,vousavez
besoindelaboîte derelais RB1691.
The contact thermometer is
immediately ready for use and will per-
form a system test. During this test,
all segments of the display will be
visible.
Subsequently the measuring channel
is tested. The display will show “38.8”.
Lethermomètreàcontactestprêtàl’emploi
et exécute un test du système. Pendant le
test, vous pouvez voir tous les éléments de
l’affichage.
Ensuite, le canal de mesure est testé.
Sur l’affichage apparaît « 38.8 ».
GFX 393/393B
12
Deutsch
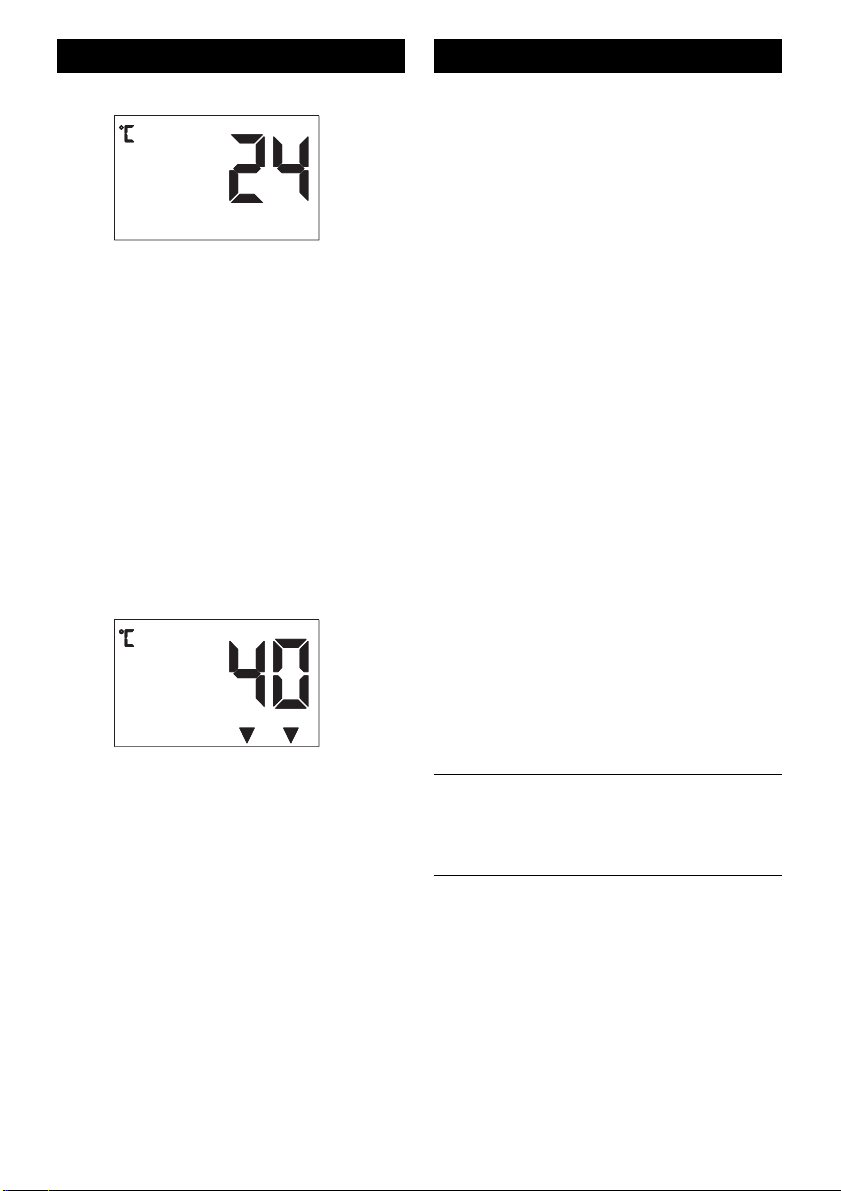
Anschließend erscheint der erste
Messwertin °C. Die Control-LED leuch-
tetrotoder grün.
WirdimDisplay eine Fehlermeldung an-
gezeigt,beachtenSie Kapitel6 „Wastun,
wenn?“
PositionierenSie den Messfühler.
Setzen Sie den Messfühler immer be-
stimmungsgemäßein. Nursovermeiden
SieFehlmessungen.
4 Bedienung
4.1 Einstellen des Sollwerts
Drücken Sie die Taste »SET«. Die
Control-LEDleuchtet grün.
ImDisplayerscheinenderzuletzteinge-
stellte Sollwert und zwei Dreiecke.
Nun können Sie mit den Pfeiltasten den
gewünschtenSollwert einstellen.
Taste kurzzeitigdrücken:
Wert wird schrittweise vergrößert oder
verkleinert.
Taste gedrückt halten:
Wert wird in 10er-Schritten vergrößert
oderverkleinert.
ZumSpeicherndesSollwertsundumzur
Temperaturmessung zurückzukehren,
drücken Sie die Taste »SET« erneut.

13
English Français
After this, the first measured value will
appear in °C. The control LED will light
up red or green.
If an error message is displayed,
please refer to chapter 6,
“Troubleshooting”.
Position the sensor.
To avoid faulty measurements, use the
sensor only as directed.
Enfin s’affiche la première valeur mesurée
en°C.Lesignalcontrol-LEDs’allumerouge
ouvert.
Si un message d’erreur s’affiche, veuillez
vous reporter au chapitre 6, «En cas de
problèmes».
Mettezlasondeenposition.
N’employezlasondequeconformémentaux
usagesprévus. Vouséviterezainsitoutrisque
de fausse mesure.
4 Operation
4.1 Setting the target
temperature
Press the »SET« key. The control LED
will light up green.
The display will show the most recently
set target temperature and two triangles.
Now you can use the arrow keys to
adjustthetargettemperature asrequired.
Press key briefly:
Value will be increased or decreasedin
increments of 1° C.
Hold down key:
Value will be increased or decreased in
increments of 10°C.
Press the »SET« key again to return to
temperature measurement mode.
4 Utilisation
4.1 Réglage de la valeur de
référence
Appuyez sur la touche »SET«. Le signal
control-LEDs’allumevert.
Surl’affichageapparaissentladernièrevaleur
deréférenceprogramméeetdeuxtriangles.
Alorsvouspouvezréglerlavaleurderéférence
souhaitéeaveclestouchesfléchées.
Appuyezbrièvementsurlatouche:
Lavaleur serègle progressivement àla
hausse ou à la baisse.
Tenirla touche appuyée:
La valeur est augmentée ou réduite de 10
unités à la fois.
Pour enregistrer la valeur de référence et
retourner à la mesure de la température,
appuyez de nouveau sur la touche « SET ».

GFX 393/393B
14
Deutsch
Betätigen Sie keine Taste, schaltet
das Gerät nach ca. 15 Sekunden in
den Messmodus.
ControlLEDrot-->Heizungein
ControlLEDgrün-->Heizungaus
MAX
4.2 Anzeigen der Maximal-
temperatur
Die maximale Temperatur seit dem Ein-
schaltendes Kontaktthermometers wird
automatischgespeichert.
Drücken Sie die Taste »MAX«.
Im Display erscheinen die maximale
Temperatur und zwei auf der Spitze ste-
hendeDreiecke.
Wenn Sie wieder zum Messmodus zu-
rückkehren möchten, betätigen Sie die
Taste »MAX« nochmal.
Wollen Sie den gespeicherten Wert lö-
schen, müssen Sie
• die »SET« Taste drücken oder
• dieStromversorgung ausschalten.
4.3 Ausschalten des Kontakt-
thermometers
UmdasKontaktthermometerabzuschal-
ten, müssen Sie die Stromversorgung
zumGerät ausschalten.

15
English Français
If no key is pressed, the thermometer
will automatically return to measuring
mode after approx. 15 seconds.
Control LED red --> heating on
Control LED green --> heating off
Si vous n’appuyez sur aucune touche,
l’appareil se met en mode mesure
après environ 15 secondes.
Control LED rouge --> chauffage allumé
Control LED vert --> chauffage éteint
4.2 Display of maximum
temperature
The maximum temperature reached since
switching on the contact thermometer will
be saved automatically.
Press the »MAX« key. The display will
show the maximum temperature and two
triangles pointing down.
To return to measuring mode, press the
»MAX« key again.
To cancel the saved value,
• press the »SET« key or,
• turn off the power supply.
4.3 Switching off the contact
thermometer
For switching off the contact
thermometer, the power supply must be
turned off.
4.2 Affichage de la tem-
pérature maximale
La température maximale mesurée depuis
la mise en marche du thermomètre à
contact est enregistrée automatiquement.
Appuyez sur la touche »MAX«. Sur
l’affichage apparaissent la température
maximale et deux triangles inversés.
Si vous voulez retourner au mode mesure,
appuyez de nouveau sur la touche « MAX ».
Sivousvoulezannulerlavaleurenregistrée,
vous devez
• appuyer sur la touche »SET« ou
• couper l’alimentation électrique
4.3 Arrêt du thermomètre à
contact
Pourarrêterlethermomètreàcontact,vous
devez couper l’alimentation électrique de
l’appareil.

GFX 393/393B
16
Deutsch
5 Fühlerwechsel
DasThermometerwurdewerksseitig
auf den mitgelieferten Fühler kali-
briert. Wenn Sie einen anderen
Temperaturfühler anschließen, oder
eineVerlängerungskabelverwenden,
kann sich die Messgenauigkeit ver-
ringern.
DrehenSie mitdembeiliegenden Gabel-
schlüssel die Schutzkappe ein wenig
nachlinks,umdieVerbindungzuentrie-
geln.
ZiehenSie die Schutzkappe nach unten.
DieFühler-Steckverbindungistjetztsicht-
bar.
Ziehen Sie den Fühler nach unten her-
aus.
SteckenSie einenneuenFühler oder ge-
gebenenfalls eine Verlängerungskabel
ein.
AchtenSieauffestenSitzderVerbin-
dung. Der Stecker muss einrasten.
Schieben Sie die Schutzkappe über die
Steckverbindung, und drehen Sie diese
nach rechts, um die Verbindung zu ver-
riegeln.
Verbinden Sie gegebenenfalls das
Verlängerungskabel auf die gleiche Art
mitdemTemperaturfühler.VerwendenSie
hierbei die beiliegende Schutzkappe.

17
English Français
5 Changing the sensor
The thermometer has been
calibrated by the manufacturer to
the sensor that is supplied with it.
Using a different sensor or using
an extension cable with the
thermometer may result in reduced
measurement accuracy.
To unlock the connection, use the
supplied open-end spanner to turn the
safety cap slightly to the left.
Pull down the safety cap. Now you can
see the plug-in connector for the
sensor.
Pull the sensor out downwards.
Plug in a new sensor or an extension
cable, if required.
Ensure a tight connection. The plug
must snap in.
Push the safety cap over the plug-in
connector and turn it to the right to lock
the connection.
5 Remplacement de la
sonde
Le thermomètre a été calibré sur la
sonde livrée par le fabricant. Si vous
adaptez une autre sonde de
température ou utilisez un câble de
prolongation, la précision de la
mesure peut en être réduite.
À l’aide de la clé plate fournie, tournez
légèrementlebouchondeprotectionversla
gauchepourdéverrouillerlaconnexion.
Tirez le bouchon de protection vers le bas.
La fiche de connexion de la sonde est
maintenantvisible.
Tirez la sonde vers le bas pour la détacher.
Branchez une nouvelle sonde ou le cas
échéantuncâbledeprolongation.
Veillez à ce que la connexion soit
correctement fixée. La prise doit
s’encliqueter.
Repoussez le bouchon de protection sur la
ficheettournez-leversladroitepourverrouiller
laconnexion.
Ifrequired, connect the extension cable
to the temperature sensor in the same
manner, using the safety cap provided
for this purpose.
Le cas échéant, raccordez le câble de
prolongationdelamêmefaçonaveclasonde
àtempérature.Utilisezàceteffetlebouchon
deprotectionfourni.

GFX 393/393B
18
Deutsch
Mögliche Ursache Störung beheben
Messbereich
überschritten
Steckverbindung
Buchse-Stecker
Fühler defekt
Messbereich
beachten
Verbindung über-
prüfen, Stecker
muss einrasten
Gerät zur Repa-
ratur an den Her-
steller schicken
Messbereich
unterschritten
Kurzschluss des
Messfühlers
Messbereich
beachten
Gerät zur Repa-
ratur an den Her-
steller schicken
6 Was tun wenn?

19
English Français
6 Troubleshooting 6 En cas de problèmes
Possible cause Remedy
Measuring range
exceeded Observe
measuring range
Plug-in connection
socket – plug Check connection;
plug has to
snap in
Sensor defective Return unit
to manufacturer
for repair
Temperature below
measuring range Observe
measuring range
Sensor short-
circuit Return unit
to manufacturer
for repair
Cause possible Remède
Plage de mesure
dépassée Respectez la
plage de mesure
Connexion prises
mâle/femelle
Sonde
défectueuse Envoyez l’appareil
au fabricant pour
réparation
Plage de mesure
non atteinte Respectez la
plage de mesure
Court-circuit
de la sonde Envoyez l’appareil
au fabricant pour
réparation
Vérifer la connexion:
la prise mâle doit
s’encliqueter
This manual suits for next models
1
Table of contents
Other Ebro Thermometer manuals


