manuals.online logo
Brands
  1. Home
  2. •
  3. Brands
  4. •
  5. EUFAB
  6. •
  7. Automobile Accessories
  8. •
  9. EUFAB 11232 User manual

EUFAB 11232 User manual

DE
Montageanleitung Rahmenhalter abschließbar Art. Nr. 11232, 11233
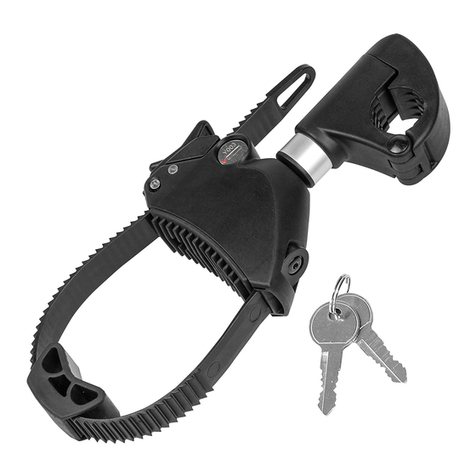
1. Lockable finger nut!
2. Bike frame clip
3. Spacer sleeve
4. U-bolt clip
5. M8 carriage bolt
6. 2 X rubber insets for 25 and 30 mm tube
1. Ecrou moleté verrouillable
2. Cadre de vélo –Pince
3. Douille d'entretoisement
4. Pince d'étrier en U
5. Vis à tête ronde M8
6. 2 X Garnitures en caoutchouc -pour tube de
25-30 mm
1. Kartelmoer afsluitbaar
2. Fietsframe -met beklede klem
3. Afstandshuls
4. U-beugelklem
5. Slotschroef M8
6. 2 X rubberinlegstukken voor 25 en 30 mm buis
1. Dado zigrinato chiudibile a chiave
2. Morsa fissatelaio
3. Distanziale a tubo
4. Morsa della staffa a U
5. Vite di chiusura M8
6. 2 spessori di gomma per tubo da 25 e 30 mm
1. uzamykateľná matice s rýhovanou hlavou
2. svěrka na rám jízdního kola
3. dištanční pouzdro
4. svěrka třmenu tvaru U
5. zámkovýšroub M8
6. 2 X gumová vložka pro 25 a 30 mm trubku
1. uzamykateľná ryhovaná matica
2. spona na rám bicykla
3. dištančné puzdro
4. spona na strmeňtvaru U
5. zámková skrutka M8
6. 2 X gumená vložka pre 25 a 30 mm rúru
1. Rändelmutter abschließbar
2. Fahrradrahmen -Klammer
3. Distanzhülse
6. 2 x Gummi – Einlagen für 25 und 30 mm Rohr
4. U -Bügelklammer
5. Schloss – Schraube M8
2
DE
Bevor Sie diesen abschließbaren Rahmenhalter einsetzen können, müssen Sie vorab
diesen demontieren. Als erstes schrauben Sie die abschließbare Rändelmutter ab.
Danach ziehen Sie die Fahrradrahmen – Klammer von der Schloss – Schraube M8 ab.
Entfernen Sie nun die Distanzhülse. Nun können Sie die U – Bügelklammer samt
Gummieinlage von der Schloss – Schraube abziehen. Bevor Sie die U - Bügelklammer um
den U –Bügel (Turm) ihres Fahrradträgers legen, sollten Sie kontrollieren welche der
beiden Gummieinlagen passt. Die mitgelieferten Einlagen sind passend für 25 mm und
30 mm Rohrdurchmesser. Die passende Gummieinlage über das Rohr legen und dann
über diese Einlage die Bügelklammer legen und zusammendrücken. Jetzt den
abschließbaren Rahmenhalter in umgekehrter Reihenfolge wieder zusammensetzen.
Ziehen Sie die Rändelmutter mit Schloss noch nicht fest zusammen, damit der
Rahmenhalter am U – Bügel (Turm) beweglich bleibt. Erst wenn Sie die richtige Position
gefunden haben und die gummierte Klammer um den Fahrrad – Rahmen gelegt ist drehen
Sie die Rändelmutter fest an und verschließen diese. Verwahren Sie diese Schlüssel gut
auf. Ihr Fahrrad ist nun sicher befestigt und zusätzlich gegen Diebstahl geschützt.
Achtung: Sichern Sie die Fahrräder immer mit einem zusätzlichen Sicherheitsgurt.
(kein Lieferumfang)
GB
Fitting Instructions for Fold-Away Frame Holder Prod. No. 11232, 11233
Before this lockable frame holder can be used, it must first be dismantled. Start by
unscrewing the lockable finger nut.
Then pull the bike frame clip off of the M8 carriage bolt. Now remove the spacer sleeve.
You can now remove the U-bolt from the carriage bolt together with the rubber inset. Before
placing the U-bolt clip around the U-bolt (tower) of your bike carrier, check which of the two
rubber insets fits. The insets supplied fit tube diameters of 25 mm and 30 mm. Place the
appropriate rubber inset over the tube, then place the bolt clip over this inset and press
together. Now reassemble the lockable frame holder in the inverse order. Do not yet firmly
tighten the finger nut with the lock, so the frame holder remains mobile on the U-bolt
(tower). Tighten the finger nut firmly and lock it only when you have found the right position
and place the rubberised clip around the bike frame. Keep this key in a safe place. Your
bike is now fixed firmly, as well as being secured against theft.
Caution: always secure the bikes with an additional safety belt. (No scope of delivery)
FR
Notice de montage du support de cadre verrouillable, n° d'article 11232, 11233
Avant de pouvoir utiliser ce support de cadre verrouillable, vous devez d'abord le démonter.
Pour commencer, dévissez l'écrou moleté verrouillable.
Puis retirez du cadre de vélo - pince caoutchoutée la vis M8 de la serrure. Retirez
maintenant la douille d'entretoisement. Vous pouvez alors retirer la pince d'étrier en U ainsi
que la garniture en caoutchouc de la vis à tête ronde. Avant de placer la pince d'étrier en U
autour de l'étrier en U (colonne) de votre porte-vélo, vous devez contrôler laquelle des deux
garnitures en caoutchouc convient. Les garnitures livrées sont adaptées pour des tubes de
25 mm et 30 mm de diamètre. Placez la garniture en caoutchouc appropriée sur le tube
puis placez les pinces d'étrier au dessus de cette garniture et serrer. Maintenant replacez
en sens inverse le support de cadre verrouillable. Ne raccordez pas encore l'écrou moleté
avec la serrure afin que le support de cadre puisse bouger sur l'étrier en U (colonne). Ce
n'est que lorsque vous aurez trouvé la position correcte et que la pince en caoutchouc est
placée autour du cadre de la bicyclette - que vous serrez solidement l'écrou moleté. Gardez
ces clés en lieu sûr. Maintenant, votre bicyclette est solidement fixée et de plus elle est
protégée contre le vol.
Attention: Fixez toujours les bicyclettes avec une sangle de sécurité supplémentaire.
(non fournie à la livraison)
3
NL
Montage-instructies framehouder afsluitbaar art.-nr. 11232, 11233
Vooraleer u deze afsluitbare framehouder kunt inzetten, moet u deze vooraf demonteren.
Eerst schroeft u de afsluitbare kartelmoer af.
Daarna trekt de fietsframeklem van de slotschroef M8 af. Verwijder nu de afstandshuls. U
kunt nu de U-beugelklem alsook het rubberinlegstuk van de slotschroef aftrekken.
Vooraleer u de U-beugelklem rond de U-beugel (toren) van uw fietsendrager legt, moet u
controleren welke van beide rubberinlegstukken past. De meegeleverde inlegstukken
passen voor buisdiameters van 25 mm en 30 mm. Leg het passend rubberinlegstuk over de
buis en leg dan over dit inlegstuk de beugelklem en druk deze samen. Zet de afsluitbare
framehouder in omgekeerde volgorde opnieuw samen. Trek de kartelmoer met slot nog niet
vast samen opdat de framehouder aan de U-beugel (toren) beweeglijk blijft. Pas nadat u de
juiste positie hebt gevonden en de met rubber beklede klem rond het fietsframe ist gelegd,
mag u de kartelmoer vastdraaien en deze sluiten. Bewaar deze sleutel goed. Uw fiets is nu
veilig bevestigd en bovendien tegen diefstal beveiligd.
Attentie: Beveilig de fietsen steeds met een extra veiligheidsgordel (behoort niet tot de
leveringsomvang)
I
Istruzioni per il montaggio del supporto del telaio chiudibile a chiave
art. n. 11232, 11233
Prima di poter usare il supporto del telaio chiudibile a chiave, si deve smontarlo. Svitare
dapprima il dado zigrinato chiudibile a chiave. Successivamente togliere dalla vite di
chiusura M8 la morsa fissatelaio. Rimuovere il distanziale a tubo. Ora si può sfilare la
morsa della staffa a U con lo spessore dalla vite di chiusura. Prima di mettere la morsa
della staffa a U attorno a quest’ultima (torre) del portabiciclette, si dovrebbe verificare quale
dei due spessori di gomma è adatto. Gli spessori in dotazione sono adatti per tubi dal
diametro di 25 mm e 30 mm. Mettere lo spessore di gomma adatto sul tubo e quindi
applicare la morsa e comprimere. Ora rimontare il supporto del telaio chiudibile a chiave
procedendo in ordine inverso. Non stringere ancora il dado zigrinato con serratura, in modo
che il supporto del telaio sulla staffa a U (torre) rimanga mobile. Solo dopo avere trovato la
posizione corretta e aver messo la morsa gommata attorno al telaio della bicicletta,
stringere il dado zigrinato e chiuderlo a chiave. Conservare la chiave con cura. La bicicletta
ora è fissata saldamente ed è inoltre protetta contro il furto.
Attenzione: assicurare sempre le biciclette con una cinghia di sicurezza addizionale!
(Non compresa nel volume della fornitura)
CZ
Návod na montážuzamykatelného držáku rámu, výr. č. 11232, 11233
Před nasazením uzamykatelného držáku rámu je třeba ho předtím demontovat. Nejdříve
odšroubujte uzamykatelnou matici s rýhovanou hlavou.
Poté stáhněte svěrku rámůna jízdní kola ze zámkového šroubu M8. Odstraňte distanční
pouzdro. Nyní je možné stáhnout svěrku třmenu tvaru U dohromady s gumovou vložkou ze
zámkového šroubu. Nežuložíte sponu třmenu tvaru U kolem třmenu tvaru U nosiče
jízdních kol, měli byste zkontrolovat, která ze dvou gumových vložek by se nejlépe hodila k
použití. Dodané vložky se hodí na průměr trubky 25 mm a 30 mm. Vhodnou gumovou
vložku nasaďte kolem trubky, na vložku nasaďte sponu třmenu a stiskněte. Nyní opět
smontujte uzamykatelnýdržák rámu v obráceném pořadí. Zatím utáhněte matici s
rýhovanou hlavou se zámkem jen volně, aby se dal držák rámu na strmeni U pohybovat.
Poté, co najdete správnou polohu a gumová svěrka je položená okolo rámu, matici s
rýhovanou hlavou pevněnašroubujte a zamkněte ji. Klíčpečlivěuschovejte. Vaše jízdní
kolo je nyní zajištěné a zároveňchráněné proti krádeži.
Pozor: Vždy zajistěte jízdní kola dodatečným bezpečnostním pásem.
(není součástí dodávky)
4
SK
Návod na montážuzamykateľného držiaka rámu, výr. č. 11232, 11233
Pred nasadením uzamykateľného držiaka rámu ho musíte najskôr demontovať. Ako prvý
krok vyskrutkujte uzamykateľnú ryhovanú maticu.
Potom vytiahnite spony na rám bicykla zo zámkovej skrutky M8. Odstráňte dištančné
puzdro. Teraz môžete stiahnuťsponu strmeňa tvaru U spolu s gumenou vložkou zo
zámkovej skrutky. Skôr ako sponu na strmeňtvaru U nasadíte okolo strmeňa tvaru U
nosiča bicyklov, mali by ste skontrolovať, ktorá z dvoch gumených vložiek je vhodnejšia na
použitie. Dodané vložky sa hodia na priemer rúry 25 mm a 30 mm. Vhodnú gumenú vložku
nasaďte okolo rúry, na vložku nasaďte sponu na držiak a stlačte. Teraz znova zložte
uzamykateľnýdržiak rámu v opačnom poradí. Zatiahnite ryhovanú maticu so zámkom,
zatiaľlen voľne, aby sa dal držiak rámu na strmeni U pohybovať. Ažkeďnájdete správnu
polohu a gumová spona je vložená okolo rámu bicykla zakrúťte ryhovanú maticu pevne a
uzamknite ju. Kľúčdobre uschovajte. Vášbicykel je teraz zaistenýa zároveňchránenýproti
krádeži.
Pozor: Vždy zaistite bicykle dodatočným bezpečnostným pásom.
(nie je súčasťou dodávky)
EAL GmbH, Postfach 14 41 24, D – 42310 Wuppertal

Other manuals for 11232

4

This manual suits for next models

1

Other EUFAB Automobile Accessories manuals

EUFAB 11234 User manual

EUFAB

EUFAB 11234 User manual

EUFAB 11242 User manual

EUFAB

EUFAB 11242 User manual

EUFAB 16420 User manual

EUFAB

EUFAB 16420 User manual

EUFAB CROW PLUS User manual

EUFAB

EUFAB CROW PLUS User manual

EUFAB 11512 User manual

EUFAB

EUFAB 11512 User manual

EUFAB 16471 User manual

EUFAB

EUFAB 16471 User manual

EUFAB 11232 User manual

EUFAB

EUFAB 11232 User manual

EUFAB Carlo Plus User manual

EUFAB

EUFAB Carlo Plus User manual

EUFAB 21014 User manual

EUFAB

EUFAB 21014 User manual

EUFAB 16564 User manual

EUFAB

EUFAB 16564 User manual

EUFAB Poker User manual

EUFAB

EUFAB Poker User manual

EUFAB BIKE THREE User manual

EUFAB

EUFAB BIKE THREE User manual

EUFAB 12008 User manual

EUFAB

EUFAB 12008 User manual

EUFAB PROBC2 / FG2 User manual

EUFAB

EUFAB PROBC2 / FG2 User manual

EUFAB 11234 User manual

EUFAB

EUFAB 11234 User manual

EUFAB JAKE User manual

EUFAB

EUFAB JAKE User manual

EUFAB FINCH 3 User manual

EUFAB

EUFAB FINCH 3 User manual

EUFAB JAKE User manual

EUFAB

EUFAB JAKE User manual

EUFAB 11408 User manual

EUFAB

EUFAB 11408 User manual

EUFAB 16472 User manual

EUFAB

EUFAB 16472 User manual

EUFAB 11563 User manual

EUFAB

EUFAB 11563 User manual

EUFAB 11583 User manual

EUFAB

EUFAB 11583 User manual

EUFAB CROW 1 User manual

EUFAB

EUFAB CROW 1 User manual

EUFAB AMBER IV User manual

EUFAB

EUFAB AMBER IV User manual

Popular Automobile Accessories manuals by other brands

Whispbar K340W Fitting Instructions for Basic Carrier

Whispbar

Whispbar K340W Fitting Instructions for Basic Carrier

Pioneer CD-PC1 Service manual

Pioneer

Pioneer CD-PC1 Service manual

CrimeStopper SecurView SV-6911.IR installation instructions

CrimeStopper

CrimeStopper SecurView SV-6911.IR installation instructions

Saab 400 106 662 installation instructions

Saab

Saab 400 106 662 installation instructions

Autel MaxiCharger DC Fast Installation and operation manual

Autel

Autel MaxiCharger DC Fast Installation and operation manual

Hamron 016039 operating instructions

Hamron

Hamron 016039 operating instructions

Polaris RW-50/15 installation instructions

Polaris

Polaris RW-50/15 installation instructions

Metra Electronics JP-RGBKT-1 manual

Metra Electronics

Metra Electronics JP-RGBKT-1 manual

BigRoad DashLink install guide

BigRoad

BigRoad DashLink install guide

Lisle Digidown plus operating instructions

Lisle

Lisle Digidown plus operating instructions

Douglas Dynamics SnowEx 6800 installation instructions

Douglas Dynamics

Douglas Dynamics SnowEx 6800 installation instructions

Jole spin 360 GT instruction manual

Jole

Jole spin 360 GT instruction manual

Prorack K491 Fitting instructions

Prorack

Prorack K491 Fitting instructions

Whispbar K350W Fitting instructions

Whispbar

Whispbar K350W Fitting instructions

RBP RBP-325B-RX7 instructions

RBP

RBP RBP-325B-RX7 instructions

epico ELLIPSE user manual

epico

epico ELLIPSE user manual

Innogy eBox smart Instructions for use

Innogy

Innogy eBox smart Instructions for use

Go Easy SH-5313 instructions

Go Easy

Go Easy SH-5313 instructions

manuals.online logo
manuals.online logoBrands
  • About & Mission
  • Contact us
  • Privacy Policy
  • Terms and Conditions

Copyright 2025 Manuals.Online. All Rights Reserved.