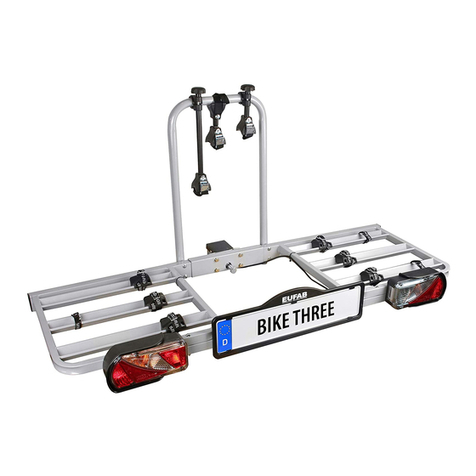
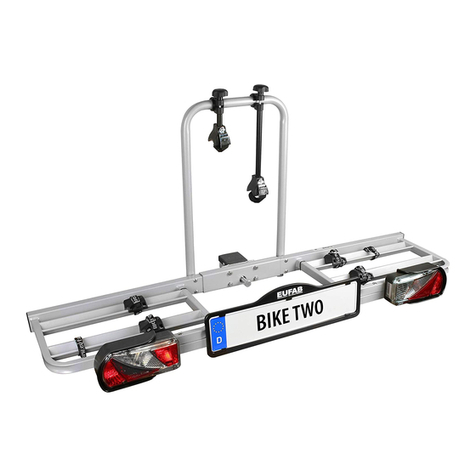
EUFAB 11583 User manual

1
Art.-Nr.: 11583
Erweiterung 3. Fahrrad für CROW PLUS
Art.-Nr.: 11582
Bedienungsanleitung ................. 2
Art. No. 11583
Extension 3. Bicycle for CROW PLUS
Art. No. 11582
Operating instructions ................ 8
Réf. art. 11583
Extension 3ème vélo pour CROW PLUS
Réf. art. 11582
Manuel de l‘opérateur ................ 15
Cod. art. 11583
Espansione terza bicicletta per CROW PLUS
Cod. art. 11582
Istruzioni per l‘uso ...................... 22

2
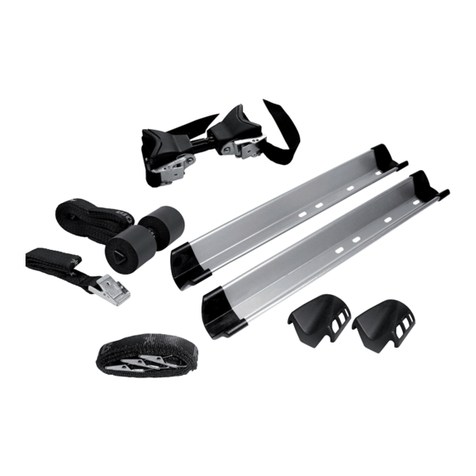
1 Radschiene links
2 Radschiene rechts
3 Rahmenhalter
4 Sicherheitsgurt, lang
5 Montagematerial
6 Kabelbinder
7 Spanngurt, kurz
WARNUNG!
Lesen Sie die Bedienungsanleitung vor Inbetriebnahme sorgfältig durch und beachten Sie alle
Sicherheitshinweise! Nichtbeachtung kann zu Personenschäden, Schäden am Gerät oder Ihrem
Eigentum führen!
Bewahren Sie die Originalverpackung, den Kaufbeleg sowie diese Anleitung zum späteren
Nachschlagen auf!
Bei der Weitergabe des Produkts geben Sie auch diese Anleitung weiter.
Prüfen Sie vor Inbetriebnahme den Inhalt der Verpackung auf Unversehrtheit und
Vollständigkeit!
1. BESTIMMUNGSGEMÄSSER GEBRAUCH
2. LIEFERUMFANG
Dieses Nachrüstset dient dazu, den EUFAB Anhängerkupplungsträger, CROW PLUS erweiterbar, Artikelnummer 11582,
um einen zusätzlichen Stellplatz für das dritte Fahrrad zu erweitern.
Dieses Gerät ist nicht dafür bestimmt, durch Kinder und Personen mit eingeschränkten geistigen Fähigkeiten oder ohne
erforderliches Fachwissen benutzt zu werden. Kinder sind von dem Gerät fernzuhalten.
Das Gerät ist nicht für den gewerblichen Einsatz bestimmt.
Zum bestimmungsgemäßem Gebrauch gehört auch die Beachtung aller Informationen in dieser Anleitung, insbe-
sondere die Beachtung der Sicherheitshinweise. Jede andere Verwendung gilt als nicht bestimmungsgemäß und
kann zu Sach- oder Personenschäden führen. Die EAL GmbH übernimmt keine Haftung für Schäden, die durch nicht
bestimmungsgemäßen Gebrauch entstehen.
INHALT
1. BESTIMMUNGSGEMÄSSER GEBRAUCH ______________________________________________2
2. LIEFERUMFANG ____________________________________________________________2
3. SPEZIFIKATIONEN ___________________________________________________________2
4. SICHERHEITSHINWEISE________________________________________________________3
5. BEDIENUNGSANLEITUNG_______________________________________________________5
5.1 ÜBERSICHT _______________________________________________________________5
5.2 MONTAGE DER ERWEITERUNG ___________________________________________________5
5.3 MONTAGE DER DER FAHRRÄDER AUF DEM FAHRRADHALTER _________________________________7
6. WARTUNG UND PFLEGE________________________________________________________7
6.1 WARTUNG________________________________________________________________7
6.2 PFLEGE__________________________________________________________________7
7. HINWEISE ZUM UMWELTSCHUTZ__________________________________________________7
8. KONTAKTINFORMATIONEN______________________________________________________7
Erweiterung 3. Fahrrad für CROW PLUS, Art.-Nr.: 11582
6
5
1
2
7
3
4
5Bild 1: Lieferumfang

3
Material: Stahl/Kunststo
Anzahl der Fahrräder: 1
Radstand (max.): 130 cm
Reifenbreite (max.) 5,6 cm
Schienenabstand: 20 cm
(zur 2. Schiene des Fahrradträgers)
Eigengewicht: ca. 1,700 kg
Nutzlast (max.): 15 kg
WARNUNG!
VORSICHT!
VORSICHT!
ACHTUNG!
ACHTUNG!
HINWEIS
HINWEIS
3. SPEZIFIKATIONEN
Personenschäden möglich:
Personen- oder Sachschaden möglich:
Sonstige Hinweise:
4. SICHERHEITSHINWEISE
Hinweise mit dem Wort WARNUNG! Warnen vor einer möglicherweise drohenden Gefahr. Wenn sie nicht
gemieden wird, könnenTod oder schwersteVerletzungen die Folge sein.
Hinweise mit dem Wort VORSICHT! Warnen vor einer möglicherweise drohenden Gefahr. Wenn sie nicht
gemieden wird, können leichte oder geringfügigeVerletzungen die Folge sein. Das Produkt oder etwas in
der Umgebung könnte schwer beschädigt werden.
• Kinder dürfen nicht mit dem Gerät spielen.
• Reinigung und Benutzerwartung dürfen nicht von Kindern ohne Beaufsichtigung durchgeführt werden.
• Lassen Sie das Verpackungsmaterial nicht achtlos liegen. Dieses kann für Kinder zu einem gefährlichen
Spielzeug werden!
• Benutzen Sie dieses Produkt nur für die dafür vorgeseheneVerwendung!
• Manipulieren oder zerlegen Sie das Gerät nicht!
• Verwenden Sie zu Ihrer eigenen Sicherheit ausschließlich Zubehör oder Ersatzteile, die in der Anleitung
angegeben sind, oder derenVerwendung durch den Hersteller empfohlen wird!
Hinweise mit demWort ACHTUNG!Warnen vor einer möglicherweise schädlichen Situation.Wenn sie nicht
gemieden wird, kann das Produkt oder etwas in der Umgebung beschädigt werden.
Der Fahrzeugführer ist grundsätzlich dafür verantwortlich, dass die Ladung und die Ladungssicherung vor-
schriftsmäßig sind. Überprüfen Sie deshalb die Ladung regelmäßig, auch bei längeren Fahrten muss die
Ladung regelmäßig überprüft werden.
NützlicherTip. Erleichtert die Bedienung oder Montage des Produkts oder dient zum besserenVerständnis.
Führen Sie keine Leerfahrten mit dem Fahrradträger durch. Verstauen Sie ihn im Koerraum Ihres
Fahrzeugs. Dies vermeidet einen erhöhten Kraftstoverbrauch und schont den Fahrradträger.
In der Anleitung nden Sie folgende Kategorien von Sicherheitshinweisen:
Dasjeweils verwendete Sicherheitssymbolersetzt nichtdenText desSicherheitshinweises.LesenSiedeshalb denSicher-
heitshinweis und befolgen Sie ihn genau!
Sollten Sie sich bei der Montage nicht sicher sein, bitten Sie Ihren Händler oder den Hersteller um weitere Informationen.
Weder Hersteller noch Händler haften für Schäden, die auf einen unsachgemäßen Gebrauch oder eine unsachgemäße
Montage zurückzuführen sind.
Kontrollieren Sie den Fahrradträger und die dazu gehörende Ladung regelmäßig! Sie sind dazu verpichtet und werden
im Schadenfall haftbar gemacht.

4
WARNUNG!
WARNUNG!
WARNUNG!
WARNUNG!
Personen- oder Sachschaden durch überstehende Teile.
ÜberdenRand desFahrzeugs bzw. Fahrradträgers stehendeTeile könnenwährendder Fahrt Personen-oder
Sachschäden verursachen.
Personen- oder Sachschaden durch Abdeckplanen.
Abdeckplanenerhöhen den Luftwiderstand. Siekönnen sichlösen undumheriegen, daskann zuschweren
Unfällen führen.
Personen- oder Sachschaden durch Verlieren des Fahrradträgers.
DerTräger setzt sich nach der Befestigung und einigen gefahrenen Kilometern erst richtig auf die Kupplung.
Personen- oder Sachschaden durch Verlieren der Fahrräder.
• Montieren Sie nurTeile, die nicht über den Rand des Fahrzeugs herausragen.
• Benutzen Sie keine Planen.
• Kontrollieren Sie die Befestigung desTrägers auf sicheren Sitz nach einigen Kilometern.
• Führen Sie die Montage bei lockerem Sitz erneut durch. Eventuell muss der Schnellverschluss nachge-
stellt werden. Lesen Sie dazu im entsprechenden Kapitel der Bedienungsanleitung des Fahrradträgers
nach. Besteht kein fester Halt, darf der Träger nicht verwendet werden.
• Das Fahren ohne Sicherheitsgurte kann zu Unfällen führen.
• Überprüfen Sie vor jedem Fahrtantritt den korrekten und festen Sitz des Gurtes um die Fahrräder und
Rahmenhalter desTrägers.
• Überprüfen Sie vor jedem Fahrtantritt den korrekten und festen Sitz der beiden Gurte um dasVorderrad
und den Gurt um das Hinterrad des Fahrrades.
• Spannen Sie die Gurte ggf. nach.
• Überprüfen Sie vor jedem Fahrtantritt, ob die verwendeten Gurte unbeschädigt und unverschlissen sind.
• Beschädigte oder verschlissene Gurte müssen vor Fahrtantritt gegen unbeschädigte Gurte ausgetauscht
werden. Es dürfen nur Gurte verwendet werden, die von der EAL GmbH dafür zugelassen sind.
WARNUNG!
WARNUNG!
Personen- oder Sachschaden durch verändertes Fahrzeugverhalten.
Das Fahren mit dem Fahrradträger beeinusst die Fahreigenschaften Ihres Fahrzeugs.
Personen- oder Sachschaden durch Überladen.
Das Überschreiten der max.Nutzlast des Fahrradträgers, sowieder zulässigen Stützlastder Anhängerkupplung
oder des zulässigen Gesamtgewichts kann zu schweren Unfällen führen.
• Passen Sie Ihre Fahrgeschwindigkeit dem neuen Fahrzeugverhalten an.
• Fahren Sie nie schneller als 130 km/h.
• Vermeiden Sie plötzliche und ruckartige Steuerbewegungen.
• Achten Sie darauf, dass Ihr Fahrzeug länger ist als gewohnt.
• Beachten Sie unbedingt die Angaben zur max. Nutzlast, zulässigen Stützlast und zulässigem Gesamtge-
wicht Ihres Fahrzeugs. Überschreiten Sie diese Angaben keinesfalls.
WARNUNG!
Personen- oder Sachschaden durch nicht komplett montierten Fahrradträger.
Das Fahren mit zusammengeklapptem Fahrradträger kann zu Unfällen führen.
Die beweglichenTeile des Fahrradträgers stellen im nicht fertig montierten Zustand eine Gefahrenquelle dar.
• Demontieren Sie den Fahrradträger, wenn Sie ihn nicht benötigen.
• Fahren Sie niemals mit zusammengeklapptem Fahrradträger.
5
Bild 3: Entfernen der Halteklammern Bild 4: Entfernen der Halteschrauben
5.2 MONTAGE DER ERWEITERUNG
WARNUNG!
ACHTUNG!
ACHTUNG!
Personen- oder Sachschaden durch Abbrechen des Fahrradträgers.
Das Fahren mit montiertem Fahrradträger im Gelände kann zu Beschädigungen oder zum Bruch desTrägers
führen.
Sachschaden durch önende Heckklappe.
Die Heckklappe könnte gegen den Fahrradträger schlagen und beschädigt werden.
Sachschaden durch heiße Auspugase.
Es können Schäden am Träger oder den Fahrrädern entstehen, wenn die Auspumündung direkt daran
grenzt.
Die Allgemeine Betriebsgenehmigung muss bei angebautem Träger immer im Fahrzeug mit
geführt werden.
• Benutzen Sie den Fahrradträger nicht im Gelände.
• Nur geeignet für den Einsatz auf einer Pkw-Anhängerkupplung.
• Fahren Sie langsam über Bremsschwellen: Max. Geschwindigkeit 10 km/h.
• Elektrische Heckklappen abschalten und manuell betätigen.
• Klappen Sie den Fahrradträger vor dem Önen der Heckklappe ab.
• Benutzen Sie ggf. eine Auspublende.
HINWEIS
Schritt 1: Schritt 2:
Bevor Sie die Erweiterung an Ihrem Fahrradträger montieren, lösen Sie die Elektrokabel vom Grundrahmen
des Fahrradträgers indem Sie die Kabelbinder mit einem Seitenschneider durchschneiden.
Entfernen Sie die Halteklammern für die Leuchtenträger
von der Außenseite des Grundrahmens (links und rechts). Entfernen Sie die Halteschrauben aus dem
Grundrahmen (links und rechts).
5. BEDIENUNGSANLEITUNG
5.1 ÜBERSICHT
1 Radschiene links
2 Radschiene rechts
3 Rahmenhalter
4 Sicherheitsgurt, lang
5 Montagematerial
6 Kabelbinder
7 Spanngurt, kurz
6
5
1
2
7
3
4
5Bild 2: Übersicht

6
Bild 7: Montage der Halteklammern
Bild 9: Festschrauben der Radschiene
Bild 8: Radschiene aufsetzen
Schritt 5:
Schritt 7:
Schritt 6:
Befestigen Sie die Halteklammern für die Leuchtenträger
an der Außenseite der Rahmenverlängerung mit den
Schrauben und den Distanzstücken (Montagematerial
Position 5 in der Übersicht) (links und rechts).
Die Rundungder Halterklammermuss nachunten weisen.
Befestigen Sie die Radschiene mit den Schloßschrauben,
ScheibenunddenMuttern(MontagematerialPosition5in
derÜbersicht).NachdemSiedieMutternfestgezogenhaben,
stecken Sie die Schutzkappen auf die Muttern (links und
rechts).
Setzen Sie die Radschienen mit dem Scharnier
auf die Rahmenverlängerung. Achten Sie darauf,
dass die Mutter mit der Schutzkappe des Schar-
niers nach hinten zeigt (links und rechts).
Mutter mit Schutzkappe nach hinten
Bild 5: Herausziehen der Rahmenverlängerung Bild 6: Einsetzen der Halteschrauben
Schritt 3: Schritt 4:
Ziehen Sie die Rahmenverlängrung mit dem Kennzei-
chenhalter und den Leuchtenträgern soweit aus dem
Grundrahmen heraus, bis sich das zweite Bohrungspaar
der Verlängerung mit den Bohrungen des Grundrahmens
überdecken.
Setzen Sei die Halteschrauben wieder ein
(links und rechts).

7
Bild 12: Befestigung Vorderrad
Bild 13: Verwendung Sicherheitsgurt
Sicherheitsgurt
6. WARTUNG UND PFLEGE
6.1 WARTUNG
6.2 PFLEGE
5.3 MONTAGE DER DER FAHRRÄDER AUF DEM FAHRRADHALTER
• Reinigen Sie den Fahrradträger und die Erweiterung mit einem milden Reinigungsmittel, mit warmemWasser und/oder
einem weichenTuch. Entfernen Sie vorher groben Schmutz und Staub.
• Benutzen Sie keine Lösungsmittel oder ähnliche Reiniger, da diese den Fahrradträger beschädigen können.
• Lassen Sie den Fahrradträger von alleine trocknen. Benutzen Sie keinen Fön oder andere Heizgeräte um denTrocknungs-
vorgang zu beschleunigen.
Befestigen Sie die ersten beiden Fahrräder gemäß der Anleitung Ihres Fahrradträgers.
Setzen Sie das dritte Fahrrad in die dritte Radschiene, entgegen der Richtung des zweiten Fahrrades.Verbinden Sie den
Rahmen des dritten Fahrrades mit Hilfe des losen Rahmenhalters, (Position 3 in der Übersicht), mit dem Rahmen des
zweiten Fahrrades.
Sichern Sie die Räder mit den mitgelieferten kurzen Spannbändern. Ein
Spannband für die Befestigung des Hinterrads und zwei für das Vorderrad
(siehe Bild 12), als Schutz gegen Verdrehen.
Sichern Sie nun die Fahrräder mit dem langen Sicherheitsgurt (Position 4 in
der Übersicht). Legen Sie den Sicherheitsgurt durch die Fahrradrahmen und
um den U-Bügel herum und ziehen den Sicherheitsgurt fest an.
Die Demontage der Fahrräder erfolgt in umgekehrter Reihenfolge.
Bei bestimmungsgemäßem Gebrauch sind der Fahrradträger und die Erweiterung für das dritte Fahrrad wartungsfrei.
WARNUNG!
Ohne diesen Sicherheitsgurt darf der Fahrradträger
nicht benutzt werden.
Bild 10: 3 x kurze Spanngurte Bild 11: Montage Spanngurte
Verlegen der Elektrokabel
Montage der kurzen Spanngurte
Verlegen Sie die Kabel entlang der Rohre des Grundrahmens. Die Kabel dürfen nicht geknickt, gezogen oder gequetscht
werden, z. B. im Bereich des Abklappmechanismus. Befestigen Sie die Kabel mit den mitgelieferten Kabelbindern (Position
6 in der Übersicht). Schneiden Sie zum Schluss das überschüssige Material der Kabelbinder mit einem Seitenschneider ab.
Schieben Sie die kurzen Spanngurte von innen nach außen unter dem Radhalter herum und dann wieder von außen
nach innen durch die Langlöcher des Radhalters (siehe Bild 11). Für das Hinterrad des Fahrrads benutzen Sie das mitt-
lere Langloch des Radhalters, für das Vorderrad die beiden äußeren Langlöcher (zwei Spanngurte gegen Verdrehen des
Vorderrades).

8
CONTENT
1. PROPER USE OFTHE PRODUCT ____________________________________________ 9
2. SCOPE OF DELIVERY __________________________________________________ 9
3. SPECIFICATIONS_____________________________________________________ 9
4. SAFETY PRECAUTIONS _________________________________________________ 9
5. INSTRUCTIONS FOR USE ________________________________________________ 12
5.1 OVERVIEW ________________________________________________________ 12
5.2 ATTACHINGTHE EXTENSION______________________________________________ 12
5.3 MOUNTINGTHE BICYCLESTOTHE BICYCLE RACK _________________________________ 14
6. MAINTENANCE AND CARE_______________________________________________ 14
6.1 MAINTENANCE______________________________________________________ 14
6.2 CARE____________________________________________________________ 14
7. NOTES REGARDING ENVIRONMENTAL PROTECTION _______________________________ 14
8. CONTACT INFORMATION ________________________________________________ 14
Extension 3. Bicycle for CROW PLUS, Art. No. 11582
• Reinigen Sie den Fahrradträger nachVerwendung im Küstenbereich und nach Einsatz bei Winterbedingungen regel-
mäßig, um Salz entfernen und dadurch die Haltbarkeit des Fahrradträgers zu verlängern.
• Lagern Sie den Fahrradträger in längeren Zeiten ohne Benutzung (z. B. über den Winter) trocken und geschützt, um
die Lebensdauer zu verlängern.
• Prüfen Sie vor jeder Fahrt den Fahrradträger und die Erweiterung aufVerschleiß.
• DefekteTeile und Spannriemen müssen ausgetauscht werden.
• Bei Beschädigung der Lackschicht sorgen Sie schnellstmöglich für eine Beseitigung des Schadens um eine Korrosion
des Materials zu vermeiden.
• Für den Austausch derTeile wenden Sie sich an unseren Kundenservice.
• JeglicheVeränderung an Originalteilen und Materialien oder an der Konstruktion des Fahrradträgers kann die Sicherheit
und Leistungsfähigkeit beeinträchtigen.
7. HINWEISE ZUM UMWELTSCHUTZ
Entsorgen Sie dieses Gerät über dieWertstotonne oder die öentlichen/kommunalen Sammelstellen.
Die Materialien sind recycelbar. Durch Recycling, stoiche Verwertung oder andere Formen der Wieder-
verwendung von Altgeräten leisten Sie einen wichtigen Beitrag zum Schutz unserer Umwelt!
8. KONTAKTINFORMATIONEN
EAL GmbH
Otto-Hausmann-Ring 107
42115Wuppertal, Deutschland
+49 (0)202 42 92 83 0
+49 (0) 202 42 92 83 – 160
info@eal-vertrieb.com
www.eal-vertrieb.com

9
WARNING!
Please read the operating instructions carefully prior to use and observe all safety instructions!
Non-compliance can lead to personal injuries, damage to the device or your property!
Please retain the original packaging, the proof of purchase as well as these instructions
for subsequent reference! When passing on the product, please include these operating
instructions as well.
Please check content of package for integrity and completeness prior to use!
1 Wheel rail left
2 Wheel rail right
3 Frame holder
4 Safety strap, long
5 Assembly material
6 Cable ties
7 Tensioning strap, short
1. PROPER USE OF THE PRODUCT
2. SCOPE OF DELIVERY
This retrotting set is used to extend the EUFAB trailer coupling rack CROW PLUS extendable, Article No. 11582, to include
an additional space for a third bicycle.
This device is not designed to be used by children or persons with limited mental abilities or without experience and/or
lack of required specialist knowledge. Keep children away from the device.
The device is not designated for commercial use.
Utilisation according to the intended purpose also includes the observance of all information in these operating
instructions, particularly the observance of the safety instructions. Any other use is considered improper and can lead to
property damage or personal injury. EAL GmbH assumes no liability for damage resulting from improper use.
6
5
1
2
7
3
4
5Figure 1: Scope of delivery
Material: Steel/plastic
Number of bicycles: 1
Wheel base (max.): 130 cm
Tyre width (max.): 5.6 cm
Rail distance: 20 cm
(to the 2nd rail of the bicycle rack)
Net weight: approx. 1.700 kg
Load bearing capacity (max.): 15 kg
3. SPECIFICATIONS
WARNING!
ATTENTION!
CAUTION!
Personal injury possible:
Personal injury or property damages are possible:
4. SAFETY PRECAUTIONS
Notes with the wordWARNING! warn of a potential risk. If this is not prevented, death or serious injury may
be the consequence.
Notes with the word ATTENTION! warn of a potential risk. If this is not prevented, minor or slight injury may
be the consequence.The product or something in the vicinity may be badly damaged.
Notes with the word CAUTION! warn of a potentially damaging situation. If this not prevented, the product
or something in its vicinity may be damaged.
The instructions contain the following categories of safety precaution:

10
CAUTION!
CAUTION!
NOTE
NOTE
Other note:
• Children may not play with the device.
• Cleaning and user maintenance may not be carried out by children without supervision.
• Do not treat packaging material carelessly. This may become a dangerous plaything for a child!
• Only use this product for its designated purpose!
• Do not manipulate or disassemble the device!
• For your own safety, only use accessories and spare parts that are stated in these instructions or that are
recommended by the manufacturer!
The driver is always responsible for ensuring that the load and the load securing meet the regulations. For
this reason, check the bicycle rack and the securing of the bicycles regularly, even on long journeys.
Useful tip. Makes operating or assembling the product easier or helps to improve understanding.
Do not travel with the bicycle rack empty. Store it in the boot of your vehicle. This prevents increased fuel
consumption and protects the rack.
The safety symbol used does not replace the text of the safety precaution. For this reason, read the safety note and follow
it well!
If you are not sure about the assembly, please ask your dealer or the manufacturer for additional information. Neither
the manufacturer nor the dealer are liable for damages caused as a result of the incorrect use or incorrect assembly.
Check the bicycle carrier and the load regularly!You are required to do so and may be held liable in case of damage.
WARNING!
WARNING!
Personal injury or property damage due to changed vehicle driving characteristics.
Driving with the mounted bicycle rack will aect the driving characteristics of your vehicle.
Personal injury or property damage due to overloading.
Exceeding the maximum payload of the bicycle rack and the permitted supporting load of the trailer tow bar
or permitted overall weight may lead to serious accidents.
• Adjust your speed to the new driving characteristics.
• Never drive faster than 130 km/h.
• Avoid sudden and jerky steering operations.
• Remember that your vehicle is longer than usual.
• Always observe the specications regarding the maximum payload, permitted supporting load and per-
mitted overall weight of your vehicle. Do not exceed these specications at any time.
WARNING!
Personal injury or property damage possible due to an incompletely mounted bicycle rack.
Driving with the bicycle rack folded can lead to accidents.
The moving parts of the bicycle rack do not represent a source of danger when fully mounted.
• Remove the bicycle rack when it is not required.
• Never drive with the bicycle rack folded.

11
WARNING!
WARNING!
WARNING!
WARNING!
Personal injury or property damages caused by protruding parts.
Parts protruding beyond the edge of the vehicle or rack may cause personal injury or property damage
during the journey.
Personal injury or property damage due to tarpaulins.
Tarpaulins increase the air resistance. They may come undone and ap which may result in serious
accidents. Do not use tarpaulins.
Personal injury or property damage due to loss of the bicycle rack.
The rack will only be seated properly on the coupling after it has been secured and driven for a few kilometres.
Personal injury or property damage due to loss of the bicycles.
• Only mount parts that do not protrude beyond the edge of the vehicle.
• Do not use tarpaulins.
• After a few kilometres, check the secure seating of the rack.
• If it is seated loosely, reinstall. The quick closure may need to be adjusted. For this, see the relevant
chapter of the bicycle rack operating instructions. If there is no rm hold, the rack may not be used.
• Driving without safety straps can lead to accidents.
• Before embarking on any journey, check the correct and rm seating of the strap around the bicycles and
frame holder of the rack.
• Before embarking on any journey check the correct and rm seating of both straps around the front
wheel and the strap around the rear wheel of the bicycle.
• If necessary tighten the straps again.
• Before embarking on any journey, check to make sure the straps used are undamaged and not worn.
• Damaged or worn straps must be replaced with undamaged ones before you embark on your journey.
Only straps authorised by EAL GmbH for the purpose may be used.
WARNING!
CAUTION!
Personal injury or property damage due to breakage of the bicycle rack.
Driving with a mounted bicycle rack o the road may cause damages or breakage of the rack.
Property damage due to opening tailgate.
The tailgate could hit the bicycle rack and be damaged.
• Do not use the bicycle rack o the road.
• Only suitable for use on a car trailer coupling.
• Drive over speed bumps slowly: Maximum speed 10 km/h.
• Switch o the electric tailgate and operate it manually.
• Fold down the bicycle rack before opening the tailgate.
CAUTION!
Property damage caused by hot exhaust gases.
Damages may be caused to the rack or bicycles if the exhaust outlet is close by.
• Use an exhaust deector if necessary.
The general operating permit must be carried in the vehicle when the rack is mounted.

12
Figure 3: Removing the retaining clips Figure 4: Removing the retaining screws
5.2 ATTACHING THE EXTENSION
NOTE
Step 1: Step 2:
Before tting the extension to your bicycle rack, disconnect the electrical cables from the base frame of the
bicycle rack by cutting through the cable ties with cutting pliers.
Remove the brackets for the lamp holders from the outside
of the base frame (left and right). Remove the retaining screws from the base frame.
(Left and right).
5. INSTRUCTIONS FOR USE
5.1 OVERVIEW
1 Wheel rail left
2 Wheel rail right
3 Frame holder
4 Safety strap, long
5 Assembly material
6 Cable ties
7 Tensioning strap, short
6
5
1
2
7
3
4
5Figure 2: Overview
Figure 5: Pulling out the frame extension Figure 6: Inserting the retaining screws
Step 3: Step 4:
Pull the frame extension with the licence plate holder and
the lamp holders outof the base frameuntil the secondpair
of holes in the extension coincide with the holes in the base
frame.
Replace the retaining screws (left and right).

13
Figure 7: Mounting the retaining clips
Figure 9: Tightening the wheel rail
Figure 8: Mounting the wheel rail
Step 5:
Step 7:
Step 6:
Fasten the brackets for the lamp holders to the outside of the
frame extension using the screws and spacers (mounting
material position 5 in the overview) (left and right).
The rounding of the holder clamp must point downwards.
Fasten the wheel rail with the lock bolts, washers and nuts
(installation material position 5 in the overview). After
tightening thenuts, placethe protective capson the nuts (left
and right).
Place the wheel rails with the hinge on the frame
extension. Makesure that the nut withthe protective
cap of the hinge points backwards (left and right).
Nut with protective cap to the rear
Laying electrical cables
Lay the cables along the tube of the base frame. The cables may not be bent, stretched or crushed, e.g. in the vicinity of the
folding mechanism. Secure the cables with the supplied cable ties (Position 6 in the overview). When you are nished, trim
any excess material from the cable ties using cutting pliers.
Figure 10: 3 x short tensioning strap Figure 11: Mounting the tensioning straps
Mounting the short tensioning strap
Insert the short tensioning strap from the inside to the outside below the bike holder and then from the outside to the
inside through the slots of the bike holder (Figure 11). For the rear wheel of the bicycle, use the centre slot of the wheel
holder, for the front wheel, use the two outer slots (two tensioning straps to prevent the front wheel from turning).
Nut with protective cap to the rear

14
Figure 12: Fastening the front wheel
Figure 13: Using the safety strap
Safety strap
6. MAINTENANCE AND CARE
6.1 MAINTENANCE
6.2 CARE
5.3 MOUNTING THE BICYCLES TO THE BICYCLE RACK
• Clean the bicyclerack and theextension with a mildcleaning agent,with warmwaterand/or a soft cloth. Before cleaning,
remove coarse dirt and dust.
• Do not use solvents or similar cleaning agents since these can damage the bicycle rack.
• Let the bicycle rack dry in the air. Do not use a hair dryer or other heaters to speed up the drying process.
• Clean the bicycle rack regularly after use in coastal areas and after use in winter conditions to remove salt and thereby
prolong the life of the bicycle rack.
• Store the bicycle rack in a dry and protected place for longer periods without use (e.g. over the winter) in order to prolong
its service life.
• Before each ride, check the bicycle rack and the extension for wear.
• Defective parts and tensioning belts must be replaced.
• In case of damage to the paint, make sure that the damage is removed as quickly as possible in order to prevent corrosion
of the material.
• Please contact our customer service for the exchange of parts.
• Any modication to original parts and materials or to the construction of the bicycle rack may compromise safety and
performance.
Fasten the rst two bikes according to the instructions on your bicycle carrier.
Place the third bicycle in the third wheel rail, facing the opposite direction to the second. Connect the frame of the third
bicycle using the loose frame holder (position 3 in the overview) to the frame of the second bicycle.
Secure the wheels with the supplied short tensioning straps. Use one tensio-
ning strap to secure the rear wheel and two for the front wheel (see gure 12)
to prevent them from turning.
Now secure the bicycles with the long safety strap (position 4 in the over-
view). Wrap the safety strap through the bicycle frames and the U-shaped
bracket and tighten.
The bicycles are removed in reverse order.
When used as intended, the bicycle rack and the extension for the third bicycle are maintenance-free.
WARNING!
The bicycle rack may not be used without this safety
strap.
7.NOTES REGARDING ENVIRONMENTAL PROTECTION
Please dispose of this device via the recycling bin or the public/municipal collection points.
The materials are recyclable. You make an important contribution to protecting our environment by
recycling, material utilisation or other forms of reusing waste equipment!
8. CONTACT INFORMATION
EAL GmbH
Otto-Hausmann-Ring 107
42115Wuppertal, Germany
+49 (0)202 42 92 83 0
+49 (0) 202 42 92 83 – 160
info@eal-vertrieb.com
www.eal-vertrieb.com

15
SOMMAIRE
1. UTILISATION CONFORME________________________________________________ 15
2. FOURNITURES ______________________________________________________ 15
3. SPÉCIFICATIONS_____________________________________________________ 16
4. CONSIGNES DE SÉCURITÉ _______________________________________________ 16
5. MODE D‘EMPLOI_____________________________________________________ 18
5.1 VUE GÉNÉRALE _____________________________________________________ 18
5.2 MONTAGE DE L‘EXTENSION ______________________________________________ 18
5.3 MONTAGE DESVÉLOS SUR LE PORTEVÉLO_____________________________________ 20
6. MAINTENANCE ET ENTRETIEN ____________________________________________ 21
6.1 MAINTENANCE______________________________________________________ 21
6.2 ENTRETIEN ________________________________________________________ 21
7. REMARQUES RELATIVES À LA PROTECTION DE L‘ENVIRONNEMENT ______________________ 21
8. DONNÉES DE CONTACT _________________________________________________ 21
Extension 3ème vélo pour CROW PLUS, Réf. art. 11582
AVERTISSEMENT!
Lisez attentivement le mode d‘emploi avant la mise en service et respectez toutes les consignes
de sécurité !
Tout non-respect de ces consignes peut entraîner des dommages corporels, endommager
l‘appareil ou vos biens !
Conservez l‘emballage d‘origine en lieu sûr, de même que le bon d‘achat et ce mode d‘emploi
an de pouvoir le compulser à tout moment ! Si vous transmettez cet appareil à quelqu‘un
d‘autre, fournissez également ce mode d‘emploi.
Vériez l‘intégrité et l‘intégralité du contenu de l‘emballage !
1. UTILISATION CONFORME
Ce kit de rééquipement sert à étendre le porte-vélo d‘attelage EUFAB, CROW PLUS extensible, référence article 11582
an d‘obtenir un emplacement supplémentaire pour le troisième vélo.
Cet appareil n‘est pas destiné à être utilisé par des enfants et des personnes ayant des aptitudes intellectuelles limitées
ou ne possédant pas les connaissances techniques requises. Il convient de tenir l‘appareil hors de portée des enfants.
L‘appareil n‘est pas conçu pour une utilisation professionnelle.
Le respect de l‘ensemble des informations gurant dans le présent mode d‘emploi, notamment le respect des consignes
desécurité, faitégalement partie d‘uneutilisation conforme.Touteautre utilisationest considéréecommenonconforme
et peut entraîner des dégâts matériels ou des blessures corporelles. La société EAL GmbH décline toute responsabilité en
cas de dommages découlant d‘une utilisation non conforme.
1 Rail porte-roue gauche
2 Rail porte-roue droit
3 Support de cadre
4 Sangle de sécurité, longue
5 Matériel de montage
6 Serre-câbles
7 Sangle de serrage, courte
2. FOURNITURES
6
5
1
2
7
3
4
5Figure 1 : Fournitures

16
Matériau : Acier/matière plastique
Nombre de vélos: 1
Empattement (max.) : 130 cm
Largeur des pneus (max.) : 5,6 cm
Intervalle des rails : 20 cm
(par rapport au 2ème rail du porte-vélo)
Poids propre : evn. 1,700 kg
Charge utile (max.) : 15 kg
AVERTISSEMENT !
PRUDENCE !
PRUDENCE !
ATTENTION !
ATTENTION !
REMARQUE
REMARQUE
3. SPÉCIFICATIONS
Dommages aux personnes possibles :
Dommages matériels ou aux personnes possibles :
Autres remarques :
4. CONSIGNES DE SÉCURITÉ
Les remarques précédées du terme AVERTISSEMENT ! vous avertissent d‘un danger imminent possible. Si le
danger n‘est pas évité, il peut entraîner la mort ou des blessures graves.
Les remarques précédées du terme PRUDENCE ! vous avertissent d‘un danger imminent possible. Si le danger
n‘est pas évité, il peut entraîner des blessures légères ou minimes. Le produit ou des objets alentours peuvent
être fortement endommagés.
• Les enfants ne doivent pas jouer avec l‘appareil.
• Les tâches de nettoyage et d‘entretien à eectuer chez soi ne doivent pas être exécutées par des enfants
qui ne sont pas sous surveillance.
• Ne laissez pas traîner le matériel d‘emballage. Il pourrait devenir un jouet dangereux pour les enfants !
• N‘utilisez cet appareil qu‘aux ns pour lesquelles il a été prévu !
• Ne pas manipuler ni démonter l‘appareil !
• Pourvotrepropresécurité,utilisez exclusivementles accessoiresou piècesde rechangequi sontindiqué(e)
s dans la notice d‘utilisation ou dont l‘utilisation est conseillée par le fabricant !
Les remarques précédées du terme ATTENTION ! vous avertissent d‘une situation dangereuse possible. Si le
danger n‘est pas évité, il peut entraîner des dommages sur le produit ou des objets alentours.
Le conducteur du véhicule est responsable du respect des prescriptions relatives à la charge et à sa
sécurisation. Contrôlez donc régulièrement le porte-vélos et la sécurité des vélos, aussi lors des longs trajets.
Conseil utile. Facilite l‘utilisation ou le montage du produit ou sert à une meilleure compréhension.
Ne faites pas de trajets à vide avec le porte-vélos. Rangez-le dans le core de votre véhicule. Vous évitez
ainsi une augmentation de votre consommation d‘essence et ménagez votre porte-vélos.
Vous trouverez les catégories suivantes de consignes de sécurité dans le mode d‘emploi :
Le symbole de sécurité utilisé correspondant ne remplace pas le texte de la remarque de sécurité. Lisez donc la remarque
de sécurité et veillez à la respecter !
Si vous avez des doutes lors du montage, demandez conseil à votre vendeur ou au fabricant. Le fabricant et les vendeurs
n‘endossentaucuneresponsabilitéen casdedommages résultantd‘une utilisationinappropriée oud‘unmontage incorrect.
Contrôlez régulièrement le porte-vélos et la charge correspondante !Vous en avez l‘obligation et serez responsable en cas
de dommage.

17
AVERTISSEMENT !
AVERTISSEMENT !
Dommages matériels ou corporels en cas de modication du comportement du véhicule.
La conduite avec le porte-vélos inuence les caractéristiques de conduite de votre véhicule.
Dommages matériels ou aux personnes en cas de surcharge.
Le dépassement de la charge utile max. du porte-vélos ainsi que de la charge d‘appui admissible de l‘atte-
lage de remorque ou du poids total admissible peut entraîner des accidents graves.
• Adaptez la vitesse de conduite au nouveau comportement du véhicule.
• Ne dépassez jamais 130 km/h.
• Évitez les mouvements de conduite soudains et brusques.
• Tenez compte du fait que votre véhicule est plus long que d‘habitude.
• Respectez impérativement les indications concernant la charge utile max., la charge d‘appui admissible
et le poids total admissible de votre véhicule. Ne les dépassez en aucun cas.
AVERTISSEMENT !
Dommages matériels ou aux personnes en cas de porte-vélos partiellement monté.
La conduite avec le porte-vélos replié peut entraîner des accidents.
Les pièces amovibles du porte-vélos en état démonté représentent une source de danger.
• Démontez le porte-vélos lorsque vous n’en avez pas besoin.
• Ne roulez jamais avec le porte-vélos replié.
AVERTISSEMENT !
Dommages matériels ou aux personnes en cas de perte des vélos.
• La conduite sans les sangles de sécurité peut entraîner des accidents.
• Avantchaquedéplacement,contrôlezlaxationcorrectedelasangleautourdesvélosetdusupportdecadredu
porte-vélos.
• Avant chaque déplacement, contrôlez la xation correcte des deux sangles autour de la roue avant et de
la roue arrière du vélo.
• Serrez les sangles au besoin.
• Avant chaque déplacement, contrôlez si les sangles utilisées sont exemptes de dommages et d‘usure.
• Les sangles endommagées ou usées doivent être remplacées avant le déplacement par des sangles en
bon état. Seules des sangles autorisées par la société EAL GmbH peuvent être utilisées.
AVERTISSEMENT !
AVERTISSEMENT !
Dommages matériels ou aux personnes en cas de pièces saillantes.
Les pièces dépassant des limites du véhicule ou du porte-vélos peuvent entraîner des dommages matériels
ou aux personnes pendant le déplacement.
Dommages matériels ou aux personnes provoqués par des bâches.
Les bâches augmentent la résistance au vent. Elles peuvent se détacher et s’envoler, ce qui peut provoquer
des accidents graves.
• Ne montez que des pièces qui ne dépassent pas les limites du véhicule.
• N’utilisez pas de bâches.
AVERTISSEMENT !
Dommages matériels ou aux personnes en cas de rupture du porte-vélos.
Conduire sur un terrain accidenté avec le porte-vélos monté peut provoquer des dommages ou la rupture
du porte-vélos.
• Vériez le porte-vélos soit xé en toute sécurité après quelques kilomètres.
• S‘il n’est pas correctement xé, recommencez le montage. La fermeture rapide devra éventuellement
être réajustée. Pour cela, veuillez lire le chapitre correspondant du mode d’emploi du porte-vélos. S’il n’y
a pas d’appui solide, le porte-vélos ne doit pas être utilisé.

18
AVERTISSEMENT !
Dommages matériels ou aux personnes en cas de rupture du porte-vélos.
Conduire sur un terrain accidenté avec le porte-vélos monté peut provoquer des dommages ou la rupture
du porte-vélos.
• Vériez le porte-vélos soit xé en toute sécurité après quelques kilomètres.
• S‘il n’est pas correctement xé, recommencez le montage. La fermeture rapide devra éventuellement
être réajustée. Pour cela, veuillez lire le chapitre correspondant du mode d’emploi du porte-vélos. S’il n’y
a pas d’appui solide, le porte-vélos ne doit pas être utilisé.
5.2 MONTAGE DE L‘EXTENSION
AVERTISSEMENT !
ATTENTION !
ATTENTION !
Personal injury or property damage due to breakage of the bicycle rack.
Driving with a mounted bicycle rack o the road may cause damages or breakage of the rack.
Dommages matériels en cas d‘ouverture du hayon arrière.
Le hayon arrière pourrait cogner contre le porte-vélos et être endommagé.
Des dommagessur leporte-vélosousur lesvélos peuventseproduiresi lasortie d‘échappement lesavoisine
directement.
Lorsque le porte-vélos est monté, veillez à toujours avoir avec vous l‘autorisation générale
d‘exploitation.
• N’utilisez jamais le porte-vélos sur un terrain accidenté.
• Il convient uniquement à un attelage de remorque de voiture particulière.
• Roulez lentement lorsque vous passez sur un ralentisseur : vitesse max. de 10 km/h.
• Couper les hayons électriques et les actionner manuellement.
• Rabattez le porte-vélos avant d‘ouvrir le hayon.
• Utilisez éventuellement un embout d‘échappement.
REMARQUE
Avant de monter l‘extension sur votre porte-vélo, desserrez les câbles électriques du cadre de base du
porte-vélo en découpant le serre-câbles à l‘aide d‘une pince coupante.
5. MODE D‘EMPLOI
5.1 VUE GÉNÉRALE
1 Rail porte-roue gauche
2 Rail porte-roue droit
3 Support de cadre
4 Sangle de sécurité, longue
5 Matériel de montage
6 Serre-câbles
7 Sangle de serrage, courte
6
5
1
2
7
3
4
5Figure 2 : Vue générale

19
Figure 3 : Retrait des attaches de maintien Figure 4 : Retrait des vis de retenue
Etape n°1 : Etape n° 2 :
Retirez les attaches de maintien pour le porte-éclairage
du côté extérieur du cadre de base (à gauche et à droite). Retirez les vis de retenue du cadre de base
(à gauche et à droite).
1
2
7
3
Figure 5 : Enlèvement de la rallonge du cadre Figure 6 : Introduction des vis de retenue
Etape n° 3 : Etape n° 4 :
Retirez la rallonge du cadre avec le support de plaque
d‘immatriculation et les porte-éclairages du cadre de base
jusqu‘à ce que la deuxième paire d‘alésages de la rallonge
soit recouverte avec les alésages du cadre de base.
Réintroduisezlesvisde retenue(à gaucheet àdroite).
Figure 7 : Retrait des attaches de maintien Figure 8 : Poser le rail porte-roue
Etape n°5 : Etape n°6 :
Fixez les attaches de maintien pour le porte-éclairage sur
le côté extérieur de la rallonge du cadre à l‘aide des vis et
des entretoises (matériel de montage position 5 dans la
vue générale) (à gauche et à droite).
L‘arrondi des attaches de maintien doit apparaître en bas.
Posez les rails porte-roue avec la charnière sur la
rallonge du cadre. Veillez à ce que l‘écrou avec le
capuchon protecteur de la charnière apparaisse à
l‘arrière (à gauche et à droite).
Ecrou avec capuchon protecteur à
l‘arrière

20
Figure 9 : Fixation du rail porte-roue
Etape n°7 :
Fixez le rail porte-roue avec les vis de carrosserie, les rondelles et les
écrous (matériel de montage position 5 dans la vue générale). Une
fois que vous avez serré les écrous, posez les capuchons protecteurs
sur les écrous (à gauche et à droite).
Figure 12 : Fixation de la roue avant
5.3 MONTAGE DESVÉLOS SUR LE PORTEVÉLO
Fixez les deux premiers vélos conformément aux instructions de votre porte-vélo.
Insérezle troisième vélodans letroisièmerail porte-roue dansle sensinversedudeuxième vélo. Reliezle cadredu troisiè-
me vélo à l‘aide du porte-cadre détaché (position 3 dans la vue générale) avec le cadre du deuxième vélo.
Protégez les roues avec les sangles de serrage courtes fournies. Une sangle
de serrage pour la xation de la roue arrière et deux pour la roue avant (voir
Figure 12), comme protection contre la déformation.
Figure 10 : 3 x sangles de maintien courtes Figure 11 : Montage des sangles de maintien
Pose des câbles électriques
Montage des sangles de maintien courtes
Posez les câbles le long des tubes du cadre de base. Les câbles ne doivent pas être tordus, tirés ou écrasés, notamment au
niveau du mécanisme de rabattement. Fixez les câbles avec les serre-câbles fournis (position 6 dans la vue générale). Pour
nir, enlevez l‘excédent de matière des serres-câbles à l‘aide d‘une pince coupante.
Déplacez les sangles de maintien courtes de l‘intérieur vers l‘extérieur sous le porte-roue, puis de l‘extérieur vers l‘intérieur
à travers les trous oblongs du porte-roue (voir Figure 11). Pour la roue arrière du vélo, utilisez le trou oblong central du por-
te-roue,pourla roueavantles deuxtrousoblongsextérieurs(deuxsanglesdemaintiencontreladéformationde laroueavant).
This manual suits for next models
1
Table of contents
Languages:
Other EUFAB Automobile Accessories manuals
Popular Automobile Accessories manuals by other brands

Hoppe
Hoppe AUDIO SHADE Installation instructions and owner's manual

Vixen Horns
Vixen Horns VXT3000A installation guide

Thule
Thule EuroWay G2 922 instructions

Dometic
Dometic DELIBOX DEL90H Installation and operating manual

Steinhof
Steinhof K-017 FITTING AND OPERATION MANUAL

Cruz
Cruz 909-650 Assembly instructions