6
1. DOMAINE D‘APPLICATION 5. NOTICE D‘UTILISATION
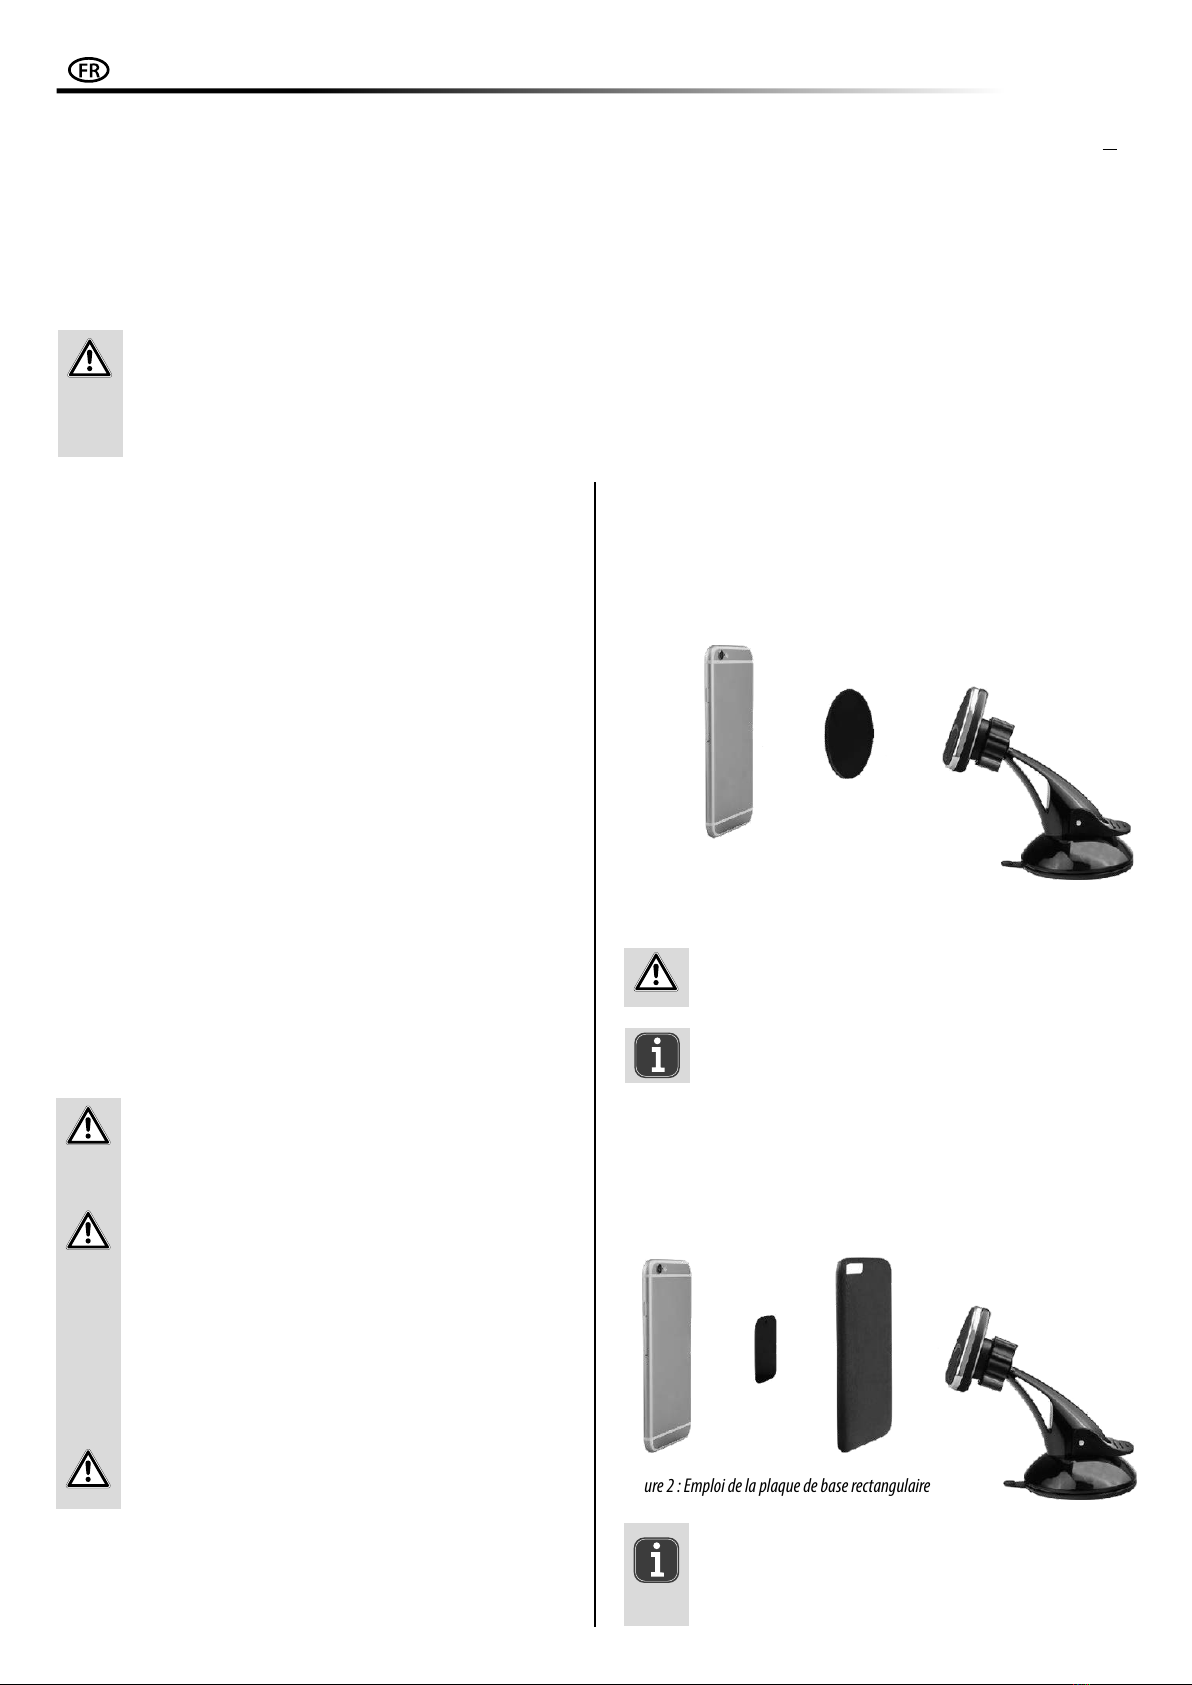
5.1 UTILISATION DE LA PLAQUE DE BASE RONDE
2. MATÉRIEL FOURNI
3. SPÉCIFICATIONS
4.CONSIGNES DE SÉCURITÉ
Le support magnétique pour téléphone portable sert à la xation de téléphones
mobiles, de smartphones et d‘appareils de navigation sur le pare-brise ou à l‘intérieur
de véhicules.
Cet appareil n‘est pas destiné à être utilisé par des enfants ou des personnes aux
capacités mentales limitées ou ne disposant pas de l‘expérience ou des connaissances
nécessaires. Les enfants doivent rester à distance de cet appareil.
L‘utilisation conforme aux prescriptions implique également le respect de toutes
les informations contenues dans ce mode d‘emploi, en particulier le respect des
consignes de sécurité. Toute autre utilisation est considérée comme non conforme
et risque d‘entraîner des dommages matériels ou corporels. EAL GmbH décline toute
responsabilité pour les dommages résultant d‘une utilisation non conforme.
La plaque de base ronde est collée au dos du téléphone mobile. Avant le montage,
nettoyez l‘arrière de votre téléphone mobile an qu‘il n‘y ait pas de saleté, de pous-
sière et de graisse. Retirez le lm de protection de la surface adhésive sur la plaque
magnétique. Placez la plaque magnétique au milieu de l‘arrière de votre téléphone
mobile et pressez-la fermement.
1x Support magnétique
1x Plaque de base magnétique, ronde
1x plaque de base magnétique, rectangulaire
1x Instructions
Plaque de base magnétique, ronde : Ø 42 mm
Plaque de base magnétique, rectangulaire : 65 x 45 [mm]
Diamètre ventouse : 62 mm
• Le triangle de signalisation signale toutes les instructions relatives à
la sécurité. Respectez-les à tout moment car vous risqueriez sinon de
vous blesser ou l‘appareil risquerait d‘être endommagé.
• Les enfants ne doivent pas jouer avec l‘appareil.
• Les tâches de nettoyage et d‘entretien ne doivent pas être exécutées
par des enfants qui ne sont pas sous surveillance.
• Ne laissez pas traîner le matériel d‘emballage. Il pourrait devenir un
jouet dangereux pour les enfants !
• N‘utilisez cet appareil qu‘aux ns pour lesquelles il a été prévu !
• Ne manipulez ni démontez jamais l‘appareil !
• Pour votre propre sécurité, utilisez exclusivement les accessoires ou
pièces de rechange qui sont indiqué(e)s dans la notice d‘utilisation ou
dont l‘utilisation est conseillée par le fabricant !
• Le support de portable ne doit pas entraver la vue du conducteur.
• Le conducteur ne doit pas être entravé par le support de portable
magnétique.
• Le support magnétique de portable ne doit pas être monté à proximité
des airbags.Veuillez lire à cet eet le manuel de votre véhicule ou vous
adresser à votre garagiste.
Figure 1 : Emploi de la plaque de base ronde
Retirez à nouveau la plaque de base de votre téléphone mobile en la décollant de
l‘arrière du téléphone mobile avec une lame de couteau.
N‘utilisez pas de produit nettoyant ou de solvant agressif pour éliminer
les résidus de colle. Lisez à ce sujet les instructions d‘entretien de votre
téléphone mobile.
Une décoloration prolongée de la surface de collage peut survenir à
cause de la colle.
1. DOMAINE D‘APPLICATION _____________________________ 6
2. MATÉRIEL FOURNI __________________________________ 6
3. SPÉCIFICATIONS ___________________________________ 6
4. CONSIGNES DE SÉCURITÉ______________________________ 6
5. NOTICE D‘UTILISATION _______________________________ 6
5.1 UTILISATION DE LA PLAQUE DE BASE RONDE__________________ 6
5.2 UTILISATION DE LA PLAQUE DE BASE RECTANGULAIRE____________ 6
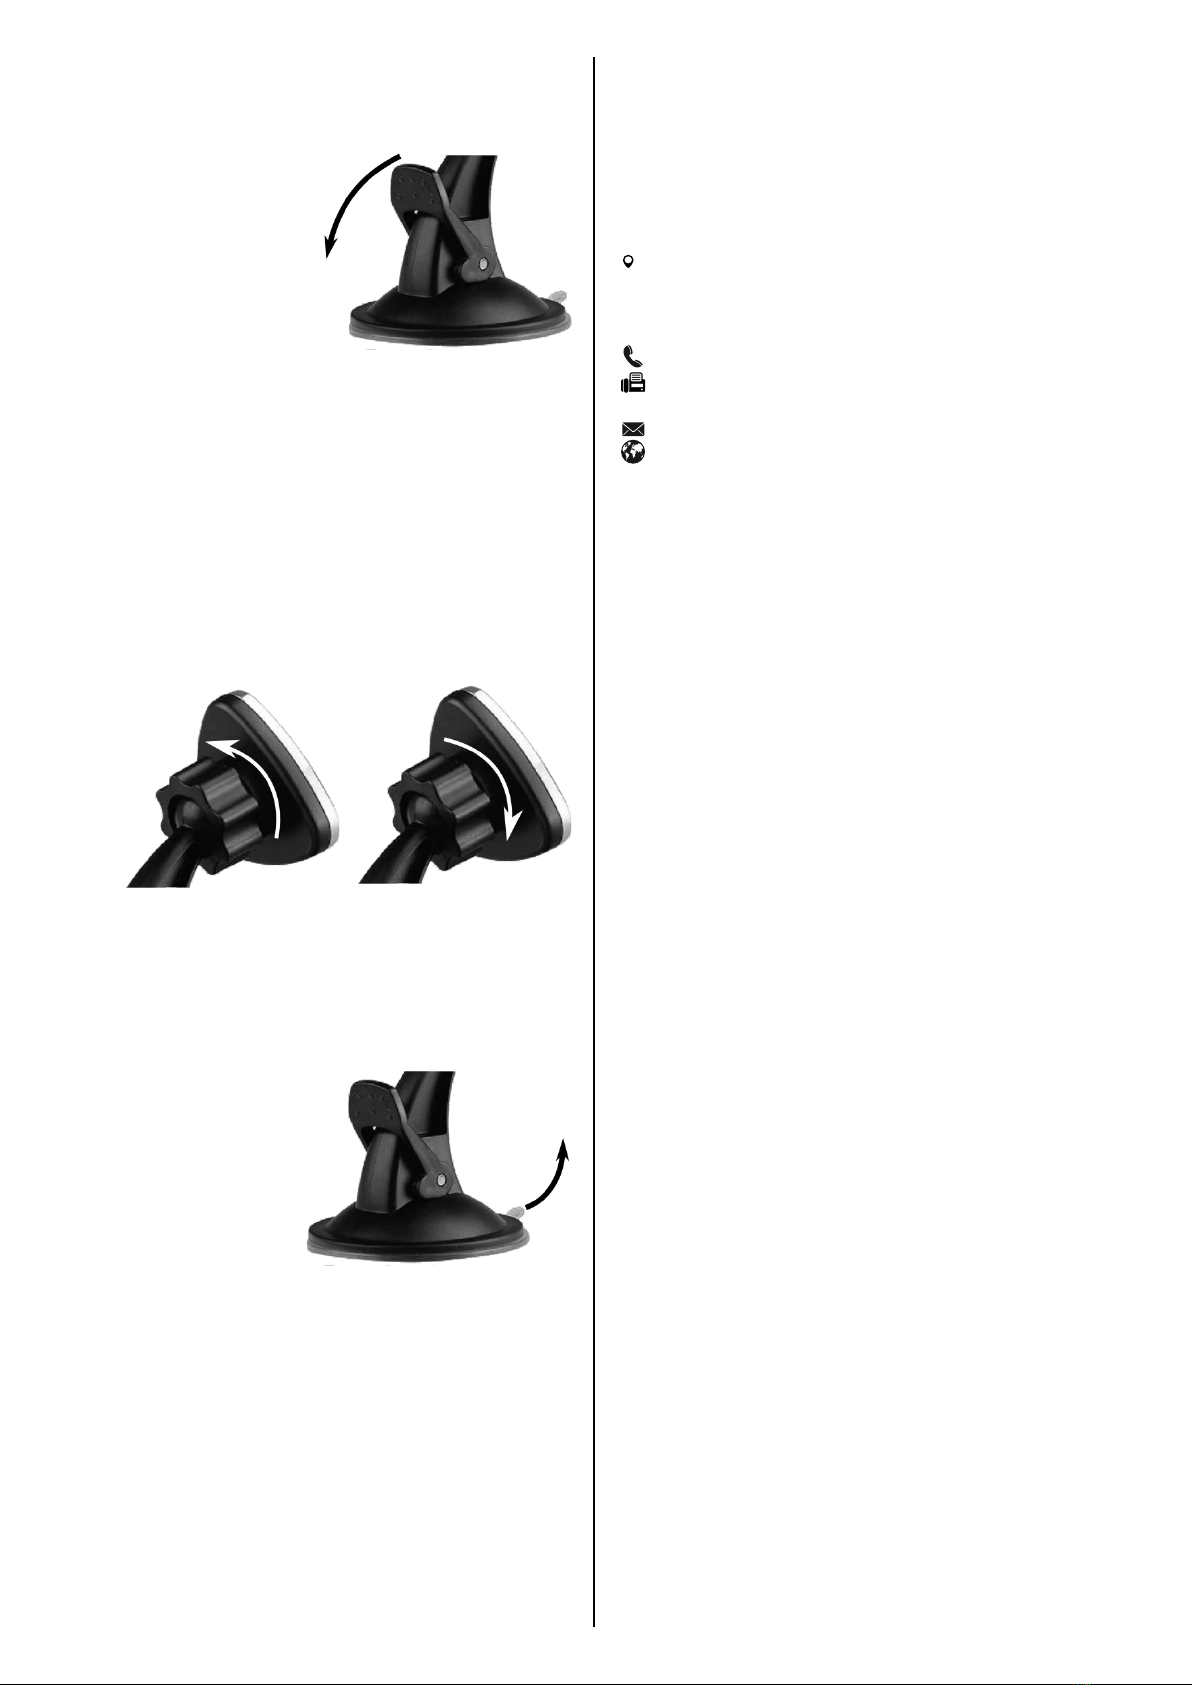
5.3 MONTAGE DU SUPPORT MAGNÉTIQUE______________________ 7
5.4 FIXATION DE L‘APPAREIL MOBILE AU NIVEAU DU SUPPORT MAGNÉTIQUE 7
5.5 RÉGLAGE DE L‘ANGLE ________________________________ 7
5.6 DÉMONTAGE DU SUPPORT MAGNÉTIQUE ____________________ 7
6. ENTRETIEN ET NETTOYAGE _____________________________ 7
6.1 MAINTENANCE ____________________________________ 7
6.2 MAINTENANCE ____________________________________ 7
7. REMARQUES RELATIVES À LA PROTECTION DE L‘ENVIRONNEMENT ____ 7
8. DONNÉES DE CONTACT _______________________________ 7
Porte-téléphone magnétique
5.2 UTILISATION DE LA PLAQUE DE BASE RECTANGULAIRE
La plaque magnétique rectangulaire est utilisée entre le téléphone mobile et la
housse de protection. Retirez la housse de protection de votre appareil. Retirer la
poussière et la saleté à l‘arrière de votre téléphone mobile et à l‘intérieure de la hous-
se de protection. Placez la plaque la plaque magnétique rectangulaire avec le côté
rembourré sur le téléphone mobile et replacez la housse de protection.
Figure 2 : Emploi de la plaque de base rectangulaire
De la poussière et de la saleté peuvent s‘accumuler entre le téléphone
mobile et la housse de protection après une longue utilisation. Cela peut
provoquer des traces de frottement et des rayures sur l‘appareil. Nettoyez
donc régulièrement l‘arrière du téléphone et l‘intérieure de la housse de
protection.
SOMMAIRE
AVERTISSEMENT !
Lisez attentivement la notice d‘utilisation avant la mise en service et respectez toutes les consignes de sécurité !
Tout non-respect de ces consignes peut entraîner des dommages corporels, endommager l‘appareil ou vos biens !
Conservez l‘emballage d‘origine, le justicatif d‘achat et la présente notice pour vous y référer ultérieurement ! Si vous revendez ou remettez
l‘appareil à des tiers, veuillez également leur remettre cette notice d‘utilisation.
Avant la mise en service, veuillez contrôler le contenu de l‘emballage quant à l‘absence de dommages et vérier si toutes les pièces sont présentes !