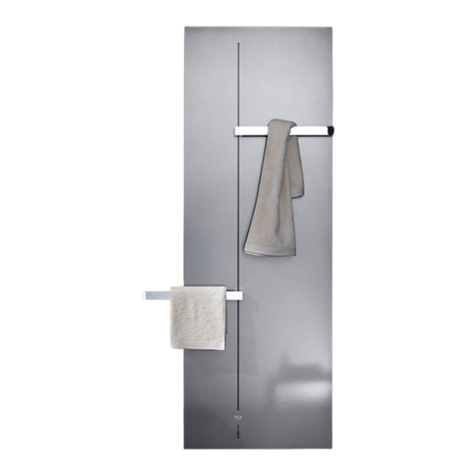
Kermi Ideos IDE10 Manual

2010/01 • 6908951
DE – Gebrauchs- und Montageanleitung Designheizkörper Ideos
EN – Instruction and installation manual Ideos design radiator
FR – Instructions d'utilisation et de montage du radiateur design Ideos
IT – Istruzioni d'uso e di montaggio radiatore design Ideos
RU – Инструкция по использованию и монтажу дизайнерского радиатора Ideos
CS – NávodkpoužitíamontážidesignovéhotopnéhotělesaIdeos
NL – Gebruiks- en montagehandleiding designradiator Ideos
ES – Instrucciones de empleo y montaje radiadores de diseño Ideos
ZH – Ideos 设计散热器说明书和安装手册
PL – InstrukcjaużytkowaniaimontażugrzejnikówdekoracyjnychIdeos
EL – Οδηγίες χρήσης και συναρμολόγησης θερμαντικού σώματος υψηλής αισθητικής Ideos
FA –
IdeosέϮΗΎϳΩέίΪϧϩέϭΐμϧϞϤόϟέϮΘγΩ – FA
IDE10

2
DE – Gebrauchsanleitung
Zulässiger Gebrauch
Der Heizkörper darf nur zum Heizen von In-
nenräumen und zum Trocknen von Textilien
und wärmebeständigen Materialien verwen-
det werden.
Jeder andere Gebrauch ist nicht bestimmungs-
gemäß und daher unzulässig.
Fehlgebrauch
Der Heizkörper ist nicht geeignet als Sitzgele-
genheit, Kletter- oder Steighilfe.
Sicherheitshinweise
GEFAHR
Lebensgefahr!
Löschen Sie im Brandfall nicht mit Wasser.
Verwenden Sie Feuerlöscher mit Kohlen-
stoffdioxid, Schaum, Pulver oder Sand.
►
►
WARNUNG
Verbrennungsgefahr!
Die Oberfläche des Heizkörpers kann bis zu
110 °C (230 °F) heiß werden.
Seien Sie vorsichtig beim Berühren des
Heizkörpers.
►
Betreiben Sie den Heizkörper nicht mit be-
schädigtem Anschlusskabel.
Bei Auslaufen von Wärmeträgerflüssigkeit:
Fangen Sie die Flüssigkeit in einem Be-
hälter auf.
Informieren Sie Ihren Fachhandwerker.
Ersetzen Sie ausgelaufene Flüssigkeit
nicht durch Wasser.
Reinigung
Verwenden Sie nur milde, nicht scheuernde
Reinigungsmittel.
Reklamation
Wenden Sie sich an Ihren Fachhandwerker.
Montage und Reparaturen
Lassen Sie die Montage und Reparaturen nur
vom Fachhandwerker ausführen, damit Ihre
Gewährleistungsansprüche nicht erlöschen.
Entsorgung
Führen Sie ausgediente Heizkörper mit Zu-
behör dem Recycling oder der ordnungs-
gemäßen Entsorgung zu. Beachten Sie die
örtlichen Vorschriften.
►
►
–
–
–
►
►
►
►
Entsorgen Sie Wärmeträgerflüssigkeit ge-
mäß den behördlichen Bestimmungen über
einen zugelassenen Entsorgungsfachbe-
trieb (Abfallschlüssel-Nr. 160115).
DE – Montageanleitung
Der Heizkörper darf nur von einem Fachhand-
werker montiert werden.
Folgende Tätigkeiten dürfen nur von einer
Elektrofachkraft gemäß BGV A3 durchgeführt
werden:
Anschluss des Elektro-Sets
Anschluss des Heizstabs an Elektro-Set
Sicherheitshinweise
Vor der Montage diese Anleitung gründlich
lesen.
Nach der Montage die Anleitung dem End-
verbraucher überlassen.
Sicherheitshinweise in der separaten Anlei-
tung des Elektro-Sets beachten.
GEFAHR
Lebensgefahr!
Lage der Versorgungsleitungen (Strom,
Gas, Wasser) prüfen.
Keine Leitungen anbohren.
►
►
WARNUNG
Verletzungsgefahr!
Gewicht des Heizkörpers beachten (siehe
Seite 31).
Ab 25 kg mit Hebeeinrichtung oder meh-
reren Personen arbeiten.
►
►
WARNUNG
Personen- und Sachschäden!
Untergrund auf Tragfähigkeit prüfen.
Gewicht des Heizkörpers (siehe Seite 31).
und mögliche Zusatzlasten beachten.
Befestigungsmaterial auf Eignung prüfen
und auf die bauliche Situation abstimmen.
Gesonderte Anforderungen, z. B. für
öffentliche Gebäude (Schulen o. Ä.),
berücksichtigen.
►
►
►
Einsatzbedingungen
Schutzbereiche gemäß DIN VDE 0100-701
beachten. Darüber hinaus alle örtlichen
Vorschriften beachten.
►
•
•
►
►
►
►

3
Heizkörper nicht an das Heizungssystem
anschließen.
Heizstab nur mit der zugelassenen Span-
nung betreiben (siehe Typenschild).
Einsatzgrenzen in Feuchträumen gemäß
DIN 55900 "Beschichtungen für Raumheiz-
körper" beachten.
Heizkörper nur in der Schutzverpackung
lagern und transportieren.
Mindestabstände zwischen Heizkörper und
umgebenden Teilen für Luftzirkulation be-
achten: 50 mm.
Reklamation
An den Lieferanten wenden.
Entsorgung
Verpackung und nicht benötigte Teile dem
Recycling oder der ordnungsgemäßen
Entsorgung zuführen. Die örtlichen Vor-
schriften beachten.
Technische Merkmale
Elektrischer Anschluss:
Heizstab unten rechts oder links im Heiz-
körper montiert
Anschluss über Elektro-Set
Prüfdruck: 7,8 bar
Füllung: Nicht brennbare, ungiftige Wär-
meträgerflüssigkeit
Betriebsart: Elektrobetrieb, unabhängig
vom Heizungssystem, mit Regelung über
Elektro-Set
Montage
Heizkörper mit montiertem Heizstab so abstel-
len, dass das Kabel nicht geknickt oder beschä-
digt wird.
Vorbereitende Tätigkeiten (siehe Abb. 1–5)
Sicherstellen, dass in Kabelreichweite eine
vorschriftsmäßig installierte Gerätedose
(230 V, Absicherung 16 A) vorhanden ist.
Lieferumfang auf Vollständigkeit und Schä-
den prüfen.
Benötigtes Werkzeug bereitlegen.
Schutzverpackung zur Montage nur an den Be-
festigungs- und Anschlusspunkten entfernen.
Lange Befestigungsschrauben in die oberen
Muffen einschrauben und festziehen.
Kurze Befestigungsschrauben in die unteren
Muffen einschrauben und festziehen.
Ggf. im Lieferumfang vorhandene Acces-
soires, z. B. Handtuchstange, montieren
(siehe separate Anleitung).
►
►
►
►
►
►
►
•
–
–
•
•
•
►
►
►
►
►
►
►
Obere Befestigungen montieren (siehe
Abb. 6–9)
Bohrpunkte anzeichnen (siehe Abb. A).
Löcher bohren und Dübel setzen.
An den Wandlagern die Sicherungsschrau-
ben ausschrauben und die Aufnahmen he-
rausziehen.
Wandlager mit Innensechskant-Schrauben
anschrauben. Dabei auf die Lage der Boh-
rung achten.
Aufnahmen in die Wandlager einsetzen.
Dabei auf die Lage der Öffnungen achten.
Aufnahmen mit den Sicherungsschrauben
nur handfest anschrauben. So können die
Aufnahmen zum Ausrichten noch verscho-
ben werden.
Untere Abstandhalter vormontieren (siehe
Abb. 10–11)
Mit einem Messer die beiden Aufschnapp-
bolzen an der zweiten Markierung auf das
Maß 49 mm kürzen.
Beide Abstandhalter am Heizkörper mon-
tieren.
Heizkörper einhängen und ausrichten (siehe
Abb. 12–15)
Heizkörper über die Schrauben in die Auf-
nahmen einhängen. Dabei darauf achten,
dass der Heizkörper einrastet.
Um den Heizkörper seitlich auszurichten:
Aufnahmen verschieben.
Um den Wandabstand einzustellen: Auf-
nahmen herausziehen oder hineindrücken.
Um die Höhe einzustellen: An der Aufnah-
me die Einstellschraube drehen.
Untere Abstandhalter montieren und Heizkör-
per befestigen (siehe Abb. 16–27)
Untere Abstandhalter so weit herausdre-
hen, bis diese an der Wand aufliegen und
der Heizkörper gerade hängt.
Obere Sicherungsschrauben fest anziehen.
Untere Bohrlöcher für die Abstandhalter
markieren.
Sicherungsbügel nach hinten drücken und
Heizkörper aushängen. Heizkörper mit
montiertem Heizstab so abstellen, dass das
Kabel nicht geknickt oder beschädigt wird.
An den unteren Markierungen die Löcher
bohren und Dübel setzen.
Beide Abstandhalter demontieren.
Beide Aufschnappbolzen festschrauben.
►
►
►
►
►
►
►
►
►
►
►
►
►
►
►
►
►
►
►
4
Heizkörper über die Schrauben in die Auf-
nahmen einhängen. Dabei darauf achten,
dass der Heizkörper einrastet.
Beide Abdeckkappen aufdrücken und nach
hinten schieben.
An beiden Abstandhaltern die Wandab-
stützclips aufdrücken.
Heizkörper mit der Schutzverpackung voll-
ständig abdecken.
Elektrischer Anschluss
Folgende Tätigkeiten von einer Elektro-
fachkraft durchführen lassen (gemäß sepa-
raten Anleitungen):
Anschluss des Elektro-Sets
Anschluss des Heizstabs an Elektro-Set
Inbetriebnahme
Schutzverpackung zur Endreinigung oder vor
der Inbetriebnahme vollständig entfernen.
►
►
►
►
►
–
–
►
EN – Instruction manual
Proper use
The radiator may only be used for heating in-
door areas and for drying textiles and heat-re-
sistant materials.
Any other use is improper and is therefore pro-
hibited.
Improper use
The radiator is not suitable for use as a seat or
as a climbing or mounting aid.
Safety precautions
DANGER
Danger to life!
Do not extinguish a fire with water.
Use a fire extinguisher with carbon diox-
ide, foam, powder or sand.
►
►
WARNING
Risk of burns!
The radiator surface can reach temperatures
of up to 110 °C (230 °F).
Take care when touching the radiator.
►
Do not operate the radiator with a dam-
aged connection cable.
When heat carrier liquid escapes:
Catch the liquid in a container.
Inform your specialised tradesman.
Do not replace the escaped liquid with
water.
Cleaning
Only use mild, non-scouring cleaning
agents.
Complaints
Contact your specialised tradesman.
Installation and repair
Installation and repair should only be per-
formed by a specialised tradesman so that
warranty claims remain valid.
Disposal
Take disused radiators with accessories to a
recycling centre or authorised waste man-
agement facility. Observe local regulations.
Dispose of the heat carrier liquid at an ap-
proved waste management facility accord-
ing to the official regulations (Waste Key
No. 160115).
►
►
–
–
–
►
►
►
►
►

5
EN – Installation manual
The radiator may only be installed by a special-
ised tradesman.
The following activities may only be carried out
by an electrician in accordance with BGV A3:
Connection of the electrical unit
Connection of the heating element to the
electrical unit
An electrician is someone who can assess the
work assigned to him and identify possible
dangers due to his specialist training, knowl-
edge, experience and his knowledge of corre-
sponding regulations.
Safety precautions
Read these instructions thoroughly before
installation.
After installation, hand over the manual to
the end user.
Observe the safety instructions in the sepa-
rate instructions of the electrical unit.
DANGER
Danger to life!
Check the location of the supply lines
(electricity, gas, water).
Do not drill into any of the lines.
►
►
WARNING
Danger of injury!
Take the weight of the radiator (see
Page 31) into account.
Work with lifting equipment or several
persons for weights from 25 kg upwards.
►
►
WARNING
Damage to person and property!
Check the bearing surface for load-carry-
ing capacity. Take the weight of the radi-
ator (see Page 31) and possible additional
loads into account.
Check the fastening material suitability
and adapt to the structural situation.
Observe special requirements for e.g.
public buildings (schools, etc.).
►
►
►
•
•
►
►
►
Conditions of use
Please note that electrical units may only be
installed in certain areas in rooms with bath
and shower facilities when choosing the in-
stallation site. Observe the corresponding
local regulations.
Do not connect the radiator to the heating
system.
Only operate the heating element with the
rated voltage (see rating plate).
Observe the limitations on use in damp
rooms in accordance with local conditions.
Only transport and store the radiator in the
protective packaging.
Observe the minimum distances between
the radiator and ambient parts to ensure
air circulation: 50 mm.
Complaints
Contact the supplier.
Disposal
Take the packaging and parts not required
to a recycling centre or authorised waste
management facility. Observe the local
regulations.
Technical characteristics
Electrical connection:
Heating element installed at the lower
right or left in the radiator
Connection via the electrical unit
Test pressure: 7,8 bar
Filling: Non-flammable, non-toxic heat car-
rier liquid
Operating mode: Electrical operation, in-
dependent of heating system, with control
via electrical unit
Installation
Put down the radiator with installed heating ele-
ment so that the cable is not bent or damaged.
Preparatory activities (see Fig. 1–5)
Ensure that a properly installed connector
socket (230 V, 16 A fuse) is available within
the range of the cable.
Check the delivery for completeness and
damage.
Lay out any tools that are required.
Remove the installation protective packag-
ing only at the fastening and connecting
points.
►
►
►
►
►
►
►
►
•
–
–
•
•
•
►
►
►
►

6
Screw in and tighten the long fastening
screws into the upper sleeves.
Screw in and tighten the short fastening
screws into the lower sleeves.
If appropriate, install any accessories in-
cluded in the scope of delivery, such as a
towel rod, (see separate instructions).
Mount the upper fastenings (see Fig. 6–9)
Mark the drill holes (see Fig. A).
Drill the holes and insert the anchors.
At the wall adapters screw out the securing
screws and pull out the retainers.
Screw on the wall adapters with hexagon
socket screws. Take the position of the drill
hole into account.
Insert the retainers into the wall adapters.
Take the position of the openings into ac-
count.
Only screw on the retainers handtight with
the securing screws. This allows the retain-
ers to still be moved for alignment.
Pre-install the lower spacers (see Fig. 10–11)
Use a knife to cut the two snap-in bolts
at the second marking to the dimension
49 mm.
Install both spacers on the radiator.
Suspend and align the radiator (see Fig. 12–
15)
Suspend the radiator via the screws into
the retainers. Ensure that the radiator does
latch in.
In order to align the radiator sideways:
Slide the retainers.
In order to set the wall clearance: Pull out
or push in the retainers.
In order to set the height: Turn the adjust-
ing screw at the retainer.
Install the lower spacers and fasten the radia-
tor (see Fig. 16–27)
Turn out the lower spacers until these are
positioned flat at the wall and the radiator
hangs straight.
Tighten the upper securing screws.
Mark the lower drill holes for the spacers.
Press the locking clamp to the rear and
hang out the radiator. Put down the radia-
tor with installed heating element so that
the cable is not bent or damaged.
Drill the holes and insert the anchors at the
lower markings.
Dismantle both spacers.
►
►
►
►
►
►
►
►
►
►
►
►
►
►
►
►
►
►
►
►
►
Screw both snap-in bolts tight.
Suspend the radiator via the screws into
the retainers. Ensure that the radiator does
latch in.
Press on both cover caps and slide them to
the rear.
Press the wall support clips onto both spacers.
Cover the radiator completely with the pro-
tective packaging.
Electrical connection
Have the following activities carried out by
an electrician (in accordance with the sepa-
rate instructions):
Connection of the electrical unit
Connection of the heating element to
the electrical unit
Commissioning
Remove the protective packaging com-
pletely before final cleaning or commis-
sioning.
►
►
►
►
►
►
–
–
►

7
FR – Instructions d'utilisation
Utilisation conforme
Le radiateur ne doit être utilisé que pour le
chauffage de pièces intérieures et pour le sé-
chage de textiles et de matériaux résistant à
la chaleur.
Toute autre utilisation est non conforme et par
conséquent interdite.
Utilisation non conforme
Le radiateur ne convient pas comme siège, es-
trade ou escabeau.
Consignes de sécurité
DANGER
Danger de mort!
En cas d'incendie, ne pas éteindre avec
de l'eau.
Utilisez des extincteurs au gaz carboni-
que, à mousse, à poudre ou du sable.
►
►
AVERTISSEMENT
Danger de brûlure!
La surface du radiateur peut atteindre une
température de 110 °C (230 °F).
Soyez prudent avant de toucher le radiateur.
►
N'exploitez pas le radiateur si le câble de
raccordement est endommagé.
En cas de fuite de fluide caloporteur:
Collectez le liquide dans un récipient.
Informez votre technicien spécialisé.
Ne remplacez pas le liquide épanché par
de l'eau.
Nettoyage
Utilisez uniquement des produits de net-
toyage doux, non abrasifs.
Réclamation
Le cas échéant, adressez-vous à votre tech-
nicien spécialisé.
Montage et réparations
Ne faites exécuter le montage et les répara-
tions que par un technicien spécialisé pour
que vos droits à la garantie restent valides.
Elimination
Envoyer les radiateurs usés et leurs acces-
soires au recyclage ou à un système d'éva-
cuation de déchets approprié. Respectez les
prescriptions locales.
►
►
–
–
–
►
►
►
►
Eliminez le fluide caloporteur suivant les
prescriptions administratives via une en-
treprise d'élimination de déchets (code de
déchet 160115).
FR – Instructions de montage
Le montage du radiateur ne doit être exécuté
que par un technicien spécialisé.
Les activités suivantes peuvent uniquement être
exécutées par un électricien selon BGV A3:
Raccordement du kit électrique
Raccordement de l'élément chauffant au
kit électrique
Un électricien est une personne qui, en rai-
son de sa formation professionnelle, de ses
connaissances et de son expérience, ainsi que
de ses connaissances des prescriptions en vi-
gueur, peut évaluer et exécuter le travail qui
lui est confié et en reconnaître les dangers
possibles.
Consignes de sécurité
Avant le montage, lire attentivement ces
instructions.
Après le montage, remettre les instructions
à l'utilisateur final.
Respecter les consignes de sécurité dans les
instructions séparées du kit électrique.
DANGER
Danger de mort!
Contrôler la position des conduites d'ali-
mentation (électricité, gaz, eau).
Ne pas percer de conduites.
►
►
AVERTISSEMENT
Danger de blessure!
Tenir compte du poids du radiateur (voir
page 31).
A partir de 25 kg, travailler avec un dispo-
sitif de levage ou à plusieurs personnes.
►
►
►
•
•
►
►
►

8
AVERTISSEMENT
Danger de blessures et de dommages maté-
riels!
Vérifier la capacité de charge du support.
Tenir compte du poids du radiateur (voir
page 31) et des charges supplémentaires
éventuelles.
Contrôler l'aptitude du matériel de fixa-
tion et l'adapter à la situation construc-
tive.
Tenir compte des exigences particuliè-
res, p. ex. pour bâtiment public (écoles
ou similaires).
►
►
►
Conditions d'utilisation
Lors du choix du lieu de montage, tenir
compte de ce que les appareils électriques
ne peuvent être installés que dans certaines
zones des locaux de bain et de douche. Res-
pecter les prescriptions locales.
Ne pas raccorder le radiateur au système de
chauffage.
Exploiter l'élément chauffant uniquement
avec la tension agréée (voir plaque signa-
létique).
Tenir compte des limites d'utilisation dans
les locaux humides selon les prescriptions
locales.
N'entreposer et transporter le radiateur
que dans l'emballage de protection.
Respecter l'écartement minimum entre le
radiateur et les éléments environnants:
50 mm.
Réclamation
S'adresser au fabricant.
Elimination
Envoyer l'emballage et les pièces non uti-
lisées au recyclage ou à une élimination
réglementaire. Respecter les prescriptions
locales.
Caractéristiques techniques
Raccordement électrique:
Elément chauffant monté en bas à droi-
te ou à gauche dans le radiateur
Raccordement via kit électrique
Pression d'épreuve: 7,8 bars
Remplissage: Fluide caloporteur ininflam-
mable, non toxique
►
►
►
►
►
►
►
►
•
–
–
•
•
Mode de fonctionnement: Fonctionne-
ment électrique, indépendant du système
de chauffage, avec régulation via kit
électrique
Montage
Déposer le radiateur avec l'élément chauffant
monté de telle façon que le câble ne soit pas
plié ni endommagé.
Travaux préparatoires (voir ill. 1–5)
S'assurer qu'une prise de courant (230 V, fu-
sible 16 A) installée conformément aux pres-
criptions est présente à portée du câble.
Contrôler que le contenu de la livraison est
complet et exempt de dommages.
Préparer l'outillage nécessaire.
Lors du montage, n'enlever l'emballage de
protection qu'aux points de fixation et de
raccordement.
Visser les vis de fixation longues dans les
manchons supérieurs et les serrer.
Visser les vis de fixation courtes dans les
manchons inférieurs et les serrer.
Monter les accessoires compris le cas
échéant dans la livraison, p. ex. barre pour
serviettes (voir instructions séparées).
Monter les fixations supérieures (voir ill. 6–9)
Marquer les trous de forage (voir ill. A).
Percer les trous et placer les chevilles.
Dévisser les vis de blocage des supports mu-
raux et extraire les logements.
Visser le support mural avec les vis à six
pans creux. Ce faisant, veiller à la position
du trou.
Placer les logements dans les supports mu-
raux. Ce faisant, veiller à la position des
ouvertures.
Visser les logements avec les vis de blocage
sans serrer. Les logements peuvent ainsi en-
core être décalés pour l'alignement.
Préassembler les pièces d'écartement infé-
rieures (voir ill. 10–11)
Avec un couteau, raccourcir les deux bou-
lons à clipser au deuxième marquage à la
cote de 49 mm.
Monter les deux pièces d'écartement.
Accrocher et aligner le radiateur (voir
ill. 12–15)
Accrocher le radiateur dans les logements
au-dessus des vis. Ce faisant, veiller à ce que
le radiateur se verrouille.
•
►
►
►
►
►
►
►
►
►
►
►
►
►
►
►
►

9
Pour aligner latéralement le radiateur: Dé-
caler les logements.
Pour régler l'écartement par rapport au
mur: Extraire ou enfoncer les logements.
Pour régler la hauteur: Tourner la vis de ré-
glage du logement.
Monter les pièces d'écartement inférieures et
fixer le radiateur (voir ill. 16–27)
Dévisser les pièces d'écartement inférieures
jusqu'à ce que celles-ci soient contre le mur
et que le radiateur soit droit.
Serrer les vis de blocage supérieures.
Marquer les trous de forage inférieurs pour
les pièces d'écartement.
Pousser l'étrier de protection vers l'arrière
et décrocher le radiateur. Déposer le radia-
teur avec l'élément chauffant monté de
telle façon que le câble ne soit pas plié ni
endommagé.
Percer les trous aux marquages inférieurs et
placer des chevilles.
Démonter les deux pièces d'écartement.
Visser et serrer les deux boulons à clipser.
Accrocher le radiateur dans les logements
au-dessus des vis. Ce faisant, veiller à ce que
le radiateur se verrouille.
Presser les deux caches et les faire glisser
vers l'arrière.
Presser les clips d'appui mural aux deux piè-
ces d'écartement.
Recouvrir entièrement le radiateur avec
l'emballage de protection.
Raccordement électrique
Faire effectuer les activités suivantes par
un électricien (suivant les instructions sépa-
rées):
Raccordement du kit électrique
Raccordement de l'élément chauffant
au kit électrique
Mise en service
Enlever entièrement l'emballage de pro-
tection pour le nettoyage final ou avant la
mise en service.
►
►
►
►
►
►
►
►
►
►
►
►
►
►
►
–
–
►
IT – Istruzioni d'uso
Uso consentito
Il radiatore deve essere utilizzato solo per il ri-
scaldamento di interni e per asciugare tessuti e
materiali resistenti al calore.
Ogni altro uso è da considerarsi improprio e
pertanto non è consentito.
Uso errato
Il radiatore non è adatto come sedile, per ar-
rampicarsi o per salirvi sopra.
Norme di sicurezza
PERICOLO
Pericolo di morte!
Non estinguere gli incendi con acqua.
Utilizzare un estintore al biossido di car-
bonio, schiuma, polvere o sabbia.
►
►
AVVERTENZA
Pericolo di ustioni!
La superficie del radiatore può assumere an-
che una temperatura di 110 °C (230 °F).
Usare cautela per toccare il radiatore.
►
Non far funzionare il radiatore con cavo di
collegamento danneggiato.
In caso di fuoriuscita del liquido termovettore:
Raccogliere il liquido in un recipiente.
Informare l'installatore specializzato.
Non sostituire il liquido fuoriuscito con
acqua.
Pulizia
Utilizzare solo detergenti delicati e non
abrasivi.
Reclami
Contattare l'installatore specializzato.
Montaggio e riparazione
Per non perdere la garanzia sul prodotto,
far eseguire il montaggio e la riparazione
solo da un installatore specializzato.
Smaltimento
Portare i radiatori non più utilizzabili e gli
accessori in un centro di riciclaggio o smal-
tirli correttamente. Rispettare la normativa
locale.
Smaltire il liquido termovettore conforme-
mente alla normativa ufficiale tramite una
ditta specializzata (codice rifiuti 160115).
►
►
–
–
–
►
►
►
►
►

10
IT – Istruzioni di montaggio
Il radiatore deve essere montato solo da un in-
stallatore specializzato.
Le seguenti attività devono essere eseguite solo
da un elettricista qualificato secondo BGV A3:
Allacciamento del kit elettrico
Collegamento della barra termica al kit
elettrico
Per elettricista qualificato si intende chi sulla
base del proprio addestramento tecnico, delle
sue nozioni ed esperienze nonché della cono-
scenza delle norme pertinenti è in grado di
valutare i lavori affidatigli e di riconoscere gli
eventuali pericoli.
Norme di sicurezza
Prima del montaggio leggere attentamente
queste istruzioni.
Dopo il montaggio consegnare le istruzioni
all'utente finale.
Osservare le norme di sicurezza del kit elet-
trico riportate nelle istruzioni a parte.
PERICOLO
Pericolo di morte!
Controllare l'ubicazione delle linee di ali-
mentazione (corrente, gas, acqua).
Non danneggiare le linee.
►
►
AVVERTENZA
Pericolo di lesioni!
Attenzione al peso del radiatore (vedere
pagina 31).
A partire da 25 kg lavorare con apparec-
chio di sollevamento o in più persone.
►
►
AVVERTENZA
Lesioni e danni materiali!
Controllare la portata del supporto. At-
tenzione al peso del radiatore (vedere
pagina 31) ed ai possibili carichi supple-
mentari.
Controllare l'idoneità del materiale di fis-
saggio e sceglierlo in base della struttura
edilizia.
Tenere conto dei requisiti specifici, ad
esempio edifici pubblici (scuole, ecc.).
►
►
►
•
•
►
►
►
Condizioni di impiego
Per la scelta del luogo di montaggio si ten-
ga presente che in ambienti adibiti a bagno
o doccia gli apparecchi elettrici possono
essere montati solo in determinate zone.
Rispettare la normativa locale in materia.
Non allacciare il radiatore al sistema di ri-
scaldamento.
Far funzionare la barra termica solo con la
tensione consentita (vedere la targhetta).
Osservare i limiti di impiego in ambienti
umidi acqua secondo le norme locali.
Immagazzinare e trasportare il radiatore
solo nell'imballaggio protettivo.
Rispettare le distanze minime tra radia-
tore e parti adiacenti per la circolazione
dell'aria: 50 mm.
Reclami
Contattare il fornitore.
Smaltimento
Consegnare l'imballaggio e le parti super-
flue ad un centro di riciclaggio o smaltirle
correttamente. Rispettare la normativa lo-
cale.
Caratteristiche tecniche
Collegamento elettrico:
Barra termica montata nel radiatore in
basso a destra o a sinistra
Allacciamento mediante kit elettrico
Pressione di prova: 7,8 bar
Riempimento: Liquido termovettore non
infiammabile e non velenoso
Modo operativo: Funzionamento elettrico
indipendente dal sistema di riscaldamento
con regolazione tramite kit elettrico
Montaggio
Collocare il radiatore con barra termica pre-
montata in modo da non schiacciare o dan-
neggiare il cavo.
Attività preliminari (vedere fig. 1–5)
Verificare che alla portata del cavo sia pre-
sente una presa (230 V, fusibile 16 A) instal-
lata a norma.
Controllare la completezza e l'integrità del
materiale fornito.
Preparare gli attrezzi necessari.
Per il montaggio togliere l'imballaggio pro-
tettivo solo sui punti di fissaggio e di allac-
ciamento.
►
►
►
►
►
►
►
►
•
–
–
•
•
•
►
►
►
►

11
Avvitare le viti di fissaggio lunghe nei mani-
cotti superiori e serrarle a fondo.
Avvitare le viti di fissaggio corte nei mani-
cotti inferiori e serrarle a fondo.
Montare gli eventuali accessori in dotazio-
ne, ad esempio la barra portasciugamani
(vedere le istruzioni a parte).
Montare i fissaggi superiori (vedere fig. 6–9)
Segnare l'ubicazione dei fori (vedere
fig. A).
Praticare i fori ed applicare i tasselli.
Svitare le viti di fissaggio dai sostegni a
muro ed estrarre i supporti.
Avvitare i sostegni a muro con viti Allen pre-
stando attenzione alla posizione dei fori.
Applicare i supporti nei sostegni a muro
prestando attenzione alla posizione delle
aperture.
Avvitare i supporti con le viti di fissaggio
serrando solo a mano. In questo modo i
supporti possono essere ancora spostati per
posizionarli.
Premontare i distanziali inferiori (vedere
fig. 10–11)
Con un coltello, sulla seconda marcatura ac-
corciare i due perni ad innesto sulla misura
di 49 mm.
Montare i due distanziali sul radiatore.
Agganciare e posizionare il radiatore (vedere
fig. 12–15)
Agganciare il radiatore nei supporti me-
diante le viti prestando attenzione che si
innesti correttamente.
Per posizionare il radiatore di lato: Spostare
i supporti.
Per regolare la distanza dalla parete: Far
uscire o inserire di più i supporti.
Per regolare l'altezza: Ruotare la vite di re-
gistro sul supporto.
Montare i distanziali inferiori e fissare il radia-
tore (vedere fig. 16–27)
Svitare i distanziali inferiori fino a portarli a
contatto con la parete e ad ottenere che il
radiatore sia appeso correttamente.
Serrare a fondo le viti di fissaggio superiori.
Segnare la posizione dei fori inferiori per i
distanziali.
►
►
►
►
►
►
►
►
►
►
►
►
►
►
►
►
►
►
Spingere l'archetto di sicurezza verso il lato
posteriore e sganciare il radiatore. Colloca-
re il radiatore con barra termica premonta-
ta in modo da non schiacciare o danneggia-
re il cavo.
Praticare i fori in corrispondenza dei segni
inferiori ed applicare i tasselli.
Smontare entrambi i distanziali.
Serrare a fondo i due perni ad innesto.
Agganciare il radiatore nei supporti me-
diante le viti prestando attenzione che si
innesti correttamente.
Applicare le due coperture e spingerle ver-
so il lato posteriore.
Applicare le clip di supporto a parete sui
due distanziali.
Coprire completamente il radiatore con
l'imballaggio protettivo.
Collegamento elettrico
Far eseguire le seguenti attività solo da un
elettricista qualificato (secondo le istruzioni
a parte):
Allacciamento del kit elettrico
Collegamento della barra termica al kit
elettrico
Messa in servizio
Rimuovere completamente l'imballaggio
protettivo per la pulizia finale solo prima
della messa in servizio.
►
►
►
►
►
►
►
►
►
–
–
►

12
RU – Инструкция по
использованию
Допустимое использование
Радиатор разрешается использовать толь-
ко для отопления внутренних помещений
и для сушки текстильных изделий и термо-
стойких материалов.
Любое иное использование является ис-
пользованием не по назначению и поэтому
недопустимо.
Неправильное использование
Радиатор не рассчитан на то, чтобы на нем
сидели или использовали его в качестве
подножки.
Указания по безопасности
ОПАСНОСТЬ
Опасность для жизни!
В случае возгорания не тушите водой.
Используйте огнетушитель с углекис-
лым газом, пенный или порошковый
огнетушитель или песок.
►
►
ПРЕДУПРЕЖДЕНИЕ
Опасность ожога!
Поверхность радиатора может нагревать-
ся до 110 °C (230 °F).
Будьте осторожны при прикасании к
радиатору.
►
Радиатор не разрешается эксплуатиро-
вать с поврежденным кабелем.
Если вытекла жидкость-теплоноситель:
Соберить жидкость в сосуд.
Обратитесь к лицензированному мастеру.
Не заменяйте вытекшую жидкость водой.
Чистка
Использовать только мягкие, неабразив-
ные бытовые чистящие средства.
Рекламация
Обратитесь к лицензированному мастеру.
Монтаж и ремонт
Чтобы не утратили силу Ваши права на
гарантию, поручайте монтаж и ремонт
только лицензированному мастеру.
►
►
–
–
–
►
►
►
Утилизация
Направьте отслужившие свой срок ра-
диаторы с принадлежностями на вто-
ричную переработку или утилизируйте
их надлежащим образом. Соблюдайте
местные предписания.
Отдайте жидкость-теплоноситель в соот-
ветствии официальными предписаниями
на лицензированную фирму по утилиза-
ции отходов (код отходов № 160115).
RU –
Инструкция по монтажу
Радиатор разрешается монтировать только
лицензированному мастеру.
Следующие работы разрешается проводить
только квалифицированному электрику со-
гласно BGV A3:
Подключение электрокомплекта
Подключение стержневого нагреватель-
ного элемента к электрокомплекту
Квалифицированным электриком считается
тот, кто на основании своего специального
образования, знаний и опыта, а также зна-
ния соответствующих предписаний может
оценивать поручаемые ему работы и рас-
познавать возможные опасности.
Указания по безопасности
Перед монтажом внимательно прочи-
тать данную инструкцию.
После монтажа передать инструкцию ко-
нечному пользователю.
Соблюдать указания по безопасности,
содержащиеся в отдельной инстукции
электрокомплекта.
ОПАСНОСТЬ
Опасность для жизни!
Проверить расположение инженерных
коммуникаций (электричество, газ,
вода).
Не просверливать электропроводку и
трубопроводы.
►
►
ПРЕДУПРЕЖДЕНИЕ
Опасность получения телесных повреж-
дений!
Учитывать вес радиатора (см. стр. 31).
При весе более 25 кг работать с подъ-
емным приспособлением или с не-
сколькими помощниками.
►
►
►
►
•
•
►
►
►

13
ПРЕДУПРЕЖДЕНИЕ
Телесные повреждения и материальный
ущерб!
Проверить несущую способность ос-
нования. Учитывать вес радиатора
(см. стр. 31) и возможные дополнитель-
ные грузы.
Проверить крепежный материал на
пригодность и согласовать с монтаж-
ной ситуацией.
Учитывать особенные требования,
например, для общественных зданий
(школ и т.п.).
►
►
►
Условия применения
При выборе места установки учитывайте
то, что в помещениях с ванной или ду-
шем электрические приборы разрешает-
ся устанавливать только в определенных
зонах. Соблюдать соответствующие мест-
ные предписания.
Не подключать радиатор к системе отоп-
ления.
Стержневой нагревательный элемент раз-
решается подключать только к допусти-
мому напряжению (см. табличку данных).
Соблюдать границы применения во
влажных помещениях в соответствии с
местными предписаниями.
Хранить и транспортировать радиатор
только в защитной упаковке.
Соблюдать минимальные расстояния
между радиатором и окружающими его
предметами, необходимые для циркуля-
ции воздуха: 50 мм.
Рекламация
Обратиться к поставщику.
Утилизация
Упаковку и неиспользуемые компоненты
направить на вторичную переработку
или утилизировать надлежащим обра-
зом. Соблюдать местные предписания.
Технические характеристики
Электрическое подключение:
Стержневой нагревательный элемент,
смонтированный внизу справа или
слева в радиаторе
Подключение с помощью электро-
комплекта
►
►
►
►
►
►
►
►
•
–
–
Испытательное давление: 7,8 бар
Заполняющая жидкость: Невоспламеня-
ющаяся, неядовитая жидкость-теплоно-
ситель
Режим: Электрический режим, независи-
мо от системы отопления, с регулирова-
нием с помощью электрокомплекта
Монтаж
Радиатор со смонтированным стержневым на-
гревательным элементом отставить так, чтобы
не был изломан или поврежден кабель.
Подготовительные работы (см. рис. 1–5)
Убедиться в том, что на расстоянии дли-
ны кабеля имеется надлежащим обра-
зом смонтированная розетка (230 В, пре-
дохранитель 16 A).
Проверить объем поставки на комплект-
ность и наличие повреждений.
Приготовить необходимые инструменты.
Для монтажа удалять защитную упаков-
ку только в местах крепления и подсо-
единения.
Вкрутить длинные крепежные винты в
верхние муфты и затянуть.
Вкрутить короткие крепежные винты в
нижние муфты и затянуть.
При необходимости смонтировать име-
ющиеся в объеме поставки аксессуары,
например, перекладину для полотенца
(см. отдельную инструкцию).
Монтаж верхних креплений (см. рис. 6–9)
Отметить точки сверления (см. рис. A).
Просверлить отверстия и вставить дюбели.
На стенных опорах выкрутить стопорные
винты и вынуть крепления.
С помощью винтов с внутренним шести-
гранником прикрутить стенные опоры.
При этом проследить за расположением
отверстия.
Вставить крепления в стенные опоры.
При этом проследить за расположением
отверстий.
Прикрутить крепления с помощью сто-
порных винтов лишь от руки. За счет
этого крепления можно еще перемещать
для выравнивания.
Предварительный монтаж нижних распо-
рок (см. рис. 10–11)
Ножом укоротить оба фиксирующих пальца
в месте второй отметки на размер 49 мм.
Смонтировать обе распорки на радиаторе.
•
•
•
►
►
►
►
►
►
►
►
►
►
►
►
►
►
►

14
Подвешивание и выравнивание радиатора
(см. рис. 12–15)
Подвесить радиатор винтами в крепле-
ние. При этом проследить за тем, чтобы
радиатор зафиксировался.
Для того чтобы выровнять радиатор с бо-
ковой стороны: Переместить крепления.
Для того чтобы настроить расстояние до
стены: Вытянуть или вдавить крепления.
Для того чтобы настроить высоту: Повер-
нуть регулировочный винт на креплении.
Монтаж нижних распорок и крепление
радиатора (см. рис. 16–27)
Выкрутить распорки настолько, чтобы
они прилегали к стене и радиатор висел
ровно.
Затянуть верхние стопорные винты.
Отметить нижние отверстия для распорок.
Нажать стопорные скобы назад и отсо-
единить радиатор. Радиатор со смонти-
рованным стержневым нагревательным
элементом отставить так, чтобы не был
изломан или поврежден кабель.
В нижних помеченных местах просвер-
лить отверстия и вставить дюбели.
Снять обе распорки.
Затянуть оба фиксирующих пальца.
Подвесить радиатор винтами в крепле-
ние. При этом проследить за тем, чтобы
радиатор зафиксировался.
Надеть оба колпачка и сдвинуть назад.
На обе распорки надеть зажимы для опо-
ры стены.
Полностью закрыть радиатор защитной
упаковкой.
Электрическое подключение
Следующие работы разрешается прово-
дить только квалифицированному элек-
трику (согласно отдельной инструкции):
Подключение электрокомплекта
Подключение стержневого нагрева-
тельного элемента к электрокомплекту
Ввод в эксплуатацию
Полностью удалить защитную упаковку
для окончательной чистки или перед
вводом в эксплуатацию.
►
►
►
►
►
►
►
►
►
►
►
►
►
►
►
►
–
–
►
CS – Návod k použití
Povolené použití
Topné těleso se smí používat jen k vytápění
vnitřních prostor, k sušení textilií a materiálů
snášejících teplo.
Každé jiné použití se považuje za použití v roz-
poru s určením a není povoleno.
Nesprávné použití
Topné těleso není určeno jako místo na sezení,
ani jako pomůcka ke šplhání nebo stoupání.
Bezpečnostní pokyny
NEBEZPEČÍ
Nebezpečí ohrožení života!
V případě požáru nehaste vodou.
Použijte sněhový (CO2), pěnový nebo
práškový hasicí přístroj, resp. písek.
►
►
VÝSTRAHA
Nebezpečí popálení!
Povrch topného tělesa může dosáhnout
teploty až 110 °C (230 °F).
Při dotyku topného tělesa proto buďte
opatrní.
►
Topné těleso nesmí být v provozu, je-li při-
pojovací kabel poškozený.
V případě úniku teplonosné kapaliny:
Zachyťte kapalinu do vhodné nádoby.
Informujte svého odborného instalatéra.
Vyteklou kapalinu nenahrazujte vodou.
Čištění
Používejte jen jemné, neabrazivní čisticí
prostředky.
Reklamace
S reklamacemi se obracejte na svého odbor-
ného instalatéra.
Montáž a opravy
Montáž a opravy přenechejte odborným
instalatérům, jinak hrozí nebezpečí zániku
Vašich nároků na záruční plnění.
Likvidace odpadu
Vyřazená topná tělesa odevzdejte i s pří-
slušenstvím do systému recyklace nebo řád-
ného systému likvidace odpadu. Dodržuj-
te místní předpisy.
►
►
–
–
–
►
►
►
►

15
Teplonosnou kapalinu zlikvidujte v souladu
s nařízeními příslušných úřadů prostřednic-
tvím autorizovaného odborného podniku
(klíč třídy odpadů č. 160115).
CS – Návod k montáži
Montáž topného tělesa smí provádět jen
odborný instalatér.
Následující práce smí provádět pouze kvaliko-
vaný elektrikář v souladu s předpisy BGV A3:
Připojení elektrické sady
Připojení topné tyče na elektrickou sadu
Kvalikovaným elektrikářem se rozumí osoba,
která je díky své odborné kvalikaci, znalos-
tem a zkušenostem a obeznámenosti s přísluš-
nými předpisy schopna provádět svěřené práce
a rozpoznat a posoudit případné bezpečnostní
riziko.
Bezpečnostní pokyny
Před montáží si pozorně přečtěte tento návod.
Po montáži předejte návod konečnému
uživateli.
Dodržujte bezpečnostní pokyny podle
samostatného návodu elektrické sady.
NEBEZPEČÍ
Nebezpečí ohrožení života!
Zkontrolujte uložení napájecích vedení
(el. proudu, plynu, vody).
Dejte pozor, abyste nenavrtali žádné vedení.
►
►
VÝSTRAHA
Nebezpečí poranění!
Mějte na paměti hmotnost topného těle-
sa (viz str. 31).
Od hmotnosti 25 kg použijte zvedací
zařízení nebo více osob.
►
►
VÝSTRAHA
Poškození zdraví osob a hmotné škody!
Zkontrolujte nosnost podkladu. Mějte
na paměti hmotnost topného tělesa (viz
str. 31) a případných přídavných zatížení.
Zkontrolujte vhodnost upevňovacího materi-
álu a uveďte jej do souladu se situací stavby.
Zohledněte zvláštní požadavky, např.
ve veřejných budovách (školy apod.).
►
►
►
►
•
•
►
►
►
Podmínky použití
Při výběru místa montáže mějte na pamě-
ti, že v prostorech vybavených zařízením
do koupelen a sprch je montáž elektrických
přístrojů povolena jen na určitých místech.
Dodržujte příslušné místní předpisy.
Topné těleso nepřipojujte k vytápěcímu systému.
Topná tyč smí být v provozu jen s povole-
ným napětím (viz typový štítek).
Dodržujte omezení použitelnosti ve vlhkých
prostorách v souladu s místními předpisy.
Topné těleso skladujte a přepravujte jen
v ochranném obalu.
Dodržujte minimální vzdálenosti mezi top-
ným tělesem a okolními předměty kvůli cir-
kulaci vzduchu: 50 mm.
Reklamace
S reklamacemi se obracejte na dodavatele.
Likvidace odpadu
Obalový materiál a napotřebné díly odevzdejte
do systému recyklace nebo řádného systému
likvidace odpadu. Dodržujte místní předpisy.
Technické charakteristiky
Elektrické připojení:
Topná tyč je namontována do topného
tělesa vpravo nebo vlevo
Připojení prostřednictvím elektrické sady
Zkušební tlak: 7,8 bar
Náplň: Nehořlavá, nejedovatá teplonosná
kapalina
Druh provozu: Elektrický provoz, nezávislý
na vytápěcím systému, regulace prostřed-
nictvím elektrické sady
Montáž
Topné těleso s namontovanou topnou tyčí
odstavujte tak, aby nedošlo k zalomení nebo
poškození kabelu.
Přípravné práce (viz obr. 1–5)
Přesvědčte se, zda se v dosahu kabelu
nachází řádně, podle předpisu instalovaná
přístrojová přípojka (230 V, jištění 16 A).
Zkontrolujte obsah dodávky z hlediska úpl-
nosti a poškození.
Připravte si potřebný nástroj.
Při montáži odstraňte ochranný obal jen na
místech upevnění a připojení.
Dlouhé upevňovací šrouby našroubujte do
horních hrdel trubek a utáhněte.
►
►
►
►
►
►
►
►
•
–
–
•
•
•
►
►
►
►
►

16
Krátké upevňovací šrouby našroubujte do
spodních hrdel trubek a utáhněte.
Případně namontujte příslušenství, které je
obsahem dodávky, např. madlo na ručník
(viz samostatný návod).
Montáž horních upevňovacích prvků (viz obr. 6–9)
Označte body pro vrtání (viz obr. A).
Vyvrtejte otvory a vložte hmoždinky.
Na nástěnných ložiscích vyšroubujte pojistné
šrouby a vytáhněte úpinky.
Nástěnné ložisko našroubujte s použitím
šroubů s vnitřním šestihranem. Dbejte při-
tom na polohu vyvrtaných otvorů.
Do nástěnných ložisek vsaďte úpinky. Dbej-
te přitom na polohu otvorů.
Úpinky s pojistnými šrouby našroubujte jen
silou ruky. Tak lze ještě úpinky posunout za
účelem vyrovnání.
Předběžně namontujte spodní distanční držá-
ky (viz obr. 10–11)
Oba aretační čepy zkraťte na druhém ozna-
čení pomocí nože na rozměr 49 mm.
Namontujte oba distanční držáky na topné
těleso.
Zavěšení a vyrovnání topného tělesa (viz obr. 12–15)
Topné těleso zavěste přes šrouby do úpi-
nek. Přitom dbejte na to, aby topné těleso
zaskočilo.
Pro boční vyrovnání topného tělesa: Posuň-
te úpinky.
Pro nastavení odstupu od zdi: Vytáhněte
úpinky nebo je zatlačte dovnitř.
Pro nastavení výšky: Otáčejte seřizovacím
šroubem na úpince.
Namontujte spodní distanční držáky a upev-
něte topné těleso (viz obr. 16–27)
Spodní distanční držáky vyšroubujte tak
daleko, až budou přiléhat ke stěně a topné
těleso bude viset rovně.
Horní pojistné šrouby pevně utáhnětě.
Označte spodní vyvrtané otvory pro distanč-
ní držáky.
Pojistnou úchytku zatlačte dozadu a topné
těleso vyvěste. Topné těleso s namontova-
nou topnou tyčí odstavujte tak, aby nedo-
šlo k zalomení nebo poškození kabelu.
V místě spodních označení vyvrtejte otvory
a vložte hmoždinky.
Demontujte oba distanční držáky.
Pevně přišroubujte oba aretační čepy.
►
►
►
►
►
►
►
►
►
►
►
►
►
►
►
►
►
►
►
►
►
Topné těleso zavěste přes šrouby do úpi-
nek. Přitom dbejte na to, aby topné těleso
zaskočilo.
Obě kryzky přitlačte a zasuňte dozadu.
Na oba distanční držáky natlačte stěnové
podpěrné štítky.
Topné těleso zcela zakryjte ochranným obalem.
Elektrické připojení
Následující práce nechejte provádět kvali-
kovaného elektrikáře (v souladu se samo-
statnými návody):
Připojení elektrické sady
Připojení topné tyče na elektrickou sadu
Uvedení do provozu
Ochranný obal zcela odstraňte až při koneč-
ném čištění nebo před uvedením do provozu.
►
►
►
►
►
–
–
►

17
NL – Gebruikshandleiding
Toegestaan gebruik
De radiator mag uitsluitend worden gebruikt
voor het verwarmen van binnenruimten en
het drogen van textiel en warmtebestendige
materialen.
Elk ander gebruik is niet conform de voor-
schriften en daarom niet toegestaan.
Onjuist gebruik
De radiator is niet geschikt om op te zitten of
op te klimmen.
Veiligheidsaanwijzingen
GEVAAR
Levensgevaar!
Blus een eventuele brand niet met water.
Gebruik een brandblusser met koolzuur,
schuim, poeder of zand.
►
►
WAARSCHUWING
Gevaar voor verbranding!
Het oppervlak van de radiator kan tot 110 °C
(230 °F) heet worden.
Wees voorzichtig bij het aanraken van de
radiator.
►
Gebruik de radiator niet met een bescha-
digde aansluitkabel.
Bij lekkage van de warmtetransportvloeistof:
Vang de vloeistof op in een reservoir.
Neem contact op met de installateur.
Vervang de gelekte vloeistof niet door water.
Reiniging
Gebruik uitsluitend milde reinigingsmidde-
len zonder schuurmiddel.
Reclamaties
Neem contact op met de installateur.
Montage en reparaties
Laat montage en reparaties uitsluitend uit-
voeren door een installateur om aanspraak
te kunnen blijven maken op garantie.
Afvoeren
Voer radiator met accessoires aan het eind
van de levensduur af voor recycling of cor-
recte afvalverwerking. Neem de lokale
voorschriften in acht.
►
►
–
–
–
►
►
►
►
Voer de warmtetransportvloeistof af conform
de wettelijke bepalingen via een erkend af-
valverwerkingsbedrijf (afvalcode 160115).
NL – Montagehandleiding
De radiator mag uitsluitend door een installa-
teur worden gemonteerd.
Onderstaande werkzaamheden mogen uitslui-
tend door een elektrotechnisch vakman wor-
den uitgevoerd conform BGV A3:
Aansluiting van de elektro-set
Aansluiting van het verwarmingselement
op de elektro-set
Een elektrotechnisch vakman is iemand die op
grond van zijn opleiding, kennis en ervaring
en op grond van zijn kennis van de geldende
voorschriften de uit te voeren werkzaamheden
kan beoordelen en mogelijke gevaren kan on-
derkennen.
Veiligheidsaanwijzingen
Lees voor montage deze Handleiding gron-
dig door.
Overhandig na montage de handleiding
aan de eindgebruiker.
Neem de veiligheidsaanwijzingen in de apar-
te handleiding van de elektro-set in acht.
GEVAAR
Levensgevaar!
Controleer vooraf de ligging van leidin-
gen (elektriciteit, gas, water).
Pas op voor het doorboren van leidingen.
►
►
WAARSCHUWING
Gevaar voor letsel!
Houd rekening met het gewicht van de
radiator (zie pagina 31).
Gebruik vanaf 25 kg een hijsvoorziening
of werk met meerdere personen.
►
►
WAARSCHUWING
Letsel en materiële schade!
Controleer het draagvermogen van de
ondergrond. Houd rekening met het ge-
wicht van de radiator (zie pagina 31) en
mogelijke extra belasting.
Controleer dat het bevestigingsmateriaal ge-
schikt is voor de montageomstandigheden.
Houd rekening met bijzondere eisen, b.v.
voor openbare gebouwen (scholen, e.d.).
►
►
►
►
•
•
►
►
►

18
Gebruiksvoorwaarden
Let er bij de keuze van de montagelocatie
op dat in bad- en doucheruimten elektrische
apparaten uitsluitend op bepaalde afstan-
den mogen worden gemonteerd. Neem de
betreffende lokale voorschriften in acht.
Sluit de radiator niet aan op het verwar-
mingssysteem.
Gebruik het verwarmingselement uitsluitend
met de toegestane spanning (zie typeplaatje)
.
Houd rekening met de gebruiksgrenzen in
vochtige ruimten conform de lokale voor-
schriften.
Bewaar en transporteer de radiator uitslui-
tend in de beschermende verpakking.
Neem de minimale afstand tussen radiator
en omliggende delen ten behoeve van de
luchtcirculatie in acht: 50 mm.
Reclamaties
Neem contact op met de leverancier.
Afvoeren
Voer de verpakking en overtollige onderde-
len af voor recycling of correcte afvalverwer-
king. Neem de lokale voorschriften in acht.
Technische details
Elektrische aansluiting:
Verwarmingselement rechts of links in
de radiator gemonteerd
Aansluiting met elektro-set
Testdruk: 7,8 bar
Vulling: Niet-brandbare, ongiftige warmte-
transportvloeistof
Bedrijfsmodus: Elektrisch, onafhankelijk
van het verwarmingssysteem, met regeling
via elektro-set
Montage
Zet de radiator met gemonteerd verwarmings-
element zo neer dat de kabel niet wordt ge-
knikt of beschadigd.
Voorbereidende werkzaamheden (zie afb. 1–5)
Zorg dat er binnen het bereik van de aan-
sluitkabel een correct geïnstalleerde inbouw-
doos (230 V, zekering 16 A) beschikbaar is.
Controleer de levering op volledigheid en
beschadigingen.
Leg het benodigde gereedschap klaar.
Verwijder de beschermende verpakking
voor de montage uitsluitend bij de beves-
tigings- en aansluitpunten.
►
►
►
►
►
►
►
►
•
–
–
•
•
•
►
►
►
►
Draai de lange bevestigingsschroeven in de
bovenste moffen en draai ze vast.
Draai de korte bevestigingsschroeven in de
onderste moffen en draai ze vast.
Monteer zonodig de bij levering inbegre-
pen accessoires, b.v. de handdoekstang (zie
aparte handleiding).
Bovenste bevestigingen monteren (zie afb. 6–9)
Teken de boorgaten af (zie afb. A).
Boor de gaten en breng de pluggen aan.
Verwijder de borgschroeven van de muur-
houders en trek de opnamen uit.
Bevestig de muurhouder met inbusschroe-
ven. Let daarbij op de positie van de boring.
Plaats de opnamen in de muurhouders. Let
daarbij op de positie van de openingen.
Draai de opnamen met de borgschroeven
handvast aan. Zo kunnen de opnamen voor
het uitlijnen nog worden verschoven.
Onderste afstandhouders voormonteren (zie
afb. 10–11)
Kort met een mes beide opvangbouten bij
de tweede markering in op de maat 49 mm.
Monteer beide afstandhouders aan de radiator.
Radiator ophangen en uitlijnen (zie afb. 12–15)
Hang de radiator met de schroeven in de
opnamen. Let er daarbij op dat de radiator
vast klikt.
Om de radiator zijdelings uit te lijnen: Ver-
schuif de opnamen.
Om de muurafstand af te stellen: Trek de
opnamen uit of druk ze verder in.
Om de hoogte af te stellen: Draai aan de
stelschroef van de opname.
Onderste afstandhouders monteren en radi-
ator bevestigen (zie afb. 16–27)
Draai de onderste afstandhouders uit tot
deze tegen de muur aanliggen en de radi-
ator recht hangt.
Draai de bovenste borgschroeven stevig vast.
Markeer de onderste boorgaten voor de
afstandhouders.
Druk de borgingsbeugel naar achteren en
neem de radiator af. Zet de radiator met ge-
monteerd verwarmingselement zo neer dat
de kabel niet wordt geknikt of beschadigd.
Boor de gaten bij de onderste markeringen
en breng de pluggen aan.
Demonteer beide afstandhouders.
Draai beide opvangbouten vast.
►
►
►
►
►
►
►
►
►
►
►
►
►
►
►
►
►
►
►
►
►
►

19
ES – Instrucciones de empleo
Uso permitido
El radiador debe utilizarse sólo para la calefac-
ción en interiores y para el secado de textiles y
materiales resistentes al calor.
Cualquier otro tipo de empleo será conside-
rado como un empleo ajeno al previsto y, por
consiguiente, está prohibido.
Uso equivocado
El radiador no es adecuado como asiento, o
como ayuda para trepar o subir.
Indicaciones de seguridad
PELIGRO
¡Peligro de muerte!
En caso de incendio no extinguir el fuego
con agua.
Utilice un extintor de dióxido de carbono,
espuma, polvo o arena
►
►
ADVERTENCIA
¡Peligro de quemadura!
La superficie del radiador puede calentarse
hasta alcanzar unos 110 °C (230 °F).
Tenga especial cuidado al tocar el radiador.
►
No utilice el radiador si el cable de conexión
está deteriorado.
En caso de derrame del líquido portador del
calor:
Recoja el líquido en un recipiente.
Informe a su artesano especializado.
No sustituya nunca el líquido derramado
por agua.
Limpieza
Utilice únicamente detergentes suaves, no
abrasivos.
Reclamación
Póngase en contacto con su artesano espe-
cializado.
Montaje y reparaciones
Encargue los trabajos de montaje y de re-
paración únicamente a artesanos especiali-
zados a fin de no perder sus derechos de
garantía.
►
►
–
–
–
►
►
►
Hang de radiator met de schroeven in de
opnamen. Let er daarbij op dat de radiator
vast klikt.
Druk de beide afdekkapjes op en schuif
deze naar achteren.
Druk de muursteunclips op beide afstand-
houders.
Dek de radiator volledig af met de bescher-
mende verpakking.
Elektrische aansluiting
Laat onderstaande werkzaamheden uit-
voeren door een elektrotechnisch vakman
(conform aparte handleidingen):
Aansluiting van de elektro-set
Aansluiting van het verwarmingsele-
ment op de elektro-set
Inbedrijfname
Verwijder de volledige beschermende ver-
pakking tijdens de eindschoonmaak of voor
inbedrijfname.
►
►
►
►
►
–
–
►

20
Eliminación de desechos
Elimine los radiadores inservibles y los acce-
sorios a través del sistema de reciclaje o de
la forma prescrita. Observe las prescripcio-
nes locales.
Elimine el líquido portador del calor según
las disposiciones oficiales a través de una
empresa especializada en eliminación de
residuos (clave de desechos N° 160115).
ES – Instrucciones de montaje
El radiador deberá ser montado únicamente
por un artesano especializado.
Los siguientes trabajos deben ser realizados
sólo por un electricista competente según
BGV A3:
Conexión del kit eléctrico
Conexión de la varilla de calefacción al kit
eléctrico
A raíz de su preparación técnica, conocimien-
tos y experiencias prácticas, así como su co-
nocimiento respecto a las prescripciones per-
tinentes, un electricista especializado está en
condiciones de poder juzgar los trabajos encar-
gados, y reconocer los posibles peligros.
Indicaciones de seguridad
Leer del todo estas instrucciones antes del
montaje.
Después del montaje, entregar el manual
de instrucciones al consumidor final.
Observar las indicaciones de seguridad en la
instrucción separada del kit eléctrico.
PELIGRO
¡Peligro de muerte!
Comprobar la posición de las líneas de ali-
mentación (corriente, gas, agua).
No perforar las líneas.
►
►
ADVERTENCIA
¡Riesgo de lesiones!
Observar el peso del radiador (ver página 31).
A partir de 25 kg, trabajar con aparato de
levantamiento o con varios ayudantes.
►
►
►
►
•
•
►
►
►
ADVERTENCIA
¡Daños personales y materiales!
Comprobar la capacidad portante del sue-
lo. Observar el peso del radiador (ver pági-
na 31) y las posibles cargas suplementarias.
Comprobar la idoneidad del material de
fijación y adaptarlo a la situación arqui-
tectónica.
Tener en cuenta los requisitos aparte, p.ej.
edificio público (escuelas, o semejantes).
►
►
►
Condiciones de aplicación
Al elegir el lugar de instalación tener en
cuenta que en recintos húmedos (cuartos
de baño, etc.) los aparatos eléctricos deben
instalarse sólo en determinadas áreas. Ob-
servar las correspondientes prescripciones
localmente vigentes.
No conectar el radiador al sistema de cale-
facción central.
Utilizar la varilla de calefacción únicamente
con la tensión permitida (ver placa indica-
dora del tipo).
Observar los límites de aplicación en sitios
húmedos según normativas locales.
Almacenar y transportar el radiador única-
mente en el embalaje protector.
Observar las distancias mínimas entre el
radiador y las partes circundantes para la
circulación de aire: 50 mm.
Reclamación
Dirigirse al fabricante.
Eliminación de desechos
Llevar el embalaje y las partes no necesarias al
reciclaje o a la eliminación de desechos regla-
mentaria. Observar las prescripciones locales.
Características técnicas
Conexión eléctrica:
varilla de calefacción montada a la dere-
cha o izquierda en el radiador
conexión a través del kit eléctrico
Presión de prueba: 7,8 bares
Relleno: Líquido portador del calor no infla-
mable, no tóxico
Modo de operación: Funcionamiento con
corriente eléctrica, de forma independien-
te de la calefacción por agua caliente, con
regulación a través de un kit eléctrico
►
►
►
►
►
►
►
►
•
–
–
•
•
•
Other manuals for Ideos IDE10
1
Table of contents
Languages:
Other Kermi Heater manuals

Kermi
Kermi Pateo Technical manual

Kermi
Kermi DVE1A Series User manual

Kermi
Kermi Leveo User manual

Kermi
Kermi 6918418 User manual

Kermi
Kermi Credo-Uno User manual

Kermi
Kermi Ideos IDE10 Manual

Kermi
Kermi CRE1A User manual

Kermi
Kermi Credo-Twist-V User manual

Kermi
Kermi TBN10 Guide

Kermi
Kermi 6918351 User manual

Kermi
Kermi AKP 2011/03 Technical manual

Kermi
Kermi x-flair User manual

Kermi
Kermi DUN2D User manual

Kermi
Kermi T. 10 Technical manual

Kermi
Kermi Credo Duo CDV 21 Series User manual

Kermi
Kermi TBE10 Guide

Kermi
Kermi Credo-Uno-E User manual

Kermi
Kermi DS Series Parts list manual

Kermi
Kermi 6911519 Technical manual

Kermi
Kermi Decor Typ 21 User manual