manuals.online logo
Brands
  1. Home
  2. •
  3. Brands
  4. •
  5. MHZ
  6. •
  7. Window Blind
  8. •
  9. MHZ 11-8148 User manual

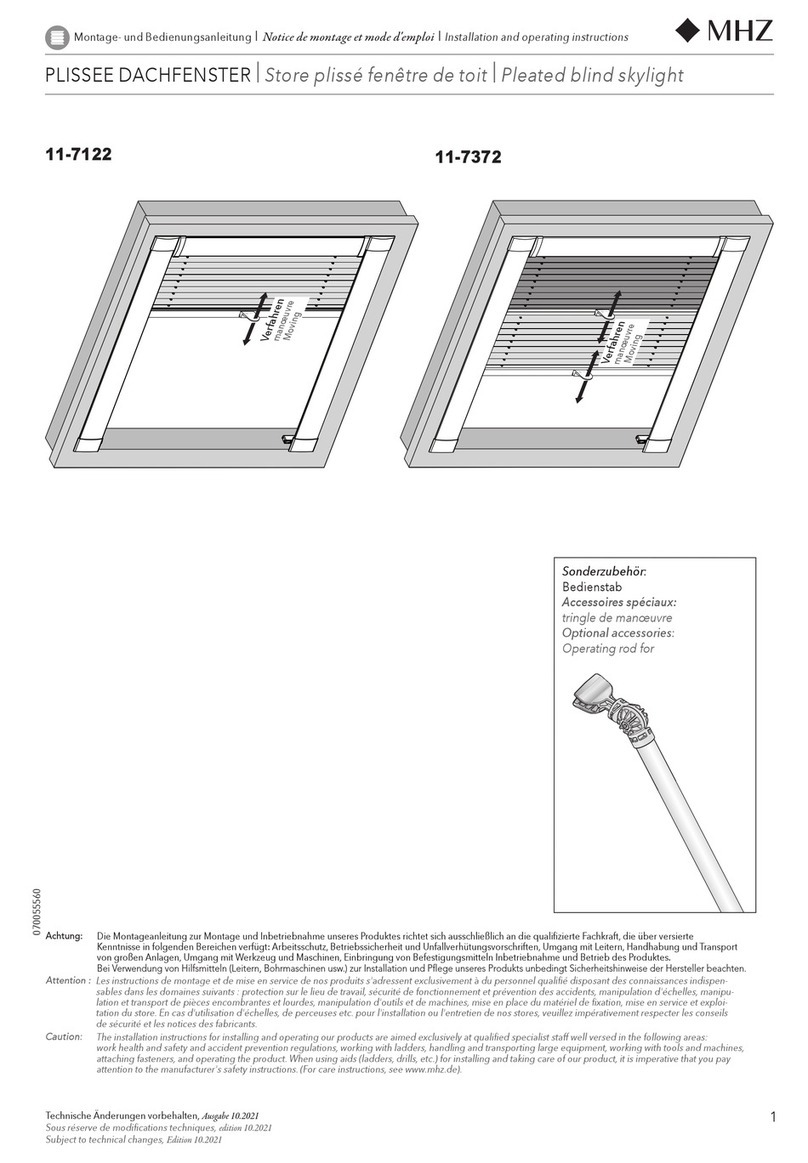
MHZ 11-8148 User manual

070056866
Transportsicherung vor Inbetriebnahme entfernen!
Retirer le dispositif de sécurité pour
le transport avant la mise en service
Remove transport lock before
before putting into operation!
Achtung:
Die Montageanleitung zur Montage und Inbetriebnahme unseres Produktes richtet sich ausschließlich an die qualifizierte Fachkraft, die über versierte Kenntnisse in
folgenden Bereichen verfügt: Arbeitsschutz, Betriebssicherheit und Unfallverhütungsvorschriften, Umgang mit Leitern, Handhabung und Transport von großen Anlagen,
Umgang mit Werkzeug und Maschinen, Einbringung von Befestigungsmitteln Inbetriebnahme und Betrieb des Produktes.
Bei Verwendung von Hilfsmitteln (Leitern,
Bohrmaschinen usw.) zur Installation und Pflege unseres Produkts unbedingt Sicherheitshinweise der Hersteller beachten. (Pflegehinweise siehe www.mhz.de)
Caution:
The installation instructions for installing and operating our products are aimed exclusively at qualified specialist staff well versed in the following areas:
work health and safety and accident prevention regulations, working with ladders, handling and transporting large equipment, working with tools and machines,
attaching fasteners, and operating the product. When using aids (ladders, drills, etc.) for installing and taking care of our product, it is imperative that you pay
attention to the manufacturer's safety instructions. (For care instructions, see www.mhz.de). Protect the pleated fabric from dirt during installation!
Les instructions de montage et de mise en service de nos produits s'adressent exclusivement à du personnel qualifié disposant des connaissances indispen-
sables dans les domaines suivants : protection sur le lieu de travail, sécurité de fonctionnement et prévention des accidents, manipulation d'échelles, manipu-
lation et transport de pièces encombrantes et lourdes, manipulation d'outils et de machines, mise en place du matériel de fixation, mise en service et exploi-
tation du store. En cas d'utilisation d'échelles, de perceuses etc. pour l'installation ou l'entretien de nos stores, veuillez impérativement respecter les conseils
de sécurité et les notices des fabricants. (Instructions d‘entretien voir www.mhz.de)
Attention :
1
Technische Änderungen vorbehalten, Ausgabe 03.2021
Sous réserve de modifications techniques, edition 03.2021
Subject to technical changes, Edition 03.2021
11-8148
4
3
2
1
5
6
open
close
all
ª
n
1.
PLISSEE-VORHÄNGE 18 V |STORES PLISSÉS 18 V |
PLEATED BLINDS 18 V
Montage- und Bedienungsanleitung
INotice de montage et mode d'emploi I
Installation and operating instructions
Trägerbefestigung für Decken- und
Wandmontage
Support de fixation pour montage au
mur et au plafond
Bracket fixing for ceiling
and wall mounting
Wandträger
Support mural
Wall bracket
mit Elektro-Funk-Antrieb
avec moteur électrique radio
with electric radio drive
Bei Bedarf kann an dieser Schraube
die Behanghöhe nachgestellt werden.
Si nécessaire, possibilité de réglage de
la hauteur du store à l'aide de cette vis.
If necessary, this screw can be used to
the height of the blind can be adjusted.
mit Akku-Funk-Antrieb 18 V
moteur radio avec accu
with battery-operated
radio drive 18 V
30 mm
mit Pendelsicherung
keine Höheneinstellung vom Behang möglich
avec cordon tendeur
aucun réglage en hauteur du store plissé possible
with side guide
no height adjustment of the pleated blind possible
bei 45-83 cm Anlagenbreite, Akku außerhalb der Oberschiene
Avec des stores de 45-83 cm de large, l'accu est placé à l'extérieur du rail supérieur
for 45-83 cm system width, battery outside the top rail
1.
3.
2.
Trägermontage Montage du support Bracket mounting
Technische Änderungen vorbehalten, Ausgabe 03.2021
Sous réserve de modifications techniques, edition 03.2021
Subject to technical changes, Edition 03.2021
2
Plissee-Vorhänge
IStores plissés I
Pleated blinds
2.
1.
1.
Vorstechen
prépercer
Pre-drill
5 cm 5 cm
max. 70 cm
ø 4 mm
15
30 mm
Glasleiste mit Pendelsicherung
Parclose
avec cordon tendeur
Glazing bead with side guide
1.
Vorstechen
prépercer
Pre-drill
1.
2.
1.
2.
Rahmen/Wand
cadre/mur
Frame / wall
Decke
plafond
Ceiling
3
Technische Änderungen vorbehalten, Ausgabe 03.2021
Sous réserve de modifications techniques, edition 03.2021
Subject to technical changes, Edition 03.2021
Plissee-Vorhänge
IStores plissés I
Pleated blinds
Montage Akku Montage de l'accu Mounting the battery
1.
2.
MHZ Hachtel GmbH & Co. KG
Sindelfinger Straße 21
D-70771 Leinfelden-Echterdingen
Telefon +49 800 123 654 779
E-Mail: auftrag@mhz.de
www.mhz.de
MHZ Hachtel & Co. Ges.m.b.H.
Laxenburger Straße 244
A-1230 Wien
Telefon +43 810 95 10 05
E-Mail: auftrag@mhz.at
www.mhz.at
MHZ Hachtel & Co. AG
Eichstrasse 10
CH-8107 Buchs/Zürich
Telefon +41 848 47 13 13
E-Mail: info@mhz.ch
www.mhz.ch
MHZ Hachtel S.à.r.l.
27, Rue de Steinfort
L-8366 Hagen
Téléphone +352 311 421-1
E-Mail: info@mhz.lu
www.mhz.lu
ATES-Groupe MHZ
1 B, rue Pégase
CS 20163
F 67960 Entzheim
Téléphone +33 388 10 16 20
E-Mail: [email protected]
www.ates-mhz.com
•
Lors du transport, du stockage et du montage, protéger le store et le moteur
radio avec accu contre les chocs
• Utiliser uniquement le chargeur agréé par MHZ!
• A la livraison, l'accu n’est que partiellement chargé.
• Avant la première utilisation, l'accu doit être complètement
rechargé (durée de chargement env. 5 heures).
• La durée des rechargements suivants lorsque l'accu est complètement
déchargé est d’env. 5 heures.
• Pour obtenir une capacité de charge maximale, l'accu doit être
rechargé tous les 6 mois.
• Le voyant LED rouge s’allume à la mise en route du chargeur et indique
que le chargement est en cours. L'accu est complètement chargé
dès que le voyant LED vert s’allume.
• Durée de vie de l'accu : env. 300 cycles (en fonction de la taille et du
poids du store, 1 cycle correspond à une montée et une descente de store).
• Installé dans le profilé : un accu défectueux peut être mis au
rebut indépendamment du moteur.
• Le réglage des fins de courses est maintenu lorsque l'accu est déchargé.
• Les composants du moteur et des commandes ne sont pas compatibles
avec les produits d’autres fournisseurs.
• Distance min. entre les moteurs radio 20 cm.
• En cas de décharge totale de l'accu, le plissé s'arrête.
Hinweise zum Akku-Funk-Antrieb Remarque concernant le moteur radio avec accu Notes on the battery radio drive
• Plissee bzw. Accu-Funk-Antrieb bei Transport, Lagerung und Montage
vor Stößen schützen.
• Verwenden Sie nur das von MHZ zugelassene Ladegerät!
• Der Akku ist im Auslieferzustand teilgeladen.
• Vor dem ersten Gebrauch muss der Akku vollständig aufgeladen werden
(Ladedauer ca. 5 Stunden).
• Im nachfolgenden Betrieb beträgt die Ladezeit bei vollständig
entladenem Akku ca. 5 Stunden.
• Um die volle Ladekapazität des Akkus zu erhalten, sollte dieser alle
6 Monate aufgeladen werden.
• Die rote LED am Ladegerät leuchtet beim Einstecken des Ladegerätes auf
und zeigt den Ladevorgang an. Der Akku ist komplett aufgeladen,
sobald die grüne LED aufleuchtet.
• Betriebsdauer des Akku: ca. 300 Zyklen (je nach Anlagengröße und
–gewicht, 1 Zyklus entspricht einer Auf- und Abbewegung).
• Akku im Vorsatzprofil verbaut, ein defekter Akku kann unabhängig
vom Antrieb entsorgt werden.
• Die Einstellung der Endlagen bleibt bei entladenem Akku erhalten.
• Accu-Funk-Antrieb- und Steuerungskomponenten sind nicht mit Produkten
anderer Hersteller kompatibel.
• Mindestabstand Antriebe bei Funkanlagen 20 cm.
• Im Falle einer Tiefenentladung stoppt das Plissee.
VORSICHT!
Gefahr durch Sturz von der Aufstiegshilfe!
Zum Laden und Einstellen an erhöhter Stelle muss eine sichere Aufstiegshilfe ver-
wendet werden! Die Aufstiegshilfe nur auf ebenem und tragfähigem Grund verwenden!
Maximale Tragkraft beachten!
Die Aufstiegshilfe nicht an das Produkt lehnen!
Bei unsachgemäßer Aufstellung oder Belastung kann die Aufstiegshilfe umkippen!
ATTENTION !
Travaux présentant un danger de chute !
Les travaux en hauteur nécessitent un équipement approprié !
Cet équipement (p.ex. échelle) doit avoir un appui stable et résistant, offrant une force
de portée suffisante ! Veiller à la charge maximale !
L’équipement ne doit pas prendre appui sur le store ! En cas de mise en place non
conforme ou de surcharge l’équipement d’accès en hauteur peut basculer !
Ladekabel anschließen
Raccorder le câble de charge
Connect charging cable
Ladebuchse
Prise de charge
Charging socket
• Protect the pleated blind or Accu radio drive from impacts during transport,
storage and installation.
• Only use the charger approved by MHZ!
• The battery is partially charged when delivered.
• Before using the battery for the first time, it must be fully charged.
(charging time approx. 5 hours).
• In subsequent operation, the charging time is approx. fully discharged
battery is approx. 5 hours.
• To maintain the full charge capacity of the battery, it should be recharged
every 6 months.
• The red LED on the charger lights up when the charger is plugged in
and indicates the charging process. The battery is fully charged
as soon as the green LED lights up.
• Operating time of the battery: approx. 300 cycles (depending on the size
and weight of the system, 1 cycle corresponds to one up and down
movement).
• Battery installed in the attachment profile, a defective battery can be
disposed of independently of the drive.
• The setting of the end positions is retained when the battery is discharged.
• Accu-radio drive and control components are not compatible with products
from other manufacturers.
• Minimum distance between drives for radio systems 20 cm.
• In the event of a deep discharge, the pleated blind stops.
CAUTION!
Danger of falling from the climbing aid!
A safe climbing aid must be used for loading and setting in an elevated position.
be used! Only use the climbing aid on level and stable ground!
Observe the maximum load capacity!
Do not lean the climbing aid against the product!
In case of improper installation or loading, the climbing aid may tip over!
Plissee-Vorhänge
IStores plissés I
Pleated blinds
Other MHZ Window Blind manuals

MHZ Solix Guide

MHZ

MHZ Solix Guide

MHZ R 03 User manual

MHZ

MHZ R 03 User manual

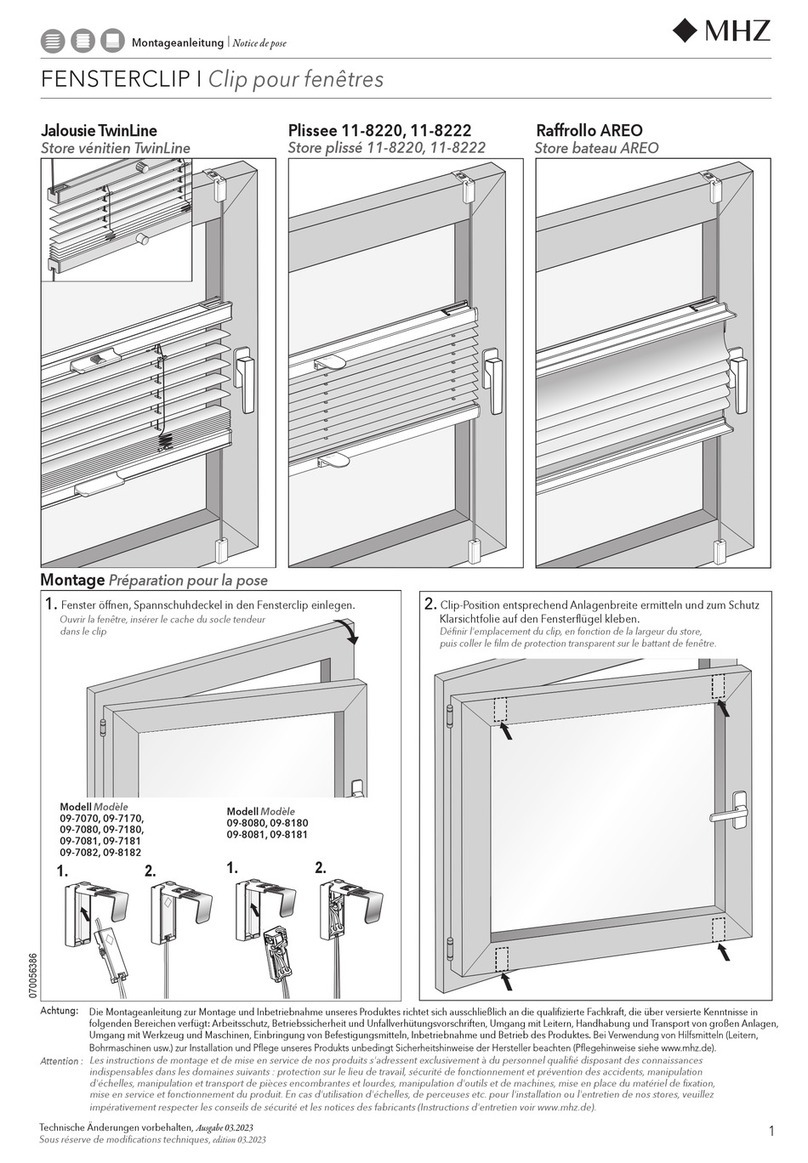
MHZ FENSTERCLIP 11-8220 User manual

MHZ

MHZ FENSTERCLIP 11-8220 User manual

MHZ R 03 User manual

MHZ

MHZ R 03 User manual

MHZ JALOUSIEN 09-1067 User manual

MHZ

MHZ JALOUSIEN 09-1067 User manual

MHZ BASIC 04-1620 User manual

MHZ

MHZ BASIC 04-1620 User manual

MHZ 11-8220 Service manual

MHZ

MHZ 11-8220 Service manual

MHZ 17-8250 User manual

MHZ

MHZ 17-8250 User manual

MHZ 11-8722 User manual

MHZ

MHZ 11-8722 User manual

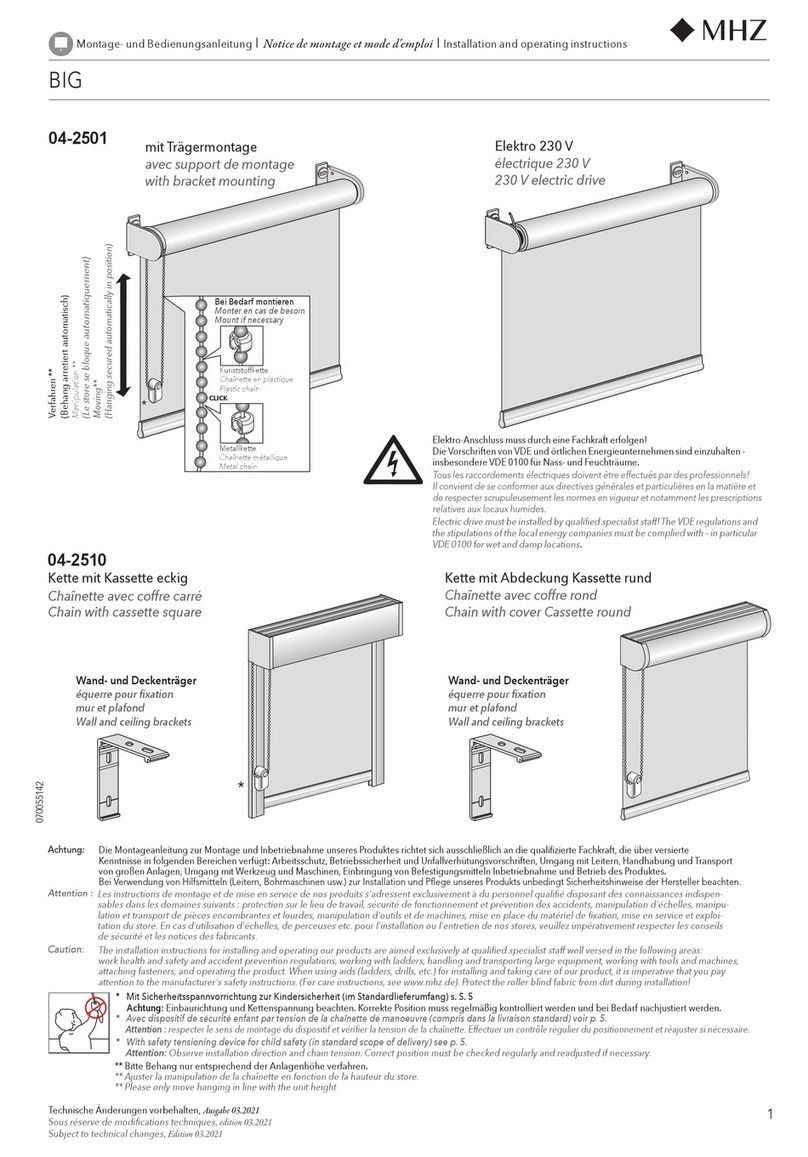
MHZ 04-2250 Instruction Manual

MHZ

MHZ 04-2250 Instruction Manual

MHZ R 03 User manual

MHZ

MHZ R 03 User manual

MHZ LOOK_2 04-1621 User manual

MHZ

MHZ LOOK_2 04-1621 User manual

MHZ 11-8225 User manual

MHZ

MHZ 11-8225 User manual

MHZ 11-8130 User manual

MHZ

MHZ 11-8130 User manual

MHZ 11-7223 User manual

MHZ

MHZ 11-7223 User manual

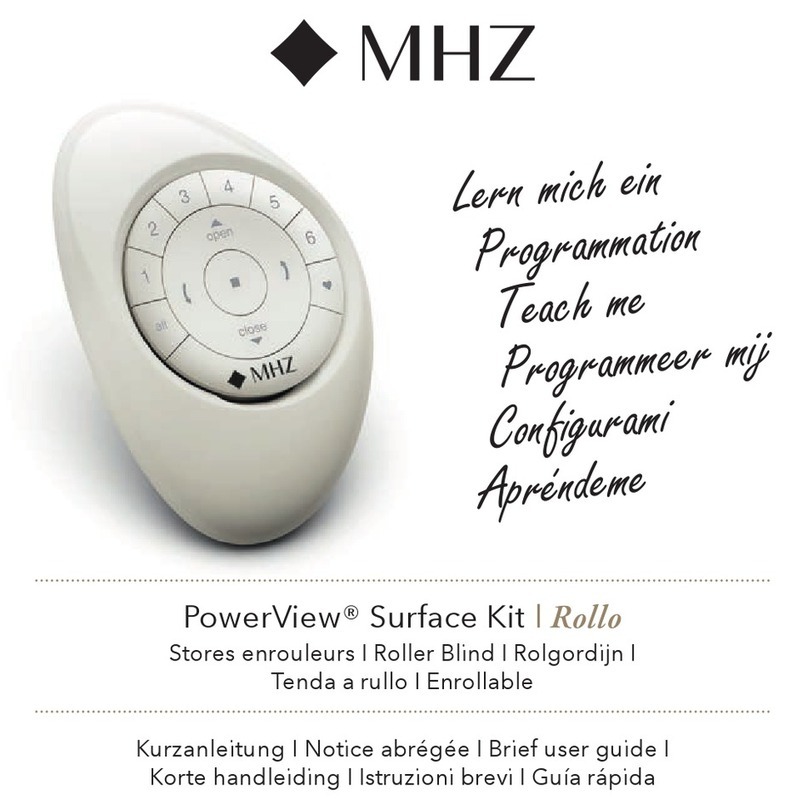
MHZ PowerView Rollo Surface Kit User manual

MHZ

MHZ PowerView Rollo Surface Kit User manual

MHZ 11-8110 Owner's manual

MHZ

MHZ 11-8110 Owner's manual

MHZ R 04 User manual

MHZ

MHZ R 04 User manual

MHZ SOLIX EXTERNAL User manual

MHZ

MHZ SOLIX EXTERNAL User manual

MHZ NOVELL User manual

MHZ

MHZ NOVELL User manual

MHZ VILO 04-2030 User manual

MHZ

MHZ VILO 04-2030 User manual

MHZ BASIC 04-1620 User manual

MHZ

MHZ BASIC 04-1620 User manual

MHZ Skid User manual

MHZ

MHZ Skid User manual

MHZ 04-3302 User manual

MHZ

MHZ 04-3302 User manual

Popular Window Blind manuals by other brands

Dometic Oceanair Romanblind Installation and operating manual

Dometic

Dometic Oceanair Romanblind Installation and operating manual

Benthin RL01 manual

Benthin

Benthin RL01 manual

Victoria M Plissee nach mass Original instructions

Victoria M

Victoria M Plissee nach mass Original instructions

Desteny Mini 19mm Series manual

Desteny

Desteny Mini 19mm Series manual

ITB CINEDOMUS LI453584 user manual

ITB

ITB CINEDOMUS LI453584 user manual

Rolllra Mechanical Series instructions

Rolllra

Rolllra Mechanical Series instructions

SKYLIGHT BLINDS LANTERNLITE Fitting instructions

SKYLIGHT BLINDS

SKYLIGHT BLINDS LANTERNLITE Fitting instructions

YewdaleDefiant C40-120T Manufacturing Instructions

YewdaleDefiant

YewdaleDefiant C40-120T Manufacturing Instructions

FAAC TM2 E manual

FAAC

FAAC TM2 E manual

IKEA PRAKTLYSING manual

IKEA

IKEA PRAKTLYSING manual

Velux FMF manual

Velux

Velux FMF manual

LF Style Selections 70628-70649 manual

LF

LF Style Selections 70628-70649 manual

Smith & Noble Metal Blinds Step by step installation instructions
Smith & Noble

Smith & Noble Metal Blinds Step by step installation instructions
Witt Sensoric LIGI-10 FLEX Series Original operating instructions

Witt Sensoric

Witt Sensoric LIGI-10 FLEX Series Original operating instructions

Erfal Rodin Disc Assembly and operating instructions

Erfal

Erfal Rodin Disc Assembly and operating instructions

LuxaFlex LUMINETTE Product information manual

LuxaFlex

LuxaFlex LUMINETTE Product information manual

Hallis Hudson DUAL RISE quick start guide

Hallis Hudson

Hallis Hudson DUAL RISE quick start guide

CHERUBINI WAVE RX V25 instructions

CHERUBINI

CHERUBINI WAVE RX V25 instructions

manuals.online logo
manuals.online logoBrands
  • About & Mission
  • Contact us
  • Privacy Policy
  • Terms and Conditions

Copyright 2025 Manuals.Online. All Rights Reserved.