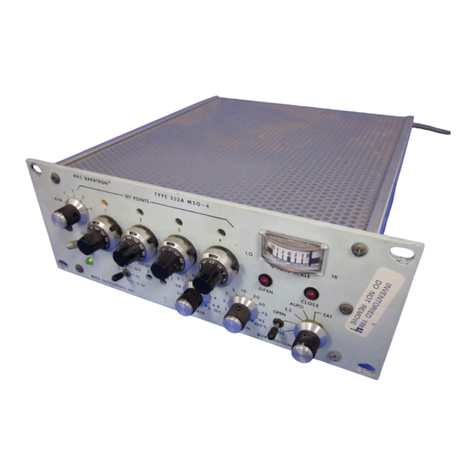
MKS 250E User manual

120552-P1
Rev A, 2/97
Instruction Manual
MKS Type 250E
Pressure/Flow Controller
Six Shattuck Road
Andover, MA 01810-2449
(800) 227-8766 or (978) 975-2350
Fax: (978) 975-0093
E-mail: mks@mksinst.com
Web site: http://www.mksinst.com

WARRANTY
T
y
pe 250E E
q
uipment
MKS Instruments, Inc. (MKS) warrants that the equipment described above (th
e
“equipment”) manufactured by MKS shall be free from defects in materials and
workmanship for a period of one year from date of shipment and will for a period of tw
o
years from the date of shipment, correctly perform all date-related operations, including
without limitation accepting data entry, sequencing, sorting, comparing, and reporting,
regardless of the date the operation is performed or the date involved in the operation,
provided that, if the equipment exchanges data or is otherwise used with equipment,
software, or other products of others, such products of others themselves correctl
y
perform all date-related operations and store and transmit dates and date-related dat
a
in a format compatible with MKS equipment. THIS WARRANTY IS MKS’ SOLE
WARRANTY CONCERNING DATE-RELATED OPERATIONS.
For the period commencing with the date of shipment of this equipment and ending one
year later in the case of defects in materials and workmanship, but two years later in the
case of failure to comply with the date-related operations warranty, MKS will, at its
option, either repair or replace any part which is defective in materials or workmanship
or with respect to the date-related operations warranty without charge to the purchaser.
The foregoing shall constitute the exclusive and sole remedy of the purchaser for an
y
breach by MKS of this warranty.
The purchaser, before returning any equipment covered by this warranty, which is
asserted to be defective by the purchaser, shall make specific written arrangements
with respect to the responsibility for shipping the equipment and handling any othe
r
incidental charges with the MKS sales representative or distributor from which the
equipment was purchased or, in the case of a direct purchase from MKS, with the MKS
home office in Andover, Massachusetts, USA.
This warranty does not apply to any equipment which has not been installed and used
in accordance with the specifications recommended by MKS for the proper and normal
use of the equipment. MKS shall not be liable under any circumstances for indirect,
special, consequential, or incidental damages in connection with, or arising out of, th
e
sale, performance, or use of the equipment covered by this warranty.
MKS recommends that all MKS pressure and flow products be calibrated periodicall
y
(typically every 6 to 12 months) to ensure accurate readings. When a product is
returned to MKS for this periodic re-calibration it is considered normal preventativ
e
maintenance not covered by any warranty.
THIS WARRANTY IS IN LIEU OF ALL OTHER RELEVANT WARRANTIES,
EXPRESSED OR IMPLIED, INCLUDING THE IMPLIED WARRANTY OF
MERCHANTABILITY AND THE IMPLIED WARRANTY OF FITNESS FOR
A
PARTICULAR PURPOSE, AND ANY WARRANTY AGAINST INFRINGEMENT O
F
ANY PATENT.
11-98 120552-P1

120552-P1

Rev A, 2/97
MKS Type 250E
Pressure/Flow Controller

Copyright © 1997 by MKS Instruments, Inc.
All rights reserved. No part of this work may be reproduced or transmitted in any form or by
any means, electronic or mechanical, including photocopying and recording, or by any
information storage or retrieval system, except as may be expressly permitted in writing by MKS
Instruments, Inc.
Baratron®is a registered trademark of MKS Instruments, Inc., Andover, MA

Table of Contents
iii
Table of Contents
Safety Information.................................................................................................................. 1
Symbols Used in This Instruction Manual.................................................................. 1
Symbols Found on the Unit ....................................................................................... 2
Safety Procedures and Precautions............................................................................. 3
Chapter One: General Information......................................................................................... 5
Introduction............................................................................................................... 5
How This Manual is Organized.................................................................................. 7
Customer Support...................................................................................................... 7
Chapter Two: Installation......................................................................................................9
How To Unpack the Type 250 Unit ........................................................................... 9
Unpacking Checklist ..................................................................................... 9
Interface Cables ......................................................................................................... 10
System Interface Cables ................................................................................ 10
Generic Shielded Cable Description .............................................................. 11
Product Location and Requirements........................................................................... 13
Operating Environmental Requirements ........................................................ 13
Safety Conditions.......................................................................................... 13
Setup ......................................................................................................................... 14
System Design .............................................................................................. 14
Mounting Instructions ................................................................................... 16
Interconnections............................................................................................ 17
Electrical Information................................................................................................ 19
Fuses............................................................................................................. 19
Grounding..................................................................................................... 19
Valve Connector............................................................................................ 20
Input Connector............................................................................................. 21
Interface Connector....................................................................................... 22
Chapter Three: Overview....................................................................................................... 23

Table of Contents
iv
General Information ...................................................................................................23
Multi-Gas Ratio Control.............................................................................................23
Front Panel Controls ..................................................................................................24
Rear Panel Controls....................................................................................................26
Labels ........................................................................................................................27
Serial Number Label......................................................................................27
Chapter Four: Operation ........................................................................................................29
How To Setup the Controller......................................................................................29
How To Use Manual Control......................................................................................30
How To Tune-Up the Controller.................................................................................30
How To Use the Bias Control.....................................................................................31
How To Use the Normal/Reverse Switch....................................................................32
How To Use External Control ....................................................................................32
How To Use the DVM Option....................................................................................33
How To Use the Proportional Gain.............................................................................33
How To Use the Multiple Set Point Option................................................................34
Settings..........................................................................................................34
Selection........................................................................................................34
Interconnections.............................................................................................35
How To Use the Process Limit Option .......................................................................36
Controls.........................................................................................................36
Interconnections.............................................................................................37
Chapter Five: Maintenance and Troubleshooting....................................................................39
General Information ...................................................................................................39
Maintenance...............................................................................................................39
How To Clean the Unit..................................................................................39
How To Replace the Fuses.............................................................................39
How To Perform the Controller Alignment Procedure....................................40
Troubleshooting.........................................................................................................42
Appendix A: Product Specifications.......................................................................................45
Appendix B: Model Code Explanation...................................................................................47
Model Code ...............................................................................................................47

Table of Contents
v
Index...................................................................................................................................... 49

Table of Contents
vi

List of Fi
g
ures and Tables
vii
List of Figures and Tables
Figures
Figure 1: Preferred Method To Connect a Shielded Cable...................................................... 12
Figure 2: Alternate Method To Connect a Shielded Cable ..................................................... 12
Figure 3: Standard Pressure Control Setup............................................................................. 18
Figure 4: Multi-Gas Ratio Control......................................................................................... 18
Figure 5: Front Panel Controls .............................................................................................. 24
Figure 6: Rear Panel Controls................................................................................................ 26
Figure 7: Serial Number Label .............................................................................................. 27
Figure 8: Process Limit Set Point Control .............................................................................36
Tables
Table 1: Definition of Symbols Found on the Unit .....................................................................2
Table 2: System Interface Cables..............................................................................................10
Table 3: Control Valves............................................................................................................16
Table 4: Fuse Information ........................................................................................................19
Table 5: Valve Connector Pinout..............................................................................................20
Table 6: Input Connector Pinout...............................................................................................21
Table 7: Interface Connector Pinout .........................................................................................22
Table 8: Multiple Set Point Option Pinout................................................................................35
Table 9: Process Limit Option Pinout.......................................................................................37
Table 10: Test Point Voltages...................................................................................................41
Table 11: Troubleshooting Chart..............................................................................................43

List of Figures and Tables
viii

Safety Information
1
Safety Information
Symbols Used in This Instruction Manual
Definitions of WARNING, CAUTION, and NOTE messages used throughout the manual.
Warning The WARNING sign denotes a hazard. It calls attention to a
procedure, practice, condition, or the like, which, if not
correctly performed or adhered to, could result in injury to
personnel.
Caution The CAUTION sign denotes a hazard. It calls attention to an
operating procedure, practice, or the like, which, if not correctly
performed or adhered to, could result in damage to or destruction of
all or part of the product.
Note The NOTE sign denotes important information. It calls attention to a
procedure, practice, condition, or the like, which is essential to highlight.

Safet
y
Information
2
Symbols Found on the Unit
The following table describes symbols that may be found on the unit.
Definition of Symbols Found on the Unit
|
On (Supply)
IEC 417, No.5007 Off (Supply)
IEC 417, No.5008 Earth (
g
round)
IEC 417, No.5017
Protective earth
(
g
round)
IEC 417, No.5019
Frame or chassis
IEC 417, No.5020 Equipotentiality
IEC 417, No.5021 Direct current
IEC 417, No.5031 Alternatin
g
Current
IEC 417, No. 5032
Both direct and
alternatin
g
Current
IEC 417, No.5033-a Class ll equipment
IEC 417, No.5172-a
Three phase
alternatin
g
Current
IEC 617-2 No. 020206
Caution, refer to
accompanyin
g
documents
ISO 3864, No. B.3.1
Caution, risk of
electric shock
ISO 3864, No. B.3.6 Caution, hot surface
IEC 417, No. 5041
Table 1: Definition of Symbols Found on the Unit

Safety Information
3
Safety Procedures and Precautions
The following general safety precautions must be observed during all phases of operation of this
instrument. Failure to comply with these precautions or with specific warnings elsewhere in
this manual violates safety standards of intended use of the instrument and may impair the
protection provided by the equipment. MKS Instruments, Inc. assumes no liability for the
customer’s failure to comply with these requirements.
DO NOT SUBSTITUTE PARTS OR MODIFY INSTRUMENT
Do not install substitute parts or perform any unauthorized modification to the instrument.
Return the instrument to an MKS Calibration and Service Center for service and repair to ensure
that all safety features are maintained.
SERVICE BY QUALIFIED PERSONNEL ONLY
Operating personnel must not remove instrument covers. Component replacement and internal
adjustments must be made by qualified service personnel only.
GROUNDING THE PRODUCT
This product is grounded through the grounding conductor of the power cord. To avoid electrical
shock, plug the power cord into a properly wired receptacle before connecting it to the product
input or output terminals. A protective ground connection by way of the grounding conductor in
the power cord is essential for safe operation.
DANGER ARISING FROM LOSS OF GROUND
Upon loss of the protective-ground connection, all accessible conductive parts (including knobs
and controls that may appear to be insulating) can render an electrical shock.
GROUND AND USE PROPER ELECTRICAL FITTINGS
Dangerous voltages are contained within this instrument. All electrical fittings and cables must
be of the type specified, and in good condition. All electrical fittings must be properly connected
and grounded.
USE THE PROPER POWER CORD
Use only a power cord that is in good condition and which meets the input power requirements
specified in the manual.
Use only a detachable cord set with conductors that have a cross-sectional area equal to or greater
than 0.75 mm2. The power cable should be approved by a qualified agency such as VDE,
Semko, or SEV.

Safet
y
Information
4
USE THE PROPER POWER SOURCE
This product is intended to operate from a power source that does not apply more voltage
between the supply conductors, or between either of the supply conductors and ground, than that
specified in the manual.
USE THE PROPER FUSE
Use only a fuse of the correct type, voltage rating, and current rating, as specified for your
product.
DO NOT OPERATE IN EXPLOSIVE ATMOSPHERES
To avoid explosion, do not operate this product in an explosive environment unless it has been
specifically certified for such operation.
HIGH VOLTAGE DANGER
High voltage is present in the cable and the sensor when the controller is turned on.

Chapter One: General Information Introduction
5
Chapter One: General Information
Introduction
The MKS Type 250E Pressure/Flow Controller will control any one of a variety of flow valves to
accurately maintain a set pressure or flow. The 250 controller can provide a ±15 VDC output
and accepts inputs from a variety of pressure transducers and mass flow meters. Two controllers
can be combined to provide two gas ratio control. The front panel controls allow selection of the
input range, control loop tuning, and automatic and manual valve control. An error meter is
provided on standard units to assist you in tuning the control loop. External signals can
command the external set point, close the valve, or switch to the manual control. A DVM option
is available to provide 4½place display of the control variable.
Typically, a pressure control system consists of three basic parts:
•The pressure sensor
•The controller and control valve
•The system whose pressure is to be controlled
The pressure sensor will usually be an MKS Baratron®Capacitance Manometer with an output of
0 to 10 VDC. Provision for other outputs (0 to 1 VDC or 0 to 100 mV) has been built into the
controller so that other transducers may be used. The pressure (vacuum) system will consist of a
chamber and a pumping system. Typically, users want to control the flow of gas entering the
system while the system pressure is maintained by the 250 controller and a control valve.
The controller’s new 9-pin Type “D”connector allows you to connect the unit to a variety of
control valves (refer to Table 3, page 16). If you install the 250 controller into an existing
system that uses the old (hex) connector cables, an adapter cable is required (refer to Valve
Connector, page 20, for more information.

Introduction Cha
p
ter One: General Information
6
In more elaborate systems, the chamber pressure may be controlled with one controller while a
known mass flow is admitted with the aid of a laminar flow element and its separate controller.
The 250 controller takes the DC pressure signal, compares it to the set point, and positions the
valve so that it drives the actual pressure to the set pressure. The 250 controller contains the
three modes of control action found in most industrial controllers: proportional, derivative, and
integral. Briefly, these functions are as follows:
1. Proportional gives a valve action (position) that is instantaneously a linear function of
the error signal. For example:
Signal to valve = K1 x Error (K1is adjustable by the gain pot)
2. Derivative action provides a signal to the valve that is proportional to the rate of change
of the error signal. For example:
Signal to valve = K2x d Error (K2is adjustable by the phase pot)
dt
A simple description of this mode of control is that it provides an anticipation element,
or the valve reaches its proper steady state position sooner than without derivative. This
is apparent when setting up a system; the derivative or phase lead control tailors the
under or overshoot. In other words, it cancels out the build-up of lags already built into
the system.
3. Integral action provides an additional valve signal which is proportional to the length of
time that an error signal exists. For example:
Signal to valve = ∫d Error / dt
In other words, as time passes, the valve position changes which reduces the error signal
to zero.
Note The 250 controller has the integral and proportional control adjustments
combined into one front panel GAIN pot.

Chapter One: General Information How This Manual is Or
g
anized
7
How This Manual is Organized
This manual is designed to provide instructions on how to set up, install, and operate a Type 250
unit.
Before installing your Type 250 unit in a system and/or operating it, carefully read and
familiarize yourself with all precautionary notes in the Safety Messages and Procedures
section at the front of this manual. In addition, observe and obey all WARNING and
CAUTION notes provided throughout the manual.
Chapter One, General Information, (this chapter) introduces the product and describes the
organization of the manual.
Chapter Two, Installation, explains the environmental requirements and describes how to mount
the instrument in your system.
Chapter Three, Overview, gives a brief description of the instrument and its functionality.
Chapter Four, Operation, describes how to use the instrument and explains all the functions and
features.
Chapter Five, Maintenance and Troubleshooting, lists any maintenance required to keep the
instrument in good working condition, and provides a checklist for reference should the
instrument malfunction.
Appendix A, Product Specifications, lists the specifications of the instrument.
Appendix B, Model Code Explanation, describes the instrument’s ordering code.
Customer Support
Standard maintenance and repair services are available at all of our regional MKS Calibration
and Service Centers, listed on the back cover. In addition, MKS accepts the instruments of other
manufacturers for recalibration using the Primary and Transfer Standard calibration equipment
located at all of our regional service centers. Should any difficulties arise in the use of your Type
250 instrument, or to obtain information about companion products MKS offers, contact any
authorized MKS Calibration and Service Center. If it is necessary to return the instrument to
MKS, please obtain an ERA Number (Equipment Return Authorization Number) from the MKS
Calibration and Service Center before shipping. The ERA Number expedites handling and
ensures proper servicing of your instrument.
Please refer to the inside of the back cover of this manual for a list of MKS Calibration and
Service Centers.
Warning All returns to MKS Instruments must be free of harmful,
corrosive, radioactive, or toxic materials.

Customer Support Cha
p
ter One: General Information
8
This page intentionally left blank.

Chapter Two: Installation How To Un
p
ack the T
yp
e 250 Unit
9
Chapter Two: Installation
How To Unpack the Type 250 Unit
MKS has carefully packed the Type 250 unit so that it will reach you in perfect operating order.
Upon receiving the unit, however, you should check for defects, cracks, broken connectors, etc.,
to be certain that damage has not occurred during shipment.
Note Do not discard any packing materials until you have completed your
inspection and are sure the unit arrived safely.
If you find any damage, notify your carrier and MKS immediately. If it is necessary to return the
unit to MKS, obtain an ERA Number (Equipment Return Authorization Number) from the MKS
Service Center before shipping. Please refer to the inside of the back cover of this manual for a
list of MKS Calibration and Service Centers.
Caution Only qualified individuals should perform the installation and any
user adjustments. They must comply with all the necessary ESD and
handling precautions while installing and adjusting the instrument.
Proper handling is essential when working with all highly sensitive
precision electronic instruments.
Unpacking Checklist
Standard Equipment
•Type 250 Unit
•Type 250 Instruction Manual (this book)
•Power Cable
Optional Equipment
•Rack Mounting Kit:
RM-6
•Electrical Connector Accessory Kit:
250E-K1 (includes an I/O connector for the rear panel of the unit, a cover for the
I/O connector, and a screw lock assembly for the I/O connector cover)
•System Interface Cables (refer to Table 2, page 10)

Interface Cables Cha
p
ter Two: Installation
10
Interface Cables
As of January 1, 1996, most products shipped to the European Community must comply with the
EMC Directive 89/336/EEC, which covers radio frequency emissions and immunity tests. In
addition, as of January 1, 1997, some products shipped to the European Community must also
comply with the Product Safety Directive 92/59/EEC and Low-Voltage Directive 73/23/EEC,
which cover general safety practices for design and workmanship. MKS products that meet
these requirements are identified by application of the CE Mark.
To ensure compliance with EMC Directive 89/336/EEC, an overall metal braided shielded cable,
properly grounded at both ends, is required during use. No additional installation requirements
are necessary to ensure compliance with Directives 92/59/EEC and 73/23/EEC.
Note 1. Overall metal braided shielded cables, properly grounded at both
ends, are required during use to meet CE Mark specifications.
2. To order metal braided, shielded cables, add an “S”after the cable
type designation. For example, to order a standard cable to connect
the 250 unit to a Type 627 transducer, use part number CB258-1-10;
for a metal braided, shielded cable, use part number CB258S-1-10.
System Interface Cables
The system interface cables include cables to connect the 250 controller to a transducer or to a
valve, as well as the adapter cable necessary to replace a 250A-C unit with a 250E unit.
System Interface Cables
To Connect the 250 Unit To... Use the MKS Cable...
Standard Shielded
270/690 system CB250-7-3 CB250S-7-3
122, 124, 223, 622, and 623 transducers CB254-2-10 CB254S-2-10
221 transducer CB254-1-10 CB254S-1-10
220 transducer CB254-10-10 CB254S-10-10
127, 624, 626, 627 transducers and 179, 258, 358,
558 mass flow meters CB258-1-10 CB258S-1-10
128, 625, and 628 transducers CB128-2-10 CB128S-2-10
PDR-C-1C/2C, PDR-D-1, and PDR-5B power
supply/readouts CB254-17-6 CB254S-17-6
120 transducer with a separate power connector CB120-3-10 CB120S-3-10
Table 2: System Interface Cables
(Continued on next page)
Table of contents
Other MKS Controllers manuals