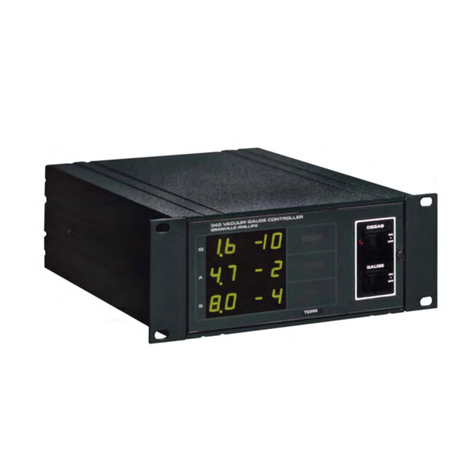
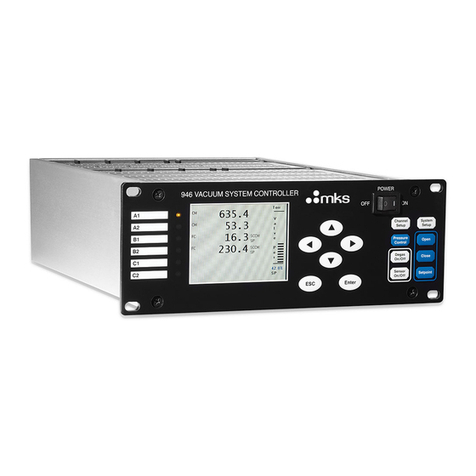
MKS PDR 2000 User manual

129097-P1
Rev A, 04/01
Instruction Manual
MKS Type PDR 2000
Dual Capacitance Diaphragm
Gauge Controller
Six Shattuck Road
Andover, MA 01810-2449
(800) 227-8766 or (978) 975-2350
Fax: (978) 975-0093
E-mail: mks@mksinst.com
Web site: http://www.mksinst.com

WARRANTY
Type PDR 2000 Equipment
MKS Instruments, Inc. (MKS) warrants that for two years from the date of shipment
the equipment described above (the “equipment”) manufactured by MKS shall be
free from defects in materials and workmanship and will correctly perform all date-
related operations, including without limitation accepting data entry, sequencing,
sorting, comparing, and reporting, regardless of the date the operation is performed
or the date involved in the operation, provided that, if the equipment exchanges
data or is otherwise used with equipment, software, or other products of others,
such products of others themselves correctly perform all date-related operations
and store and transmit dates and date-related data in a format compatible with
MKS equipment. THIS WARRANTY IS MKS’ SOLE WARRANTY CONCERNING
DATE-RELATED OPERATIONS.
For the period commencing with the date of shipment of this equipment and ending
two years later, MKS will, at its option, either repair or replace any part which is
defective in materials or workmanship or with respect to the date-related operations
warranty without charge to the purchaser. The foregoing shall constitute the
exclusive and sole remedy of the purchaser for any breach by MKS of this
warranty.
The purchaser, before returning any equipment covered by this warranty, which is
asserted to be defective by the purchaser, shall make specific written arrange-
ments with respect to the responsibility for shipping the equipment and handling
any other incidental charges with the MKS sales representative or distributor from
which the equipment was purchased or, in the case of a direct purchase from MKS,
with the MKS home office in Andover, Massachusetts, USA.
This warranty does not apply to any equipment which has not been installed and
used in accordance with the specifications recommended by MKS for the proper
and normal use of the equipment. MKS shall not be liable under any circumstances
for indirect, special, consequential, or incidental damages in connection with, or
arising out of, the sale, performance, or use of the equipment covered by this
warranty.
MKS recommends that all MKS pressure and flow products be calibrated
periodically (typically every 6 to 12 months) to ensure accurate readings. When a
product is returned to MKS for this periodic re-calibration it is considered normal
preventative maintenance not covered by any warranty.
THIS WARRANTY IS IN LIEU OF ALL OTHER RELEVANT WARRANTIES,
EXPRESSED OR IMPLIED, INCLUDING THE IMPLIED WARRANTY OF
MERCHANTABILITY AND THE IMPLIED WARRANTY OF FITNESS FOR A
PARTICULAR PURPOSE, AND ANY WARRANTY AGAINST INFRINGEMENT OF
ANY PATENT.
04/01 129097-P1 Rev A

MKS Type PDR 2000
Dual Capacitance Diaphragm
Gauge Controller

Copyright © 2001 by MKS Instruments, Inc.
All rights reserved. No part of this work may be reproduced or transmitted in any form or by any means,
electronic or mechanical, including photocopying and recording, or by any information storage or
retrieval system, except as may be expressly permitted in writing by MKS Instruments, Inc.

Table of Contents
1
Table of Contents
Safety Information....................................................................................................................... 1
Symbols Used in This Instruction Manual..................................................................... 1
Symbols Found on the Unit............................................................................................ 2
Safety Procedures and Precautions................................................................................ 3
Sicherheitshinweise für den Druckmeßumformer ...................................................................... 5
In dieser Betriebsanleitung vorkommende Symbole...................................................... 5
Erklärung der am Gerät angebrachten Symbole ............................................................ 6
Sicherheitsvorschriften und Vorsichtsmaßnahmen........................................................ 7
Informations relatives à la sécurité ............................................................................................. 9
Symboles utilisés dans ce manuel d’utilisation ............................................................. 9
Symboles apparaissant sur l’unité..................................................................................10
Mesures de sécurité et mises en garde........................................................................... 11
Informatión sobre seguridad ....................................................................................................... 13
Símbolos usados en este manual de instrucciones......................................................... 13
Símbolos hallados en la unidad...................................................................................... 14
Pocedimientos y precauciones de segurida.………………………………………………….…15
Additional Safety Information .................................................................................................... 17
Chapter One: General Information............................................................................................. 18
Introduction....................................................................................................................18
Purpose.............................................................................................................. 18
Specifications.................................................................................................... 18
Controls and Indicators.....................................................................................20
How This Manual is Organized.....................................................................................23
Customer Support........................................................................................................... 24


Table of Contents
2
Chapter Two: Installation........................................................................................................... 25
How To Unpack the PDR 2000 Controller.................................................................... 25
Unpacking Checklist......................................................................................... 25
Mounting the Controller................................................................................................. 26
Selecting the CDG.......................................................................................................... 26
Connecting the CDG...................................................................................................... 26
Attaching the CDG Cable .............................................................................................. 26
Making Accessory Connections........................................................................ 29
Checking Supply Voltage ................................................................................. 30
Attaching the Power Cord.................................................................................30
Chapter 3: Operation................................................................................................................... 31
Sequence After Power Being Turned On....................................................................... 31
Front Panel Controls ...................................................................................................... 31
Description of Parameter Selection and Adjustment..................................................... 32
Set Pt 1 High..................................................................................................... 32
Set Pt 1 Low...................................................................................................... 32
Set Pt 2 High..................................................................................................... 33
Set Pt 2 Low...................................................................................................... 33
Units mTorr/Torr/kTorr—Bar/mBar/microBar—Pascal/kPascal—Arb .......... 33
Calibrate............................................................................................................ 33
Full Scale........................................................................................................... 34
Zero................................................................................................................... 34
Reset of Stored (Default) Values...................................................................... 35
Set Point Operation........................................................................................... 35
Reading Pressure............................................................................................... 36
Analog Output................................................................................................... 37
Serial Interface.................................................................................................. 38
The Commands Used in the PDR 2000: ........................................................................ 38
Pressure............................................................................................................. 38
Full Scale Of the Gauges .................................................................................. 40
Units of Measurement....................................................................................... 41
Set Point #1....................................................................................................... 41
Set Point #2...................................................................................................... 41
Model and Software Revision........................................................................... 41

3
Chapter Four: Maintenance and Troubleshooting ..................................................................... 42
Changing Fuses .............................................................................................................. 42
Schematic Diagrams....................................................................................................... 42
Trouble Shooting............................................................................................................ 42
Index............................................................................................................................................ 44

4
List of Figures and Tables
Figures
Figure 1: Model PDR 2000 Front View.........................................................................................22
Figure 2: Model PDR 2000 Rear View..........................................................................................23
Figure 3: Model PDR 2000 Dimensions........................................................................................23
Figure 4: Model PDR 2000 Sensor Connector – 9 Pin Female D-Sub Connector........................28
Figure 5: RS-232 I/O; Analog Out; Relays....................................................................................30
Tables
Table 1: Definition of Symbols Found on the Unit .........................................................................1
Table 2: PDR 2000 9-Pin ‘D’ - MKS Baratron 15-Pin ‘D’ Connections .....................................28
Table 3: PDR 2000 9-Pin ‘D’ - MKS Baratron 5-Pin Molex Connections ..................................29
Table 4: PDR 2000 15 Pin - Accessory Connector Signals and Pins ...........................................30
Table 5: PDR 2000 Ranges: Sensor, High, Low, Set Points.........................................................37
Table 6: Analog Output and Displayed Pressure..........................................................................38
Table 7: Serial Output and Displayed Pressure ............................................................................39
Table 8: Serial Output and Full Scale Range Setting ...................................................................40
Table 9: Information on Replacing Fuses.....................................................................................42

Safety information Symbols used in This Instructions manual
5
Safety Information
Symbols Used in This Instruction Manual
Definitions of WARNING, CAUTION, and NOTE messages used throughout the manual.
Warning The WARNING sign denotes a hazard to personnel. It calls
attention to a procedure, practice, condition, or the like,
which, if not correctly performed or adhered to, could result in
injury to personnel.
Caution The CAUTION sign denotes a hazard to equipment. It calls
attention to an operating procedure, practice, or the like, which, if
not correctly performed or adhered to, could result in damage to or
destruction of all or part of the product.
Note The NOTE sign denotes important information. It calls attention to a
procedure, practice, condition, or the like, which is essential to highlight.

Safety information Symbols used in This Instructions manual
6
Symbols Found on the Unit
The following table describes symbols that may be found on the unit.
Definition of Symbols Found on the Unit
|
On (Supply)
IEC 417, No.5007 Off (Supply)
IEC 417, No.5008 Earth (ground)
IEC 417, No.5017
Protective earth
(ground)
IEC 417, No.5019
Frame or chassis
IEC 417, No.5020 Equipotentiality
IEC 417, No.5021 Direct current
IEC 417, No.5031 Alternating current
IEC 417, No.5032
Both direct and
alternating current
IEC 417, No.5033-a Class ll equipment
IEC 417, No.5172-a
Three phase
alternating current
IEC 617-2 No.020206
Caution, refer to
accompanying
documents
ISO 3864, No.B.3.1
Caution, risk of
electric shock
ISO 3864, No.B.3.6 Caution, hot surface
IEC 417, No.5041
Table 1: Definition of Symbols Found on the Unit

Safety information Safety Procedures and Precautions
7
Safety Procedures and Precautions
The following general safety precautions must be observed during all phases of operation of this
instrument. Failure to comply with these precautions or with specific warnings elsewhere in this
manual violates safety standards of intended use of the instrument and may impair the protection
provided by the equipment. MKS Instruments, Inc. assumes no liability for the customer’s failure
to comply with these requirements.
DO NOT SUBSTITUTE PARTS OR MODIFY INSTRUMENT
Do not install substitute parts or perform any unauthorized modification to the instrument. Return the
instrument to an MKS Calibration and Service Center for service and repair to ensure that all safety
features are maintained.
SERVICE BY QUALIFIED PERSONNEL ONLY
Operating personnel must not remove instrument covers. Component replacement and internal
adjustments must be made by qualified service personnel only.
GROUNDING THE PRODUCT
This product is grounded through the grounding conductor of the power cord. To avoid electrical shock,
plug the power cord into a properly wired receptacle before connecting it to the product input or output
terminals. A protective ground connection by way of the grounding conductor in the power cord is
essential for safe operation.
DANGER ARISING FROM LOSS OF GROUND
Upon loss of the protective-ground connection, all accessible conductive parts (including knobs and
controls that may appear to be insulating) can render an electrical shock.
GROUND AND USE PROPER ELECTRICAL FITTINGS
Dangerous voltages are contained within this instrument. All electrical fittings and cables must be of the
type specified, and in good condition. All electrical fittings must be properly connected and grounded.
USE THE PROPER POWER CORD
Use only a power cord that is in good condition and which meets the input power requirements specified
in the manual.
Use only a detachable cord set with conductors that have a cross-sectional area equal to or greater than
0.75 mm2. The power cable should be approved by a qualified agency such as VDE, Semko, or SEV


8
USE THE PROPER POWER SOURCE
This product is intended to operate from a power source that does not apply more voltage between
the supply conductors, or between either of the supply conductors and ground, than that specified
in the manual
USE THE PROPER FUSE
Use only a fuse of the correct type, voltage rating, and current rating, as specified for your product
DO NOT OPERATE IN EXPLOSIVE ATMOSPHERES
To avoid explosion, do not operate this product in an explosive environment unless it has been
specifically certified for such operation.
HIGH VOLTAGE DANGER
High voltage is present in the cable, and in the sensor when the controller is turned on.

9
Sicherheitshinweise
In dieser Betriebsanleitung vorkommende Symbole
Definition der mit WARNUNG!, VORSICHT! und HINWEIS überschriebenen Abschnitte in dieser
Betriebsanleitung.
Warnung! Das Symbol WARNUNG! weist auf eine Gefahrenquelle hin. Es
macht auf einen Arbeitsablauf, eine Arbeitsweise, einen
Zustand oder eine sonstige Gegebenheit aufmerksam, deren
unsachgemäße Ausführung bzw. ungenügende
Berücksichtigung zu Körperverletzung führen kann.
Vorsicht! Das Symbol VORSICHT! weist auf eine Gefahrenquelle hin. Es
macht auf einen Bedienungsablauf, eine Arbeitsweise oder eine
sonstige Gegebenheit aufmerksam, deren unsachgemäße Ausführung
bzw. Ungenügende Berücksichtigung zu einer Beschädigung oder
Zerstörung des Produkts oder von Teilen des Produkts führen kann.
Hinweis Das Symbol HINWEIS weist auf eine wichtige Mitteilung hin, die auf
einen Arbeitsablauf, eine Arbeitsweise, einen Zustand oder eine sonstige
Gegebenheit von besonderer Wichtigkeit aufmerksam macht.

Sicherheitsinweise Am Gerät angebrachte Symbole
10
Erkärung der Am Gerät angebrachte Symbole
Der untenstehenden Tabelle sind die Bedeutungen der Symbole zu entnehmen, die an dem Gerät
angebracht sind.
Definitionen der am Gerät angebrachten Symbole
|
Ein (Netz)
IEC 417, Nr. 5007 Aus (Netz)
IEC 417, Nr. 5008 Erde
IEC 417, Nr. 5017 Schutzleiter
IEC 417, Nr. 5019
Rahmen oder Chassis
IEC 417, Nr. 5020 Äquipotentialanschluß
IEC 417, Nr. 5021 Gleichstrom
IEC 417, Nr. 5031 Wechselstrom
IEC 417, Nr. 5032
Wechselstrom und
Gleichstrom
IEC 417, Nr. 5033-a Geräteklasse II
IEC 417, Nr. 5172-a Drehstrom
IEC 617-2 Nr. 020206
Vorsicht! Bitte
Begleitdokumente
lesen!
ISO 3864, Nr. B.3.1
Vorsicht!
Stromschlaggefahr!
ISO 3864, Nr. B.3.6
Vorsicht!
Heiße Fläche!
IEC 417, Nr. 5041
Tabelle 2: Definitionen der am Gerät angebrachten Symbole

11
Sicherheitsvorschriften und Vorsichtsmaßnahmen
Die untenstehenden allgemeinen Sicherheitsvorschriften sind bei allen Betriebs-phasen dieses
Instruments zu befolgen. Jede Mißachtung dieser Sicherheits-vorschriften oder sonstiger
spezifischer Warnhinweise in dieser Betriebsanleitung stellt eine Zuwiderhandlung der für dieses
Instrument geltenden Sicherheits-standards dar und kann die an diesem Instrument vorgesehenen
Schutzvor-richtungen unwirksam machen. MKS Instruments, Inc. haftet nicht für eine
Mißachtung dieser Sicherheitsvorschriften seitens des Kunden.
Keine Teile austauschen und keine Veränderungen vornehmen!
Bauen Sie in das Instrument keine Ersatzteile ein, und nehmen Sie keine eigenmächtigen Änderungen am
Gerät vor! Schicken Sie das Instrument zu Wartungs- und Reparatur-zwecken an einen MKS-
Kalibrierungs- und -Kundendienst ein! Dadurch wird sicher-gestellt, daß alle Sicherheitseinrichtungen
voll funktionsfähig bleiben.
Wartung nur durch qualifizierte Fachleute!
Das Gehäuse des Instruments darf vom Bedienpersonal nicht geöffnet werden. Das Auswechseln von
Bauteilen und das Vornehmen von internen Einstellungen ist nur von qualifizierten Fachleuten
durchzuführen.
Produkt erden!
Dieses Produkt ist mit einer Erdleitung und einem Schutzkontakt am Netzstecker versehen. Um der
Gefahr eines elektrischen Schlages vorzubeugen, ist das Netzkabel an einer vorschriftsmäßig geerdeten
Schutzkontaktsteckdose anzuschließen, bevor es an den Eingangs- bzw. Ausgangsklemmen des Produkts
angeschlossen wird. Das Instrument kann nur sicher betrieben werden, wenn es über den Erdleiter des
Netzkabels und einen Schutzkontakt geerdet wird.
Gefährdung durch Verlust der Schutzerdung!
Geht die Verbindung zum Schutzleiter verloren, besteht an sämtlichen zugänglichen Teilen aus
stromleitendem Material die Gefahr eines elektrischen Schlages. Dies gilt auch für Knöpfe und andere
Bedienelemente, die dem Anschein nach isoliert sind.

Sicherheitsvorschriften und VorsichtsmaBnahmen sicherheitshinweise
12
Erdung und Verwendung geeigneter elektrischer Armaturen!
In diesem Instrument liegen gefährliche Spannungen an. Alle verwendeten elektrischen Armaturen und
Kabel müssen dem angegebenen Typ entsprechen und sich in einwand-freiem Zustand befinden. Alle
elektrischen Armaturen sind vorschriftsmäßig anzubringen und zu erden.
Richtiges Netzkabel verwenden!
Das verwendete Netzkabel muß sich in einwandfreiem Zustand befinden und den in der
Betriebsanleitung enthaltenen Anschlußwerten entsprechen.
Das Netzkabel muß abnehmbar sein. Der Querschnitt der einzelnen Leiter darf nicht weniger als 0,75
mm2betragen. Das Netzkabel sollte einen Prüfvermerk einer zuständigen Prüfstelle tragen, z.B. VDE,
Semko oder SEV.
Richtige Stromquelle verwenden!
Dieses Produkt ist für eine Stromquelle vorgesehen, bei der die zwischen den Leitern bzw. zwischen
jedem der Leiter und dem Masseleiter anliegende Spannung den in dieser Betriebsanleitung angegebenen
Wert nicht überschreitet.
Richtige Sicherung benutzen!
Es ist eine Sicherung zu verwenden, deren Typ, Nennspannung und Nennstromstärke den Angaben für
dieses Produkt entsprechen.
Gerät nicht in explosiver Atmosphäre benutzen!
Um der Gefahr einer Explosion vorzubeugen, darf dieses Gerät nicht in der Nähe explosiver Stoffe
eingesetzt werden, sofern es nicht ausdrücklich für diesen Zweck zertifiziert worden ist.
Hochspannungsgefahr!
Bei eingeschaltetem Steuerteil liegt im Kabel und im Sensor Hochspannung an.

13
Informations relatives à la sécurité Pour le trangdueteur de
pression
Symboles utilisés dans ce manuel d’utilisation
Définition des indications AVERTISSEMENT, ATTENTION et REMARQUE utilisées dans ce manuel.
Avertissement L’indication AVERTISSEMENT signale un danger potentiel. Elle
est destinée à attirer l’attention sur une procédure, une
utilisation, une situation ou toute autre chose présentant un
risque de blessure en cas d’exécution incorrecte ou de non-
respect des consignes.
Attention L’indication ATTENTION signale un danger potentiel. Elle est
destinée à attirer l’attention sur une procédure, une utilisation, une
situation ou toute autre chose présentant un risque d’endommagement
ou de dégât d’une partie ou de la totalité de l’appareil en cas
d’exécution incorrecte ou de non-respect des consignes.
Remarque L’indication REMARQUE signale des informations importantes. Elle est
destinée à attirer l’attention sur une procédure, une utilisation, une situation
ou toute autre chose présentant un intérêt particulier.

Informations relatives à la sécurité Symboles apparaissant sur l’ appareil
14
Symboles apparaissant sur l’appareil
Le tableau suivant décrit les symboles apparaissant sur l’appareil.
Définition des symboles apparaissant sur l’appareil
|
Marche (sous tension)
IEC 417, No. 5007 Arrêt (hors tension)
IEC 417, No. 5008 Terre (masse)
IEC 417, No. 5017
Terre de protection
(masse)
IEC 417, No. 5019
Masse
IEC 417, No. 5020 Equipotentialité
IEC 417, No. 5021 Courant continu
IEC 417, No. 5031 Courant alternatif
IEC 417, No. 5032
Courant continu et
alternatif
IEC 417, No. 5033-a Matériel de classe II
IEC 417, No. 5172-a
Courant alternatif
triphasé
IEC 617-2 No. 020206
Attention : se reporter
à la documentation
ISO 3864, No. B.3.1
Attention : risque de
secousse électrique
ISO 3864, No. B.3.6
Attention : surface
brûlante
IEC 417, No. 5041
Tableau 3 : Définition des symboles apparaissant sur l’appareil
Table of contents
Other MKS Controllers manuals

MKS
MKS Compact Closed Loop Picomotor User manual

MKS
MKS Stabil-Ion 370 Series User manual

MKS
MKS BEA AFA Series Operating manual

MKS
MKS Mass-Flo 1159B User manual

MKS
MKS 640A User manual

MKS
MKS MRK402 User manual

MKS
MKS Granville-Phillips 358 series User manual

MKS
MKS 640B User manual

MKS
MKS 250E User manual

MKS
MKS 579A User manual