manuals.online logo
Brands
  1. Home
  2. •
  3. Brands
  4. •
  5. Otto Bock
  6. •
  7. Medical Equipment
  8. •
  9. Otto Bock 17KO1 Series User manual

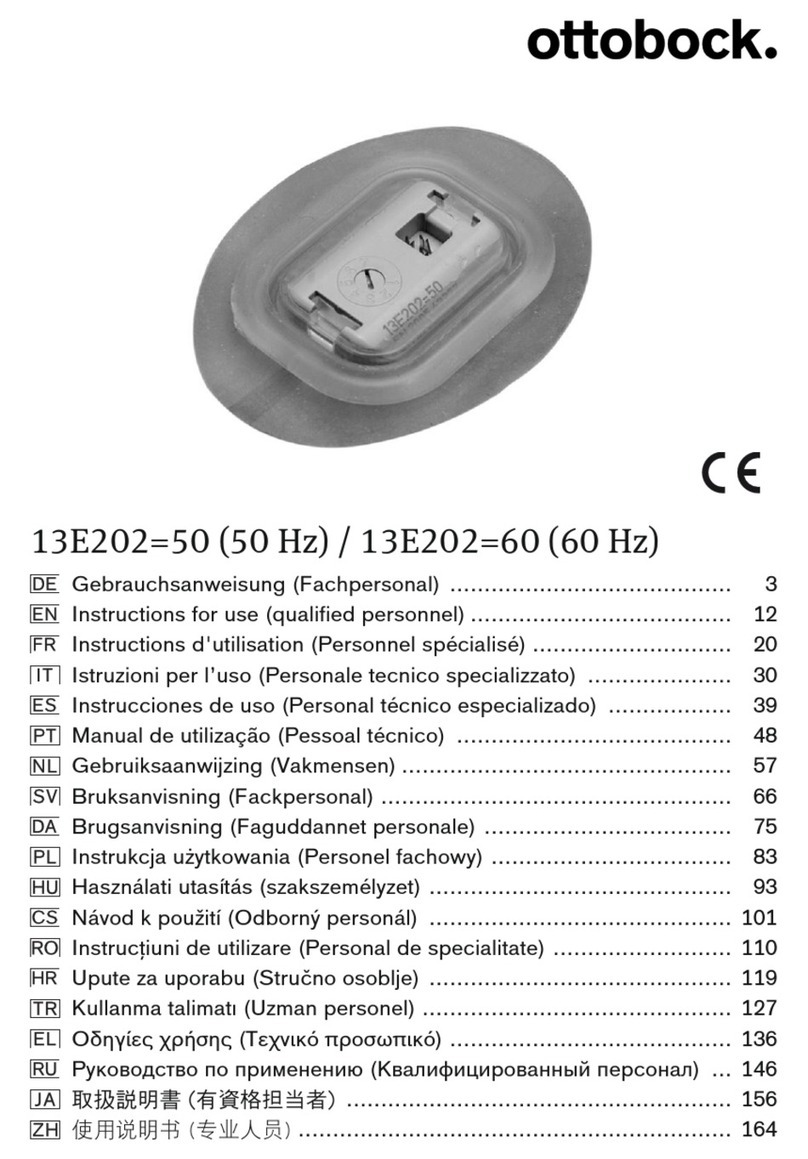
Otto Bock 17KO1 Series User manual

Instructions for use (user) ............................................................................................... 4
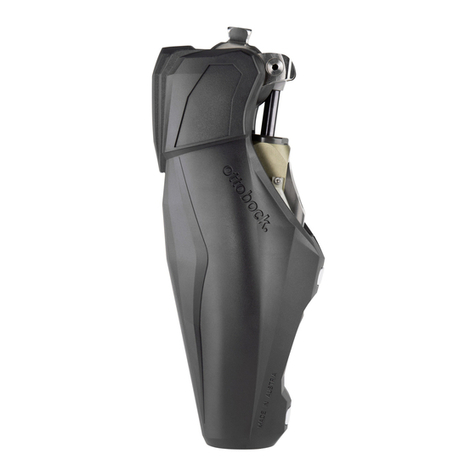
C-Brace joint unit 17KO1=*
@
SCAN ME
[email protected]
Lassen Sie sich durch das Fachpersonal in den sicheren Gebrauch des Produkts einweisen.Weitere Sprachen dieser Gebrauchsanweisung sind online verfügbar oder können kostenlos alsgedrucktes Exemplar bestellt werden (siehe Seite 2).DE |
Consult qualified personnel for instructions on how to use the product safely.These instructions for use are available in additional languages online or can be ordered as a printed copy free of charge (see page 2).EN |
FR |
IT |
ES |
Solicite ao pessoal técnico que o instrua no uso seguro do produto.Outros idiomas destas instruções de uso estão disponíveis online ou podem ser solicitados gratuitamente como um exemplar impresso (veja a página 2).PT |
Laat u door deskundig personeel uitleggen hoe u veilig met het product moet omgaan.Andere talen van deze gebruiksaanwijzing zijn online beschikbaar of kunnen gratis in gedruktevorm worden besteld (zie pagina 2).NL |
SV |
Få faguddannet personale til at vise dig, hvordan du anvender produktet på sikker vis.Denne brugsanvisning er tilgængelig på yderligere sprog online eller kan bestilles gratis som et trykt eksemplar (se side 2).DA |
2
La fagpersonell instruerer deg i sikker bruk av produktet.Flere språk for denne bruksanvisningen er tilgjengelige på nett, eller de kan bestilles somutskrevet eksemplar (se side 2).NO |
Anna ammattihenkilöstön perehdyttää itsesi tuotteen turvalliseen käyttöön.Tämän käyttöohjeen muut kielet ovat saatavilla online tai niitä voi tilata maksutta painettuna versiona (katso sivu 2).FI |
Personel fachowy powinien poinstruować użytkownika na temat bezpiecznego używania produktu.Niniejszą instrukcję używania w innych językach można przeczytać online lub zamówić bezpłatniew wersji drukowanej (patrz strona 2).PL |
Kérje meg a szakszemélyzetet, hogy tanítsa meg Önt a termék biztonságos használatára.A használati útmutató további nyelvi változatai az interneten elérhetők, vagy nyomtatott példányként ingyenesen megrendelhetők (lásd a 2. oldalt).HU |
Nechte se poučit odborným personálem ohledně bezpečného použití produktu.Další jazykové verze tohoto návodu k použití jsou k dispozici online nebo je lze zdarma objednatv tištěné podobě (viz str. 2).CS |
Uzman personelin size ürünün güvenli kullanımı hakkında bilgi vermesini sağlayın.Bu kullanım kılavuzundaki diğer diller online olarak mevcuttur veya ücretsiz basılı kopya olarak sipariş verilebilir (bkz. sayfa 2).TR |
EL |
RU |
製品の安全な使用方法については、有資格担当者の指示に従ってください。本取扱説明書のその他言語は、オンラインで入手可能ですが、印刷版も無料で注文できます(P2を参照)。JA |
由专业人员就产品的安全使用提供指导。使用说明书的其他语言版本可在线获取,也可免费订购印刷版(参见第 2 页)。ZH |
전문 기사에게 제품의 안전한 사용법을 배우십시오.
이 사용 설명서의 다른 언어는 온라인에서 볼 수 있으며 또는 인쇄본은 무료로 주문할
수 있습니다 (2 페이지 참조).
KO |
Basic UDI-DI: 406441100000000017KO1LU
3
1 Foreword English
INFORMATION
Date of last update: 2023-07-19
►Please read this document carefully before using the product and observe the safety
notices.
►Obtain instruction from the qualified personnel in the safe use of the product.
►Please contact the qualified personnel if you have questions about the product or in case of
problems.
►Report each serious incident related to the product to the manufacturer and to the relevant
authority in your country. This is particularly important when there is a decline in the health
state.
►Please keep this document for your records.
The product "C-Brace joint unit 17KO1=*" is referred to as the product/component/orthosis/joint
unit below.
These instructions for use provide you with important information on the use, adaptation and
handling of the product.
Only put the product into use in accordance with the information contained in the accompanying
documents supplied.
2 Product description
2.1 Design
The fabricated orthosis and the course of the orthosis shell edges can be individually designed.
For this reason, the following illustration and the illustration on the cover page of these instruc
tions for use only show one possible version:
InsideOutside987654321
1. Thigh closure straps
2. Thigh shell
3. 17KO1=* C-Brace joint unit with control panel
4. Medial joint support
5. Lower leg closure straps
6. Lower leg shell
7. Connecting element to ankle joint.
The connection can also be established with a dorsal spring
element.
8. Ankle joint
9. Foot component
4
5
2.1.1 Control panel on the joint unit
1. Long button press: turns the component on/off (see page29)
Short button press: queries the status (see page38)
2. Displays the charge level of the integrated battery (see page17)
3. Maintenance required (see page38)

4. Long button press: turns the Bluetooth function on/off (see page30).
Short button press: if the Bluetooth function is on, the component
becomes "visible" for about 2 minutes so it can be detected by another
device such as a smartphone.
Under the cover at the end of the control panel: Charging receptacle to
connect the battery charger (see page16)
2.2 Function
The product is an orthopaedic technology device that makes everyday activities such as standing
and walking possible or easier for the user. If the user's activity level increases in the course of
use, adjustments are required. Changes will also have to be made if the user's physical condition
worsens and more support from the product is needed.
This product features microprocessor control of the stance and swing phase (SSCO).
The microprocessor uses the measurements of an integrated sensor system as a basis to control
a hydraulic unit that influences the extension and flexion resistance of the product.
These sensor data are updated and evaluated 100 times per second. As a result, the behaviour of
the product is adapted to the current motion situation (gait phase) dynamically and in real time.
Thanks to the microprocessor-controlled stance and swing phase, the product can be individually
adapted to your needs.
In order to do so, the product is adjusted by the O&P professional using an adjustment app.
The product features MyModes for special motion types (e.g.cycling ...). These are pre-con
figured by the O&P professional using the adjustment software and can be activated using the
Cockpit app (see page31).
In case of an error in the sensor system, hydraulic control or when the battery is empty, safety
mode makes restricted operation possible. Resistance parameters that are predefined by the
product are configured for this purpose (see page33).
The microprocessor-controlled hydraulic unit offers the following advantages
• Approximation of the physiological gait pattern
• Stability while standing and walking
• Adaptation of product characteristics to various surfaces, inclines, gait situations and walking
speeds
Essential performance of the product
• Stability in the stance phase
6
3 Application
3.1 Indications for use
The product is intended solely for orthotic fittings of the lower limbs.
3.2 Conditions of use
The product was developed for everyday use and must not be used for unusual activities. These
unusual activities include, for example, extreme sports (free climbing, parachuting, paragliding,
etc.), sports activities that involve jumping, sudden movements or fast sequences of steps (e.g.
basketball, badminton, sporty riding).
Possible sports activities must be discussed with the O&P professional.
Permissible ambient conditions are described in the technical data (see page35).
The product is intended exclusively for use on one user. Use of the product by another person is
not approved by the manufacturer.
3.3 Indications
• Unilateral or bilateral lower limb paresis or flaccid paralysis, e.g.due to post-polio syndrome,
traumatic paresis, incomplete paraplegia.
• Physical prerequisites such as muscle status, joint mobility and possible axis deviations are
crucial and proper control of the orthosis must be guaranteed.
• The user must fulfil the physical and mental requirements for perceiving optical/acoustic sig
nals and/or mechanical vibrations
• The existing muscle strength of the hip extensors and flexors must permit the controlled
swing-through of the limb (compensation using the hip is possible).
3.4 Contraindications
3.4.1 Absolute Contraindications
• Flexion contracture in the knee and/or hip joint in excess of 10°
• Knee varus/valgus malposition in excess of 10°
• Severe spasticity
• Body weight over 125 kg / 275 lbs
3.4.2 Relative Contraindications
• Moderate spasticity
3.5 Qualifications of the therapist or nursing staff
The therapists or nursing staff must be trained in handling the product. Training must be carried
out by the authorised orthopaedic technician.
4 Safety
4.1 Explanation of warning symbols
WARNING Warning regarding possible serious risks of accident or injury.
CAUTION Warning regarding possible risks of accident or injury.
NOTICE Warning regarding possible technical damage.
4.2 Structure of the safety instructions
WARNING
The heading describes the source and/or the type of hazard
The introduction describes the consequences in case of failure to observe the safety instruc
tions. Consequences are presented as follows if more than one consequence is possible:
7
> E.g.: Consequence 1 in the event of failure to observe the hazard
> E.g.: Consequence 2 in the event of failure to observe the hazard
►This symbol identifies activities/actions that must be observed/carried out in order to avert
the hazard.
4.3 General safety instructions
WARNING
Non-observance of safety notices
Personal injury/damage to the product due to using the product in certain situations.
►Observe the safety notices and the stated precautions in this accompanying document.
WARNING
Using the orthosis while operating a vehicle
Accident due to unexpected orthosis behaviour.
►All users are required to observe their country’s national and state driving laws when operat
ing vehicles with the orthosis. For insurance purposes, drivers should have their driving abil
ity examined and approved by an authorised test centre.
►The leg on which the orthosis is worn may not be used to control the vehicle or its peripheral
components (e.g.clutch pedal, brake pedal, gas pedal...).
WARNING
Use of damaged power supply unit, adapter plug or battery charger
Risk of electric shock due to contact with exposed, live components.
►Do not open the power supply unit, adapter plug or battery charger.
►Do not expose the power supply unit, adapter plug or battery charger to extreme loading
conditions.
►Immediately replace damaged power supply units, adapter plugs or battery chargers.
CAUTION
Failure to observe warning/error signals
Falling due to unexpected product behaviour because of changed damping behaviour.
►The warnings/error signals (Warnings/error signals) and corresponding change in damping
settings must be observed.
CAUTION
Penetration of dirt and moisture into components of the orthosis
> Falling due to unexpected behaviour of the orthosis as a result of malfunction.
> Falling due to breakage of load-bearing components.
►Ensure that neither solid particles, foreign bodies nor liquids penetrate the orthosis compo
nents.
►The orthosis components are protected against splashed water from all directions.
►However, the orthosis components are not protected against submersion, jets of water and
steam.
►If water has penetrated the components of the orthosis, remove the straps and pads if pos
sible and allow the components to dry.
►In case of a malfunction after drying, the orthosis must be inspected by an authorised
Ottobock Service Centre. The O&P professional is your contact person.
►Always close the charging receptacle with the protective cap after disconnecting the char
ging cable.
8
CAUTION
Independent manipulations on the joint unit and orthosis components
Falling due to the breakage of load-bearing components or malfunction of the orthosis.
►Manipulations on the joint unit and orthosis components other than the tasks described in
these instructions for use are not permitted.
►The battery may only be handled by Ottobock authorised, qualified personnel (no replace
ment by the user).
►The joint unit and orthosis components may only be opened and repaired by authorised,
qualified Ottobock personnel.
CAUTION
Use of the product when battery charge level is too low
Falling due to unexpected behaviour of the product because of changed damping behaviour.
►Check the current charge level before use and charge the product if required.
►Note that the operating time of the product may be reduced at low ambient temperatures or
due to ageing of the battery.
CAUTION
Mechanical stress on the product
> Falling due to unexpected product behaviour as the result of a malfunction.
> Falling due to breakage of load-bearing components.
> Skin irritation due to defects on the hydraulic unit with leakage of liquid.
►Do not subject the product to mechanical vibrations or impacts.
►Check the product for visible damage before each use.
CAUTION
Signs of wear and tear on the product components
Falling due to damage or malfunction of the product.
►Regular service inspections (maintenance) are mandatory in the interest of your own safety
and in order to maintain operating reliability and protect the warranty.
CAUTION
Use of unapproved accessories
> Falling due to product malfunction as a result of reduced interference resistance.
> Interference of other electronic devices due to increased emissions.
►Use the product only in combination with the accessories, signal converters and cables lis
ted in the sections "Scope of delivery" (see page15) and "Accessories" (see page16).
NOTICE
Improper product care
Damage to the product due to the use of incorrect cleaning agents.
►Clean the product with a damp cloth only (fresh water).
4.4 Information on the Power Supply/Battery Charging
CAUTION
Charging the product with damaged power supply unit/charger/charger cable
Falling due to unexpected behaviour of the product caused by insufficient charging.
9
►Check the power supply unit, charger and charger cable for damage before use.
►Replace any damaged power supply unit, charger or charger cable.
CAUTION
Charging while wearing the product
> Falling due to walking and getting caught on the connected battery charger.
> Falling due to unexpected product behaviour because of changed damping behaviour.
►Only charge the product in a sitting position while wearing it.
NOTICE
Use of incorrect power supply unit/battery charger
Damage to product due to incorrect voltage, current or polarity.
►Use only power supply units/battery chargers approved for this product by Ottobock (see
instructions for use and catalogues).
4.5 Battery charger information
NOTICE
Penetration of dirt and humidity into the product
Lack of proper charging functionality due to malfunction.
►Ensure that neither solid particles nor liquids can penetrate into the product.
NOTICE
Mechanical stress on the power supply/battery charger
Lack of proper charging functionality due to malfunction.
►Do not subject the power supply/battery charger to mechanical vibrations or impacts.
►Check the power supply/battery charger for visible damage before each use.
NOTICE
Operating the power supply unit/charger outside of the permissible temperature range
Lack of proper charging functionality due to malfunction.
►Only use the power supply unit/charger for charging within the allowable temperature range.
The section "Technical data" contains information on the allowable temperature range (see
page35).
NOTICE
Independent changes or modifications carried out to the battery charger
Lack of proper charging functionality due to malfunction.
►Have any changes or modifications carried out only by Ottobock authorised, qualified per
sonnel.
4.6 Notes on applying the product
CAUTION
Foreign objects between the leg and orthosis shells
Pressure points on the leg due to foreign objects at the contact points between the leg and
orthosis shells.
►Smooth out wrinkles in the padding material and clothing.
►Check the leg for pressure points.
10
CAUTION
Improper fit of the orthosis
Falling/skin irritation due to insufficient support/hold by the orthosis shells.
►Take the orthosis off immediately and put it back on.
►Observe the instructions for applying and removing.
CAUTION
Pinching skin in the area of the closures
Injuries and swelling due to disruption of blood circulation to the skin in the area of the closures.
►Do not over-tighten the closures when applying the product.
CAUTION
Volume fluctuations of the leg or problems with the fit of the orthosis
Injuries, friction and local pressure caused by improper fit of the orthosis shells (too firm/too
loose).
►Sensitivity problems and skin damage require special attention with regard to the fit. Check
skin areas daily.
►Consult a physician or O&P professional in case of any signs of skin damage, even if they
are only minor.
►If the improper fit is the result of weight gain or loss, have new thigh shells and lower leg
shells fabricated based on a new plaster cast.
►Check the leg for pressure points.
4.7 Information on Proximity to Certain Areas
CAUTION
Insufficient distance to HF communication devices (e.g. mobile phones, Bluetooth
devices, WiFi devices)
Falling due to unexpected behaviour of the product caused by interference with internal data
communication.
►Therefore, keeping a minimum distance of 30cm to HF communication devices is recom
mended.
CAUTION
Operating the product in very close proximity to other electronic devices
Falling due to unexpected behaviour of the product caused by interference with internal data
communication.
►Do not operate the product in the immediate vicinity of other electronic devices.
►Do not stack the product with other electronic devices during operation.
►If simultaneous operation cannot be avoided, monitor the product and verify proper use in
the existing setup.
CAUTION
Proximity to sources of strong magnetic or electrical interference (e.g. theft prevention
systems, metal detectors)
Falling due to unexpected behaviour of the product caused by interference with internal data
communication.
11
►Avoid remaining in the vicinity of visible or concealed theft prevention systems at the
entrance/exit of stores, metal detectors/body scanners for people (e.g. in airports) or other
sources of strong magnetic and electrical interference (e.g. high-voltage lines, transmitters,
transformer stations...).
If this cannot be avoided, make sure to at least have a safeguard when walking or standing
(e.g. a handrail or the support of another person).
►When walking through theft prevention systems, body scanners or metal detectors, watch
for unexpected changes in the damping behaviour of the product.
►In general, monitor the product for unexpected changes in the damping behaviour when
electronic or magnetic devices are in the immediate vicinity.
CAUTION
Entering a room or area with strong magnetic fields (e.g.magnetic resonance tomo
graphs, MRT (MRI) equipment...)
> Falling due to unexpected restriction of the product's range of motion caused by metallic
objects adhering to the magnetised components.
> Irreparable damage to the product due to the effect of a strong magnetic field.
►Take off the product before entering a room or area with strong magnetic fields and store the
product outside this room or area.
►Damage to the product caused by exposure to a strong magnetic field cannot be repaired.
CAUTION
Remaining in areas outside the allowable temperature range
Falling due to breakage of load-bearing components or malfunction of the product.
►Avoid remaining in areas with temperatures outside of the permissible range (see page35).
4.8 Information on Use
CAUTION
Improper mode switching
Falling due to unexpected behaviour of the product because of changed damping behaviour.
►Ensure that you stand securely during all switching processes.
►Verify the changed damping characteristics after switching and observe the feedback from
the acoustic signal emitter.
►Switch back to basic mode once the activities in MyMode have been completed.
►Take the weight off the product and correct the switching, if required.
CAUTION
Risk of pinching in the joint flexion area
> Injury due to pinching of body parts.
> Damage to garments due to pinching in the mechanism of the joint unit or medial support.
►Ensure that no body parts or garments are in this area when flexing the product.
CAUTION
Overheating of the hydraulic unit due to uninterrupted, increased activity (e.g. extended
walking downhill)
> Falling due to unexpected behaviour of the product because of switching into overheating
mode.
> Burns due to touching overheated components.
12
►Be sure to pay attention when pulsating vibration signals start (Warnings/error signals).
They indicate the risk of overheating.
►As soon as these pulsating vibration signals begin, you have to reduce the activity level so
the hydraulic unit can cool down.
►Full activity may be resumed after the pulsating vibration signals stop.
►If the activity level is not reduced in spite of the pulsating vibration signals, this could lead to
the hydraulic element overheating and, in extreme cases, cause damage to the product. In
this case, the product has to be inspected by an authorised Ottobock Service Centre. The
O&P professional is your contact person.
CAUTION
Overloading due to unusual activities
> Falling due to unexpected product behaviour as the result of a malfunction.
> Falling due to breakage of load-bearing components.
> Skin irritation due to defects on the hydraulic unit with leakage of liquid.
►The product was developed for everyday use and must not be used for unusual activities.
These unusual activities include, for example, extreme sports (free climbing, parachuting,
paragliding, etc.), sports activities that involve jumping, sudden movements or fast
sequences of steps (e.g. basketball, badminton, sporty riding).
►Careful handling of the product and its components not only increases their service life but,
above all, ensures your personal safety!
►If the product and its components have been subjected to extreme loads (e.g. due to a fall,
etc.), then the product must be inspected for damage immediately by an O&P professional.
4.9 Notes on the movement patterns
CAUTION
Improper use of the stance function
Falling due to unexpected product behaviour because of changed damping behaviour.
►Make sure that you are standing safely when using the stance function and check the lock of
the knee joint before placing your full weight on the orthosis.
►Make sure you have been instructed in the proper use of the stance function by an O&P pro
fessional or therapist. Information on the stance function see page23.
CAUTION
Walking up stairs
> Falling due to foot being placed incorrectly on stair as a result of changed damping beha
viour.
> Falling due to breakage of load-bearing components.
►Always use the handrail when walking up stairs and place most of the sole of your foot on
the stair surface.
►Always step up with the less affected leg, followed by the leg with the product.
►If there is a connection to a foot component, support by bouncing with the product extended
while walking up stairs is not allowable and therefore has to be avoided.
►Particular caution is required when carrying children up the stairs.
CAUTION
Walking down stairs with moveable orthosis foot component
Falling due to foot being placed incorrectly on stair as a result of changed damping behaviour.
13
►Always use the handrail when walking down stairs and place most of the sole of your foot on
the stair surface.
►Observe the warnings/error signals (see page38).
►Be aware that resistance in the flexion and extension direction can change in case of warn
ing and error signals.
►Particular caution is required when carrying children down the stairs.
CAUTION
Walking down stairs with rigid orthosis foot component
Falling due to foot being placed incorrectly on stair as a result of changed damping behaviour.
►Always use the handrail when walking down stairs and roll over the edge of the step with the
middle of the shoe.
►Observe the warnings/error signals (see page38).
►Be aware that resistance in the flexion and extension direction can change in case of warn
ings and error signals.
►Particular caution is required when carrying children down the stairs.
CAUTION
Walking down stairs and ramps
Falling due to unexpected, high stance phase damping during the transition from a level surface
to stairs or ramps.
►Pay attention to the changed product behaviour.
►Verify changed stance phase damping before walking on stairs or ramps.
CAUTION
Lack of support from the product when walking down stairs
Falling due to unexpected product behaviour because of changed damping behaviour.
►Check whether corresponding flexion of the joint is possible before walking down stairs. If
this is not possible, either the Cockpit app or turning the product off/on must be used to
switch back to basic mode.
CAUTION
Improper use of the MyMode "Training mode"
Falling due to unexpected product behaviour because of changed damping behaviour.
►Make sure that you are standing safely when using this MyMode and check the lock of the
knee joint before placing your full weight on the orthosis.
►Note that the knee joint is locked in the flexion direction in this MyMode.
►Make sure you have been instructed in the correct use of this MyMode by the O&P profes
sional and/or therapist. For information about this mode, see page31.
►Switch back to basic mode once the activities in this MyMode have been completed.
CAUTION
Improper use of the MyMode "Freeze position"
Falling due to unexpected product behaviour because of changed damping behaviour.
►Make sure that you are standing safely when using this MyMode and check the lock of the
knee joint before placing your full weight on the orthosis.
►Note that the knee joint is locked in the both the flexion and extension direction in this
MyMode.
14
►Make sure you have been instructed in the correct use of this MyMode by the O&P profes
sional and/or therapist. For information about this mode, see page32.
►Switch back to basic mode once the activities in this MyMode have been completed.
CAUTION
Lack of support from the product while sitting down
Falling due to unexpected product behaviour because of changed damping behaviour.
►Check whether corresponding flexion of the joint is possible before sitting down. If this is
not possible, either the Cockpit app or turning the product off/on must be used to switch
back to basic mode.
CAUTION
Quickly pushing the hip forward with the orthosis extended
> Falling due to unexpected activation of the swing phase.
►Note that the joint may flex unexpectedly when the hip is pushed forward quickly while the
orthosis is extended.
►Therefore, familiarise yourself with swing phase activation in such situations under secure
conditions (e.g. while holding on to parallel bars) and with the instruction of trained, quali
fied personnel.
CAUTION
Changing the gait pattern influences activation of the swing phase
> Falling due to unexpected activation of the swing phase.
►Changing the gait pattern can influence activation of the swing phase. Adjustment by the
O&P professional has to be repeated in this case.
4.10 Notes on the safety modes
CAUTION
Safety mode cannot be activated due to malfunction caused by water penetration or
mechanical damage
Falling due to unexpected behaviour of the product because of changed damping behaviour.
►Do not continue using the defective product.
►Consult the O&P professional promptly.
CAUTION
Safety mode cannot be deactivated
Falling due to unexpected product behaviour because of changed damping behaviour.
►If you cannot deactivate safety mode by recharging the battery, a permanent malfunction has
occurred.
►Do not continue using the defective product.
►The product must be inspected immediately by an O&P professional.
CAUTION
Safety signal occurs (ongoing vibration)
Falling due to unexpected behaviour of the product because of changed damping behaviour.
►Observe the warnings/error signals (see page38).
►Do not continue using the product after the safety signal has been emitted.
15
►The product must be inspected by an authorised Ottobock Service Centre. In this case, the
contact person is your prosthetist.
CAUTION
Using the product in safety mode
Falling due to unexpected product behaviour because of changed damping behaviour.
►The warnings/error signals (see page38) have to be observed.
►Particular caution is necessary when using a bicycle without a freewheel (with a fixed gear).
4.11 Information on the use of a mobile device with the cockpit app
CAUTION
Improper use of the mobile device
Falling due to changed damping behaviour as a result of unexpected switching to a MyMode.
►Make sure you have been instructed in the proper use of the mobile device with the Cockpit
app.
CAUTION
Independently applied changes or modifications made to the mobile device
Falling due to altered damping behaviour as a result of unexpected switching to a MyMode.
►Do not make any independent changes to the hardware of the mobile device on which the
app is installed.
►Do not make any independent changes to the software/firmware of the mobile device that
are not included in the update function of the software/firmware.
CAUTION
Improper mode switching with the device
Falling due to unexpected product behaviour because of changed damping behaviour.
►Ensure that you stand securely during all switching processes.
►Verify the changed damping characteristics after switching and observe the feedback from
the acoustic signal emitter (beeper) and the display on the device.
►Switch back to basic mode once the activities in MyMode have been completed.
NOTICE
Failure to observe the system requirements for the installation of the Cockpit app
Mobile device malfunction.
►The Cockpit App should only be installed on mobile devices and versions which comply with
the specifications in the respective online stores (e.g. Apple App Store, Google Play Store,
...)
5 Scope of Delivery and Accessories
5.1 Scope of delivery
• 1pc. 757L16-4 power supply
• 1 pc. 4E50 Battery Charger for C-Leg
• 1pc. cosmetic case for battery charger and power supply
• 1pc. 646C107 Bluetooth PIN card
• 1 pc. Orthotic passport
16
• 1pc. 17KO1=L C-Brace joint unit left, or
17KO1=R C-Brace joint unit right
• 1pc. Instructions for use (user)
5.2 Accessories
Cockpit app for download from the website: https://www.ottobock.com/cockpitapp
• “Cockpit 4X441-IOS=V*” app for iOS
• “Cockpit 4X441-ANDR=V*” app for Android
6 Charging the battery
The following points must be observed when charging the battery:
• Use the 757L16-4 power supply unit and 4E50* battery charger to charge the battery.
• With uninterrupted walking, the capacity of the fully charged battery is sufficient for at least 18
hours. It lasts about 2 days with average use.
• We recommend charging the product every day when used on a daily basis.
• The battery should be charged for at least 3 hours prior to initial use.
• For the maximum operating time with one battery charge, turning the product off when it is not
being used is recommended.
• Switching the MyModes and changing setting parameters using the Cockpit app is not pos
sible during the charging process.
• After disconnecting the battery charger, the orthosis is in the same state it was in before con
necting the battery charger. For example, if the orthosis was switched off before connecting
the battery charger, it will also be switched off after disconnecting the battery charger.
6.1 Connecting the power supply and battery charger
1 2 3
1) Slide the country-specific plug adapter onto the power supply until it locks into place (see
fig.1).
2) Connect the round, four-pin plug of the charging cable to the OUT receptacle on the battery
charger so that the plug locks into place (see fig.2).
INFORMATION: Ensure correct polarity (guide lug). Do not use force when connecting
the cable plug to the battery charger.
3) Connect the round, three-pin plug of the power supply to the 12V receptacle on the battery
charger so that the plug locks into place (see fig.2).
INFORMATION: Ensure correct polarity (guide lug). Do not use force when connecting
the cable plug to the battery charger.
4) Plug the power supply unit into the wall socket.
→The green LED on the back of the power supply (see fig.3) and the green LED on the bat
tery charger light up.
→If the green LED on the power supply and the green LED on the battery charger do not light
up, there is an error (see page43).
17
6.2 Connect battery charger to the product
1) Open the charging receptacle cover.
2) Connect the charging plug to the charging receptacle of the
product.
INFORMATION: Take note of the plug direction!
→After the displays are tested, a short beep is emitted followed by
three short vibration signals.
→If the symbol lights up, this means an error was identified
during the self-test (see page38).
3) The charging process starts.
→To check the charge level while the battery charger is connec
ted, briefly press the button on the control panel.
4) Disconnect the product after the charging process is complete.
→After disconnecting the battery charger, a vibration signal is
emitted followed by a short beep, and the current status is dis
played for approx. 5seconds (see page38).
→When the symbol in the button is lit up green , the product
is switched on and ready for operation.
5) Close the charging receptacle cover.
INFORMATION
After disconnecting the battery charger, the orthosis is in the same state it was in before con
necting the battery charger. Forexample, if the orthosis was switched off before connecting the
battery charger, it will also be switched off after disconnecting the battery charger. A descend
ing sequence of beeps is emitted when the battery charger is disconnected while the orthosis is
switched off .
INFORMATION
No display after connecting the battery charger
If no symbols light up on the control panel after connecting the battery charger, the battery may
be deep discharged. Leave the battery charger connected for at least 15minutes and check the
charge level while charging by disconnecting/connecting the battery charger.
INFORMATION
Depending on the battery charge level, the battery charger can warm up considerably during the
charging process. This is not a malfunction.
6.3 Display of the current charge level
6.3.1 Display of battery charge level without additional devices
The current charge level of the installed battery can be displayed by briefly pressing the but
ton:
Symbol Battery charge level
Charge level 67% to 100%
Charge level 34% to 67%
Charge level 10% to 34%
18
Symbol Battery charge level
Charge level 5% to 10%
Charge level 1% to 5%
Battery empty
6.3.2 Display of the current charge level using the Cockpit app
Once the Cockpit app has been started, the current charge level is displayed in the bottom line of
the screen:
1. 38% – Charge level of battery for currently connected
component
6.3.3 Display of the current charge level during the charging process
After connecting the battery charger or pressing the button while the battery charger is con
nected, the current charge level is shown by an animated symbol on the control panel in addition
to the display on the battery charger ( , , ).
Control
panel
Battery charger
Battery is being charged, battery charge level is less
than34%
Battery is being charged, battery charge level is34%
to50%
Battery is being charged, battery charge level is50%
to67%
Battery is being charged, battery charge level is67%
to99%
The on time of the yellow
LED gets shorter as the
charge level increases. It
only flashes briefly at the
end of the charging pro
cess.
Battery is fully charged
7 Cockpit app
The Cockpit app enables switching from basic mode to the pre-configured
MyModes. In addition, information about the product (step counter, battery
charge level, etc.) can be retrieved.
The everyday behaviour of the product can be changed to a certain extent
using the app (e.g. while becoming accustomed to the product). The O&P
professional can use the adjustment software to track these changes at the
next appointment.
Information on the Cockpit app
• The Cockpit app can be downloaded free of charge from the respective online store. For
more information, please visit the following website: https://www.ottobock.com/cockpitapp.
To download the Cockpit app, the QR code on the supplied Bluetooth PIN card can also be
read with the mobile device (requirement: QR code reader and camera).
19
• The language of the user interface in the Cockpit app can be changed using the adjustment
software.
• Depending on the version of the Cockpit app being used, the language of the user interface in
the Cockpit app corresponds to the language of the mobile device on which the Cockpit app
is being used.
• The serial number of the component to be connected has to be registered with Ottobock the
first time it is connected. If the registration is not accepted, use of the Cockpit app for this
component will be limited.
• Bluetooth on the component must be turned on in order to use the Cockpit app. Briefly press
the button on the control panel to check. In the button, the symbol must be lit up blue .
If the symbol in the button is not lit up, Bluetooth has to be switched by a long press of the
button.
• The illustrations in these instructions for use are only examples and may deviate from the
respective mobile device being used and the version.
• Keep the mobile app up to date at all times.
• Please contact the manufacturer if you suspect cybersecurity problems.
7.1 System Requirements
See the information in the Apple App Store or Google Play Store regarding compatibility with
mobile devices and versions.
7.2 Initial connection between cockpit app and component
The following points need to be observed before establishing the connection:
• Bluetooth of the component must be switched on (see page30).
• Bluetooth on the mobile device must be switched on.
• The mobile device must not be in "flight mode" (offline mode), otherwise all wireless connec
tions are turned off.
•The mobile device must be connected to the Internet.
• The serial number and Bluetooth PIN of the component being connected must be known.
They are found on the enclosed Bluetooth PIN card. The serial number begins with the letters
"SN".
INFORMATION
If the Bluetooth PIN card with the Bluetooth PIN and serial number of the component is lost,
contact your O&P professional.
7.2.1 Starting the cockpit app for the first time
1) Tap the symbol of the Cockpit app ( ).
→The end user license agreement (EULA) is displayed.
2) Accept the end user license agreement (EULA) by tapping the Accept button. If the end user
license agreement (EULA) is not accepted, the Cockpit app cannot be used.
→The welcome screen appears.
3) Briefly press the button on the control panel of the component to activate recognition (visib
ility) of the Bluetooth connection for 2minutes.
4) Tap the Add component button.
→The Connection Wizard opens and guides you through the process of establishing a con
nection.
5) Follow the subsequent instructions on the screen.
6) After the Bluetooth PIN is entered, a connection to the component is established.
→While the connection is being established, 3beep signals sound and the symbol
appears in the bottom right corner of the screen.
The symbol is displayed when the connection has been established.
20
→Once the connection has been established, the data are read from the component. This pro
cess may take up to a minute.
Then the main menu appears with the name of the connected component.
INFORMATION
After the initial connection to the component has been established successfully and when the
Bluetooth function is activated, the app will connect automatically each time it is started. No fur
ther steps are required.
INFORMATION
After activating the "visibility" of the component (briefly pressing the button), the component
can be recognised by another device (e.g.smartphone) within 2minutes. If registration or
establishing the connection takes too long, the process of establishing a connection is can
celled. In this case the button on the control panel must be briefly pressed again.
INFORMATION
If the connection to the component could not be established or the connection process is ter
minated, reset the component by connecting and disconnecting the battery charger.
7.3 Control elements for cockpit app
123456781. Basic Mode 2. Training mode
3. Freeze position 4. User defined
Product change
1. Basic Mode
100%
1. Access the navigation menu (see page21)
2. Name of the component. This name can only be changed
using the adjustment app.
3. If connections to more than one component have been
saved, you can switch between the saved components by
tapping the change item (see page21).
4. MyModes configured with the adjustment app.
Switching the mode by tapping the corresponding symbol
and confirming by tapping "OK".
5. Currently selected mode
6. Charge level of the component.
Component battery fully charged
Component battery empty
Component battery is being charged
The current charge level is also displayed in %.
7. Display and name of the currently selected mode (e.g. 1.
Basic Mode)
8. Connection to component has been established
Connection to component has been interrupted. The app
is attempting to re-establish the connection automatically.
No existing connection to the component.

Other manuals for 17KO1 Series

3

Other Otto Bock Medical Equipment manuals
Otto Bock 17LA3N User manual

Otto Bock

Otto Bock 17LA3N User manual

Otto Bock 4F34 User manual

Otto Bock

Otto Bock 4F34 User manual

Otto Bock 4R72 D User manual

Otto Bock

Otto Bock 4R72 D User manual

Otto Bock 50K4-3 Agilium Freestep 3.0 User manual

Otto Bock

Otto Bock 50K4-3 Agilium Freestep 3.0 User manual

Otto Bock 8165 Genu Neurexa User manual

Otto Bock

Otto Bock 8165 Genu Neurexa User manual

Otto Bock 17B98-L16 User manual

Otto Bock

Otto Bock 17B98-L16 User manual

Otto Bock 1E57 Lo Rider User manual

Otto Bock

Otto Bock 1E57 Lo Rider User manual

Otto Bock 50R59 Dorso Direxa Posture User manual

Otto Bock

Otto Bock 50R59 Dorso Direxa Posture User manual

Otto Bock Kimba neo User manual

Otto Bock

Otto Bock Kimba neo User manual

Otto Bock 17B44 User manual

Otto Bock

Otto Bock 17B44 User manual

Otto Bock 10A3 User manual

Otto Bock

Otto Bock 10A3 User manual

Otto Bock 453D4 Derma Seal forte User manual

Otto Bock

Otto Bock 453D4 Derma Seal forte User manual

Otto Bock Kenevo 3C60 User manual

Otto Bock

Otto Bock Kenevo 3C60 User manual

Otto Bock 17PK1 WR Series User manual

Otto Bock

Otto Bock 17PK1 WR Series User manual

Otto Bock 13E202-50 User manual

Otto Bock

Otto Bock 13E202-50 User manual

Otto Bock 743L500 3D L.A.S.A.R. Posture User manual

Otto Bock

Otto Bock 743L500 3D L.A.S.A.R. Posture User manual

Otto Bock 1S101 SACH+ User manual

Otto Bock

Otto Bock 1S101 SACH+ User manual
Otto Bock C-Brace User manual

Otto Bock

Otto Bock C-Brace User manual

Otto Bock Dynion 3R85 User manual

Otto Bock

Otto Bock Dynion 3R85 User manual

Otto Bock 50R236 Smartspine SI User manual

Otto Bock

Otto Bock 50R236 Smartspine SI User manual

Otto Bock 17KO1 Series User manual

Otto Bock

Otto Bock 17KO1 Series User manual

Otto Bock 17Y32 User manual

Otto Bock

Otto Bock 17Y32 User manual

Otto Bock 1C62 Triton Harmony User manual

Otto Bock

Otto Bock 1C62 Triton Harmony User manual

Otto Bock 28U24 User manual

Otto Bock

Otto Bock 28U24 User manual

Popular Medical Equipment manuals by other brands

Forge Medical VasoStat Instructions for use

Forge Medical

Forge Medical VasoStat Instructions for use

Johnson & Johnson Codman MedStream Surgical Technique Guide

Johnson & Johnson

Johnson & Johnson Codman MedStream Surgical Technique Guide

Wassermann SG-1 user manual

Wassermann

Wassermann SG-1 user manual

ResMed Mirage Swift II user guide

ResMed

ResMed Mirage Swift II user guide

ROLENCE ENTERPRISE ELiTEDENT MS-30 user manual

ROLENCE ENTERPRISE

ROLENCE ENTERPRISE ELiTEDENT MS-30 user manual

Roscoe Medical TENS 7000 To Go Quick reference instructions

Roscoe Medical

Roscoe Medical TENS 7000 To Go Quick reference instructions

Huntleigh Sonicaid FM800 Series Reference manual

Huntleigh

Huntleigh Sonicaid FM800 Series Reference manual

Stereo Optical Optec PLUS C86 quick start guide

Stereo Optical

Stereo Optical Optec PLUS C86 quick start guide

Magic Care Mr. Beetle Instructions for use manual

Magic Care

Magic Care Mr. Beetle Instructions for use manual

Ecleris PROCAM SD user manual

Ecleris

Ecleris PROCAM SD user manual

Mediana RESCATE PERU Heart On AED A10 quick start guide

Mediana

Mediana RESCATE PERU Heart On AED A10 quick start guide

Origen ae TissueVault Series Instructions for use

Origen ae

Origen ae TissueVault Series Instructions for use

Intelect Legend 2 user manual

Intelect

Intelect Legend 2 user manual

Gima 38 KL user manual

Gima

Gima 38 KL user manual

M&B AED7000 user manual

M&B

M&B AED7000 user manual

Vela Treatment 87213 user manual

Vela

Vela Treatment 87213 user manual

Hidrex classic ION user manual

Hidrex

Hidrex classic ION user manual

Beurer PO 30 manual

Beurer

Beurer PO 30 manual

manuals.online logo
manuals.online logoBrands
  • About & Mission
  • Contact us
  • Privacy Policy
  • Terms and Conditions

Copyright 2025 Manuals.Online. All Rights Reserved.