AR-D15/D20 SPECIFICATIONS 2-1
[2] SPECIFICATIONS
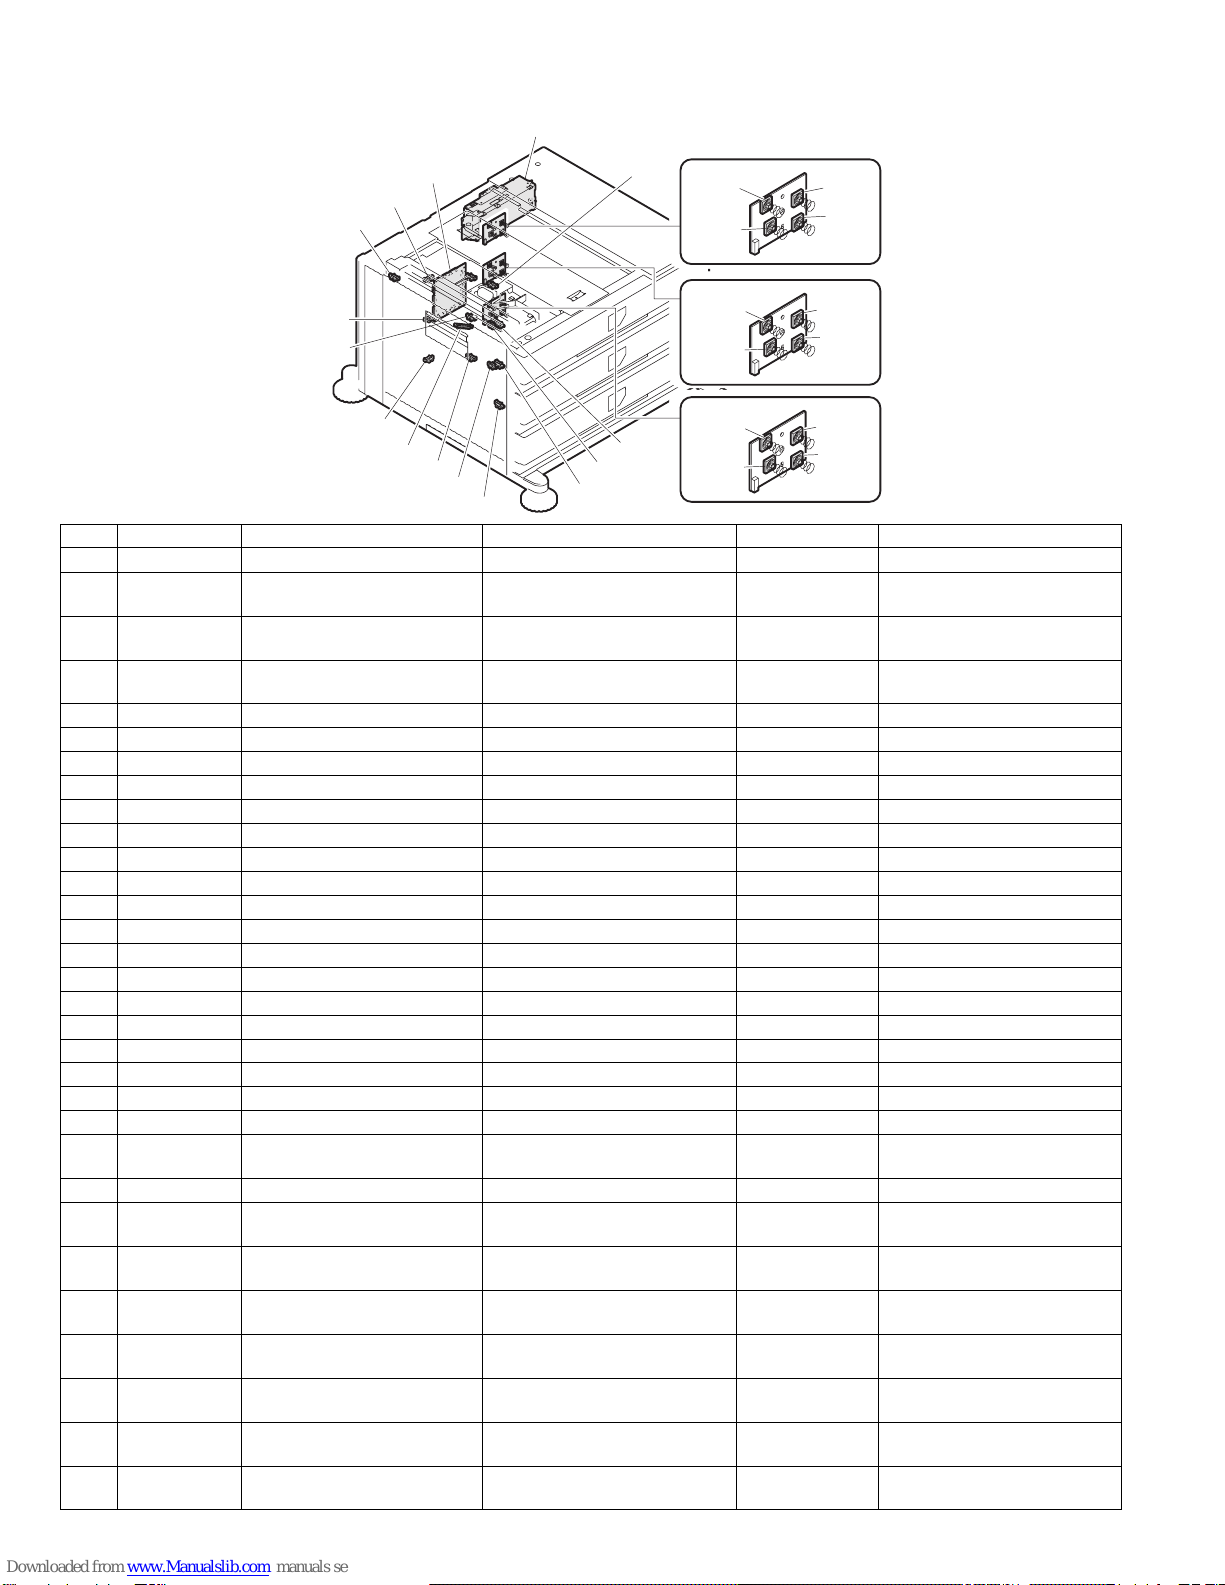
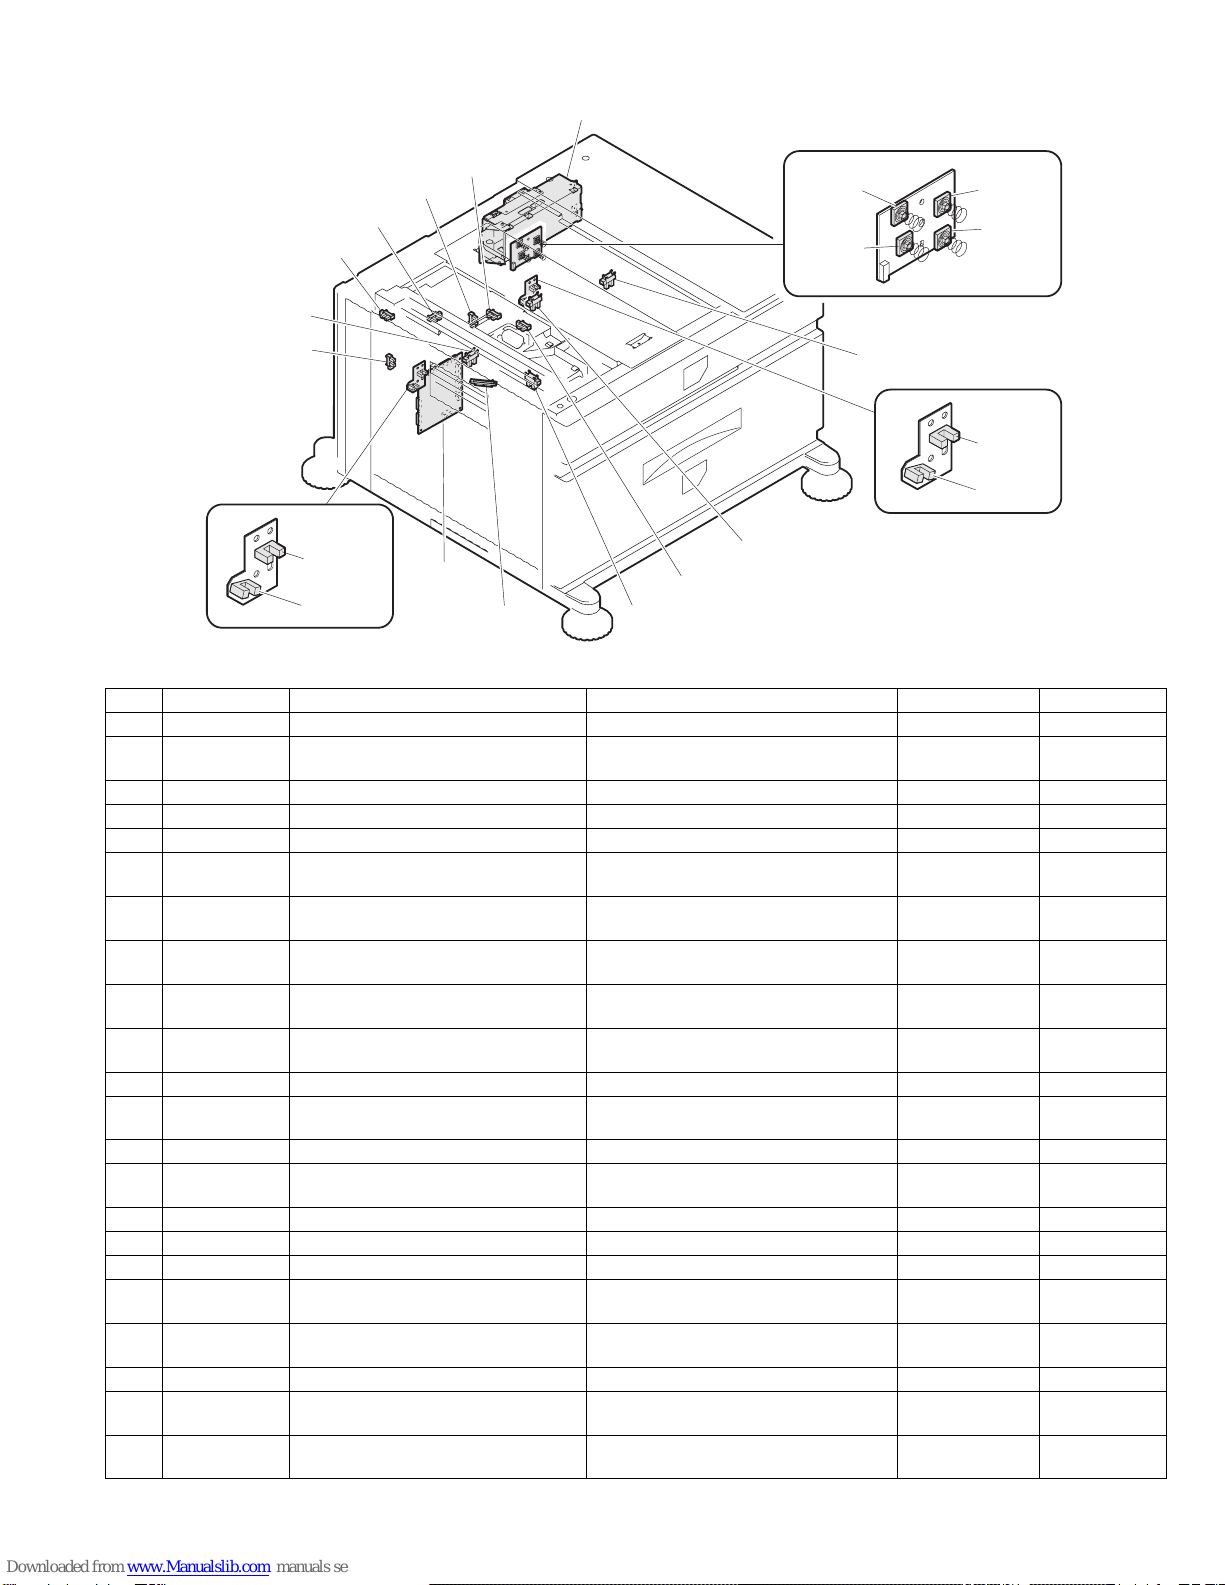
1. AR-D15
AR-D14 AR-D15 Remark
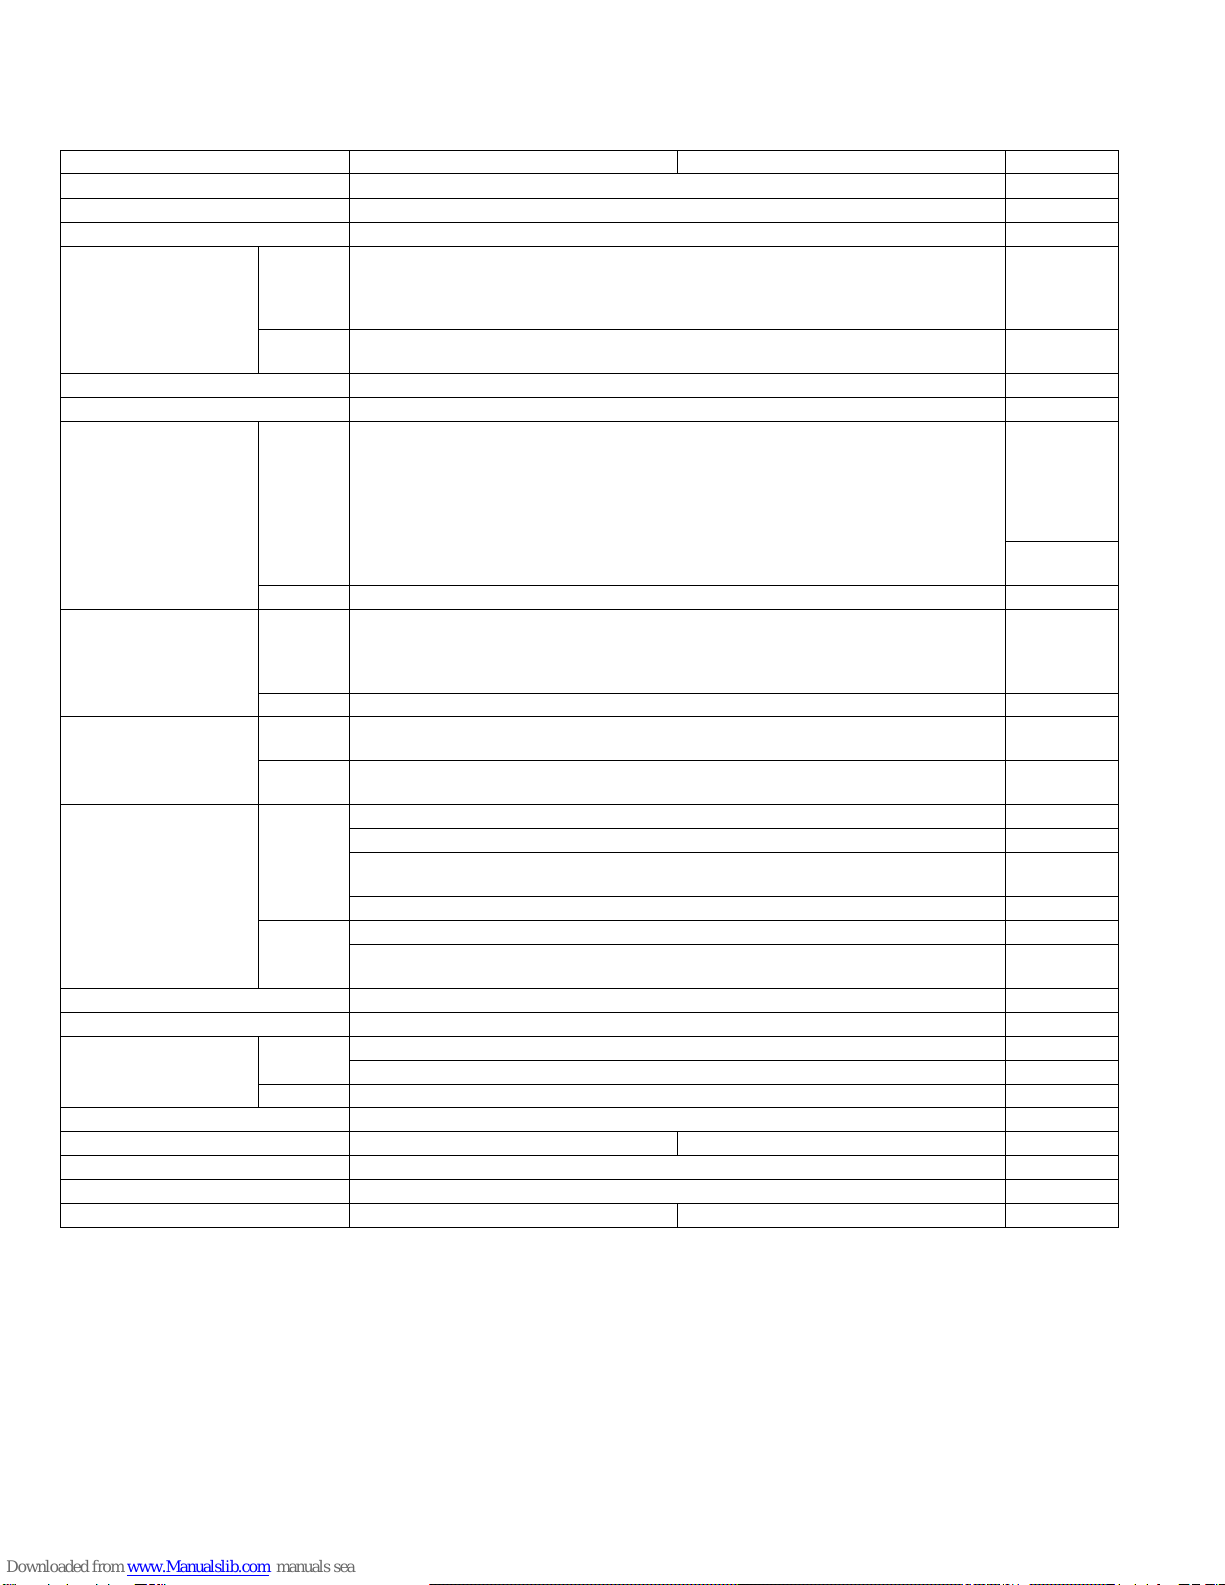
Type Stand /3x500 Sheet Paper Drawer (2 paper trays + 1 multi purpose drawer)
Transport speed To support 28-45 sheet/minute
Transport alignment Center alignment
Paper size 1 Tray A3, B4, A4, A4R, B5, B5R, A5R
11"x17", 8.5"x14", 8.5"x13", 8.5"x11", 8.5"x11"R, 5.5"x8.5"R
Executive, Japanese p/c,Monarch(envelope)
Com-10(envelope), DL(envelope), C5(envelope), ISO B5(envelope)
2 or 3 Tray A3, B4, A4, A4R, B5, B5R
11"x17", 8.5"x14", 8.5"x13", 8.5"x11", 8.5"x11"R, 7.25"x10.5"R
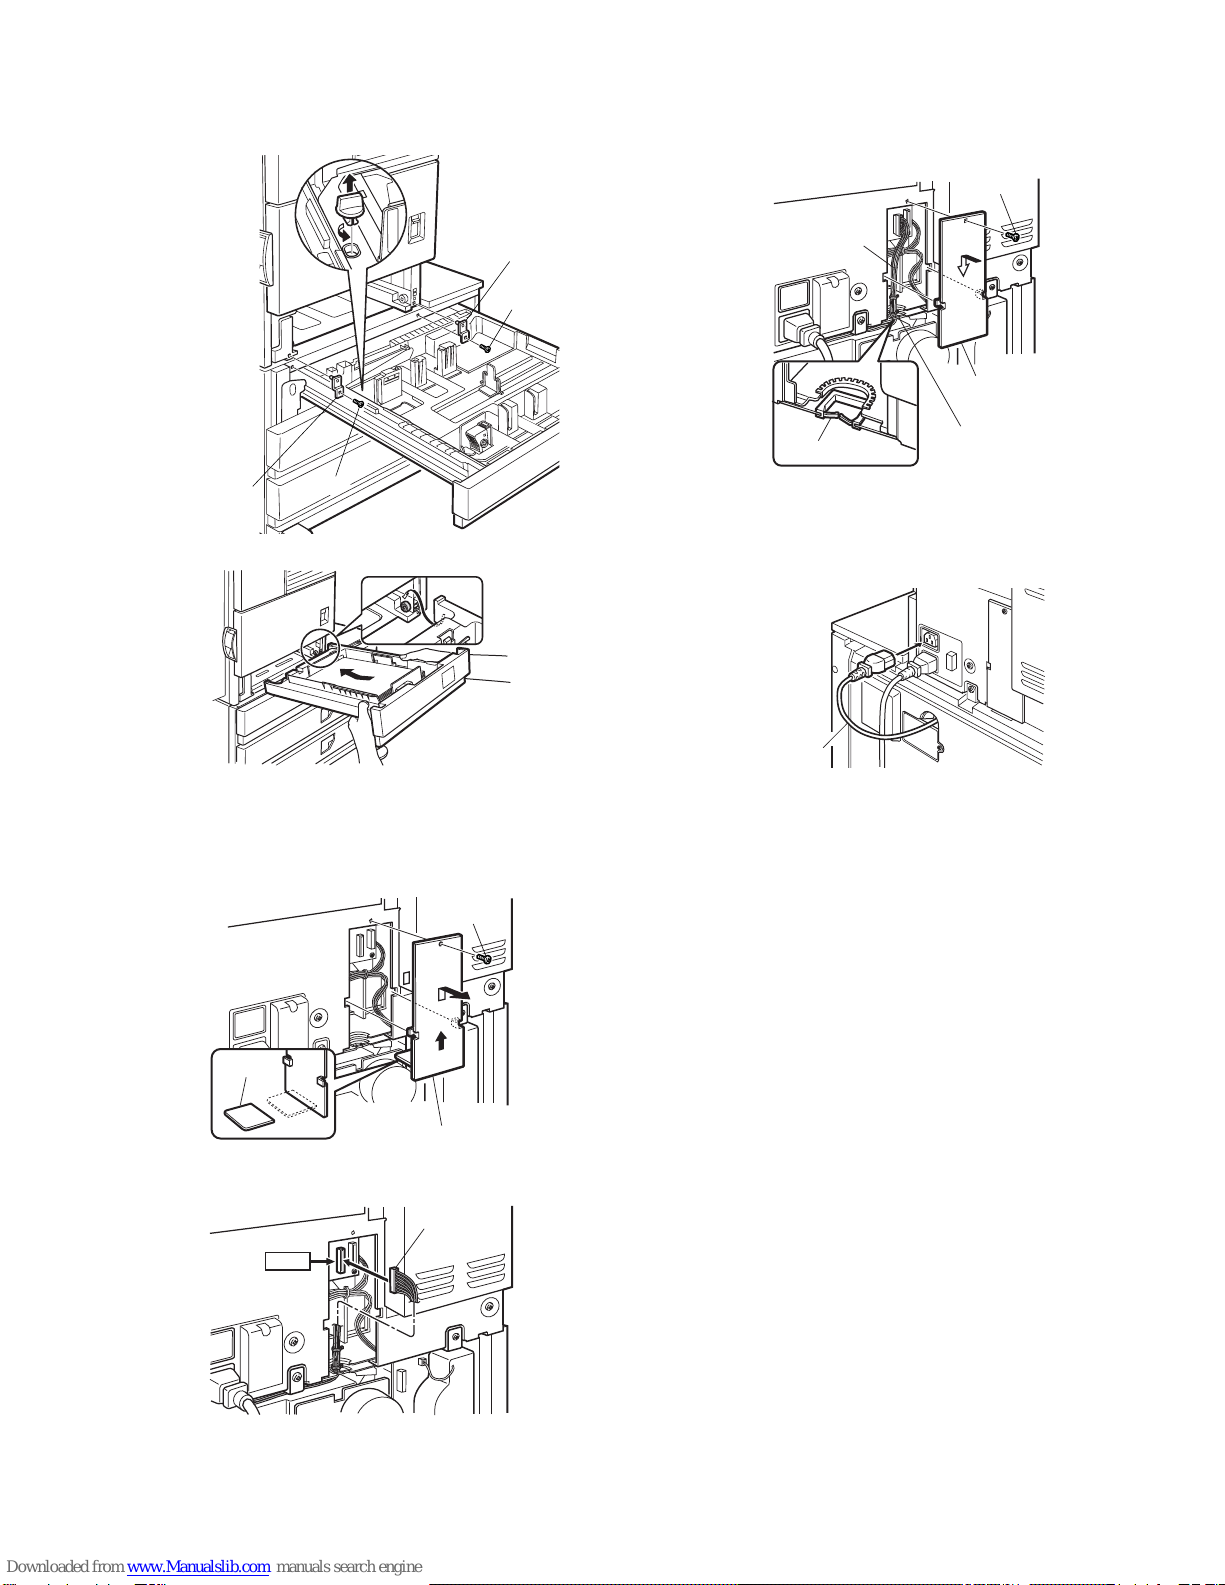
How to change the paper size Guide adjustment by user / Software setting by user
Factory default paper size setting To be set to maximum paper guide width at factory default status (for both trays)
Media available for paper
feeding 1 Tray Plain paper : 60-128g/m² / 16-34lbs
Index paper : 176g/m² / 47lbs
Cover paper : 200-205g/m² / 54-55lbs
Envelope : 75-90g/m², 20-24lbs
Transparency film
* Media heavier than 105g/m² should be
A4/8.5x11" or smaller. Media heavier than 128g/m² should be fed from shorter edge.
* Only single paper feed is enabled for overlay copy or copy on back-side of printed paper.
2 or 3 Tray Plain 60-105g/m² / 16-28lbs
Paper capacity 1 Tray Standard : 500sheets(80g/m²)
Post card : 40sheets
Envelope : 40sheets
Transparency film : 40sheets
2 or 3 Tray Standard paper : 500sheets X 2(64g/m²)
Paper type 1 Tray Plain, recycled, pre-printed, pre-punched, color, letter head, labels, heavy, transparency,
Japanese p/c, envelope (User can set bi-type for each of the above paper type.)
2 or 3 Tray Plain, recycled, pre-printed, pre-punched, color, letter head
(User can set bi-type for each of the above paper type.)
Sizes to be detected 1 Tray AutomaticAuto-AB: A3, B4, A4, A4R, B5, B5R, 8.5"x13", A5R
AutomaticAuto-Inch: 11"x17", 8.5"x14", 8.5"x11", 8.5"x11"R, 7.25"x10.5"R, 5.5" x 8.5R
Manual (input detection): postal card, Monarch(envelope),
Com-10(envelope), DL(envelope), C5(envelope), ISO B5(envelope)
Ignore detection selectable:
2 or 3 Tray Automatic detection-AB (200V system):A3, B4, A4, A4R, B5, B5R, 8.5"x13"
Automatic detection-inch
(100V system): 11"x17", 8.5"x14", 8.5"x13", 8.5"x11", 8.5"x11"R, 7.25"x10.5"R
Paper balance detection Provided (paper empty and 3 steps)
Paper loading system To be loaded from the upper side with front loading system
Tray ascent/descent time Ascent Within 7 seconds
At paper empty, required time from tray insert to the empty detection
Descent Own weight descent
Power consumption 32.2W or lower
Power supply unit Requires the option power unit, AR-DC1. Standard provision
External dimensions(W x D x H) 619 x 664 x 404 (mm)
Occupied dimensions(W x D) 745 x 664 (mm)
Weight Approx. 32kg Approx. 32.9kg
!"#$%