manuals.online logo
Brands
  1. Home
  2. •
  3. Brands
  4. •
  5. SPEWE
  6. •
  7. Cutter
  8. •
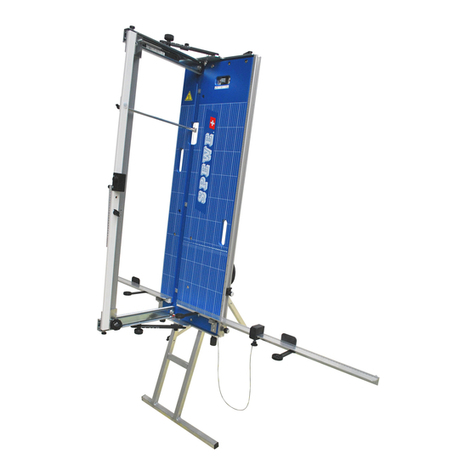
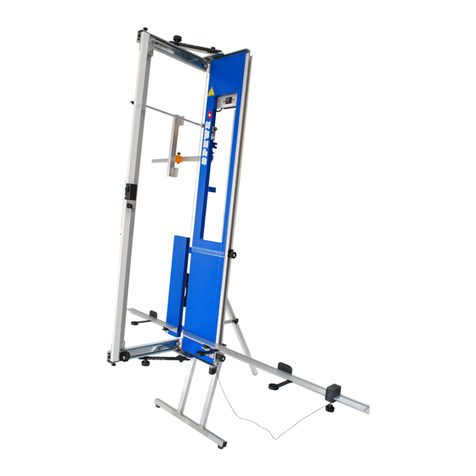
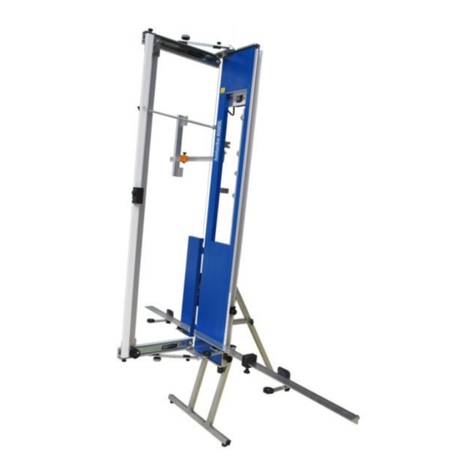
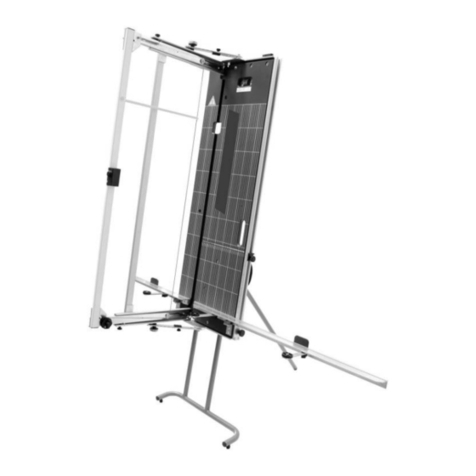
  9. SPEWE 392GT User manual

SPEWE 392GT User manual

1901175 | 08-2013 | Spewe.ch
392GT
1
Glühdraht-Schneidegerät
Sicherheitshinweise 2
Lieferumfang Bedienungsanleitung 3-10
instrukcja obsługi Urządzenie do cięcia
Skład zestawu Wskazówki dotyczące
bezpieczeństwa
2
Instrukcja obsługi 3-10
Trancia a filo incandescente
Avvisi di sicurezza 2
Dorredo di fornitura Istruzioni per l’uso mo-
dello
3-10
eated Wire Cutting Device
Safety Instructions 2
Scope of delivery Operating Instructions 3-10
Řezačka se žhavicím drátem
Bezpečnostní pokyny
2
Objem dodávky
Návod k obsluze
3
-
1
0
392GT
392GT392GT
392GT
Mod. 2011
Art.-Nr. 1000083
PL
I
D
GB
CZ
2
392GT
1901175 08-2013
D
Sicherheitshinweise - Vorwort
Diese Anleitung ist die Grundlage zur Bedienung des Glühdraht-Schneidegeräts. Sie verdient Ihre volle Aufmerksamkeit.
Bevor Sie mit irgendwelchen Arbeiten an oder mit dem Gerät beginnen, verpflichten wir Sie, die vorliegende Anleitung
und die separaten Sicherheitsbestimmungen bis zum Schluss sorgfältig durchzulesen. Bestehen irgendwelche Unklar-
heiten, sprechen Sie uns umgehend dazu an. Nehmen Sie das Gerät nicht in Betrieb solange Unklarheiten bestehen. Mit
der Inbetriebnahme des Gerätes bestätigen Sie, dass Sie die Anleitung gelesen und verstanden haben und somit die Be-
triebsverantwortung übernommen haben.
PL
Informacje dotyczące bezpieczeństwa
-
Słowo wstępne
Zanim zostaną rozpoczęte jakiekolwiek prace przy urządzeniu lub przy pomocy urządzenia zobowiązujemy Państwa do
dokładnego przeczytanie do końca tej instrukcji. Gdyby wystąpiły jakiekolwiek niejasności proszę niezwłocznie skontak-
tować się z nami. Proszę nie uruchamiać urządzenia dopóki takie niejasności będą występowały. Uruchamiając urządze-
nie potwierdza się przeczytanie instrukcji oraz jej zrozumienie, a tym samym przejmuje się odpowiedzialność za eks-
ploatację urządzenia.
I
Avvisi di sicurezza per la trancia a filo incandescente - Premssa
Le presenti istruzioni sono la base per l’uso della taglierina a filo incandescente.
Prima di iniziare qualsiasi operazione sull’apparecchio o con l’apparecchio, vi chiediamo di impegnarvi a leggere atten-
tamente le presenti istruzioni e la avvertenze di sicurezza separato fino alla fine. Qualora dovessero esservi dei punti
non chiari, contattateci immediatamente e parlatecene. Non mettete in funzione l’apparecchio fino a quando sussistono
questi dubbi. Mettendo in funzione l’apparecchio, confermate di avere letto le istruzioni e di esservi assunto la responsa-
bilità del relativo esercizio.
GB
ot wire cutter safety advice and instructions manual - Foreword
These instructions must be read before using the hot wire cutter. Please read them carefully.
Before you begin any work or begin using the tool, you must carefully read this introduction and the separate safety ad-
vice . If you have any queries, please do not hesitate to contact us. Do not use the tool if you continue to be unsure
about any aspect. When you begin to use the tool, you tacitly confirm that you have read and understood the introduction
and that you take full responsibility for the operation of the tool.
CZ
Bezpečnostní pokyny - Předmluva
Tato příručka je základem pro obsluhu řezačky se žhavicím drátem. Zaslouží si Vaši plnou pozornost. Než začnete
jakoukoli práci na zařízení nebo se zařízením, měli byste si pečlivě pročíst tento návod až a samostatný bezpečnostní
politiky pečlivě až do konce. V případě jakýchkoli nejasností se na nás ihned obraťte. Zařízení neuvádějte do provozu,
dokud existují nejasnosti. Uvedením zařízení do provozu potvrzujete, že jste si přečetli návod a porozuměli mu, čímž na
sebe přebíráte odpovědnost za jeho provoz.
Daten | Details | Dati | Details | Údaje
D
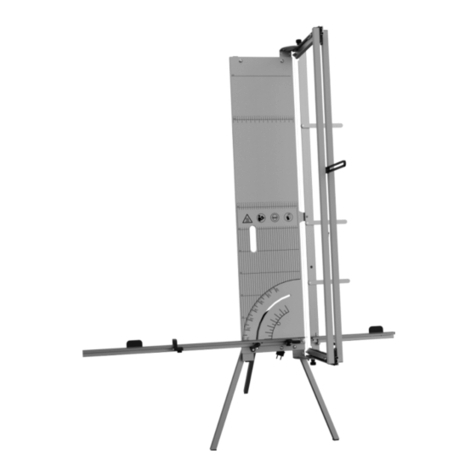
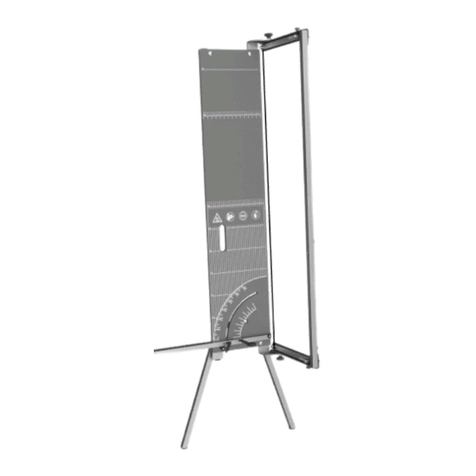
Lieferumfang: Glühdraht-Schneidegerät Typ 392GT mit integriertem Trafo, Ersatzdrahtspule 9m, Flachzange,
Ersatzsicherung, Bedienungsanleitung.
Technische Daten: Schnittlänge: 102 cm | Schnitttiefe: 21 cm | Gewicht Gerät: 7.5 kg
Zuschnitt: Thermisch, Stromversorgung: 230V 50 Hz
PL
Skład zestawu: Urządzenie do cięcia Typ 392GT ze zintegrowanym transformatorem, szpula zapasowego drutu 9m,
szczypce płaskie, zabezpieczenie dodatkowe, instrukcja obsługi.
Dane techniczne: Długość cięcia: 102 cm| Głębokość cięcia 21 cm | Waga urządzenia: 7.5 kg
Cięcie: Termiczne, Zasilanie w prąd elektryczny: 230V 50 Hz
I
Corredo di fornitura : Apparecchio di taglio a filo incandescente tipo 392GT con trasformatore integrato, pinza piatta, filo di
ricambio (9 m) fusibile di ricambio, istruzioni per l’uso.
Dati tecnici: Lunghezza di taglio: 102 cm | Profondità di taglio: 21 cm | Peso dell’apparecchio: 7.5 kg
Taglio: termico, Alimentazione: 230V 50 Hz
GB
Scope of delivery: Hot-wire cutting tool Type 392GT with integrated transformer, flat nose pliers,
replacement conductor (9m), replacement fuse, operating instructions.
Technical details: Cutting length: 102 cm | Cutting depth: 21 cm | Equipment weight: 7.5 kg
Cut: Thermal, Power supply: 230V 50 Hz
CZ
Objem dodávky: Řezačka se žhavicím drátem typ 392GT s integrovaným trafem, cívka s 9 m
Náhradního drátu, ploché kleště, náhradní pojistka, návod k obsluze.
Technické údaje: Délka řezu: 102 cm | Hloubka řezu: 21 cm | Hmotnost přístroje: 7,5 kg
Řezání: tepelné Napájení: 230 V 50 Hz
1901175 08-2013
392GT
3
Inbetriebnahme |
Uruchamianie | Messa in funzione | Setting the Device Up | Uvedení do provozu
D
Fussleiste
Fussleiste (2) mit Kennzeichnung mittels Stern-
griffen (3) an Geräteunterseite montieren.
PL
Listwa podtrzymująca
Listwę podtrzymującą (2) przymocować do
dolnej listwy urządzenia (3) przy pomocy
uchwytów gwiazdowych
I
Listello di base:
Montare il listello di base (2) provvisto di con-
trassegnatura identificativa mediante le impu-
gnature a stella (3) sul lato inferiore
dell’apparecchio.
GB
Base support:
Mount the base support(2) with marking on the
lower side of the tool by means of star handles
(3)
CZ
Podlahová lišta
Podlahovou lištu (2) s označením namontujte
pomocí hvězdicových ručních koleček (3) na
zařízení.
D
Lieferumfang
Schneidegerät (1)
Fussleiste (2)
Beutel mit Ersatzdraht Kleinwerkzeug
PL
Skład zestawu
Urządzenie do cięcia (1)
Listwa podtrzymująca (2)
Worek z zapasowym drutem Narzędzia małe
I
Scopo della fornitura
Taglierina (1)
Listello di Base (2)
Sacchetto con filo di ricambio piccoli utensili
GB
Scope of deliver
Cutting equipment (1)
Base support (2)
Bag with spare wire small tools
CZ
Objem dodávky
Řezačka (1)
Podlahová lišta (2)
Vak s náhradním drátem drobným nářadím
Fig. 1
1
2
3
2
Fig. 2
4
392GT
1901175 08-2013
Inbetriebnahme |
Uruchamianie | Messa in funzione | Setting the Device Up | Uvedení do provozu
Var. 1
D
Einsatz z.B. auf Gerüstgeländer:
Gerät mit Fussleiste (2) auf Gerüstgeländer set-
zen und Hacken (4) an unterer Geländerstange
einhängen. Mittels Zurrgurt kann die Neigung
des Gerätes verändert werden.
Flügelgriffe (5) oben und unten abschwenken
(Bügelauszugssicherung ist entriegelt)
Netzkabel an 230V anschliessen.
PL
Zastosowanie np. na poręczy rusztowania:
Urządzenie ustawić listwą podtrzymującą (2)
na poręczy rusztowania, a hak (4) zaczepić na
dolnej listwie poręczy. Przy pomocy pasa
linowego może być zmieniany kąt ustawienia
urządzenia. Uchwyty skrzydełkowe (5) na
górze i na dole przekręcić (zabezpieczenie
przed wyciągnięciem uchwytu jest zwolnione).
Kabel sieciowy przyłączyć do 230V.
I
Utilizzo ad esempio su parapetti di impalca-
ture:
Applicare l’apparecchio con il listello di base (2)
sul parapetto dell’impalcatura e applicare il gan-
cio (4) sulla sbarra inferiore del parapetto.
Per modificare l’inclinazione dell’apparecchio in-
tervenire sulla cinghia tenditrice.
Muovere le impugnature ad alette (5) orientan-
dole in alto e in basso per sbloccare la sicura di
estrazione della staffa.
Collegare il cavo di allacciamento alla rete a
230V.
GB
Usage e.g. on the scaffolding:
Place the tool with base support (2) on the scaf-
folding rail and hang the hook (4) on the lower
handrail.
The inclination of the tool can be changed with
the use of the load-securing strap.
Swivel the wing grips (4) upwards and down-
wards (The safety fixture to pull out the yoke is
released)
Connect the power cord to 230V .
CZ
Použití např. na zábradlí lešení:
Zařízení posaďte pomocí podlahové lišty (2) na
zábradlí lešení a zavěste háky (4) na spodní tyč
zábradlí.
Pomocí upínacího pásu lze měnit sklon
zařízení.
Sklopte křídlová madla (5) nahoře a dole
(pojistka vytažení třmenu je odjištěná)
Připojte napájecí kabel na 230 V.
4
2
Fig. 3
5
1901175 08-2013
392GT
5
Inbetriebnahme |
Uruchamianie | Messa in funzione | Setting the Device Up | Uvedení do provozu
Var. 2
D
Geländerhalterung (Optionales Zubhör)
Geländerhalterung für senkrechten Geräteein-
satz am Rückengeländer: z.B. bei eingepackter
Fassade oder wenn generelle Einschränkungen
bestehen, dass Gerät nach aussen zu hängen
Montage:
Geländerhalterung an Rückseite des Gerätes
392GT mittels beiliegenden Sterngriffschrauben
(5) in die dafür vorgesehenen Gewindebüchsen
montieren.
PL
Podparcie do poręczy (wyposażenie
dodatkowe)
Podparcie do poręczy do zastosowania
urządzenia w pozycji pionowej na poręczy
tylnej: np. przy wykonywaniu nowej fasady na
starą pokrytą już wcześniej płytami izolacyjnymi
lub gdy występują ogólne ograniczenia, aby
urządzenie wywiesić na zewnątrz.
Montaż:
Zamontować podparcie do poręczy na odwrocie
urządzenia 392GT przy pomocy załączonych
śrub gwiazdokowych (5) w przewidziane do tego
gwintowane tuleje.
I
Supporto per parapetto (Accessorio optional)
Supporto per parapetto per l’uso
dell’apparecchio in senso verticale su una rin-
ghiera posteriore: p. es. in caso di facciate ap-
pese o quando vi sono limitazioni oggettive che
impediscono l’aggancio dell’apparecchio verso
l’esterno
Montaggio:
Montare il supporto per parapetto sul lato poste-
riore dell’apparecchio 392GT con le viti con ma-
nopola a crociera (5) nelle apposite bussole fi-
lettate.
GB
Scaffolding support (Optional accessory)
Scaffolding support for vertical use of tools in
the rear handrail: e.g. in the case of wrapped
facade or if there are general restrictions on
hanging the tool on the outside
Assembly:
Mount the scaffolding support on the rear of the
Tool 392GT in the tapped bush meant for it with
the aid of the attached star handle screws (5).
CZ
Držák na zábradlí lešení (doplňkové
příslušenství)
Držák na zábradlí pro použití přístroje v kolmé
poloze na zadním zábradlí: např. v případě
zatěsněné fasády nebo obecného omezení pro
zavěšení přístroje vně.
Montáž:
Držák na zábradlí připevněte na zadní stranu
přístroje 392GT pomocí přiložených šroubů s
hvězdicovým kolečkem (5) do závitových
pouzder, která jsou k tomuto účelu určena.
Fig. 4
5
Fig. 5
Fig. 6
Art.
-
Nr. 1200047
6
392GT
1901175 08-2013
Inbetriebnahme |
Uruchamianie | Messa in funzione | Setting the Device Up | Uvedení do provozu
D
Schneidegerät gemäss Abbildung auf Geländerstange setzen,
Gerätesicherung: Klettband um Geländerstange legen (6). Das Gerät ist gegen ein Herunterfallen gesichert.
PL
Ustawić urządzenie zgodnie z rysunkiem na drążku poręczy
Zabezpieczenie urządzenia:Założyć taśmę z rzepami wokół drążka poręczy (6). Urządzenie jest w ten sposób
zabezpieczone przed upadkiem.
I
Applicare l’apparecchio di taglio sulla barra del parapetto secondo le modalità illustrate nella figura,
Blocco dell’apparecchio: Avvolgere il nastro di velcro intorno alla barra del parapetto (6) per impedire che
l’apparecchio possa cadere.
GB
Put the cutting tool on the scaffolding rod as in the illustration,
Equipment safety: Put the Velcro strip around the scaffolding rod (6). The tool is thus protected from falling down.
CZ
Řezačku posaďte dle vyobrazení na tyč zábradlí,
Zajištění zařízení:Kolem tyče zábradlí dejte upínací pásku (6). Zařízení je tak zajištěno proti pádu.
Schnittvarianten | Wytnij warianty | Varianti di taglio | Cutting variants | Varianty řezů
D
Gerader Schnitt:
Grundsätzlich:
Durch Drücken des Drucktasters (7) wird der Draht er-
wärmt. Eine Aufwärmzeit ist nicht nötig. Der uschnitt
kann sofort erfolgen
Bügel (8) vor dem Zuschnitt herausziehen, Platte bis
zum Zuschnittmass vorschieben und Zuschnitt ausfüh-
ren.
PL
Cięcie proste:
asadniczo:
Naciśnięcie przycisku (7) powoduje rozgrzanie drutu.
Nie jest potrzebeny czas na rozgrzanie. Przycięcie
może nastąpić natychmiast.
Wyciągnąć uchwyt (8) przed docięciem, płytę
podsunąć do wymiaru cięcia i wykonać cięcie.
I
Taglio rettilineo:
Istruzioni di base:
Premendo l’interruttore a pressione (7) il filo di riscalda.
Non occorre attendere il raggiungimento di una deter-
minata temperatura, bensì è possibile procedere im-
mediatamente con le operazioni di taglio.
Estrarre l’archetto (8) prima del taglio, premere il pan-
nello fino alla misura di taglio desiderata e lasciare
l’archetto nel pannello.
GB
Straight cut:
Fundamental principle:
The wire gets heated by pressing on the push-button
switch (7). A pre-heating period is not necessary. The
cut can be made immediately
Pull out bracket (8) before cutting, push board forwards
to cutting dimension and allow bracket to dive into
board.
CZ
Rovný řez:
V zásadě:
Stisknutím tlačítka (7) se drát zahřívá. Není nutné čekat
na úplné zahřátí, řezat lze okamžitě
Před řezáním vytáhněte třmen (8), desku přisuňte až
na velikost přířezu a proveďte řez.
7
8
Fig. 8
6
Fig. 9
1901175 08-2013
392GT
7
Schnittvarianten | Wytnij warianty | Varianti di taglio | Cutting variants | Varianty řezů
D
Falz:
Falztiefe oder Auftrenndicke einstellen (9).
Dämmplatte einlegen, Platte bis zur ge-
wünschten Ausschnittmarkierung vorschie-
ben, Falz durch herausziehen des Schneid-
bügel (7) ausschneiden.
PL
Felc:
Ustawić głębokość felca lub grubość
rozstawu (9). Włożyć płytę izolacyjną ,
przesunąć płytę do żądanego oznakowania
wycięcia, wyciąć felc poprzez wyciągnięcie
chwytaka tnącego (7).
I
Taglio piegato:
Determinare una profondità o spessore di
scanalatura (9).
Inserire il pannello isolante, far avanzare il
pannello fino alla marcatura di taglio deside-
rata, sollevare l’archetto per taglio (7) e ta-
gliare la piega.
GB
Seam:
Set seam depth or separating thickness (9).
Insert insulation board, push the board for-
ward to the cutting marking desired, lift the
cutting bracket (7) and cut out seam.
CZ
Drážka:
Nastavte hloubku drážky nebo tloušťku řezu
(9).
Vložte izolační desku, přisuňte ji až k
požadované značce výřezu, vytažením
řezacího třmenu (7) vyřízněte drážku.
9
Fig. 10
Fig. 11
7
Fig. 10a
8
392GT
1901175 08-2013
Schnittvarianten | Wytnij warianty | Varianti di taglio | Cutting variants | Varianty řezů
D
Schrägschnitt:
Auflageschiene (10) abschwenken, Feststeller
(11) nachschieben und fixieren.
90°-Justierung:
Schraube (12) lösen, Schnittwinkel neu ausrich-
ten und Schraube wieder fixieren.
Plattenandruckstab:
Flügelgriff (13) lösen und Andruckstab (14) auf
Platte drücken. Platte wird nun im Gerät gehal-
ten und kann nicht herunterfallen.
PL
Cięcie ukośne :
Przekręcić ogranicznik wzdłużny (10),
przesunąć i ustawić zatrzask (11).
Ustawienie 90°:
Zwolnić śrubę (12), na nowo ustawić kąt
przecinania i znowu unieruchomić śrubę.
Pręt dociskowy płyty:
Zwolnić uchwyt skrzydełkowy (13) i przycisnąć
pręt dociskowy (14) na płycie. Płyta jest teraz
utrzymywana w urządzeniu i nie może spaść.
I
Taglio obliquo:
Oscillare via l’arresto meccanico longitudinale
(10), spingere il fermo (11) e fissare.
Regolazione a 90°:
Allentare la vite (12) regolare l’angolo di taglio e
fissare nuovamente la vite.
Barra premi-lastra:
Allentare l’impugnatura alare (13) e spingere la
barra premi-lastra (14) sulla lastra. A questi pun-
to quest’ultima viene tenuta ferma
nell’apparecchio e non può cadere.
GB
Slope cut:
Swivel length stop (10), attach the locking pin
(11) and fix it.
90°-alignment:
Loosen the screw (12), adjust the cutting angle
again and fix the screw again.
Board pressure rod:
Release the wing grip (13) and press the pres-
sure rod (14) on the board. The board is now
held by the tool and cannot fall down.
CZ
Šikmý řez:
Odkloňte podélný doraz (10), přisuňte
nastavovač (11) a upevněte.
Nastavení 90 °:
Povolte šroub (12), znovu srovnejte řezací úhly
a šroub znovu utáhněte.
Přítlačná tyč:
Povolte křídlové madlo (13) a přítlačnou tyč (14)
přitiskněte na desku. Tím je deska držena v
přístroji a nemůže vypadnout.
10
11
Fig. 12
12
Fig. 13
13
14
1901175 08-2013
392GT
9
Schnittvarianten | Wytnij warianty | Varianti di taglio | Cutting variants | Varianty řezů
D
Gehrungsschnitt:
Gehrungsstab (14) lösen und nach oben schie-
ben.
Dämmplatte in Abstellwinkel (15) setzen und bis
zur gewünschten Neigung anheben.
Gehrungsstab (14) an Dämmplatte schieben
und fixieren. (Gehrung bleibt für Wiederho-
lungsschnitte eingestellt)
PL
Cięcie pod kątem:
Zwolnić drążek do cięcia pod kątem (14) i
przesunąć do góry.
Ustawić płytę izolacyjną w kątowniku
ograniczającym (15) i unieść do żądanego
nachylenia.
Przesunąć drążek do cięcia pod kątem (14) do
płyty izolacyjnej i ustawić go. (To ustawienie
pozostaje do cięć powtarzających się).
I
Taglio ad angolo:
Allentare la barra di bisellatura (14) spingendola
verso l’alto.
Posizionare la lastra isolante nella squadra di
fermo (15) e sollevare fino ad ottenere
l’inclinazione desiderata.
Premere la barra di bisellatura (14) sulla lastra
isolante e procedere con il fissaggio (l’angolo di
bisellatura regolato rimarrà impostato anche per
i tagli successivi.
GB
Mitre cut:
Release the mitre rod (14) and push it upwards.
Place the insulation board at the angle sup-
port(15) and elevate it to the desired inclination.
Push the mitre rod (14 onto the insulation board
and fix it. (The mitre is set for repeat cuts)
CZ
Zkosený řez:
Povolte pokosovou tyč (14) a posuňte směrem
nahoru.
Polystyrenovou desku usaďte na ukládací
úhelníky (15)a nadzdvihněte do požadovaného
úhlu. Pokosovou tyč (14) přisuňte k desce a
zajistěte ji. (Pokos zůstane nastaven pro
následně opakované řezání)
14
15
Fig. 14
Fig. 15
10
392GT
1901175 08-2013
Störungsursachen |
Przyczyny zakłóceń | Potenziali problemi | Potential problems | Příčiny poruch
D
Störungsursachen / Störungsbehebung
Sicherung ersetzen:
Dreh- und Druckschraube (16) für die Fein-
sicherung entfernen, defekte Sicherung er-
setzen und Schraube wieder eindrehen.
Feinsicherung 5x20mm
PL
Wymienić bezpiecznik:
Usunąć śrubkę obrotową i dociskową (16)
bezpiecznika czułego, wymienić uszkodzony
bezpiecznik i zakręcić ponownie śrubkę.
Bezpiecznik czuły 5x20mm
I
Potenziali problemi / Risoluzione dei
problemi
Sostituire il fusibile:
girare e rimuovere la vite (16) per fusibili fi-
ne, sostituire difettoso Si-assicurazione e vi-
te del bullone.
Fusibili 5x20mm
GB
Potential problems / troubleshooting
Replace fuse:
turn and remove screw (16) for fine fuses,
replace defective Si-assurance and bolt
screw.
Fuses 5x20mm
CZ
Příčiny poruch / odstranění poruch
Výměna pojistky:
Vyndejte utahovací a stavěcí šroub (16)
jemné pojistky, vadnou pojistku vyměňte a
šroub znovu namontujte.
Jemná pojistka 5x20 mm
Fig. 16
16

This manual suits for next models

1

Other SPEWE Cutter manuals

SPEWE 1900MK-30 User manual

SPEWE

SPEWE 1900MK-30 User manual

SPEWE Isoturbo 5305S-30 2014 User manual

SPEWE

SPEWE Isoturbo 5305S-30 2014 User manual

SPEWE ES-5300 User manual

SPEWE

SPEWE ES-5300 User manual

SPEWE 410GTL 2014 User manual

SPEWE

SPEWE 410GTL 2014 User manual

SPEWE Isoturbo 6000L S-05 User manual

SPEWE

SPEWE Isoturbo 6000L S-05 User manual

SPEWE Isoturbo 6005L-30 Operation and maintenance manual

SPEWE

SPEWE Isoturbo 6005L-30 Operation and maintenance manual

SPEWE 1900M-24 User manual

SPEWE

SPEWE 1900M-24 User manual

SPEWE 1900L-30 User manual

SPEWE

SPEWE 1900L-30 User manual

SPEWE ES-212SL-30 User manual

SPEWE

SPEWE ES-212SL-30 User manual

SPEWE 112GT-28 User manual

SPEWE

SPEWE 112GT-28 User manual

SPEWE DT127-30 User manual

SPEWE

SPEWE DT127-30 User manual

SPEWE DT104-28 User manual

SPEWE

SPEWE DT104-28 User manual

SPEWE 1900ML-30 04 Series User manual

SPEWE

SPEWE 1900ML-30 04 Series User manual

SPEWE ES-5305 Series User manual

SPEWE

SPEWE ES-5305 Series User manual

SPEWE 600SL User manual

SPEWE

SPEWE 600SL User manual

SPEWE 212SL-30 User manual

SPEWE

SPEWE 212SL-30 User manual

SPEWE 1200169 User manual

SPEWE

SPEWE 1200169 User manual

SPEWE 212GS-30 User manual

SPEWE

SPEWE 212GS-30 User manual

SPEWE 3500EL-40 Manual

SPEWE

SPEWE 3500EL-40 Manual

SPEWE 1900L-30 User manual

SPEWE

SPEWE 1900L-30 User manual

SPEWE 5300S User manual

SPEWE

SPEWE 5300S User manual

SPEWE DT104-28 User manual

SPEWE

SPEWE DT104-28 User manual

SPEWE 112SL-28 Manual

SPEWE

SPEWE 112SL-28 Manual

SPEWE 890SL User manual

SPEWE

SPEWE 890SL User manual

Popular Cutter manuals by other brands

INNO A3 Quick reference guide

INNO

INNO A3 Quick reference guide

tattered lace Crossover instruction manual

tattered lace

tattered lace Crossover instruction manual

Eraser HC10 operating manual

Eraser

Eraser HC10 operating manual

REHOBOT PC75-40 operating instructions

REHOBOT

REHOBOT PC75-40 operating instructions

HIKOKI BENDOF DC-16MV instruction manual

HIKOKI

HIKOKI BENDOF DC-16MV instruction manual

Tapco PRO14 operating instructions

Tapco

Tapco PRO14 operating instructions

Rubi HIT-850-N manual

Rubi

Rubi HIT-850-N manual

Milwaukee M18 BLTRC Original instructions

Milwaukee

Milwaukee M18 BLTRC Original instructions

Makita CC300D instruction manual

Makita

Makita CC300D instruction manual

Choice 4074WDG user manual

Choice

Choice 4074WDG user manual

LESITE LH8100 manual

LESITE

LESITE LH8100 manual

Makita 4101RH instruction manual

Makita

Makita 4101RH instruction manual

Hercules Deluxe manual

Hercules

Hercules Deluxe manual

Raider RD-ETC23 user manual

Raider

Raider RD-ETC23 user manual

Sioux Tools SCO10S253F Instructions-parts list

Sioux Tools

Sioux Tools SCO10S253F Instructions-parts list

Eastwood 31847 instructions

Eastwood

Eastwood 31847 instructions

PROPOINT 9113911 manual

PROPOINT

PROPOINT 9113911 manual

CO/Tech LS400-UK Original instructions

CO/Tech

CO/Tech LS400-UK Original instructions

manuals.online logo
manuals.online logoBrands
  • About & Mission
  • Contact us
  • Privacy Policy
  • Terms and Conditions

Copyright 2025 Manuals.Online. All Rights Reserved.