manuals.online logo
Brands
  1. Home
  2. •
  3. Brands
  4. •
  5. Teknik
  6. •
  7. Indoor Furnishing
  8. •
  9. Teknik Craft 5421407 User manual

Teknik Craft 5421407 User manual

Storae Cabinet
Craft Collection | Model 5421407
NOTE: THIS INSTRUCTION
BOOKLET CONTAINS IMPORTANT
SAFETY INFORMATION.
PLEASE READ AND KEEP FOR
FUTURE REFERENCE.
You'll love what we
have in storage.
Teknik
www.teknikoffice.co.uk
Table of Contents Assembly Tools Required
3
4
5-21
22-25
26-29
30
31
Part Identification
Hardware Identification
Assembly Steps
Français
Español
Safety
Warranty
No. 2 Phillips Screwdriver
Tip Shown Actual Size
Skip the power trip.
This time.
Pae 2
Part Identification
åWhile not all parts are labeled, some of the parts will have a label or an inked letter on the ede
to help distinuish similar parts from each other. Use this part identification to help identify similar parts.
A RIGHT END (1)
B LEFT END (1)
C UPRIGHT (1)
D TOP (1)
E SHELF (1)
F RIGHT BRACE (1)
G LEFT BRACE (1)
H FRONT BOTTOM (1)
I REAR BOTTOM (1)
J BOTTOM BRACE (1)
K SKIRT (1)
L BACK (1)
M SMALL RIGHT DRAWER FRONT (1)
N SMALL LEFT DRAWER FRONT (1)
O LARGE RIGHT DRAWER FRONT (1)
P LARGE LEFT DRAWER FRONT (1)
Q SMALL RIGHT DRAWER SIDE (2)
R SMALL LEFT DRAWER SIDE (2)
S SMALL DRAWER BACK (2)
T LARGE RIGHT DRAWER SIDE (2)
U LARGE LEFT DRAWER SIDE (2)
V LARGE DRAWER BACK (2)
W DRAWER BOTTOM (4)
Short Screwdriver
Part Identification Now you know
our ABCs.
Pae 3
A
B
C
D
E
F
G
H
I
J
K
L
M
NO
Q
R
S
T
U
V
W
W
Q
R
S
W
P
T
U
V
W
Hardware Identification
åScrews are shown actual size. You may receive extra hardware with your unit.
Pae 4
HIDDEN CAM - 38
3
APPLIQUE CARD - 4
7
(EXTENSION SET SHOWN SEPARATED)
1EXTENSION RAIL - 8 2EXTENSION SLIDE - 8
WOOD DOWEL - 15
5KNOB - 4
6
SILVER 1/2" FLAT HEAD SCREW - 52
15
SILVER 1-3/16" FLAT HEAD SCREW - 18
11
CAM SCREW - 38
4
METAL
BRACKET - 4
8
SILVER 1/2" PAN HEAD SCREW - 8
17 18 SILVER 1116" MACHINE SCREW  4
Step 1
å Assemble your unit on a carpeted floor or on the empty
carton to avoid scratchin your unit or the floor.
å Push thirty-eiht HIDDEN CAMS (3) into the ENDS (A
and B), UPRIGHT (C), SHELF (E), BRACES (F, G, and J),
BOTTOMS (H and I), and DRAWER SIDES (Q, R, T, and U).
Pae 5
3
Arrow
Arrow
(38 used)
3
A
C
B
E
F
G
H
I
Q
R
T
U
Q
R
T
U
J
Arrow
The arrow in the HIDDEN
CAM must point toward the
hole in the ede of the board.
Hole
Step 2
å Turn thirty-eiht CAM SCREWS (4) into the exact
holes shown in the ENDS (A and B), UPRIGHT (C),
TOP (D), SHELF (E), SKIRT (K), BOTTOMS (H and I),
and DRAWER FRONTS (M, N, O, and P).
å NOTE: Be sure to use the exact holes shown.
Pae 6
4(38 used)
A
B
D
M
N
O
P
C
E
H
I
K
4
Meet Part (D). This component has been
enineered to be lihter, stroner, faster…
well ok. Not technically faster. But
definitely makes for a sturdier Storae
Cabinet that’s easier to assemble and
friendlier to the environment.
Anled ede
Step 3
Pae 7
å Separate the EXTENSION SLIDES (2) from the EXTENSION RAILS (1) as shown in the upper diaram below. Be
prepared, the parts are reasy.
å Fasten four EXTENSION RAILS (1) to the ENDS (A and B). Use eiht SILVER 1/2" FLAT HEAD SCREWS (15).
å NOTE: For each EXTENSION RAIL, turn a SCREW into the hole shown in the enlared diaram. Then, slide the inner
cartride of the EXTENSION RAIL in to find the other hole that lines up with the hole in the END. Turn a SCREW into
this hole.
å NOTE: The EXTENSION SLIDES will be used later for the DRAWERS.
B
SILVER 1/2" FLAT HEAD SCREW
(8 used in this step)
15
1
1
Surface with
HIDDEN CAMS
1
1
A
Surface with
HIDDEN CAMS
Finished ede
Open end
Finished ede
Open end
Open end
Push up on the black lever and pull the SLIDE from the RAIL.
2
1
Use these holes.
Step 4
å NOTE: Use the correct holes for the EXTENSION RAILS
that are shown in the diarams.
å Fasten four EXTENSION RAILS (1) to the UPRIGHT (C).
Use eiht SILVER 1/2" FLAT HEAD SCREWS (15).
å NOTE: For each EXTENSION RAIL, turn a SCREW into the
hole shown in the enlared diaram. Then, slide the inner
cartride of the EXTENSION RAIL in to find the other hole
that lines up with the hole in the UPRIGHT. Turn a SCREW
into this hole.
Pae 8
F
L
I
P
O
V
E
R
C
SILVER 1/2" FLAT HEAD SCREW
(8 used in this step)
15
1
1
C
1
1
1
Use these holes for
the RAILS that are
fastened to the surface
with HIDDEN CAMS.
Open end
Open end
1
Open end
Surface with
HIDDEN CAMS
Finished ede
Surface without
HIDDEN CAMS
Use these holes for the
RAILS that are fastened
to the surface without
HIDDEN CAMS.
å Insert one WOOD DOWEL (5) into the SHELF (E).
å Fasten the UPRIGHT (C) to the SHELF (E). Tihten two
HIDDEN CAMS.
å NOTE: Be sure the WOOD DOWEL in the SHELF inserts
into the UPRIGHT.
å Fasten the BOTTOMS (H and I) to the UPRIGHT (C). Use
two SILVER 1-3/16" FLAT HEAD SCREWS (11).
Step 5
Pae 9
C
I
H
E
Surface
with
HIDDEN
CAMS
Surface
without
HIDDEN
CAMS
These holes
must be here.
The HIDDEN CAMS
are closer to this ede.
5
1
2
SILVER 1-3/16" FLAT HEAD SCREW
(2 used in this step)
11
Finished ede
Step 6
å Insert one WOOD DOWEL (5) into the UPRIGHT (C).
å Fasten the LEFT BRACE (G) to the UPRIGHT (C). Tihten one HIDDEN CAM.
å NOTE: Be sure the WOOD DOWEL in the UPRIGHT inserts into the LEFT BRACE.
å Insert four WOOD DOWELS (5) into the LEFT END (B).
å Fasten the LEFT END (B) to the SHELF (E), LEFT BRACE (G), and BOTTOMS (H and I). Tihten five HIDDEN CAMS.
å NOTE: You will need to use your STUBBY SCREWDRIVER to tihten the HIDDEN CAMS in the SHELF.
å NOTE: Be sure the WOOD DOWELS in the LEFT END insert into the SHELF, LEFT BRACE, and BOTTOMS.
Pae 10
C
I
H
E
Surface without
HIDDEN CAMS
5
G
B
Surface with
HIDDEN CAMS
5
5
Finished ede
Step 7
Pae 11
å Insert one WOOD DOWEL (5) into the UPRIGHT (C).
å Fasten the RIGHT BRACE (F) to the UPRIGHT (C). Tihten one HIDDEN CAM.
å NOTE: Be sure the WOOD DOWEL in the UPRIGHT inserts into the RIGHT BRACE.
å Insert four WOOD DOWELS (5) into the RIGHT END (A).
å Fasten the RIGHT END (A) to the SHELF (E), RIGHT BRACE (F), and BOTTOMS (H and I). Tihten five HIDDEN CAMS.
å NOTE: You will need to use your STUBBY SCREWDRIVER to tihten the HIDDEN CAMS in the SHELF.
å NOTE: Be sure the WOOD DOWELS in the RIGHT END insert into the SHELF, RIGHT BRACE, and BOTTOMS.
C
I
H
E
Surface
with
HIDDEN
CAMS
F
A
Surface with
HIDDEN CAMS
5
Finished ede
5
5
Step 8
å Fasten four METAL BRACKETS (8) to the SKIRT (K) exactly
as shown. Use four SILVER 1/2" PAN HEAD SCREWS (17).
Pae 12
K
SILVER 1/2" PAN HEAD SCREW
(4 used in this step)
17
8
Anled ede
Slotted hole
å Insert two WOOD DOWELS (5) into the ENDS (A and B).
å Fasten the SKIRT (K) to the ENDS (A and B). Tihten two HIDDEN CAMS.
å NOTE: Be sure the WOOD DOWELS in the ENDS insert into the SKIRT.
å Fasten the SKIRT (K) to the FRONT BOTTOM (H). Use four SILVER 1/2"
PAN HEAD SCREWS (17) throuh the METAL BRACKETS on the SKIRT
and into the FRONT BOTTOM.
å Fasten the BOTTOM BRACE (J) to the BOTTOMS (H and I). Tihten two
HIDDEN CAMS.
Step 9
Pae 13
5
5
K
J
I
H
Surface without
HIDDEN CAMS
Anled ede
SILVER 1/2" PAN HEAD SCREW
(4 used in this step)
17
A
B
Step 10
å Carefully stand your unit upriht.
å Insert two WOOD DOWELS (5) into the ENDS (A and B).
å Fasten the TOP (D) to the ENDS (A and B). Tihten four
HIDDEN CAMS.
å NOTE: Be sure the WOOD DOWELS in the ENDS insert
into the TOP.
Pae 14
5
A
B
D
These edes
must be even.
Ede with holes
Unfinished ede
å Peel APPLIQUES from the APPLIQUE CARD (7) and stick
them onto each visible HIDDEN CAM.
å Unfold the BACK (L) and place it aainst your unit.
å HINT: Start the corner SCREWS first to hold up the BACK.
å Fasten the BACK (L) to the ENDS (A and B), UPRIGHT (C),
TOP (D), and REAR BOTTOM (I). Use twenty SILVER 1/2"
FLAT HEAD SCREWS (15).
Step 11
Pae 15
A
B
D
C
I
L
SILVER 1/2" FLAT HEAD SCREW
(20 used in this step)
15
7
Ede without holes
(4 used)
Surface without tape
Step 12
Pae 16
23
å Slide the DRAWER BOTTOM (W) into the rooves in
the SMALL DRAWER SIDES (Q and R) and SMALL
DRAWER BACK (S).
å Fasten the SMALL RIGHT DRAWER FRONT (M) to
the SMALL DRAWER SIDES (Q and R). Tihten four
HIDDEN CAMS.
å Repeat this for the other small drawer usin the
SMALL LEFT DRAWER FRONT (N).
å Fasten the SMALL DRAWER SIDES (Q and R) to the SMALL DRAWER
BACK (S). Use four SILVER 1-3/16" FLAT HEAD SCREWS (11).
1
1
2
S
R
Q
S
R
Q
R
Q
W
M
W
Groove
Be sure the
DRAWER
BOTTOM inserts
into the DRAWER
FRONT roove.
SILVER 1-3/16" FLAT HEAD SCREW
(8 used in this step)
11
(4 used per drawer)
Finished surface
å Fasten the EXTENSION SLIDES (2) to the SMALL
DRAWER SIDES (Q and R). Use four SILVER 1/2" FLAT
HEAD SCREWS (15).
å NOTE: Be sure to use the exact holes shown.
å Fasten a KNOB (6) to the SMALL RIGHT DRAWER
FRONT (M). Use one SILVER 11/16" MACHINE SCREW (18).
å Repeat this step for the other small drawer.
Step 13
Pae 17
R
Q
M
2
2
6
Open end
Open end
SILVER 1/2" FLAT HEAD SCREW
(8 used for the SLIDES)
15
SILVER 11/16" MACHINE SCREW
(2 used for the KNOBS)
18
Step 14
Pae 18
23
å Slide the DRAWER BOTTOM (W) into the rooves in
the LARGE DRAWER SIDES (T and U) and LARGE
DRAWER BACK (V).
å Fasten the LARGE RIGHT DRAWER FRONT (O) to
the LARGE DRAWER SIDES (T and U). Tihten four
HIDDEN CAMS.
å Repeat this for the other lare drawer usin the LARGE
LEFT DRAWER FRONT (P).
å Fasten the LARGE DRAWER SIDES (T and U) to the LARGE DRAWER
BACK (V). Use four SILVER 1-3/16" FLAT HEAD SCREWS (11).
1
Be sure the
DRAWER
BOTTOM inserts
into the DRAWER
FRONT roove.
1
2
SILVER 1-3/16" FLAT HEAD SCREW
(8 used in this step)
11
(4 used per drawer)
Groove
V
U
T
W
Finished surface
V
U
T
O
U
T
W
Step 15
Pae 19
å Fasten the EXTENSION SLIDES (2) to the LARGE
DRAWER SIDES (T and U). Use four SILVER 1/2" FLAT
HEAD SCREWS (15).
å NOTE: Be sure to use the exact holes shown.
å Fasten a KNOB (6) to the LARGE RIGHT DRAWER
FRONT (O). Use one SILVER 11/16" MACHINE SCREW (18).
å Repeat this step for the other lare drawer.
U
T
SILVER 1/2" FLAT HEAD SCREW
(8 used for the SLIDES)
15
6
O
2
2
Open end
Open end
SILVER 11/16" MACHINE SCREW
(2 used for the KNOBS)
18
Step 16
å To insert a drawer into your unit, line up the EXTENSION
SLIDES on the drawer with the EXTENSION RAILS on the
unit and push the drawer into the unit until the drawer is
fully inserted. The drawer will push in hard until it is all the
way in, then it will slide in and out easier.
å Peel APPLIQUES from the APPLIQUE CARD (7) and stick
them onto each visible HIDDEN CAM.
Pae 20
O
M
P
N
7(16 used)

Other Teknik Indoor Furnishing manuals
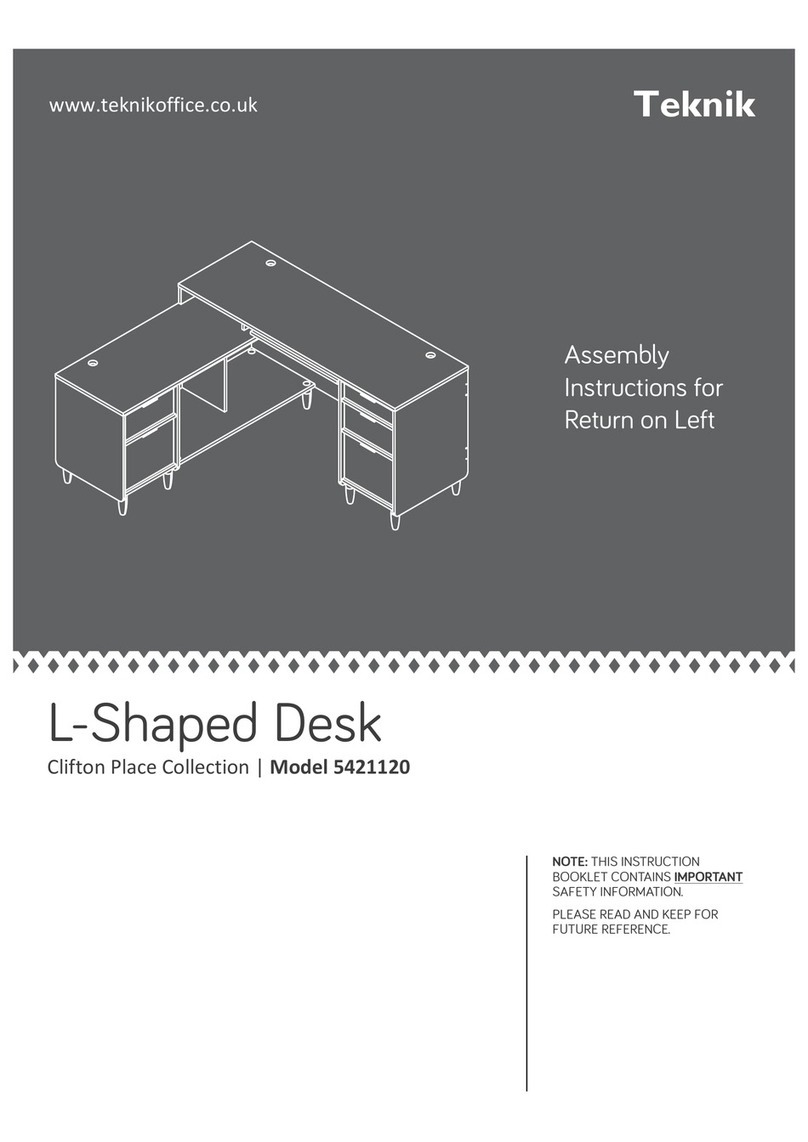
Teknik White Home Study L-Shaped Desk User manual

Teknik

Teknik White Home Study L-Shaped Desk User manual

Teknik Hampstead Park Compact Desk 5420284 User manual

Teknik

Teknik Hampstead Park Compact Desk 5420284 User manual

Teknik Lateral Filer 5421114 User manual

Teknik

Teknik Lateral Filer 5421114 User manual

Teknik 5427427 User manual

Teknik

Teknik 5427427 User manual

Teknik 1800 Hutch User manual

Teknik

Teknik 1800 Hutch User manual

Teknik Barrister Home 4 Drawer Chest User manual

Teknik

Teknik Barrister Home 4 Drawer Chest User manual

Teknik 5420277 User manual

Teknik

Teknik 5420277 User manual

Teknik 5423912 User manual

Teknik

Teknik 5423912 User manual

Teknik Boulevard Cafe 5427345 User manual
Teknik

Teknik Boulevard Cafe 5427345 User manual

Teknik 5426436 User manual

Teknik

Teknik 5426436 User manual

Teknik Craft 5427456 User manual

Teknik

Teknik Craft 5427456 User manual

Teknik 5414142 User manual

Teknik

Teknik 5414142 User manual

Teknik 5431262 User manual

Teknik

Teknik 5431262 User manual

Teknik Boutique Style Desk User manual

Teknik

Teknik Boutique Style Desk User manual

Teknik 5420276 User manual

Teknik

Teknik 5420276 User manual

Teknik Barrister Home User manual

Teknik

Teknik Barrister Home User manual

Teknik Scribed Oak Storage Desk 5418294 User manual

Teknik

Teknik Scribed Oak Storage Desk 5418294 User manual

Teknik 5427429 User manual

Teknik

Teknik 5427429 User manual

Teknik Spanish Style Desk 5420114 User manual

Teknik

Teknik Spanish Style Desk 5420114 User manual

Teknik 5421405 User manual

Teknik

Teknik 5421405 User manual

Teknik 5423547 User manual

Teknik

Teknik 5423547 User manual

Teknik Canal Heights Console 5419230 User manual

Teknik

Teknik Canal Heights Console 5419230 User manual

Teknik Denver Swivel Recliner User manual

Teknik

Teknik Denver Swivel Recliner User manual

Teknik Barrister Home Lift Up 5420329 User manual

Teknik

Teknik Barrister Home Lift Up 5420329 User manual

Popular Indoor Furnishing manuals by other brands

URBAN OUTFITTERS RILEY PLATFORM BED Assembly instructions

URBAN OUTFITTERS

URBAN OUTFITTERS RILEY PLATFORM BED Assembly instructions

Habitat KITT-SR-AW19-A Assembly instructions

Habitat

Habitat KITT-SR-AW19-A Assembly instructions

Pearl District 290-2WAY-MP Assembly instructions

Pearl District

Pearl District 290-2WAY-MP Assembly instructions

Lightolier Brisa FP28LEC specification

Lightolier

Lightolier Brisa FP28LEC specification

Pier 1 Imports CM8861A Assembly

Pier 1 Imports

Pier 1 Imports CM8861A Assembly

Rauch M2592 Assembly instructions

Rauch

Rauch M2592 Assembly instructions

Cooper Lighting LTC2 Series Specification sheet

Cooper Lighting

Cooper Lighting LTC2 Series Specification sheet

Parachute Outpost Assembly instructions

Parachute

Parachute Outpost Assembly instructions

OVE BETTY 48 installation manual

OVE

OVE BETTY 48 installation manual

BorMann BSR3001 Assembly instructions

BorMann

BorMann BSR3001 Assembly instructions

Weltevree SHEEPSCOAT product manual

Weltevree

Weltevree SHEEPSCOAT product manual

Lopas Saara Assembly instructions

Lopas

Lopas Saara Assembly instructions

Inside Weather ADA DINING CHAIR manual

Inside Weather

Inside Weather ADA DINING CHAIR manual

Econoco ALTA T505SC-H quick start guide

Econoco

Econoco ALTA T505SC-H quick start guide

LDI SAFCO Xpressions 1936 Assembly instructions

LDI

LDI SAFCO Xpressions 1936 Assembly instructions

Amisco 31244 Assembly

Amisco

Amisco 31244 Assembly

Whalen WSCSC6172WB quick start guide

Whalen

Whalen WSCSC6172WB quick start guide

HearthPro SP6548 user manual

HearthPro

HearthPro SP6548 user manual

manuals.online logo
manuals.online logoBrands
  • About & Mission
  • Contact us
  • Privacy Policy
  • Terms and Conditions

Copyright 2025 Manuals.Online. All Rights Reserved.