manuals.online logo
Brands
  1. Home
  2. •
  3. Brands
  4. •
  5. Teknik
  6. •
  7. Indoor Furnishing
  8. •
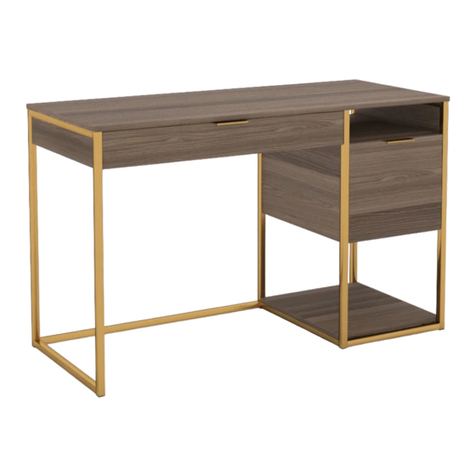
  9. Teknik Scribed Oak Desk 5414836 User manual

Teknik Scribed Oak Desk 5414836 User manual

Other Teknik Indoor Furnishing manuals
Teknik Denver Swivel Recliner User manual

Teknik

Teknik Denver Swivel Recliner User manual

Teknik 5425304 User manual

Teknik

Teknik 5425304 User manual

Teknik 5420276 User manual

Teknik

Teknik 5420276 User manual

Teknik 5420277 User manual

Teknik

Teknik 5420277 User manual

Teknik 5427427 User manual

Teknik

Teknik 5427427 User manual

Teknik Wide Bookcase 5420282 User manual

Teknik

Teknik Wide Bookcase 5420282 User manual

Teknik 5423912 User manual

Teknik

Teknik 5423912 User manual

Teknik Boulevard Cafe 5421950 User manual

Teknik

Teknik Boulevard Cafe 5421950 User manual

Teknik 5427415 User manual

Teknik

Teknik 5427415 User manual

Teknik Canal Heights 5419231 User manual

Teknik

Teknik Canal Heights 5419231 User manual

Teknik Essentials L-Shaped Desk 5425092 User manual

Teknik

Teknik Essentials L-Shaped Desk 5425092 User manual

Teknik 5427127 User manual

Teknik

Teknik 5427127 User manual

Teknik 5427872 User manual

Teknik

Teknik 5427872 User manual

Teknik 5427030 User manual

Teknik

Teknik 5427030 User manual

Teknik 5420173 User manual

Teknik

Teknik 5420173 User manual

Teknik Hideaway Cotswold 5430446 User manual

Teknik

Teknik Hideaway Cotswold 5430446 User manual

Teknik Barrister Home 5418891 User manual

Teknik

Teknik Barrister Home 5418891 User manual

Teknik 5420649 User manual

Teknik

Teknik 5420649 User manual

Teknik Hampstead 5426504 User manual

Teknik

Teknik Hampstead 5426504 User manual

Teknik 5427430 User manual

Teknik

Teknik 5427430 User manual

Teknik 5424943 User manual

Teknik

Teknik 5424943 User manual

Teknik Clifton Place 5421113 User manual

Teknik

Teknik Clifton Place 5421113 User manual

Teknik 5418295 User manual

Teknik

Teknik 5418295 User manual

Teknik 5427429 User manual

Teknik

Teknik 5427429 User manual

Popular Indoor Furnishing manuals by other brands

Regency LWMS3015 Assembly instructions

Regency

Regency LWMS3015 Assembly instructions

Furniture of America CM7751C Assembly instructions

Furniture of America

Furniture of America CM7751C Assembly instructions

Safavieh Furniture Estella CNS5731 manual

Safavieh Furniture

Safavieh Furniture Estella CNS5731 manual

PLACES OF STYLE Ovalfuss Assembly instruction

PLACES OF STYLE

PLACES OF STYLE Ovalfuss Assembly instruction

Trasman 1138 Bo1 Assembly manual

Trasman

Trasman 1138 Bo1 Assembly manual

Costway JV10856 manual

Costway

Costway JV10856 manual

moss DESIGN Caisson Credenza Assembly instructions

moss DESIGN

moss DESIGN Caisson Credenza Assembly instructions

Aquaglide FULL DECK 15.0 owner's manual

Aquaglide

Aquaglide FULL DECK 15.0 owner's manual

AREBOS AR-HE-SW30 user manual

AREBOS

AREBOS AR-HE-SW30 user manual

Till-Hilft Fulda 87005.330 Assembly instructions

Till-Hilft

Till-Hilft Fulda 87005.330 Assembly instructions

Twoey Outside 2010 quick start guide

Twoey Outside

Twoey Outside 2010 quick start guide

Hettich Easys 200 operating instructions

Hettich

Hettich Easys 200 operating instructions

The bedboss RELAX 404 Series owner's manual

The bedboss

The bedboss RELAX 404 Series owner's manual

Oeseder Möbelindustrie Bern 991 720 Assembly instructions

Oeseder Möbelindustrie

Oeseder Möbelindustrie Bern 991 720 Assembly instructions

Costway HW68469 user manual

Costway

Costway HW68469 user manual

Next ALIX A27743 Assembly instructions

Next

Next ALIX A27743 Assembly instructions

BROSA Hans Assembly guide

BROSA

BROSA Hans Assembly guide

Prodigg MINIKA PBA015T-FUR installation manual

Prodigg

Prodigg MINIKA PBA015T-FUR installation manual

manuals.online logo
manuals.online logoBrands
  • About & Mission
  • Contact us
  • Privacy Policy
  • Terms and Conditions

Copyright 2025 Manuals.Online. All Rights Reserved.

NOTE: THIS INSTRUCTION
BOOKLET CONTAINS IMPORTANT
SAFETY INFORMATION.
PLEASE READ AND KEEP FOR
FUTURE REFERENCE.
Scribed Oak Desk
5414836
Business or pleasure.
Works both ways.
Teknik
www.teknikoffice.co.uk
Table of Contents Assembly Tools Required
Part Identification
Hardware Identification
Assembly Steps
Français
Español
Safety
Warranty
No. 2 Phillips Screwdriver
Tip Shown Actual Size
Hammer
Not actual size
Skip the power trip.
This time.
2-3
4-5
6-32
33-36
37-40
41-42
43
Pae 2
Short Screwdriver
åWhile not all parts are labeled, some of the parts will have a label or an inked letter on the ede
to help distinuish similar parts from each other. Use this part identification to help identify similar parts.
Now you know
our ABCs.
Part Identification
A INNER RIGHT END (1)
B OUTER RIGHT END (1)
C LEFT END (1)
D UPRIGHT (1)
E TOP (1)
F BOTTOM (1)
G MODESTY PANEL (1)
H UPPER SHELF (1)
I LOWER SHELF (1)
J DIVIDER (1)
K BACK (1)
L SIDE SKIRT (4)
M PENCIL DRAWER FRONT (1)
N TOP FRONT MOLDING (1)
O LEFT TOP MOLDING (1)
P RIGHT TOP MOLDING (1)
Q SHELF MOLDING (1)
R LEFT MOLDING (2)
S FILE DRAWER FRONT (1)
T RIGHT FRONT MOLDING (1)
U BASE (1)
V RIGHT REAR MOLDING (1)
W LOWER SHELF MOLDING (1)
X EXTENSION BLOCK (1)
Y PLINTH (1)
B20 PENCIL DRAWER BOTTOM (1)
D28 FILE RIGHT DRAWER SIDE (1)
D29 FILE LEFT DRAWER SIDE (1)
D78 FILE DRAWER BACK (1)
D266 PENCIL RIGHT DRAWER SIDE (1)
D267 PENCIL LEFT DRAWER SIDE (1)
D455 PENCIL DRAWER BOX FRONT (1)
D456 PENCIL DRAWER BACK (1)
D707 FILE DRAWER BOTTOM (1)
M62 DRAWER BRACE (1)
Part Identification
Pae 3
A
B
C
D
E
F
G
H
I
J
K
LM
N
O
P
Q
R
S
T
U
V
W
X
Y
L
R
L
D707
B20
D456
D455
D78 D28
D29
D266
D267
L
M62
Hardware Identification
åScrews are shown actual size. You may receive extra hardware with your unit.
Pae 4
FILE GLIDE - 2
15B
FILE ROD - 2
8B
AA EXTENSION
SLIDE - 2
ZEXTENSION
RAIL - 2
(EXTENSION SET SHOWN SEPARATED)
SLIDE CAM - 2
10A
TWIST-LOCK®
FASTENER - 18
10F
NAIL - 22
1N METAL PIN - 4
1R
METAL
BRACKET - 5
4G
GROMMET - 1
7P GROMMET CAP- 1
8P
MOLDING
CONNECTOR - 2
19F
SPRING
CLIP - 1
38G PULL - 1
70K KNOB - 6
71K CARD
HOLDER - 2
35M
HIDDEN
CAM - 1
1F CAM
DOWEL - 1
2F
40CA CABINET RIGHT - 1 40CB CABINET LEFT - 1
40CC DRAWER RIGHT - 1 40CD DRAWER LEFT - 1
Hardware Identification
åScrews are shown actual size. You may receive extra hardware with your unit.
Pae 5
GOLD 5/16" FLAT HEAD SCREW - 16
3S
BLACK 1-7/8" FLAT HEAD SCREW - 8
2S
BLACK 9/16" LARGE HEAD SCREW - 10
1S
SILVER 7/8" MACHINE SCREW - 6
42S
GRAY 1-3/8" MACHINE SCREW - 2
39S
BLACK 7/8" LARGE HEAD SCREW - 2
17S
SILVER 1-1/8" FLAT HEAD SCREW - 8
10S
SILVER 1/2" MACHINE SCREW - 4
38S
BLACK 1" PAN HEAD SCREW - 8
60S
BLACK 1-9/16" FLAT HEAD SCREW - 9
30S
BLACK 7/8" FLAT HEAD SCREW - 2
31S
Step 1
å Assemble your unit on a carpeted floor or on the empty
carton to avoid scratchin your unit or the floor.
å To bein assembly, push a SAUDER TWIST-LOCK®
FASTENER (10F) into the lare holes in the ENDS (A
and B). Repeat this step for the LEFT END (C), UPRIGHT (D),
MODESTY PANEL (G), and SHELVES (H and I).
å Push a HIDDEN CAM (1F) into the DRAWER BRACE (M62).
Then, insert the metal end of a CAM DOWEL (2F) into the
HIDDEN CAM.
Pae 6
A
B
(18 used)
10F Do not tihten the TWIST-LOCK®
FASTENERS in this step.
Arrow
1F
2F
Do not tihten the HIDDEN
CAMS in this step.
Insert the metal end of the CAM
DOWEL into the HIDDEN CAM.
Arrow
M62
å Tap two MOLDING CONNECTORS (19F) into the notches
in the MOLDINGS (N, O, and P).
Step 2
Pae 7
19F
N
19F
P
O
Flat end
Flat end
Use your hammer to tap the MOLDING CONNECTORS (19F) into the notches in the MOLDINGS.
å Carefully turn the MOLDINGS over.
å Fasten the MOLDINGS (N, O, and P) to the TOP (E). Use
eiht SILVER 1-1/8" FLAT HEAD SCREWS (10S).
Step 3
Pae 8
Remember:
Rihty tihty.
Lefty loosey.
N
P
O
E
Surface with holes
Finished surface
Finished surface
Finished surface
SILVER 1-1/8" FLAT HEAD SCREW
(8 used in this step)
10S
Lon curved ede
å Fasten the SKIRTS (L) to the ENDS (A and B). Use four
BLACK 1" PAN HEAD SCREWS (60S).
Step 4
Pae 9
A
B
Surface with
TWIST-LOCK
®
FASTENERS
Surface without
TWIST-LOCK
®
FASTENERS
L
L
These edes
should be even.
Short unfinished ede
BLACK 1" PAN HEAD SCREW
(4 used in this step)
60S
å Fasten the EXTENSION BLOCK (X) to the UPRIGHT (D).
Use two BLACK 7/8" FLAT HEAD SCREWS (31S) throuh
the lare holes in the EXTENSION BLOCK.
å Fasten a CABINET RIGHT (40CA) to the INNER RIGHT
END (A) and a CABINET LEFT (40CB) to the EXTENSION
BLOCK (X ). Use four GOLD 5/16" FLAT HEAD
SCREWS (3S) throuh holes #1 and #3.
Step 5
Pae 10
1
2
3
4
1
2
34
Roller end
Surface with
TWIST-LOCK
®
FASTENERS
Surface without
TWIST-LOCK
®
FASTENERS
A
X
D
Roller end
GOLD 5/16" FLAT HEAD SCREW
(4 used for the RAILS)
3S
Finished surface
Notched ede
These holes
must be here.
31S
BLACK 7/8" FLAT HEAD SCREW
(2 used in this step)
31S
å Separate the EXTENSION SLIDES (AA) from the EXTENSION RAILS (Z) as shown in the upper diaram below. Be
prepared, the parts are reasy.
å Fasten an EXTENSION RAIL (Z) to the LEFT END (C) and UPRIGHT (D). Use four GOLD 5/16" FLAT HEAD SCREWS (3S).
å NOTE: For each EXTENSION RAIL, turn a SCREW into the hole shown in the enlared diaram. Then, slide the inner
cartride of the EXTENSION RAIL in to find the other hole that lines up with the hole in the END and UPRIGHT. Turn a
SCREW into this hole.
å Slide the LEFT MOLDINGS* (R) onto the notched edes of the LEFT END (C) and UPRIGHT (D).
å *U.S. Patent No. 5,499,886
Step 6
Pae 11
Z
Surface with
TWIST-LOCK
®
FASTENERS
R
Surface with
TWIST-LOCK
®
FASTENERS
D
C
R
Z
Z
Open end
Open end
GOLD 5/16" FLAT HEAD SCREW
(4 used for the RAILS)
3S
Push the black lever in and pull the SLIDE from the RAIL.
AA
Notched ede
Notched ede
The MOLDING (R) should
be even with this ede.
The MOLDING (R) should
be even with this ede.
å Fasten the OUTER RIGHT END (B) to the RIGHT
TOP MOLDING (P) on the TOP (E). Tihten two
TWIST-LOCK® FASTENERS.
Step 7
Pae 12
B
P
E
Surface with
TWIST-LOCK®
FASTENERS
How to use the SAUDER TWIST-LOCK®FASTENER
1. Insert the dowel end of the FASTENER into the hole of the
adjoinin part.
NOTE: The dowel end of the FASTENER must remain fully
inserted in the hole of the adjoinin part while lockin
the FASTENER.
2. Tihten the FASTENER with a Phillips screwdriver as tiht
as possible.
Dowel end
Lon curved ede
Use outer holes.
å Fasten the MODESTY PANEL (G) to the INNER RIGHT END (A).
Use two BLACK 1-7/8" FLAT HEAD SCREWS (2S).
Step 8
Pae 13
G
A
Surface with
TWIST-LOCK
®
FASTENERS
Surface with
TWIST-LOCK®
FASTENERS
BLACK 1-7/8" FLAT HEAD SCREW
(2 used in this step)
2S
Ede with
TWIST-LOCK®
FASTENERS
Roller end
å Fasten the INNER RIGHT END (A) to the RIGHT TOP
MOLDING (P) and the MODESTY PANEL (G) to the
TOP (E). Tihten four TWIST-LOCK® FASTENERS.
Step 9
Pae 14
P
E
G
A
Surface with
TWIST-LOCK®
FASTENERS
Surface with
TWIST-LOCK®
FASTENERS
Lon curved ede
Roller end
å Slide the MOLDINGS* (T and V) onto the notched edes
of the ENDS (A and B).
å NOTE: The RIGHT FRONT MOLDING (T) is shorter
than the RIGHT REAR MOLDING (V). Do not confuse
these MOLDINGS.
å *U.S. Patent No. 5,499,886
Step 10
Pae 15
A
B
T
V
The MOLDINGS should
rest aainst the RIGHT
FRONT MOLDING.
å Slide the PLINTH (Y) onto the notched ede of the OUTER RIGHT END (B). Then, insert the SPRING CLIP (38G) into the
roove in the PLINTH to lock it into position.
å Fasten the UPRIGHT (D) to the TOP (E). Tihten two TWIST-LOCK® FASTENERS.
å Fasten the UPRIGHT (D) to the MODESTY PANEL (G). Use two BLACK 1-7/8" FLAT HEAD SCREWS (2S).
Step 11
Pae 16
D
E
G
Surface with
TWIST-LOCK®
FASTENERS
R
Y
B
38G
BLACK 1-7/8" FLAT HEAD SCREW
(2 used in this step)
2S
å Fasten the UPPER SHELF (H) to the UPRIGHT (D).
Tihten two TWIST-LOCK® FASTENERS.
å NOTE: Once the UPPER SHELF (H) is fastened to your
unit, do not apply any pressure to the UPPER SHELF. It
may break.
å Slide the SHELF MOLDING* (Q) onto the notched ede of
the UPPER SHELF (H).
å *U.S. Patent No. 5,499,886
Step 12
Pae 17
D
H
Q
Surface with
TWIST-LOCK®
FASTENERS
Now miht be a
ood time to refresh
your drink.
Notched ede
Do not apply any
pressure to the
UPPER SHELF (H).
å Insert four METAL PINS (1R) into the DIVIDER (J).
å Insert the METAL PINS (1R) in one end of the DIVIDER (J) into the
holes in the UPPER SHELF (H).
å NOTE: Do not apply any pressure to the UPPER SHELF. It may break.
Step 13
Pae 18
H
1R
J
Finished ede
Do not apply any
pressure to the
UPPER SHELF (H).
å Fasten the LOWER SHELF (I) to the UPRIGHT (D).
Tihten two TWIST-LOCK® FASTENERS.
å NOTE: Be sure the METAL PINS in the DIVIDER (J) insert
into the holes in the LOWER SHELF (I).
Step 14
Pae 19
I
Surface with
TWIST-LOCK®
FASTENERS
H
D
J
Do not apply any
pressure to the
SHELVES (H and I).
These holes must be here.