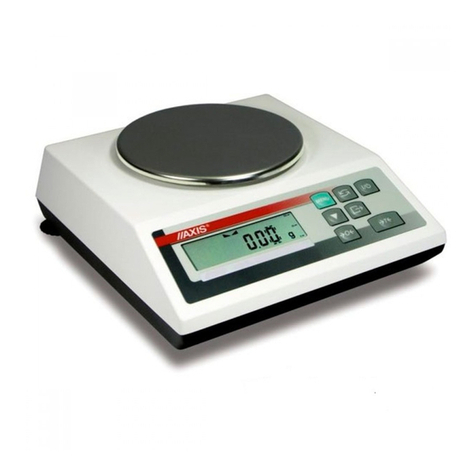
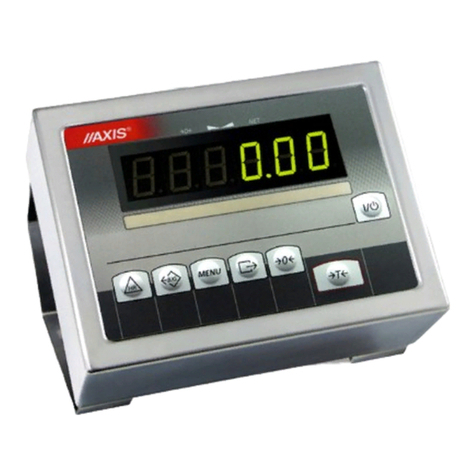
Axis SE-12 Operator's manual

METER SE-12
Technical and Motion Documentation
File: DTR-SE12-093-08-2010 T20_1

TECH ICAL A D MOTIO DOCUME TATIO
___________________________________________________________________________________________________
2
TABLE OF CONTENTS
1. Introduction ................................................................................................................................ 3
2. Certificates ................................................................................................................................. 3
3. Balance keys and indicators ....................................................................................................... 3
4. Safety principles ......................................................................................................................... 5
5. Module technical data ................................................................................................................ 6
6. Completation ..............................................................................................................................
. Preparation to work .................................................................................................................... 8
8. General operation principles .................................................................................................... 12
9. Data exchange with computer .................................................................................................. 13
10. Special functions .................................................................................................................... 14
10.1. Function of automatic measurement result sending (F..-ATO) ............................................ 14
10.2. Function of setting threshold value for automatic balance operation mode (F..-LO) ............ 14
10.3. Function of comparing with threshold values (F..-tHr) ......................................................... 15
10.4. Automatic zeroing function (AUt) ......................................................................................... 16
10.5. Pieces counting function (F..-LIC) ...................................................................................... 16
11. Maintenance and small repairs .............................................................................................. 1
Declaration of Conformity .......................................................................................................... 18

TECH ICAL A D MOTIO DOCUME TATIO
___________________________________________________________________________________________________
3
1. Introduction
Balance meter SE-12 is suitable for connecting platform with weight sensors and
performs all basic balance functions. Moreover, it is possible to perform data exchange
between SE-12 module and computer through the multi-station S485. If the module is
equipped with auxiliary S232C ports, it is also possible to read bar codes with the
handheld scanner and printing weight slips or self-adhesive labels. The module is
delivered separately or as part of ready balance (according to order).
2. Certificates
SE-12 meters have the test certificate no. PL CB 1, issued by Central Office Of
Measures in Warsaw (Notified Unit No. 1440).
Meters SE-01/N/18 and SE-01/N/25 have IP65 protection grade, confirmed by test
performed in esearch Laboratory of Electrotechnical Institute, accredited by PCA.
Meter can be used for constructing balance according to standard PN-EN 45501
Specification for metrological aspects of non-automatic weighing instruments, issued in
December 1999, harmonized with the 90/384/EEC council directive, changed by
93/68/EEC council directive).
Balances classification (PKWiU code) 29.24.23.
3. Balance keys and indicators
Keys
I/ ,
→
T
←
,
→
0←
and
Menu
perform the basic weighing functions. Key (Print)
sends the result to the computer. Key F recalls list of special functions.
Operation of F1÷F5 keys depends on their configuration, made dynamically by the
computer. Description of functions performed by those keys is shown in the bottom text
line. Alphanumeric keys and ENTE are activated automatically after selecting

TECH ICAL A D MOTIO DOCUME TATIO
___________________________________________________________________________________________________
4
functions, connected with data entering. In the module not connected to the computer
they will not perform any actions.
Operation of other keys depends on module software version.
Basic functions of keys:
I/
- switch (standby)
key
→
T
←
- tare set (entering package weight, subtracted from
weighed mass) / switch
→
0
←
- zeroing
Menu - special functions:
0/_
1/abc
2/def
...
9/wzyx
. /shift
- alphanumeric keys (press repeatedly to obtain
appropriate character):
- digit 0 or special signs ( - . , / : etc.)
- digit 0 or letters a b c ą
- digit 2 or letters d e f
- ...
- digit 9 or letters w z y z
- decimal point or switching to upper case characters
Enter
- confirmation of entered data
CL - undoing the last operation
↑
and
↓
- navigation
←
- deleting previously entered sign
F1,F2, ... ,F5
- special function keys, described in upper text line
- sending data to the computer
indicator
- signals weighing result stabilization
OK - measurement result between MIN and MAX (thresholds
function)
MAX - - measurement result above MAX

TECH ICAL A D MOTIO DOCUME TATIO
___________________________________________________________________________________________________
5
4. Safety principles
It is necessary to become familiar with safety
principles shown below, which are necessary to
avoid electric shock and damage of balance or
connected devices.
• epairs and necessary adjustments must be performed by qualified
personnel only.
• To avoid fire hazard, use only typical supply cable, and supply
voltage must be consistent with technical data.
• For the balance supply use the socket with protective contact.
• Do not use balance when the cover is removed.
• Do not use balance in explosive atmosphere.
• Do not use balance in locations with high humidity, when it is not
adapted to it.
• In case of damage suspicion, switch the balance off and do not use it
until it is tested in professional service company.

TECH ICAL A D MOTIO DOCUME TATIO
___________________________________________________________________________________________________
6
5. Module technical data
Parameter Value
Indications display LCD h=13mm
Text display LCD h=4mm, 4 lines 20 characters each
Protection grade IP65
Max. number of legalization graduations 3000e
Precision class III
Sensors supply 5V AC 25Hz
eading graduation (d) 1, 2, 5, 10, 20 (g. dkg, kg)
Verification graduation (e) any
Operational temperature -10÷40
o
C
Tare set range full
Max. number of connected sensors 6 pc.
Input voltage ranges 2,4
÷
9,5mV (option 10mV)
4,8÷19mV (option 20mV)
9,6÷38mV (option 40mV)
19,2÷72mV (option 80mV)
Load capacity of transoptor outputs
100mA, 24V
Power supply 230V, 50Hz, 6VA
eady for operation after 5 minutes from turning on
Housing material stainless, acid resistant steel sheet
Dimensions: 238x182x77mm
Installation system
Fixing 2 otwory Ф5, rozstaw 203mm
Weight 5.07lb
*e - verification graduation
Metrological data should be placed on the rating plate and are connected with type of
constructed balance.

TECH ICAL A D MOTIO DOCUME TATIO
___________________________________________________________________________________________________
7
6. Completation
Complete delivery includes:
1. SE-12 module or complete balance with SE-12 module (according to order),
2. Technical documentation
3. SE-12 module warranty,
4. CD disc:
- TE MINAL software for testing and commands list (option 1 – for programmer),
- Utility software in demo version and instruction manual (option2 – for user),
- Technical recommendations for S485 network (in case of multi-station system
delivery).
5. Licence for utility software (option 2).
6. Converter S485/232C for the computer (in case of multi-station system delivery).

TECH ICAL A D MOTIO DOCUME TATIO
___________________________________________________________________________________________________
8
. Preparation to work
1. Construction of balance upon the basis of SE-01 meter should be ordered to the
authorized producer service, or performed according to meter assembly manual,
supplied with the meter.
Fulfilling of requirements, connected with CE sign, requires application of filter cores
during wires connecting, which are supplied with the module. Core φ20mm for sensor
(sensors) wires and cores φ16mm for protective wires – see below. Distance of core
from connection point must not exceed 30 mm.
Connecting extensometer sensors to meter during balance operation could
damage the meter.
All devices connected with balance should be supplied from the same line
(phase) 230V.
or the balance supply use the socket with protective contact.
przewód ochronny
czujnika - 2 zwoje
przewód ochronny
ekran
przewody sygnałowe - 4 zwoje
sieciowy - 2 zwoje

TECH ICAL A D MOTIO DOCUME TATIO
___________________________________________________________________________________________________
9
2. Connect the external devices cables to the meter sockets, meters to the board strip
inside the meter, using the hermetic penetrations in the housing (the strip drawing is
shown below).
Abbreviations description:
IN-A,IN-B,OUT-A,OUT-B - S485 port,
4-20(mA) - analogue output 4-20 mA or 0-10 V,
P1-P3(P OGI) - transoptor outputs to relays,
GND - ground,
S1 - I, TO i GND - S232C port (for computer and scanner),
S2 - I, TO and GND - S232C auxiliary port (option),
F1, F2, F3, F4, F5 - external keys inputs,
+24V - external supply voltage input for transoptors.

TECH ICAL A D MOTIO DOCUME TATIO
___________________________________________________________________________________________________
10
Communication connector for the computer:
Tx-(nadawanie B) / biało-brąz
Tx+(nadawanie A) / brązowy
Rx-(odbiór B) / biało-nieb
Rx+(odbiór A) / niebieski
RS4 5
RJ45
Connecting to the computer is described in details in the technical recommendations for
S485 network.
Printer port:
This port is used for tape printer or label printer.
TxD (nadawanie)
masa
obudowa
RS232C
DE-9
Scanner port:
RxD (odbiór)
masa
+5V(opcja)
obudowa
RS232C
DE-9
Settings description and scanner operation principles are described in its manual.
Scanner should be set to work with code 39 or similar. Data transmission begins with
prefix 04h.

TECH ICAL A D MOTIO DOCUME TATIO
___________________________________________________________________________________________________
11
Output THRESHOLDS (option):
Tags numbers and wires colours:
Tag no. Signal Wire colour
TH ESHOLDS:
1 P1 (threshold I) green
2 P2 (threshold II) white
3 P3 (zero) brown
0 GND (meter ground) black or yellow
Output TH ESHOLDS Direct connecting diagram
(option with connector) of relay to TH ESHOLDS output
+24V
0V
0*
1
Waga Przeka nik
* in option with connector – 0 replaces 8
Outputs TH ESHOLDS are used for connecting dosing devices or signalling device
(option). These are transoptor outputs of open collector type, with load capacity
100mA/24V. It is possible to connect directly to them relays inputs or MS3K/P board,
offered by AXIS separately or in the control box ST 3K/P (3 relays, independent power
supply). Outputs are adapted for direct connection of relay M96P with input voltage
24V DC and output 250V AC 8A. elay solenoid must be protected (shunted) with
diode, e.g. 1N4148.
Operation method of TH ESHOLDS output is described in the description of function
of comparing with threshold values (thr).
External ke s inputs:
These inputs allow for placing (doubling) selected balance keys in the control cabinet or
operator station. External keys require external PSU 24V DC, which separates the
balance galvanically from the automatic systems. AXIS offers control box ST 3K/P,
including PSU and relays.
ekran
P1 (próg I)
P2 (próg II)
P3 (zero) masa

TECH ICAL A D MOTIO DOCUME TATIO
___________________________________________________________________________________________________
12
Tags numbers and wires colours:
Tag no. Signal Wire colour
External keys inputs:
11 F1 green
12 F2 white
13 F3 brown
14 F4 yellow
15 F5 red
20 +24V (external PSU voltage) black
External keys connection method:
+24V
0V
F1
F2
F1(11)
F2(12)
+24V(20)
Waga Obiekt
8. General operation principles
1. Platform with weight sensors should be located on flat, horizontal foundation, in place
not subjected to mechanical vibrations and strong air movements.
2. Devices turning on sequence: turn on computer, software, balance meter power supply.
It causes autotests performing and (after balance stabilization) displaying zero
indication.
3. Apart from connecting to the computer, the module allows for weighing and tare setting.
Tare setting is performed by pressing "T/
ON
" key. If the package tare is entered with
alphanumeric keyboard, using "T/
ON
" key is not necessary.
4. To facilitate the weight control on the pan and avoid the range exceeding, the load
indicator is located on the right side of display, scaled in 0÷100%.
5. The weighing result should be read during the " " indicator lighting, which indicates the
result stabilization.

TECH ICAL A D MOTIO DOCUME TATIO
___________________________________________________________________________________________________
13
6. Instead of negative indications 4 dashes are displayed: „ ---- ”. If that mesage is
displayed with unloaded platform, press "→0←" or "T/
ON
" key.
7. When there is no weighing, but the balance should be ready for operation, it may be
switched off by "" key. It causes the balance reading system deactivation end entering
the standby mode. The modul turning on is performed by pressing "T/
ON
" key. After the
autotests it is immediately ready for operation with full precision.
8. Weighed mass should be placed in the pan centre.
5. Do not overload the platform over 20% of maximum load.
6. Protect the module and platform from dust, aggressive dusts and liquids. For cleaning
purposes use water and dry it.
9. Data exchange with computer
If there is software activated in the computer, all module functions, besides displaying of
current indications and special functions, are controlled by the computer. Module
operator should read the messages from the computer, displayed on the module display,
and adapt his actions to them.
After the balance turning on with empty platform, indications display (upper) shows
zero indication. Three lines of text display (lower) shows computer information.
In the fourth line over F1, F2, …, F5 keys the messages indicating functions currently
realized by keys are displayed.
For example:
Then the dialogue between module operator and computer software begins, which has
various forms, depending on software type. The detailed description is presented in the
appendix.
General operator activities:
- entering numeric or text data with the module keys (in case of connecting scanner and
module keyboard the scanner is activated), e.g. product code,
- confirming of entered data upon the basis of information from computer database, e.g.
displayed product name, which code was entered earlier,
Do not drop weighed objects on the platform.
WAGA PODŁĄCZO A
R WAGI: ...
OK TOWAR
F2 F3 F5 F1 F4

TECH ICAL A D MOTIO DOCUME TATIO
___________________________________________________________________________________________________
14
- searching of computer database resources, e.g. orders for realization are displayed
successively,
- entering parameters of balance indications, e.g. unitary weight during pieces number
measurement or tare,
- finishing transaction by sending measurement result to the computer, transaction
confirming or deleting,
- slip or self-adhesive label printing, which documents the measurement (transaction).
10. Special functions
Besides the basic metrological functions, weighing and tare setting, balances may have
special functions: automatic sending of measurement result, pieces counting, automatic
zeroing, comparing with threshold values. Special functions are available for user on
demand.
The available functions may be viewed after pressing the functional key “F”. The
functions are displayed with the successive numbers: F1-LIC, F2-AUt, etc.. During the
special functions switching the display shows the MODE indicator.
10.1. Function of automatic measurement result sending (F..-ATO)
This function allows for sending measurements results without using PRINT key.
Operations sequence:
1. Press key MENU of balance.
2. During displaying F...-ATO press ENTER.
3. To activate automatic mode, during displaying F..-1 press ENTER (F..-0 deactivates
automatic mode).
10.2. Function of setting threshold value for automatic balance operation
mode (F..-LO)
This function is connected with above function of balance automatic operation. It allows
for entering the threshold value, below each the balance indication must be to allow for
next measurement in automatic mode. By default value 0.5*MIN is used, and using LO
function is not required..
Operations sequence:
1. Press key MENU of balance.
2. During displaying F..-1 press ENTER.
3. Enter threshold value and press ENTER.

TECH ICAL A D MOTIO DOCUME TATIO
___________________________________________________________________________________________________
15
10.3. Function of comparing with threshold values (F..-tHr)
This function allows to compare the weighing result with two, previously programmed
values: upper and lower threshold. The comparison result is signalled on the display and
by acoustic signal, as well as with use of control outputs.
If the weighing result is:
- lower than the lower threshold (but higher than balance minimum) – balance does not
signal and activates output threshold I (option)
- between thresholds – the balance signals OK and activates output threshold II (option),
- higher than the upper threshold – the balance signals MAX and activates output zero
(option).
If the option of weighing with threshold signalling is selected, no activities connected
with the balance are required for this function to work. If the option is not selected,
balance operator may activate the function.
Operations sequence during function activation by the operator:
1. Press key MENU.
2. After displaying F..-tHr press ENTER.
3. The display shows in sequence:
F..-0 – function deactivation,
F..-1 – function activation,
F..-2 – checking of previously entered thresholds values.
4. After displaying F..-1 press ENTER.
5. The following options are displayed:
SEt-0 – weighing with signalling of thresholds exceeding,
SEt-1 - entering of lower threshold value (not used, when weighing with thresholds
signalling is selected in the computer),
SEt-2 - entering of higher threshold value (as above),
SEt-3 – zero signalization threshold setting.
6. Using ENTER key select option SEt-1.
7. Set the lower threshold value on the display, using the numeric keys and pressing
ENTER in the end.
8. Using ENTER key select option SEt-2 and enter the upper threshold value (as above).
9. Using ENTER key select option SEt-0. It activates balance operation with
simultaneous signalling of thresholds exceeding.
10. To finish the function operation press F key, then select F..-tHr and F..-0.
Checking of entered threshold values:
1. Press key MENU.
2. After displaying F..-tHr press ENTER.
The display shows in sequence: F..-0, F..-1 and F..-2.

TECH ICAL A D MOTIO DOCUME TATIO
___________________________________________________________________________________________________
16
3. After displaying F..-2 press ENTER. The display shows value of the lower threshold,
and after pressing PRINT key – upper threshold. If the printer is connected, threshold
values are printed.
4. Press PRINT key to switch to weighing.
Caution:
After the balance turning on both thresholds are set to maximum values. During upper
threshold setting pay attention, so its value is not lo er than the lo er threshold.
After the balance turning off and on this function remains unchanged.
10.4. Automatic zeroing function (AUt)
The function activation will cause automatic maintaining of zero indications, when the
pan is not loaded, or when zero reading has been achieved by pressing "T/
ON
" key.
Operations sequence:
1. Press key MENU.
2. When the display shows F..-AUT press ENTER.
3. The display will show F..-0 and F..-1.
4. Press ENTER when the display shows F..-1. On the left side "AUT" message will be
displayed.
5.
To deactivate automatic tare setting function, perform section 1-3, selecting F..-0.
10.5.
Pieces counting function (F..-LIC)
That function allows for counting the identical details, e.g. screws or transistors,
contained in the weighed batch, and may be used as auxiliary function, operating outside
of computer system.
The measurement takes place in two phases:
- first phase – calculation of single detail weight upon the basis of sample of specified
number of pieces
- second phase – counting the details in the weighed batch.
It is recommended, that the single detail weight is higher than the balance reading
graduation, and the weight of sample, used in the first phase is higher than 100 of
reading graduations.
Operations sequence:
1. Tare the balance pressing T.
2. Put the sample of 5, 10, 20, 50, 100, 200, or 500 pieces on the pan (pay attention so the
total load is not lower than 100 reading graduations).
3. Press MENU key to recall functions menu. During displaying F...-LIC press ENTER.
4. The display will show F..-0 and F..-1. Press ENTER when the display shows F..-1.
5. When next to F.. the number of pieces on the pan will be displayed (- -, 5, 10, 20, 50,
100, 200 or 500) press ENTER.

TECH ICAL A D MOTIO DOCUME TATIO
___________________________________________________________________________________________________
17
The balance displays number of pieces on the pan, which is indicated by pcs sign on the
display right side.
6. emove the sample, seta tare with ENTER key and put the portion of pieces on the pan.
Balance indication should be read as the pieces number.
7. To finish the function operation press MENU key, then, using ENTER key, select
F..-LIC and F..-0.
Notes:
The “Err-3” message means, that no sample is put on the pan. The same message is
displayed, hen the single detail eight is lo er than one reading graduation (user may
calculate the pieces, keeping in mind, that it increases the error).
Selecting “--“ in step 5 recalls previously entered value.
During pieces counting key T/
ON
performs its normal function.
After changing details type repeat the procedure from step 1.
11. Maintenance and small repairs
1. Keep the balance clean.
2. Take care, as during the operation some impurities may block the balance sensor and
bumpers. In case of contamination remove the impurities without disturbing sensor and
bumpers setting.
3. In case of improper operation due to short power failure, switch off the balance by
unplugging the power cable from the socket, and plug it again after a few seconds.
4. The message “Err-b”, displayed after switching on the unloaded balance, indicates the
balance sensor mechanical damage. In such case contact the nearest authorized service
point.
5. All repairs must be performed by the authorized personnel.
6. To perform the repair contact the nearest service point. List of authorized service point is
included in the warranty.

TECH ICAL A D MOTIO DOCUME TATIO
___________________________________________________________________________________________________
18
Declaration of Conformity
We:
AXIS Spółka z o.o. 80-125 Gdańsk, ul.Kartuska 375B declare with full responsibility, that the balance
meters:
SE-11, SE-12 i SE-22
marked with CE mark are consistent with:
1. Standard PN-EN 61010-1:2004 Safety requirements for electrical equipment for measurement,
control and laboratory use. General requirements harmonized with the directive 73/23/EEC
(Low Voltage Directive),
2. Standard PN-EN 55022:2000 Electromagnetic compatibility (EMC) – Information technology
equipment – adio disturbance characteristics – Limits and methods of measurement, and PN-
IEC 61000-4-3 Electromagnetic compatibility (EMC) – Part 4-3: Testing and measurement
techniques - adio-frequency electromagnetic field immunity test, harmonized with
89/336/EEC directive (electromagnetic compatibility).
Additional information
- Conformity evaluation for the Council Directive 73/23/EWG and 89/336/EWG were carried out
by Laboratorium Badawcze Oddziału Instytutu Elektrotechniki w Gdańsku, accredited to PCA.
- The inspection certificate no. PL CB 1 issued by Central Office Of Measures in Warsaw
(Notified Unit No. 1440).
Standard PN-EN 45501 Specification for metrological aspects of non-automatic weighing instruments, issued in
December 1999, harmonized with the 90/384/EEC council directive, changed by 93/68/EEC council directive).
Gdańsk, 3.03.2005 year
Authorized by the Director AXIS Sp. z o.o.:
Production manager mgr inż. Jan Kończak
_________________
Signature
Table of contents
Other Axis Scale manuals
Axis
Axis BD/TL Series User manual

Axis
Axis AGN50 User manual

Axis
Axis BTA 2100 User manual

Axis
Axis B0.6D User manual

Axis
Axis AKA/G Series User manual

Axis
Axis BTA Series User manual

Axis
Axis BA/LG Series User manual

Axis
Axis ATN Series User manual

Axis
Axis 4BA/T Series User manual
Axis
Axis ATA1200 User manual

Axis
Axis 4BA SERIES User manual

Axis
Axis 4BA SERIES User manual

Axis
Axis AKA120 User manual

Axis
Axis B/E Series User manual

Axis
Axis B/P Series User manual

Axis
Axis BD2P User manual

Axis
Axis ACG Series User manual

Axis
Axis BDM Series User manual

Axis
Axis AGN/C Series User manual
Axis
Axis BD/S series User manual