4
WS9750IT-manual 0-0-0-K
EMOS spol. s r. o.
Maximum/Minimum outdoor temperature
MAX / MIN values are shown in G window.
Temperature resolution is 0,5 °C.
Hold + button for 2 seconds to erase data.
Setting clock
Hold down the SET/CH button for 2 seconds to enter setting mode.
Set up: °C/°F temperature unit – 12 or 24 hour format – hour - minute.
Values are set by + button, step forward by SET/CH button.
Weather girl icon (Temperature condition icons)
One of the 5 different temperature icons (featured by weather girl with different clothing) is displayed in the centre of LCD,
which indicates the different temperature conditions due to the current outdoor temperature (temperature value detected by
the 1st outdoor transmitter):
Mounting
POSITIONING THE WEATHER STATION:
The Weather Station has been designed to be hung onto wall or free standing.
Wall mounting:
Choose a sheltered place. Avoid direct rain and sunshine. Before wall mounting, please check that the outdoor temperature
values can be received from the desired locations.
1. Fix a screw (not supplied) into the desired wall, leaving the head extended out the by about 5mm.
2. Remove the stand from the Weather Station by pulling it away from the base and hang the station onto the screw. Make
sure that it locks into place before releasing.
Free standing
With the stand, the Weather Station can be placed onto any flat surface.
POSITIONING THE TEMPERATURE TRANSMITTER:
The transmitter is supplied with a holder that may be attached to a wall with the two screws supplied. The transmitter can also
be positioned on a flat surface by securing the stand to the bottom to the transmitter.
Wall mounting:
1. Secure the bracket onto a desired wall using the screws and plastic anchors.
2. Clip the transmitter onto the bracket.
Note: Before permanently fixing the transmitter wall base, place all units in the desired locations to check that the outdoor
temperature reading is receivable. In event that the signal is not received, relocate the transmitters or move them slightly as
this may help the signal reception.
Care and Maintance
The product is designed to serve you for years when you will handle it in the correct way. Here are some tips for correct handling:
• Do not expose the product to direct sunshine, extremely cold, damp conditions or sudden temperature changes (it may
reduce the accuracy of measuring).
• Do not place the product on places which may be subject of vibration or shaking. It may damage the product.
• Do not expose the product to excessive pressure, shock, dust, high temperature or dampness – they may damage the
product, its batteries or its plastic parts.
• Do not correct or modify the internal circuit, it may be damaged. As a result of that warranty would be terminated. The
product should be repaired by a qualified person only.
• To clean the product use only damped soft cloth. Do not use any solvent; it may damage the plastic parts.
• Do not attempt to service any parts of this product. Refer all servicing to the store where the product had been bought.
• Keep out of reach of children. This product is not a toy.
• Remove flat batteries. Leakage could damage the product. Use only new batteries of the correct type. Make sure you put
them according to right polarity.
• Do not dispose of battery in fire, do not disassemble or short circuit.
Disclaimer: The main unit and the RF remote sensor contain no user-serviceable parts. The information in this document has
been viewed and is believed to be accurate.
However, neither the manufacturer nor its affiliates assume any responsibility for inaccuracies, errors or omissions that
may be contained herein. In no event will the manufacturer or its affiliates be liable for direct, indirect, special, incidental or
consequential damages arisen by using this product or resulting from any defect/omission in this document, even if advised
of the possibility of such damages.
The manufacturer and its affiliates reserve the right to make improvements or changes to this document and the products
21
Lista de icoane şi butoane
Termometru (staţia de bază)
A ora actuală G – temperatura exterioară MAX/MIN
B baterie slabă în staţia de bază H numărul senzorului
C temperatura interioară I temperatura exterioară
D icoana temperaturii J Breşă de ancorare pe perete
E baterie slabă în senzor K Locaşul bateriilor
F icoana receptării semnalului din senzor L Stativ
Butoane
Apăsarea butonului Ţinerea butonului (2 secunde)
SET/CH Comutarea între senzori Reglarea termometrului
+ Reglarea valorilor Ştergerea valorilor MAX/MIN
Senzor fără fir
M Stativ N Locaşul bateriilor
Punerea în funcţiune
1. La punerea în funcţiune introduceţi mai întâi bateriile (2 x AA) în senzorul fără fir, iar apoi în termometru (2 x AA). Respectaţi
polaritatea corectă – altfel s-ar putea ajunge la deterioararea termometrului sau a senzorului! Folosiţi doar baterii alcaline
de acelaşi tip, nu folosiţi baterii reîncărcabile. Bateriile slabe sunt indicate de icoana pe ecran. Lichidaţi bateriile uzate
menajând mediul ambiant, în conformitate cu legislaţia ţării.
. Aşezaţi alături termometrul şi senzorul. Termometrul detectează semnalul din senzor în 2 minute. Dacă nu este detectat
semnalul din senzor, scoateţi bateriile din senzor şi termometru şi repetaţi procedeul.
3. După afişarea temperaturii primului senzor, introduceţi bateriile în al doilea senzor. După afişarea temperaturii din al
doilea senzor (apare icoana 2), introduceţi bateriile în al treilea (apare icoana 3). Introduceţi bateriile în ceilalţi senzori în
10 secunde de la înregistrarea senzorului precedent. Datele din toţi senzori se pot asfişa treptat prin apăsarea butonului
SET/CH. Dacă veţi folosi doar un singur senzor, nu va fi afişat numărul canalului.
Temperatura interioară şi exterioară
Temperatura interioară se afişează în câmpul C.
Temperatura exterioară se afişează în câmpul I.
Afişarea valorilor de temperatură maxime/minime măsurate
Valorie maxime şi minime exterioare măsurate se afişează în câmpul G. Distingerea temperaturii afişate este de 0,5 °C.
Ţinând butonul + se pot şterge valorile salvate.
Reglarea orei şi a unităţilor de temperatură
Apăsaţi lung butonul SET/CH. Cu butonul SET/CH setaţi treptat unităţile de temperatură °C/°F, formatul orar 12/24, ora,
minuta. Valorile solicitate le setaţi cu butonul +.
Afişarea grafică a temperaturii exterioare măsurate
Termometrul afişează icoana fetei în 5 variante de îmbrăcăminte, conform temperaturii actuale măsurate de senzorul 1.
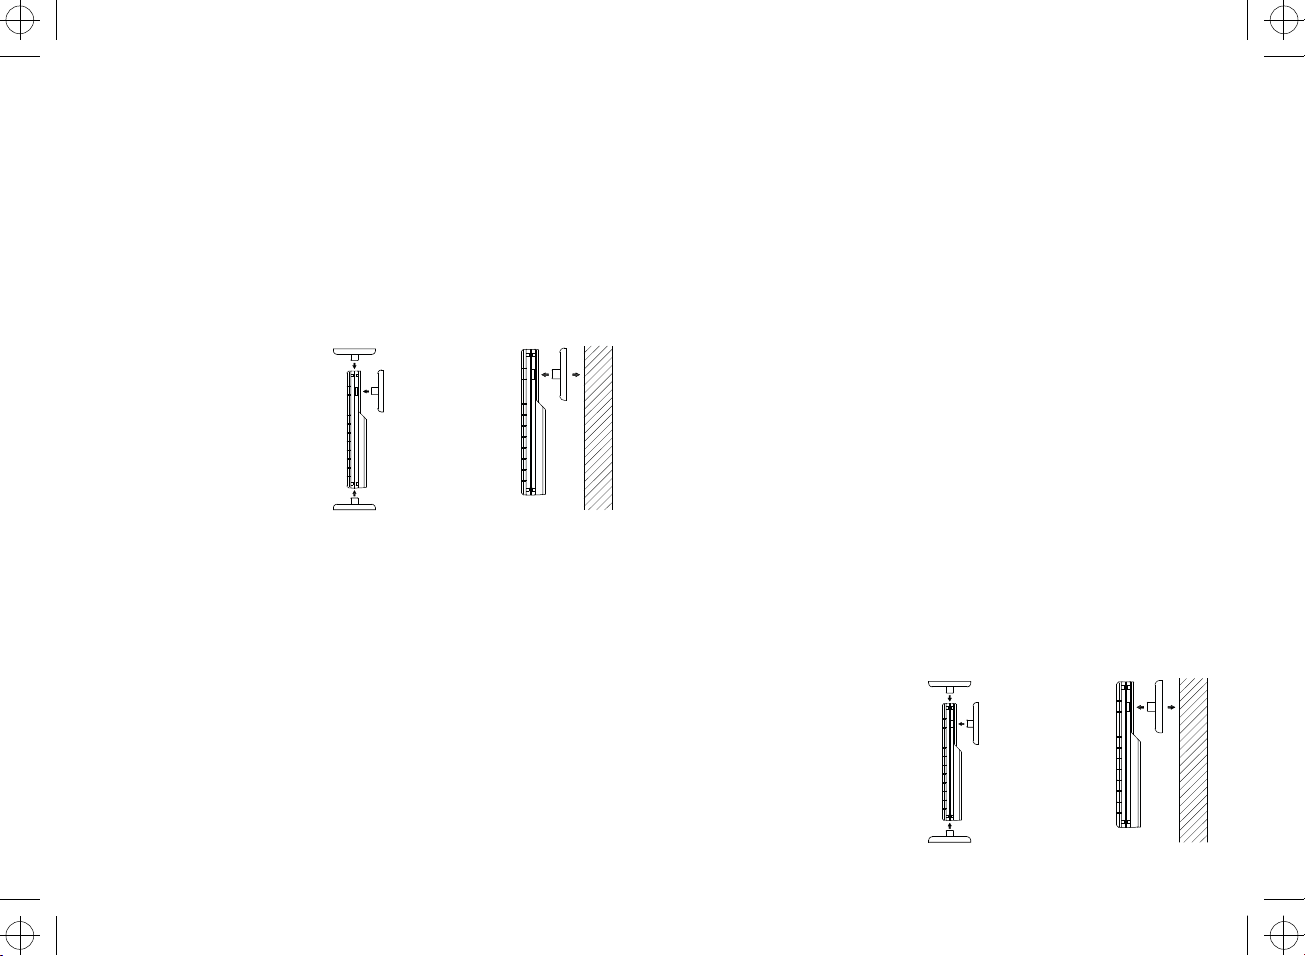
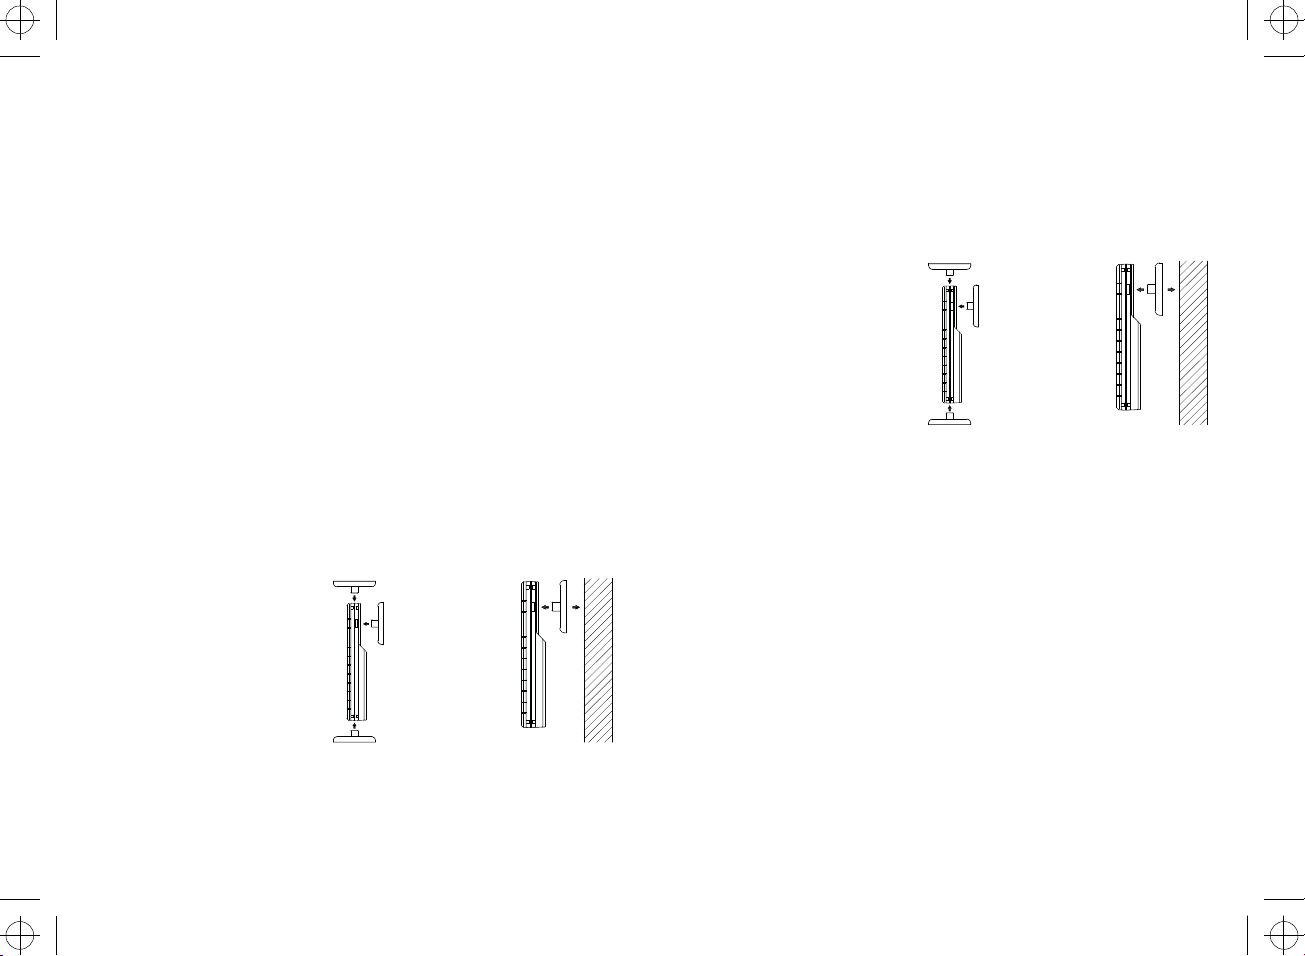
Amplasarea termometrului şi a senzorului – montajul pe perete
Termometrul se poate amplasa pe un suport, de ex. pe masă, sau se poate ancora pe perete.
1. Pentru amplasarea pe perete alegeţi un loc propice, fără acţiunea directă a luminii solare sau a căldurii. Înainte de fixarea
pe perete controlaţi, dacă va fi recepţie de calitate între termometru şi senzor.
2. Folosiţi un şurub potrivit cu cap depăşind cca 5 mm (nu este inclus).
3. Înlăturaţi stativul de pe termometru şi atârnaţi termometrul astfel, să fie bine asigurat împotriva căderii.
Senzorul este livrat cu un stativ universal şi suport de perete. Fixaţi suportul pe perete cu cele două şuruburi anexate.
4. Asiguraţi-vă că senzorul comunică corect cu termometru, înainte de a-l fixa pe perete. Dacă termometrul nu recepţionează
semnalul, apropiaţi mai mult senzorul de termometru.
5. Fixaţi suportul pe perete.
6. Fixaţi suportul în senzorul fără fir conform imaginii. Aveţi grijă să nu puneţi senzorul invers. În poziţie inversă ar putea să
pătrundă apa în senzor prin găurile de aerisire din partea de jos şi s-ar putea ajunge la deterioararea electronicii senzorului.