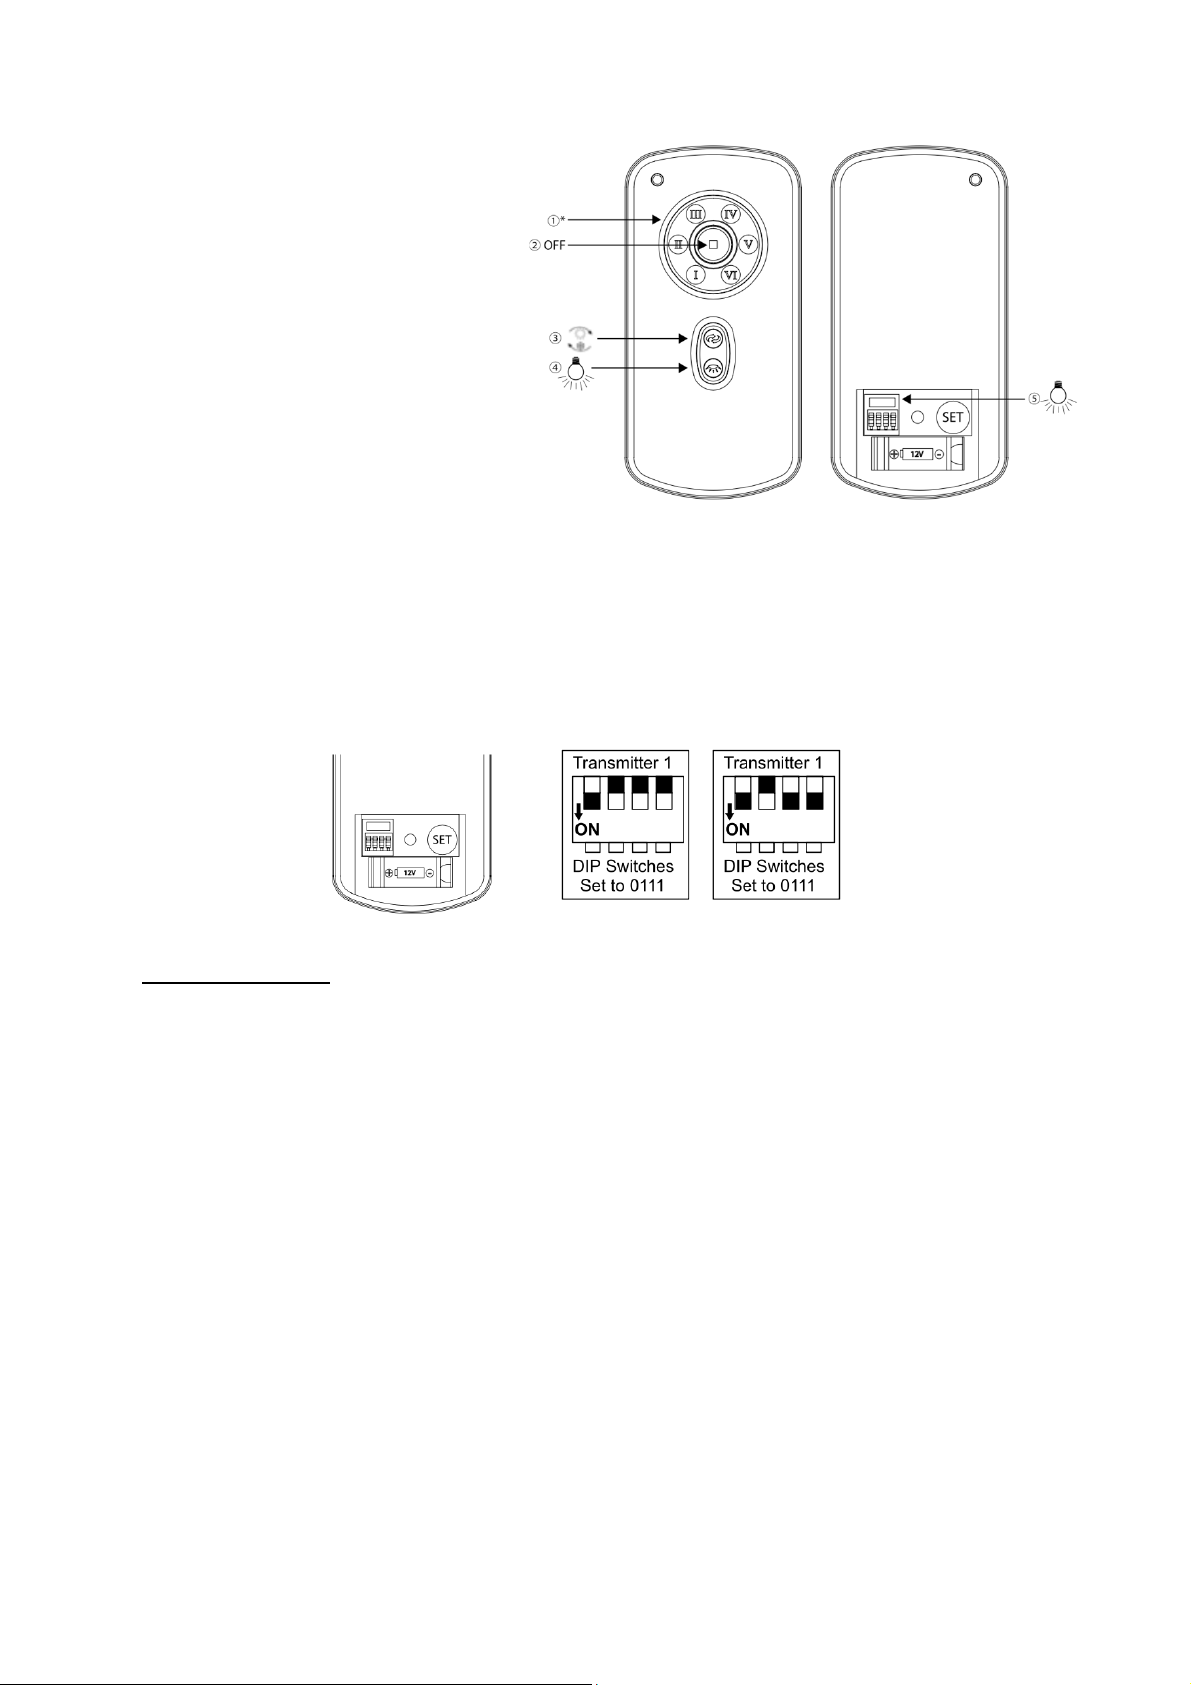
- Slide the cover of battery compartment of transmitter to access the DIP switches. This will be
transmitter 1.
- Change the position of the DIP switches in the remote transmitter 1, so that it will be different to
transmitter 2
- Install the 12VDC battery in the compartment. Please make sure the polarity of battery is correct.
- Turn on the power to receiver 1. Keep the power OFF to receiver 2. (Each ceiling fan must have its
own isolation switch, so that only the Ceiling fan that needs to be paired with the transmitter will be
ON).
- Press and hold the SET button of transmitter 1 for 6 seconds within 60 seconds of switching the
power to the receiver of Ceiling Fan 1.
- Now the transmitter should be paired with the receiver of ceiling fan 1. Turn ON/OFF or change the
speed of ceiling fan 1 by the transmitter to check the operation.
Setting DC Ceiling fan 2:
- Turn off both ceiling fans 1 and 2 via the mains supply to the receiver.
- Slide the cover of battery compartment of transmitter to access the DIP switches. This will be
transmitter 2.
- Change the position of the DIP switches in the remote transmitter 2, so that it will be different to
transmitter 1.
- Install the 12VDC battery in the compartment. Please make sure the polarity of the battery is
correct.
- Turn on the power to receiver 2. Keep the power OFF to receiver 1. (Each ceiling fan must have its
own isolation switch, so that only the Ceiling fan that needs to be paired with the transmitter will be
ON).
- Press and hold the SET button of transmitter 2 for 6 seconds within 60 seconds of switching the
power to the receiver of Ceiling Fan 2.
- Now the transmitter should be paired with the receiver of ceiling fan 2. Turn ON/OFF or change the
speed of the ceiling fan 2 by the transmitter to check operation.
GUARANTEE:
In Compliance with the General Law 23/2003. CONDITIONS
A. This product guarantee will be accepted by Lorefar S.L. provided that it is correctly completed and
send to Lorefar S.L. (note that the light bulbs are not part of the ceiling fan)
B. Lorefar S.L.’s liability is limited to the repair of articles which have defects of a technical nature.
C. If any of the parts of your ceiling fan other than the motor’s is faulty at any moment within the 2
year period since its purchase date due to an original material defect or manufacturing, the replacing
of the part or its repair will be completely free of charge
D. If the motor of your ceiling fan is faulty at any moment within the 15 years since its purchase due
to an original material defect or manufacturing, the replacing
of the part or its repair (we Hill consider it) completely free of charge for the part
or the work carried out, as long as the part is delivered in its original package together with all its
accessories.
E. All repairs which are carried out under the present guarantee should be performed by an
establishment which is duly authorized by Lorefar S.L. The fan will have to be delivered together with
the purchase receipt or any other document proving its purchase. The fan will have to be delivered
properly packaged and under no circumstance will Lorefar SL be held responsible for the damages
suffered during transport
F. This guarantee does not cover defects, poor working or breakdowns of the fan which have their
origin in repairs carried out by staff other than that authorized by Lorefar SL, in the use of non
authorized accessories or spare parts, in the bad operation of the fan, in its bad installation or in any
other type of incidence that is not an original defect of the fan