Installation Instructions
Page 2 of 3Moto
Wall Dependent Media
Table Assembly
(continued)
Step 3
Attach Worksurface
to Wall Panel
Notice To Installers: Failure to comply with installation instructions will compromise the safety, durability and performance of this product, which may risk injury to the user of this
product and/or diminish the product life cycle. Jasper Group assumes no liability in these instances.
jsifurniture.com
800.457.4511
812.482.3204 O
812.482.1548 F
225 Clay Street / PO Box 231
Jasper, Indiana 47546
Form No. INST-MT007
12/13/16
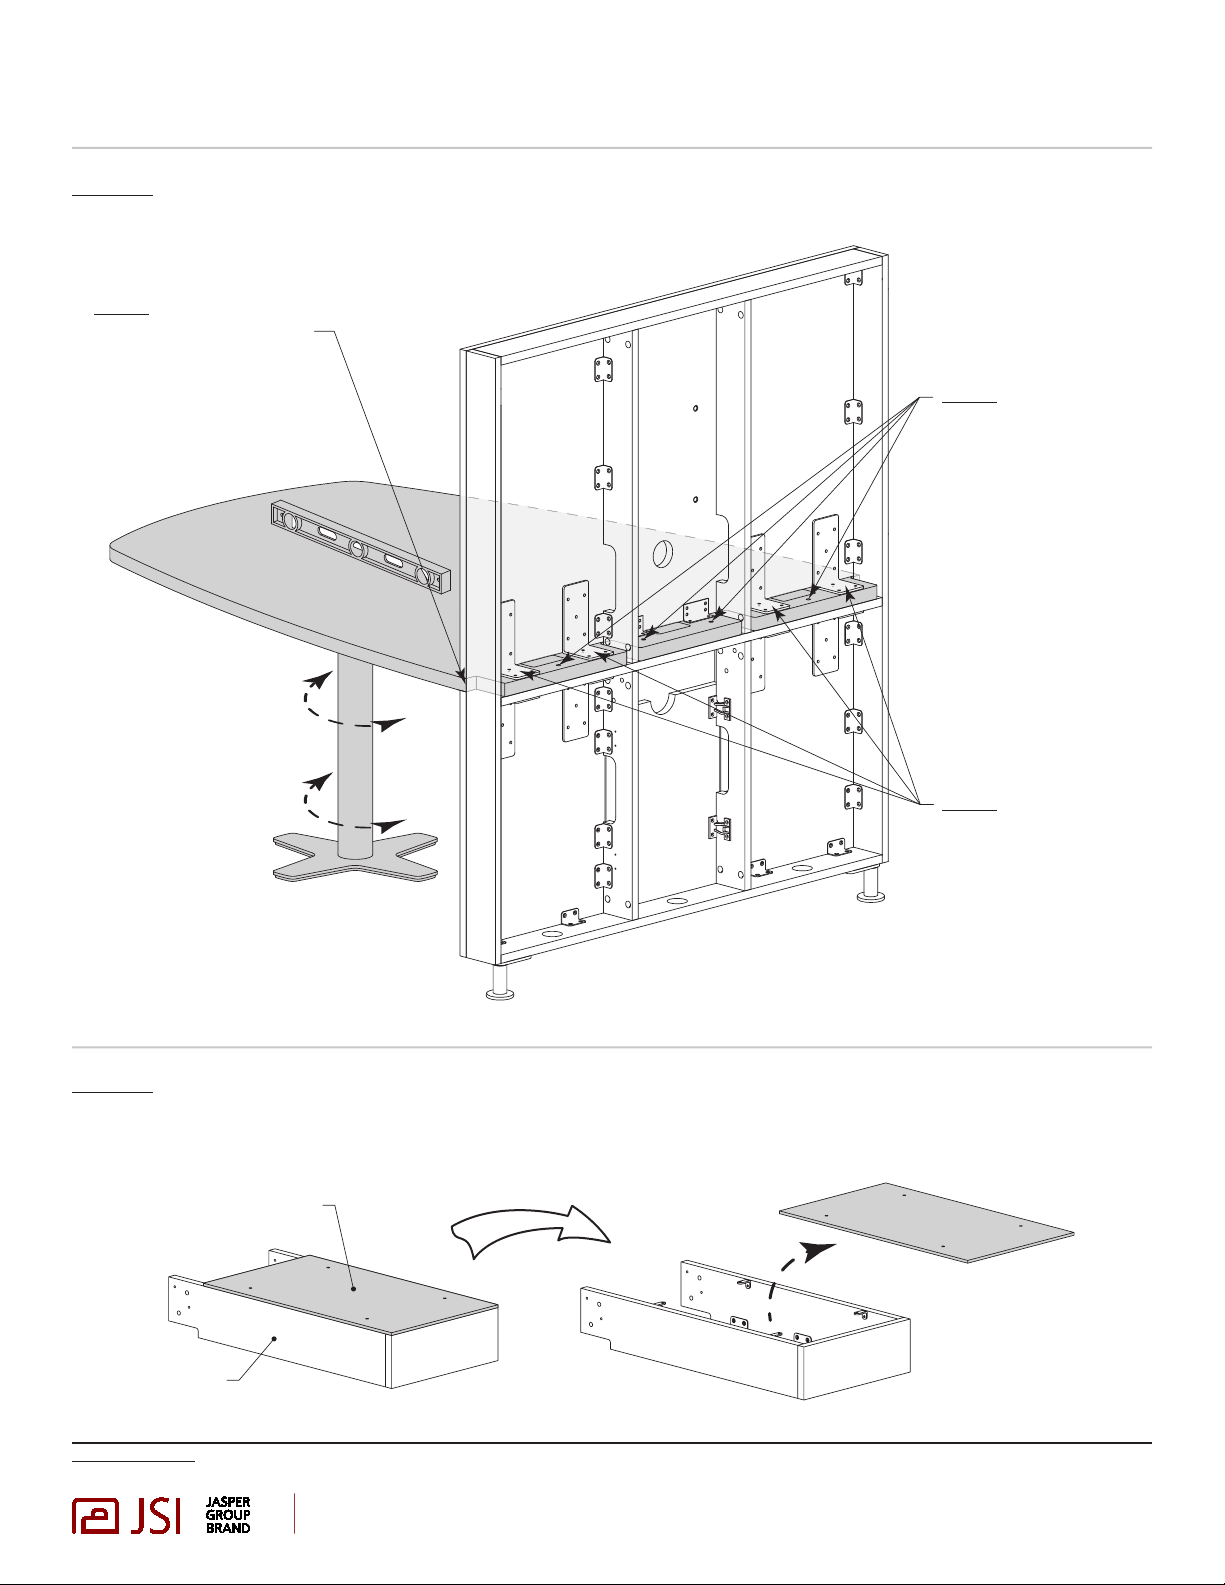
Step 3b
Secure the worksurface
to the wall panel with (4)
5/16-18 x 3”hex bolts.
Slip washer onto bolt and
insert the bolts through the
holes in top of worksur-
face. Bolt should pass
through worksurface and
cross rail in wall panel.
Use flat washer, lock
washer and 5/16”hex nut
to tighten.
Step 3c
After bolts are secured
through the work surface
and wall panel center
support, use (12) #8 x 2”
flat head wood screws to
attach (4) metal L-brackets
to top of worksurface.
Step 3a
Slide rear edge of top into the
opening in the wall panel as-
sembly. Outside corner of the
worksurface should butt tight
against the vertical end panel
of the wall panel assembly.
The support base height
should be adjusted so that
the worksurface is 90°
degrees to the panel. Rotate
the base column clockwise
to raise or counter-clockwise
to lower the surface.
Back Panel Doors have been
removed from drawing for clarity
Bottom
Panel
Trough
Step 4
Remove Bottom Panel From Trough
• Remove bottom panel from trough by unscrew
(4) thumb screws.


