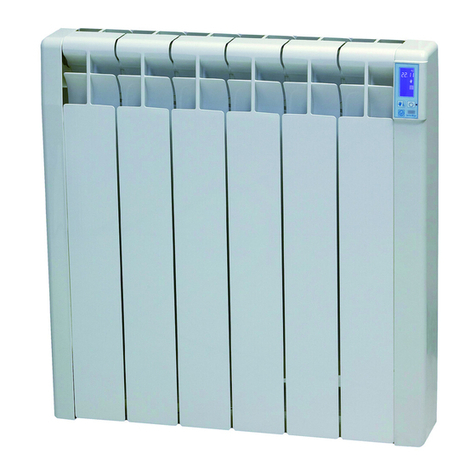
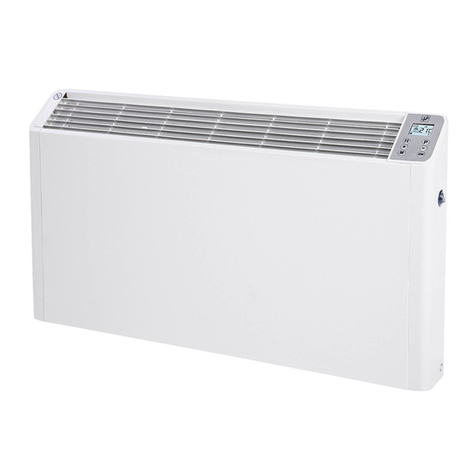
S&P 3MCN User manual

Instrucciones de montaje y uso
User instructions
Notice d’utilisation
Instruçôes de uso
3MCN
5MCN
7MCN
9MCN
11MCN
13MCN


Fig. 1 Fig. 2
Fig. 3 Fig. 4
Rendimiento térmico 75%
Thermal efficiency 75%
Efficacité thermique 75%
Eficiência térmica 75%
Rendimiento térmico 85%
Efficacité thermique 85%
Eficiência térmica 85%
Rendimiento térmico 100%
Thermal efficiency 100%
Efficacité thermique 100%
Eficiência térmica 100%
Rendimiento térmico 95%
Thermal efficiency 95%
Efficacité thermique 95%
Eficiência térmica 95%
3
Thermal efficiency 85%

Fig. 5 Fig. 6
Fig. 7 - 8
A-ZONA DE PROTECCION
PROTECION ZONE
VOLUME DE PROTECCION
ZONA DO PROTECION
B-ZONA DE PROHIBICION
FORBIDDEN ZONE
VOLUME D’INTERDICTION
ZONA PROIBIDA
A
B
1mm
4

Fig. 9 Fig. 10
5
120
170
560
510
POS. A POS. B POS. C
40
Fig. 11
SISTEMA ADICIONAL SYSTÈME ADDITIONNEL
DE SEGURIDAD DE SÉCURITÉ
Opcionalmente se puede instalar un De façon optionnelle on peut instaler un
sistema de seguridad système de securité anti-décrochement,
antidescolgamiento, útil en caso de utile en cas de tentative de manipulation
intento de manipulación por niños. par des enfants.
ADDITIONAL SECURITY SYSTEM
As an option, an additional security
system can be settled to prevent the Opcionalmente se pode instalar um
heater from being took down by sistema de seguridade anti-pemdolare,
children. útil em caso de tentativa de manipulação
por crianças.
SISTEMA ADICIONAL
DE SEGURIDADE

RADIADORES ELECTRICOS DE INSTALACIÓN
Serie " MCN "
MANUAL DE INSTALACIÓN. INSTRUCCIONES DE USO
(ESPAÑOL)
GENERALIDADES
Le agradecemos la confianza que nos ha depositado mediante la compra de este
radiador. Usted ha adquirido un producto de calidad que ha sido totalmente
fabricado según las reglas técnicas de seguridad reconocidas y conformes a las
normas de la CE.
Están dotados de un programador electrónico que permite seleccionar los
diferentes modos de funcionamiento, también permite visualizar la temperatura
de la habitación y la temperatura deseada por el usuario. Esta gama incorpora
un termostato electrónico de gran precisión, que permite alcanzar la temperatura
prefijada rápidamente, con el consiguiente ahorro de energía.
La serie "MCN" está compuesta por los siguientes modelos:
Sírvase leer atentamente estas instrucciones, antes de la instalación y puesta
en funcionamiento, posteriormente guárdelas para futuras referencias.
Rogamos compruebe el perfecto estado y funcionamiento del aparato al
desembalarlo ya que cualquier defecto de origen que presente, está amparado
por la garantía S&P.
MODELO Nº
ELEMENTOS
POTENCIA
(w)
DIMENSIONES
LxAxH(mm)
3 MCN
5 MCN
7 MCN
9 MCN
11 MCN
13 MCN
3
5
7
9
11
330
550
770
990
1210
13 1430
350x110x590
510x110x590
670x110x590
830 x 110 x590
990x110x590
1150 x 110 x 590
6

INSTRUCCIONES IMPORTANTES
ADVERTENCIAS DE SEGURIDAD E INSTALACIÓN.
- El radiador no debe estar situado justamente debajo o encima de una base
de toma de corriente.
-Para instalación en cuartos de baño, el aparato deberá colocarse de manera
que los dispositivos de mando no puedan ser tocados por una persona que
esté en la bañera o ducha. El radiador debe instalarse fuera del volumen de
protección.
-No cubrir el radiador con objetos o prendas que impidan la libre circulación
del aire. Si se cubre existe el riesgo de sobrecalentamiento.
-No usar el radiador para secar ropa por riesgo de incendio.
-No manipular el aparato con las manos mojadas.
-Siempre que realice la limpieza, tenga la precaución de desconectar el aparato.
-La instalación deberá ser realizada por un técnico electricista.
IMPORTANTE: ESTOS APARATOS DEBERÁN CONECTARSE A UNA
TOMA DE TIERRA.
- Los medios de desconexión que deben ser incorporados en la instalación fija,
para su desconexión omnipolar de la red de alimentación, deben presentar
una separación de contactos de al menos 3 mm en todos los polos.
- Al instalar el radiador asegurar que el cable de conexión nunca pueda estar
en contacto con una zona caliente del aparato.
- Si el cable de alimentación está dañado, debe ser substituido en uno de
nuestros talleres de reparación o por personal similar cualificado con el fin de
evitar un peligro.
- Este aparato se ha llenado con una cantidad de aceite especial exactamente
determinada. En caso de aparecer fugas, solamente nuestros talleres oficiales
de reparación pueden efectuar el arreglo del mismo.
INSTALACIÓN
Estos radiadores son aparatos para instalación fija, para su montaje se seguirán
las instrucciones que se detallan a continuación:
Emplazamiento
El radiador se ubicará en las zonas más próximas a los muros exteriores, los
rendimientos de emisión térmica quedan reflejados en el diagrama gráfico de
UBICACIÓN DE RADIADORES ( fig. 1 - 5 ).
En los cuartos de baño, los radiadores deben instalarse fuera de los volúmenes
de prohibición y de protección ( fig. 6 )
7

Montaje en la pared
El radiador se fijará a la pared mediante dos soportes especialmente diseñados,
utilizando los tacos de PVC y los tornillos que se adjuntan en el embalaje. Debe
asegurarse que los tacos y los tornillos suministrados, sean adecuados para el
tipo de pared donde se va a colocar el radiador.
Para instalar seguir la secuencia siguiente:
1- Marque la situación de los dos agujeros superiores, según el dibujo de la fig.
7 respetando las distancias de la tabla que se adjunta (altura dimensión 590
mm y anchura dimensión "A"). Utilice un soporte radiador como plantilla para
marcar la situación de los dos agujeros inferiores. Efectúe los taladros y
coloque los tacos.
2- Fijar los dos soportes del radiador en la pared con los 4 tornillos (fig.8).
Conexión eléctrica
- Son radiadores de instalación fija. En su conexionado a la red, deberán tenerse
En cuenta las directrices que se indican en el Reglamento de Baja Tensión
y las propias de cada país.
- La conexión fija deberá efectuarla un profesional.
- Estos aparatos deberán conectarse a una toma de tierra.
- Debe preverse en la instalación un interrUptor magneto térmico u otro dispositivo
de desconexión omnipolar que interrumpa todas las líneas de alimentación
del aparato, este dispositivo debe presentar una separación de contactos de
al menos 3 mm en todos los polos.
- Al instalar el radiador asegurar que el cable de conexión nunca pueda estar
En contacto con una zona caliente del aparato.
- Proceder al conexionado a la red, comprobando que la tensión de la misma
coincida con la indicada en la placa de características del aparato.
DESCRIPCIÓN MANDOS DE CONTROL (fig. 11)
1- Programador / termostato electrónico
2- Teclas de control
3- Luz piloto.
4- Interruptor Paro / Marcha.
DESCRIPCIÓN DE LOS MODOS DE FUNCIONAMIENTO
Modo STOP
8
3- Abrir los 4 pestillos de seguridad del radiador, inclinar levemente el aparato
para facilitar el anclaje en los soportes y colgar el radiador (fig.9).
4- Cerrar los 4 pestillos de seguridad para evitar que se descuelgue el aparato
(Fig.10). Su aparato puede contener estos ganchos de seguridad, o el soporte
adicional antidescolgamiento (véanse Fig. A, B, C) o ambos.

Modo CONFORT : Con este modo de funcionamiento, el radiador
mantiene la temperatura ambiente prefijada
previamente por el usuario.
Modo REDUCCIÓN : Cuando el usuario selecciona este modo de
funcionamiento, automáticamente el radiador mantiene
la temperatura de la habitación 3.5ºC por debajo de
la prefijada en el modo confort, por ejemplo; si usted
previamente a programado la temperatura de confort
a 23ºC y selecciona el modo de reducción, el aparato
mantendrá la temperatura ha 19.5ºC sin la necesidad
de volver a modificar la temperatura de confort.
Modo ANTI-HIELO : Este modo se utiliza para evitar que la temperatura
de la estancia disminuya por debajo de 5ºC, evitando
posibles riegos de heladas, que puedan dañar
tuberías, bombas de agua... etc.
Modo HORARIO : Sirve para entrar los diferentes tiempos de conexión
y desconexión. Para poder programar este modo de
funcionamiento, es totalmente indispensable disponer
de la centralita programadora modelo C-440 de S&P.
AJUSTE DE PARAMETROS
Una vez ubicado el radiador y conectado a la red eléctrica, ponga el interruptor
de marcha / paro en la posición I, seguidamente todos los símbolos de la pantalla
permanecerán un tiempo encendidos, para poder verificar que la pantalla funciona
correctamente.
Ajuste modo STOP
: Pulse la tecla MODE, seguidamente uno de los
símbolos de modo de programación, empezará
a parpadear, a través de las teclas + ó - busque
el símbolo SOL, una vez este aparezca
parpadeando, pulse de nuevo la tecla mode,
seguidamente y mediante las teclas + ó -
introduzca la temperatura deseada, para finalizar
la operación vuelva a pulsar la tecla MODE.
Aj. modo REDUCCIÓN : Pulse la tecla MODE, mediante las teclas + ó -
busque el símbolo LUNA, seguidamente pulse dos
veces la tecla MODE.
9

Aj. modo ANTI-HIELO : Pulse la tecla MODE, mediante las teclas + ó -
busque el símbolo ANTI-HIELO, seguidamente
pulse dos veces la tecla MODE.
Aj. modo HORARIO : Este modo solo se puede programar mediante
la centralita programadora modelo C-440 de S&P.
NOTA: Cuando ningún símbolo esté parpadeando, la temperatura que figura
en la pantalla es la temperatura ambiental de la habitación. Si el usuario
quiere consultar la temperatura de confort programada, solo tiene que
pulsar una vez MODE. La pantalla vuelve a su estado inicial
automáticamente.
ADVERTENCIA DE SEGURIDAD
Si se produjera alguna perturbación, el sistema de desconexión por
sobrecalentamiento desconecta el aparato, si esto ocurre siga las siguientes
indicaciones:
- Parar el aparato accionando el interruptor paro / marcha a posición ( 0 ).
- Deje enfriar el aparato durante unos 30 minutos.
- Revise que no haya ninguna obstrucción que impida la libre circulación del
aire.
- Vuelva ha accionar el interruptor paro / marcha a posición marcha ( I ).
- Si después de estos controles el aparato no funciona normalmente, le rogamos
que acuda a la amplia red de Servicios Oficiales S&P.
MANTENIMIENTO
Los radiadores S&P no necesitan de un especial mantenimiento, sin embargo,
le aconsejamos:
1- Mantener los pasos de aire limpios.
2- Quitar periódicamente el polvo del radiador con un paño suave seco.
3 -En caso de mucha suciedad limpiar con un paño suave impregnado con un
detergente no abrasivo.
4- Limpiar siempre en frío y evite usar disolventes.
ASISTENCIA TÉCNICA
La extensa red de Servicios Oficiales S&P garantiza una adecuada asistencia
técnica.
En caso de observar alguna anomalía en el aparato, rogamos se ponga en
contacto con cualquiera de los servicios oficiales mencionados, donde será
debidamente atendido.
Cualquier manipulación efectuada por personas ajenas a los Servicios Oficiales
S&P nos obligaría a cancelar su garantía.
S&P se reserva el derecho a modificaciones del producto sin previo aviso.
10

WALL MOUNTED ELECTRIC RADIATORS
MCN Series
OPERATING AND INSTALLATION INSTRUCTIONS
(ENGLISH)
GENERAL
The MCN range of oil filled electric radiators have been manufactured to the
rigorous standards of production and quality control in accordance with CE
recognised International Quality Standards. All components have been checked
and tested at the end of the manufacturing process.
They are provided with an electronic programmer, which allows the selection of
the different modes of function. It also allows the visualisation of the temperature
of the room and of the temperature required by the user. This range incorporates
a high precision electronic thermostat, allowing the pre-selected temperature to
be quickly reached, thereby saving energy
The MCN Series of oil filled radiators consists of the following models:
Before commencing any installation or electrical connections we would advise
that the following instructions are carefully read and then kept in an accessible
area for future reference.
All S&P appliances are supplied in perfect condition and operation. However
found to be defective the unit should be returned to the supplier in accordance
with the terms of the S&P guarantee.
3 MCN
5 MCN
7 MCN
9 MCN
11 MCN
13 MCN 13 1150 x 110 x 590
MODEL Nº OF.
ELEMENTS
POWER
(w)
DIMENSIONS
LxWxH(mm)
3
5
7
9
11
330
550
770
990
1210
1430
350x110x590
510x110x590
670x110x590
830 x 110 x590
990x110x590
11

INSTALLATION INSTRUCTIONS
IMPORTANT SAFETY NOTES
- The radiator Must Not be sited directly under an electrical connection socket
or similar device.
- When installing the radiator in a bathroom or similar environment with water
present; the radiator Must Not be mounted where the switches or thermostat
controls could come into contact with water, i.e. near bathtubs, wash basins
or swimming pools. The radiator must be installed outside the recommended
water spray area.
- Do Not cover the appliance with objects which would restrict dispersal of
radiated heat. Any object covering the appliance could cause the appliance
to overheat.
- Do Not use the radiator for the drying of clothes to prevent problematic operation
and the possibility of the appliance overheating.
- Do Not operate the radiator control switches with wet hands.
- Before any cleaning or maintenance the appliance must be disconnected and
isolated from the mains electrical supply.
IMPORTANT: THE MCN SERIES OF OIL FILLED RADIATORS MUST BE
CONNECTED TO AN ELECTRICAL SUPPLY WITH AN EARTH
/ GROUND CONNECTION.
- The radiator must be connected to the electrical supply in conjunction with
a suitably rated electrically isolating double pole switch. All switches used
must have a minimum contact clearance of at least 3mm.
- When the installing the appliance ensure that the electrical supply cable is
routed away from areas of heat or other heating products.
- If the electrical supply cable is found to be damaged then the appliance Must
Not Be Used. The appliance must be returned to an authorised supplier or
repaired by a suitably qualified person.
- All MCN radiators incorporate a special high thermally conductive oil filled to
exactly the correct quantity and specification. If the radiator is found to be
damaged and subsequently leaking the oil, then the appliance must be returned
to an official S&P dealer or supplier for repair.
INSTALLATION
The MCN range of oil filled electric radiators have been specifically designed to
be mounted in a fixed position on a wall or similar structure. For trouble free
operation the radiator should be installed in accordance with the following steps:
Location of the Radiator
The mounting position and configuration of the radiator will ultimately effect the
efficiency of operation and heat dispersal. To ensure the optimum operational
efficiency of the radiator; we would recommend that the appliance is installed
in accordance with either of Fig's 1-5, dependant upon the intended mounting
configuration.
12

The radiator must be installed out of any potential "water spray" area as defined
in Fig. (6)
Mounting on the wall.
The radiator should be fixed to the wall using the special support brackets, raw-
plus and screws provided in the product box. However before installation, we
would recommend that the raw-plugs and screws are checked, and if required
changed, to suit the type of wall on which the radiator is to be fitted.
Installation sequence:
1. With reference to the width dimension "A" and the minimum height dimension
(590 mm) form the floor, as in Fig. (7); mark the position of the two fixing holes
for both wall brackets as shown. Ensure that both brackets are level.
2. Drill the corresponding holes and fix the two separate wall brackets to the wall
with the raw-plugs and screws provided, Fig.(8).
3. On the radiator, open the four security catches located on the back fascia.
Then whilst lifting the radiator at an angle, Fig.(9), engage the wall brackets
onto the back of the radiator mounting positions.
4. Close the security catches to locate and fix the radiator in position, Fig.(10).
Electrical Connection
- The MCN electric radiators are intended for permanent fixed connection to
the electrical supply. All installation work must be carried out in accordance
with all relevant local, national and international installation and safety standards
pertaining to the country of installation.
- Any electrical connections or installations must be made by a suitable qualified
professional person(s).
- This product must be connected to an earth / ground connection point.
- The radiator must be connected to the electrical supply in conjunction with
a suitably rated electrically isolating double pole switch. All switches used
must have a minimum contact clearance of at least 3mm.
- When the installing the appliance ensure that the electrical supply cable is
routed away from areas on the product which radiate heat.
- Before making any connection ensure that the voltage and frequency detailed
on the radiator electrical data label corresponds to that of the general electrical
supply of the country of installation.
DESCRIPTION OF THE CONTROL PANEL (fig.11)
1- Programmer/electronic thermostat
2- Control keys
3- Pilot light
4- On/Off switch
13
The radiator can be available with this security catches, or the additional
security hook, or both ones.

DESCRIPTION OF THE MODES OF FUNCTION
STOP Mode
: In this mode, the radiator maintains the ambient
temperature pre-selected by the user
REDUCTION Mode : When the user selects this mode of function, the
radiator automatically maintains the room temperature
3.5 degrees below the temperature selected in comfort
mode. For example; if you have previously
programmed the comfort temperature to 23ºC, and
you select the reduction mode, the apparatus will
maintain a temperature of 19.5ºC without having to
alter the comfort mode temperature.
ANTI-FREEZE Mode : This mode is used to avoid the temperature in the
room falling below 5ºC, thereby avoiding possible
damage from frozen pipes, water pumps, etc.
TIMER Mode : This serves to program the different connection and
disconnection times. In order to programme this
function, the S&P programming console C-440 is
necessary
ADJUSTING PARAMETERS
Once the radiator is positioned and connected to the mains, put the On/Off switch
into position I, and all the symbols on the screen will light up for a short time, to
ensure that the screen is working correctly.
Adj. STOP mode
: Press the MODE key, and one of the symbols
will begín to flash. Using the + or - keys, select the
SUN symbol. Once this is flashing, push the MODE
key once again and using the + or - keys, select the
desired temperature. To finalise the operation, push
the MODE key once again.
Adj. REDUCTION mode : Press the MODE key, and using the + or -
keys, select the MOON symbol, then press the MODE
key twice.
14

Adj. ANTI-FREEZE mode : Press the MODE key, and using the + or
- keys, select the ANTI-FREEZE symbol, then press
the MODE key twice.
Adj. TIMER mode : This mode may only be programmed using the
S&P programming console, model C-440.
NOTE: When no symbol is flashing, the temperature shown on the screen is the
ambient temperature in the room. If the user wishes to consult the
programmed COMFORT temperature, they only have to press the MODE
key. The screen will return to its initial state immediately.
SAFETY WARNING
If any anomaly is produced, the overheating disconnection system will operate
and disconnect the apparatus. If this should happen, carry out the following steps:
- Stop the apparatus by turning the On/Off switch to position (0).
- Leave the apparatus to cool down for some 30 minutes.
- Ensure that there is nothing obstructing the free circulation of air.
- Return the On/Off switch to position (I).
- If having followed these steps the controls do not function correctly, please
contact the S&P Official Service Dept.
- If having followed these steps the controls do not function correctly, please
contact the S&P Official Service Dept.
MAINTENANCE
The S&P MN Series of electric radiators Do Not Require any special maintenance.
1. IMPORTANT: BEFORE CONDUCTING ANY MAINTENANCE OR
CLEANING ENSURE THAT THE APPLIANCE IS
DISCONNECTED FROM THE MAINS ELECTRICAL SUPPLY.
2. To ensure long and trouble free operation we recommend that the radiator is
periodically checked to ensure there is no build up of dust and debris.
3. To clean the appliance simply wipe with a damp (not wet) cloth.
4. Always clean the product when it is cold. Do Not Use any abrasives or solvents.
TECHNICAL ASSISTANCE SERVICE
All MN electric oil filled radiators are offered with a comprehensive guarantee and
Technical Assistance Service. If the appliance is found to be defective within the
period of guarantee then first please contact the Technical Assistance Service,
then only if necessary return to an authorised S&P supplier.
IMPORTANT: Any repairs or work carried out on the appliance by person(s)
not authorised by S&P will invalidate the guarantee.
Soler & Palau reserves the right to alter specifications without prior notice.
15

RADIATEURS ELECTRIQUES MURAUX
Série " MCN "
NOTICE DE MONTAGE ET D'UTILISATION
(FRANÇAIS)
GENERALITES
Lire attentivement ces instructions avant de mettre en marche votre installation.
Elles vous apporteront des informations importantes pour votre sécurité et sur
l'utilisation correcte de celui-ci. Par la suite, les conserver pour d'éventuelles
consultations.
Les radiateurs électriques muraux MCN sont conformes aux normes de sécurité
européennes CE.
Ils sont équipes d'un programmateur électronique permettant de sélectionner les
différents modes de fonctionnement. Il est aussi possible de visualiser la température
de la pièce ainsi que la température de consigne désirée par l'utilisateur. Un
thermostat électronique de grande précision permet d'atteindre rapidement la
température de consigne et de limiter ainsi la consommation électrique.
La série "MCN" est composée des modèles suivants:
Vérifier, dès l'avoir sorti de son emballage, le parfait état de l'appareil ainsi que
son fonctionnement, étant donné que tout éventuel défaut d'origine est couvert
par la garantie S&P.
3 MCN
5 MCN
7 MCN
9 MCN
11 MCN
13 MCN 13 1150 x 110 x 590
MODELE Nbre.
ELEMENTS
PUISSANCE
(w)
DIMENSIONS
LxPxH(mm)
3
5
7
9
11
330
550
770
990
1210
1430
350x110x590
510x110x590
670x110x590
830 x 110 x590
990x110x590
16

INSTRUCTIONS IMPORTANTES
RECOMMANDATIONS DE SECURITE ET D'INSTALLATION.
- Ne pas installer les radiateurs directement en dessous d'une prise de courant..
- En cas d'installation en salle de bains, elle devra être réalisée en accord avec
les règlements nationaux concernant les installations électriques et devra être
réalisée par un professionnel qualifié.
- Ne pas couvrir les radiateurs avec du linge ou des objets pouvant gêner à la
libre circulation de l'air. En couvrant les radiateurs on risque de les faire
surchauffer.
- Ne pas utiliser les radiateurs pour sécher du linge. Il y a risque d'incendie.
- Ne pas manipuler l'appareil avec les mains mouillées ou humides.
- Chaque fois que l'on doit nettoyer le radiateur prendre soin de le déconnecter
préalablement du réseau électrique.
IMPORTANT: LES RADIATEURS DOIVENT RACCORDES A LA TERRE.
- Pour le raccordement au réseau, la ligne électrique devra prévoir un système
de coupure omnipolaire ayant une ouverture entre contacts d'au moins 3 mm,
bien dimensionné par rapport à la charge et conforme aux normes en vigueurs.
- Au moment de l'installation, s'assurer que le câble électrique d'alimentation
ne pourra pas venir en contact avec une zone chaude de l'appareil
- Si le câble souple d'alimentation est abîmé, il doit être remplacé uniquement
par un câble ayant les mêmes caractéristiques et par un professionnel
compétent.
- Cet appareil a été rempli avec une quantité d'huile spéciale déterminée avec
précision. En cas de fuite, se mettre en contact avec le distributeur sans jamais
essayer de réparer par soi-même.
INSTALLATION
Ces appareils sont prévus pour être fixés contre un mur, pour leur montage suivre
les instructions suivantes:
Emplacement
Le radiateur se placera de préférence contre un mur extérieur. Les rendements
thermiques varient en fonction du type d'installation : voir graphiques de la fig.1
à la fig.5.
En cas d'installation en salle de bains, elle devra être réalisée en accord avec
les règlements nationaux concernant les installations électriques et devra être
réalisée par un professionnel qualifié.
Montage sur le mur
Le radiateur se fixera au mur avec les supports fournis avec l'appareil. Les vis
et les chevilles sont également fournies, néanmoins, vérifier que les chevilles
sont adéquates pour le type de mur sur lequel sera fixé le radiateur.
17

Pour installation suivre les instructions suivantes dans l'ordre :
1- Marquer l'emplacement des deux trous des vis du support comme indiqué fig.
7-8 en respectant les distances données dans le tableau. Utiliser un support
comme gabarit pour marquer les trous. Percer le mur et enfoncer les chevilles.
2- Fixer les deux supports au mur avec les vis fournies (fig.8).
3- Ouvrir les 4 crochets de sécurité, incliner légèrement le radiateur pour faciliter
son positionnement sur les supports et le placer. (fig.9).
4- Fermer les 4 crochets de sécurité pour maintenir le radiateur bien en place.
(fig.10).
Raccordement électrique
- Pour le raccordement au réseau respecter les normes et règlements en
vigueur dans chaque pays.
- Le raccordement devra être réalisé par un professionnel qualifié.
- Vérifier que la tension du réseau correspond à celle indiquée sur la plaque
caractéristique du radiateur.
- Ces appareils doivent être raccordés à la terre.
- Dans l'installation doit être monté un interrupteur magnéto-thermique ou autre
dispositif de coupure omnipolaire ayant une ouverture entre contacts d'au
moins 3 mm, bien dimensionné par rapport à la charge et conforme aux
normes en vigueurs.
- Au moment de l'installation, s'assurer que le câble électrique d'alimentation
ne pourra pas venir en contact avec une zone chaude de l'appareil
DESCRIPTION DES COMMANDES (fig. 11)
1- Programmateur / thermostat électronique
2- Touches de contrôle
3- Témoin lumineux.
4- Interrupteur Marche/Arrêt.
DESCRIPTION DES MODES DE FONCTIONNEMENT
Mode STOP
: Avec ce mode de fonctionnement, le radiateur
maintient la température ambiante fixée par l'utilisateur
Mode ECONOMIE : Quand l'utilisateur sélectionne ce mode de
fonctionnement radiateur maintient automatiquement
la température ambiante dans la pièce à une
température inférieure de 3,5ºC à la température de
confort. Par exemple, si la température en mode
confort est de 23ºC, en mode économie le radiateur
maintiendra la pièce à une température de 19,5ºC
sans qu'il soit nécessaire de modifier la température
18

de confort.
Mode ANTIGEL : Ce mode s'utilise pour empêcher que la température
du local passe en dessous de 5ºC afin d'éviter un
possible risque de gelée pouvant endommager des
tuyauteries, des pompes à eau, etc...
Mode HORAIRE : S'utilise pour entrer les différents horaires de connexion
et déconnexion. Pour ce mode de fonctionnement il
est indispensable de posséder de la centrale de
programmation C-440 de S&P.
REGLAGES DES PARAMETRES
Une fois le radiateur placé et raccordé, mettre l'interrupteur Marche/Arrêt sur la
position I. Tous les symboles de l'écran s'allument un certain temps afin de vérifier
que l'écran fonctionne correctement.
Rég. mode STOP
: Appuyer sur la touche MODE. Un des symboles
du mode de fonctionnement se mettra à clignoter. A
l'aide des touches + ou - rechercher le symbole
SOLEIL. Une fois sélectionné appuyer de nouveau
sur la touche MODE et avec les touches + ou -
introduire la température désirée. Pour finir, appuyer
encore une fois sur la touche MODE.
Rég. mode ECONOMIE : Appuyer sur la touche MODE. Un des symboles
du mode de fonctionnement se mettra à clignoter. A
l'aide des touches + ou - rechercher le symbole LUNE.
Une fois sélectionné appuyer deux fois sur la touche
MODE.
Rég. mode ANTIGEL : Appuyer sur la touche MODE. Un des symboles
du mode de fonctionnement se mettra à clignoter. A
l'aide des touches + ou - rechercher le symbole
ANTIGEL. Une fois sélectionné appuyer deux fois sur
la touche MODE.
Rég. mode HORAIRE : Ce mode ne peut être programmé qu'avec la
centrale de programmation C-440 de S&P.
NOTE: Quand aucun symbole ne clignote, la température affichée sur l'écran est
la température ambiante de la pièce. Si l'utilisateur veut consulter la
température de confort préréglée il suffit d'appuyer une fois sur la touche
MODE.
L'écran revient dans son état initial automatiquement.
19

CONSIGNES DE SECURITE
En cas de problème de surchauffe l'appareil est pourvu d'un système de sécurité
le déconnectant automatiquement. Si cela se produit, suivre les indications
suivantes:
- Mettre l'interrupteur Marche/Arrêt sur la position 0.
- Laisser refroidir le radiateur pendant environ 30 minutes.
- Vérifier que rien ne vient obstruer la libre circulation de l'air.
- Remettre l'interrupteur Marche/Arrêt sur la position I.
- Si après ces contrôles l'appareil ne fonctionne pas correctement se mettre en
contact avec son distributeur.
ENTRETIEN
Les radiateurs S&P ne nécessitent pas d'entretien particulier, néanmoins il est
conseillé de:
1- Maintenir les passages d'air propres.
2- D'enlever régulièrement la poussière se déposant sur le radiateur avec un
chiffon doux et sec.
3- En cas d'encrassement plus important nettoyer avec un chiffon doux imprégné
d'un détergent non abrasif.
4- Toujours nettoyer quand le radiateur est froid. Ne pas utiliser de solvant.
ASSISTENCE TECHNIQUE
En cas de fonctionnement anormal de l'appareil se mettre en contact avec votre
distributeur.
Ne pas démonter l'appareil, toute manipulation effectuée par une personne non
autorisée, entraînerait l'annulation de la garantie S&P.
(S&P se réserve le droit de modifier ces instructions sans préavis).
20
This manual suits for next models
5
Table of contents
Languages:
Other S&P Heater manuals
Popular Heater manuals by other brands

Consort
Consort Claudgen HE6137E Installation & Control Guide

Toyotomi
Toyotomi KS-47B Operation and maintenance instructions

Timberk
Timberk TOR 21.1206 BC instruction manual

ARDES
ARDES AR4C06 Instructions for use

DeLonghi
DeLonghi TRD50615ECA Instructions for use

Goldair
Goldair Select GSOC117T operating instructions