Sharp AR-FR11 User manual

This manual contains very important
information. Please keep the manual in a
safe place where it will not be lost.
ENGLISH
Data Security Kit
OPERATION MANUAL
ESPAÑOL
Daten-Sicherheitspaket
BEDIENUNGSHANDBUCH
FRANÇAIS
Kit de seguridad de datos
MANUAL DE INSTRUCCIONES
DEUTSCH
Kit de sécurité des données
MANUEL D'UTILISATION
ITALIANO
Kit di protezione dei dati
MANUALE DI ISTRUZIONI
NEDERLANDS
Gegevensbeveiligingskit
GEBRUIKSAANWIJZING
SVENSKA
Datasäkerhetsprogram
ANVÄNDARMANUAL
NORSK
Datasikkerhetsprogram
GENERELL BRUKERVEILEDNING
SUOMI
Tietoturvan ylläpitotyökalut
KÄYTTÖOPAS
DANSK
Data sikkerhedssæt
BETJENINGSVEJLEDNING
ÅËËÇÍÉÊÇ
POLSKI
MAGYAR
ČEŠTINA
AR-FR11
APPLICATION
NUMBER
MACHINE SERIAL
NUMBER
PRODUCT KEY
AR-FR11
This Class B digital apparatus complies with
Canadian ICES-003.
Get appareil numérique de la classe B est
conforme à la norme NMB-003 du Canada.
ページ 年月日 木曜日 午後時分

1
ENGLISH
Contents
Introduction ...........................................................................................................................1
When the data security kit is installed...................................................................................3
●Restrictions on tandem copying and tandem printing......................................................3
●Security settings in the Web page...................................................................................4
●About transfer of copied data to the machine..................................................................4
KEY OPERATOR PROGRAMS............................................................................................5
●KEY OPERATOR PROGRAM LIST................................................................................5
●Using the key operator programs ....................................................................................5
●SECURITY SETTINGS ...................................................................................................5
●PRODUCT KEY.............................................................................................................11
Introduction
The AR-FR11 adds a security function to the SHARP Digital Laser Copier/Printer. When the
copy function, printer function, network scanner function, or fax function of a SHARP Digital
Laser Copier/Printer with the security function is used, the image data that is generated for
the job is encrypted, and when the job is finished, the encrypted data is immediately erased
from memory and the hard disk.
Note:
To ensure that the data security function of the machine provides maximum security,
observe the following:
●The key operator plays an important role in maintaining security. Exercise appropriate
care in selecting the person that will assume the job of key operator.
●Be sure to change the key operator code immediately each time a new person takes over
as key operator.
●Change the key operator code on a regular basis (at least once every 60 days).
●During the procedure for changing the key operator code, the current key operator code
and new key operator code appear in the display. Be sure to complete the procedure
promptly.
●Do not select a number for the key operator code that can be easily guessed.
●The key operator programs are very important for security management. The
administrator of the machine should inform users that they are not to access the key
operator programs without permission.
●If the administrator and users of the machine are to be out of the office, security measures
such as locking the machine should be taken to prevent unauthorized access.
●The customer bears responsibility for control of copies of documents made on the
machine and faxes received on the machine.
●Even when the data security kit is installed, note that fax data in the public memory box
used by the facsimile expansion kit (AR-FX8) can be read.
ページ 4年月4日 水曜日 午前時7分

2
ENGLISH
■
■■
■Backing up and clearing data stored with the document filing
function
When the data security kit is installed, data previously stored in the machine with the
document filing function is cleared. For this reason, any data that you need to keep is
copied to a computer before the data security kit is installed, and then returned to the
machine after installation and clearing of the previous data. (This work is normally
performed by a service technician at the time of installation.)
NOTE
Some of the procedures for operating the machine change when the data security kit is
installed. The "OPERATION MANUAL (for general information and copier operation)"
explains the procedures for operating the machine when the data security kit is not
installed. This manual explains the changes to those procedures when the data security
kit is installed.
ページ 4年月4日 水曜日 午前時7分

3
ENGLISH
When the data security kit is installed
When the data security kit is installed, the following icon
appears on the touch panel. Touch the icon ( ) to view
information on the data security kit version.
When the data security kit is installed, data remaining in the machine is automatically
erased after each copy and fax job.
When data clearing begins, the following message appears for 6 seconds*.
* The duration of the message display can
be changed with the key operator
program, "MESSAGE TIME SETTING".
(See page 10 of the key operator's guide.)
Restrictions on tandem copying and tandem printing
Tandem copying and tandem printing operate as shown below based on the configuration
of the server machine and client machine (whether or not the data security kit is installed).
NOTE
If the machine power is turned off while image data is being cleared from the hard disk
drive or before jobs are finished, the data may not be completely erased. If you do not
wish to leave partially cleared data when the power is turned off, it is recommended that
you use the key operator program, "CLEAR ALL MEMORY" (page 6 of this manual), to
complete data clearing before turning off the power.
Client machine
Data security kit: Yes Data security kit: No
Server
machine
Data security kit:
Yes
The tandem function can
be used. Data is cleared
from both the server and
client machines.
The tandem function
cannot be used.
Data security kit:
No
The tandem function can
be used. Data is cleared
from the client machine.
The regular tandem
function can be used.
DATA IS BEING CLEARED.
ページ 4年月4日 水曜日 午前時7分

4
ENGLISH
Security settings in the Web page
When the machine is used as a network printer and the Pull Print function is used, the data
security kit enables authentication of the user by means of a "USER NAME" and
"PASSWORD". (The Pull Print function allows a file on a previously stored FTP server to be
printed directly from the operation panel of the machine without using the printer driver; see
"Directly printing a file on an FTP server" on page 3-9 of the "OPERATION MANUAL (for
printer)".)
User authentication is enabled by selecting the "Enable User Authentication" checkbox in
the machine's Web page for Pull Print function settings. (This checkbox appears when the
data security kit is installed, and is initially selected (a checkmark appears)).
System requirements and the procedure for accessing the Web page containing this
checkbox are explained in "REMOTE OPERATION VIA A NETWORK" on page 3-2 of the
"OPERATION MANUAL (for printer)". The checkbox appears in the screen shown in step 2
of "■ Storing an FTP server" on page 3-9 of the "OPERATION MANUAL (for printer)".
■
■■
■Procedure for directly printing a file on an FTP server when
user authentication is enabled
Your user name and password must be entered following selection of the FTP server
that contains the file to be printed from the touch panel of the machine.
When the FTP server is selected in step 3 of "■ Printing a file on an FTP server from the
operation panel of the machine" on page 3-9 of the "OPERATION MANUAL (for
printer)", a screen will appear prompting you to enter your user name and password for
the FTP server.
Press the [USER NAME] key to enter your user name and the [PASSWORD] key to
enter your password. A letter entry screen will appear in each case. When you have
finished entering your user name/password, touch the [OK] key.
After entering your user name and password, continue from step 4 on page 3-10 of the
"OPERATION MANUAL (for printer)".
About transfer of copied data to the machine
When the data security kit is installed and the Web page is used to copy data stored with
the document filing function to a computer (page 3-4 of the "OPERATION MANUAL (for
printer)"), the copied data can only be transferred back to the original machine from which it
was copied; it cannot be transferred to another machine even if the machine conditions are
the same.
USER NAME
PASSWORD
OKCANCEL
ENTER THE USER NAME AND PASSWORD FOR FTP SERVER.
ページ 4年月4日 水曜日 午前時7分

5
ENGLISH
KEY OPERATOR PROGRAMS
This section explains key operator programs that are related to the security function.
The following explanations assume that the machine has the printer, fax, and network
scanner functions.
KEY OPERATOR PROGRAM LIST
Using the key operator programs
Follow the procedure on pages 4 and 5 of the key operator's guide to configure the settings
in the key operator programs.
For explanations of each of the settings, see the following pages.
SECURITY SETTINGS
When the data security kit is installed, the [SECURITY SETTINGS] key is added to the key
operator program menu screen. Touch this key to display the security settings menu.
The security settings menu consists of several screens.
Touch the key in the lower right corner of the screen to move to the next screen.
Program name
Page
Program name
Page
SECURITY SETTINGS
CLEAR ALL MEMORY 6 DISABLING OF DOCUMENT
FILING 9
CLEAR DOCUMENT FILING DATA
7 DISABLING OF LIST PRINT 9
CLEAR ALL DATA IN JOB STATUS
JOBS COMPLETED LIST
7DISABLING OF PRINT JOBS
OTHER THAN PRINT HOLD JOB 10
CLEAR ADDRESS BOOK DATA/
IMAGE SEND REGISTERED DATA
7
JOB STATUS JOBS COMPLETED
LIST DISPLAY SETTINGS
10
NUMBER OF TIMES DATA
CLEAR IS REPEATED 8DISABLING OF FAX NUMBER
DIRECT ENTRY 10
POWER UP AUTO CLEAR 8 DISABLING RESEND KEY 11
NUMBER OF TIMES POWER UP
AUTO CLEAR PROGRAM IS
REPEATED
8
PRODUCT KEY
NUMBER OF TIMES AUTO
CLEAR AT JOB END PROGRAM
IS REPEATED
9 DATA SECURITY KIT 11
CLEAR ALL MEMORY
CLEAR DOCUMENT FILING DATA
CLEAR ALL DATA IN JOB STATUS
JOBS COMPLETED LIST
OK
KEY OPERATOR PROGRAMS
SECURITY SETTINGS
ページ 4年月4日 水曜日 午前時7分

6
ENGLISH
CLEAR ALL MEMORY
This program is used to manually clear all data from the memory and hard disk of the
machine.
Note, however, that the following types of data are not cleared with this program. Use the
"CLEAR ADDRESS BOOK DATA/IMAGE SEND REGISTERED DATA" program on page 7
to clear the following types of data
●INDIVIDUAL/GROUP/PROGRAM/RELAY BROADCAST MEMORY BOX*
●SENDER CONTROL LIST
●POLLING MEMORY/CONFIDENTIAL MEMORY BOX*
●SENDER DATA
●ALLOW/REJECT RECEPTION SETTING DATA (INCLUDING POLLING PASSCODE
NUMBER)
* The image data stored in the MEMORY BOX is cleared to execute this program (CLEAR
ALL MEMORY).
Touch the [CLEAR ALL MEMORY] key. The following screen appears asking you to confirm
your selection ("YES" or "NO").
[Clear screen 1]
●To return to the "SECURITY SETTINGS"
menu screen, touch the [NO] key.
●To clear all memory, press the [YES] key.
"PLEASE WAIT." appears, and then the
following screen is displayed.
[Clear screen 2]
●While data clearing takes place, the
percentage of data cleared and the number of
repetitions is displayed.
●When the data has been cleared, the power
briefly turns off and then automatically turns
on again.
NOTE
We recommend that you execute this program before turning off the power.
If you wish to cancel after data clearing has begun
Touch the [CANCEL] key. The key operator code entry screen will appear. Enter the key
operator code with the numeric keys. Data clearing will stop as soon as the correct key
operator code is entered. Note that any data cleared prior to entry of the key operator
code will not be restored (this data is lost).
CLEAR ALL MEMORY.
(EXCLUSIVE OF ADDRESS BOOK/
SENDER LIST DATA.)
NO YES
100%50%0%
(50.0%) (1/1 time)
CLEARING ALL MEMORY. AUTO REBOOT IS
IMPLEMENTED AFTER CLEARING.
CANCEL
ページ 4年月4日 水曜日 午前時7分

7
ENGLISH
CLEAR DOCUMENT FILING DATA
This program is used to clear data stored using the document filing function. Data set as
"PROTECT" or "CONFIDENTIAL" is also cleared. To clear data stored in the main folder
and custom folder with the "FILE" function, select the "FILE DATA (INCLUDING
PROTECTED/CONFIDENTIAL FILES)" checkbox*. To clear data saved using "QUICK
FILE", select the "QUICK FILE DATA (INCLUDING PROTECTED FILES)" checkbox. After
selecting the data to be cleared, touch the [CLEAR] key. A message asking you to confirm
the clear ("YES" or "NO") will appear. Touch the [YES] key to begin clearing the selected
data. During clearing, progress will be shown as a percentage together with the number of
repetitions. When data clearing is finished, the power of the machine will turn off temporarily
and then turn on again automatically.
*Can only be selected when the printer function is enabled.
CLEAR ALL DATA IN JOB STATUS JOBS COMPLETED LIST
This program is used to clear all data (printer user names, fax/image send destinations,
received fax sender information) that appears in the JOBS COMPLETED list in the job
status screen (page 1-14 of the "OPERATION MANUAL (for general information and copier
operation)"). To clear the data, touch the [CLEAR ALL DATA IN JOB STATUS JOBS
COMPLETED LIST] key. A message asking you to confirm the clear ("YES" or "NO") will
appear. Touch the [YES] key to begin clearing the selected data. During clearing, progress
will be shown as a percentage together with the number of repetitions. When data clearing
is finished, the power of the machine will turn off temporarily and then turn on again
automatically.
CLEAR ADDRESS BOOK DATA/IMAGE SEND REGISTERED DATA
This program is used to clear the items indicated below, which cannot be cleared or
initialized using the "CLEAR ALL MEMORY" program (page 6) or "RESTORE FACTORY
DEFAULTS" (page 13 of the "KEY OPERATOR'S GUIDE") program.
●INDIVIDUAL/GROUP/PROGRAM/RELAY BROADCAST MEMORY BOX*1
●SENDER CONTROL LIST*2
●POLLING MEMORY/CONFIDENTIAL MEMORY BOX*3
●SENDER DATA*1
●ALLOW/REJECT RECEPTION SETTING DATA (INCLUDING POLLING PASSCODE
NUMBER)*1
*1. Can only be selected when the fax or network scanner function is enabled.
*2. Can only be selected when E-mail is enabled.
*3. Can only be selected when the fax function is enabled.
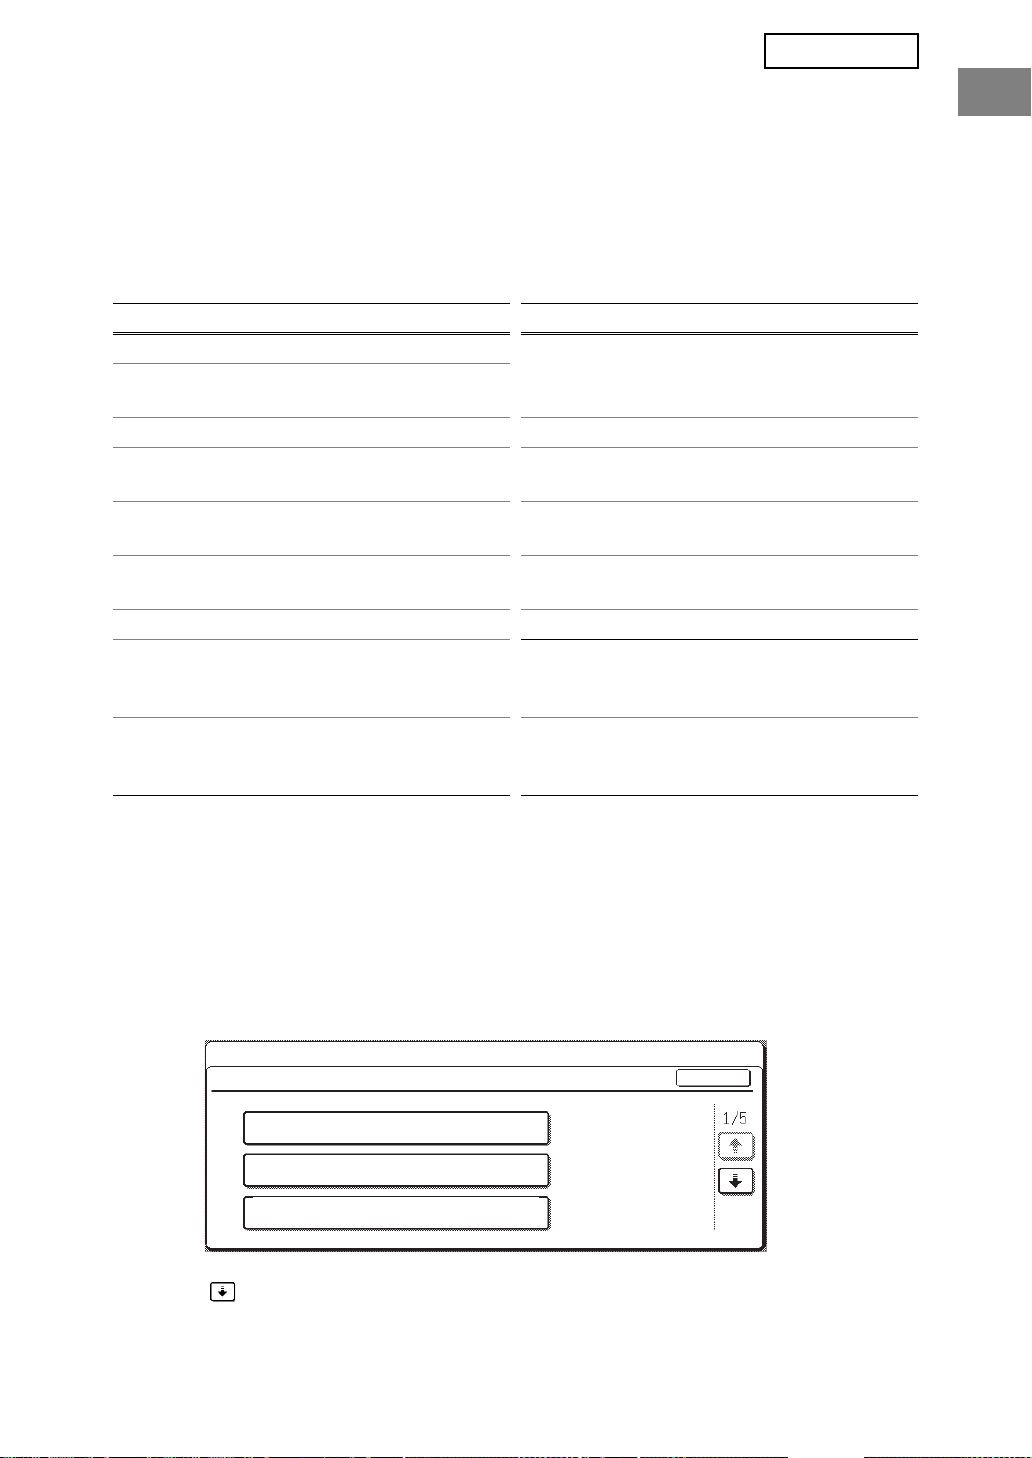
Select the checkboxes of the items that you wish to clear. (There are two screens. Touch
the or key to move between the screens.) To clear the data, touch the [CLEAR] key.
A message asking you to confirm the clear ("YES" or "NO") will appear. Touch the [YES]
key to begin clearing the selected data. During clearing, progress will be shown as a
percentage together with the number of repetitions. When data clearing is finished, the
power of the machine will turn off temporarily and then turn on again automatically.
ページ 4年月4日 水曜日 午前時7分

8
ENGLISH
NUMBER OF TIMES DATA CLEAR IS REPEATED
This program is used to enhance the security function. The number of times data clearing is
repeated when "CLEAR ALL MEMORY", "CLEAR DOCUMENT FILING DATA", "CLEAR
ALL DATA IN JOB STATUS JOBS COMPLETED LIST", or "CLEAR ADDRESS BOOK
DATA/IMAGE SEND REGISTERED DATA" is executed can be set to any number from 1 to
7. The factory setting is 1.
Touch the [NUMBER OF TIMES DATA CLEAR IS REPEATED] key, and set the desired
number of times with the or key.
When finished, touch the [OK] key.
(See "About the repeat setting" on page 9 of this manual.)
POWER UP AUTO CLEAR
This program is used to automatically clear all data in the machine when the power switch is
turned on. The following selections are available for the data to be cleared: "ALL
MEMORY", "FILE DATA (INCLUDING PROTECTED/CONFIDENTIAL FILES)", "QUICK
FILE DATA (INCLUDING PROTECTED FILES)", "JOB STATUS JOBS COMPLETED
LIST". Select the checkboxes of the data that you wish to have automatically cleared when
the power switch is turned on. (There are two screens. Touch the or key to move
between the screens.) After selecting the data to be cleared, touch the [OK] key.
*Can only be selected when the printer function is enabled.
No checkboxes are initially selected.
NUMBER OF TIMES POWER UP AUTO CLEAR PROGRAM IS REPEATED
This program is used to enhance the security function. The number of times "POWER UP
AUTO CLEAR" is repeated can be set to any number from 1 to 7. The factory setting is 1.
Touch the [NUMBER OF TIMES POWER UP AUTO CLEAR PROGRAM IS REPEATED]
key, and set the desired number of times with the or key.
When finished, touch the [OK] key.
(See "About the repeat setting" on page 9 of this manual.)
NOTE
When there is a stored image send job (fax, network scanner, or Internet fax job)*,
automatic clearing will not take place when the power is turned on.
* This includes received faxes and Internet faxes that have not yet been printed;
however, it does not include data in a fax memory box (except confidential memory
box).
If you wish to cancel after data clearing has begun
See the explanations in "Clear screen 2" and "If you wish to cancel after data clearing
has begun" in "CLEAR ALL MEMORY" on page 6 of this manual.
NOTE
This program is only enabled when the "POWER UP AUTO CLEAR" checkbox is
selected.
ページ 4年月4日 水曜日 午前時7分

9
ENGLISH
NUMBER OF TIMES AUTO CLEAR AT JOB END PROGRAM IS
REPEATED
This program is used to enhance the security function. The number of times auto clear is
repeated after each job is printed can be set to any number from 1 to 7. The factory setting
is 1.
Touch the [NUMBER OF TIMES AUTO CLEAR AT JOB END PROGRAM IS REPEATED]
key, and set the desired number of times with the or key.
When finished, touch the [OK] key.
DISABLING OF DOCUMENT FILING
This program is used to restrict the filing modes of the document filing function. Document
filing modes (QUICK FILE MODE, SHARING MODE, and CONFIDENTIAL MODE) can be
separately disableed in each mode in which document filing operates (COPY, PRINTER*1,
SCAN TO HDD*1, and IMAGE SEND*2mode).
*1. Can only be selected when the printer function is enabled.
*2. Can only be selected when the fax or network scanner function is enabled.
To disable a filing mode, touch the checkbox of the mode to select it. (There are two
screens. Touch the or key to move between the screens.) After selecting the
desired checkboxes, touch the [OK] key.
When sharing mode or confidential mode is disabled, "Property change" (page 7-18 of the
"OPERATION MANUAL (for general information and copier operation)") is not possible
when manipulating a file that was saved with the document filing function.
When printing with the printer function, filing mode disable settings selected with this
program will not be indicated in the Job Handling screen of the printer driver (page 2-13 of
the "OPERATION MANUAL (for printer)"). However, if a disabled filing mode is selected
when printing a file, the file will not be saved (only printing will take place).
DISABLING OF LIST PRINT
This program is used to disable printing of any of the following lists that are printed using
"LIST PRINT" in the custom settings (page 2-15 of "OPERATION MANUAL (for general
information and copier operation)").
"ALL CUSTOM SETTING LIST", "SENDING ADDRESS LIST"*1, "SENDER CONTROL
LIST"*2, "DOCUMENT FILING USER / FOLDER LIST"*3
*1. Can only be selected when the fax or network scanner function is enabled.
*2. Can only be selected when the network scanner function is enabled.
*3. Can only be selected when the printer function is enabled.
Select the checkboxes of the lists for which you wish to disable printing and then touch the
[OK] key.
About the repeat setting
When the repeat setting (number of repetitions) is increased to enhance the security
function, the time required for data clearing increases. It is recommended that you
select repeat settings for "NUMBER OF TIMES DATA CLEAR IS REPEATED",
"NUMBER OF TIMES POWER UP AUTO CLEAR PROGRAM IS REPEATED", and
"NUMBER OF TIMES AUTO CLEAR AT JOB END PROGRAM IS REPEATED" that are
suitable for your security needs and conditions of use.
ページ 4年月4日 水曜日 午前時7分

10
ENGLISH
DISABLING OF PRINT JOBS OTHER THAN PRINT HOLD JOB
If a printed document is left on an output tray after being printed in printer mode, it is
possible that another person might take the document and leak sensitive information. This
program is used to disable all print jobs other than print jobs that require printing to be
initiated from the operation panel of the machine. To enable this program, select the
checkbox. To print a job when this program is enabled, select "Hold Only" in the "Retention"
field of the printer driver and then execute the print command. To begin printing, call up the
file from the operation panel of the machine using the document filing function as explained
in "CALLING UP AND USING A FILE" (page 7-13 of the "OPERATION MANUAL (for
general information and copier operation)". If "Hold After Print" or "Sample Print" is selected
before executing the print command, printing will not take place. However, the job will be
held in the machine and can be printed from the operation panel using "JOB SETTINGS" of
the document filing function in the same way as a "Hold Only" job.
JOB STATUS JOBS COMPLETED LIST DISPLAY SETTINGS
This program is used to select whether or not the JOBS COMPLETED list is displayed in
the job status screen of the touch panel (page 1-14 of the "OPERATION MANUAL (for
general information and copier operation)"). (The setting can be selected separately for
"PRINT JOB", "E-MAIL/FTP", "FAX JOB", and "INTERNET-FAX" modes.) The JOBS
COMPLETED list stores and displays printer mode user names, fax/image send
destinations, and received fax sender information. If you do not wish to display this
information for security reasons, use this program to disable display of the list.
To display the JOBS COMPLETED list in a mode, touch the checkbox of the mode so that a
checkmark appears. To disable display of the list, remove the checkmark from the
checkbox.
DISABLING OF FAX NUMBER DIRECT ENTRY
When the fax function is enabled, this program is used to prohibit dialing of a destination fax
number by direct entry with the numeric keys. To prohibit dialing by direct entry with the
numeric keys, touch the checkbox to select it. When this is done, faxes can only be sent to
destinations that have been stored, and thus this program can be used to restrict fax
destinations and prevent accidental transmission to an incorrect number. The following
operations are also prohibited:
●Storing one-touch dial numbers
●Direct entry of fax numbers when storing a group
●Direct entry of fax numbers of relay destinations in a relay broadcast memory box
ページ 4年月4日 水曜日 午前時7分

11
ENGLISH
DISABLING RESEND KEY
When the fax or network scanner function is enabled, this program is used to disable
display of the [RESEND] key, which is used to transmit to the last destination transmitted to.
To disable display of the [RESEND] key, touch the checkbox so that a checkmark appears.
When the [RESEND] key is disabled, it will not appear in the main screens of fax mode and
scanner mode (page 1-4 of the Facsimile Expansion Kit AR-FX8 manual and page 9 of the
"OPERATION MANUAL (for network scanner)"). (Normally the key appears in these
screens.)
PRODUCT KEY
To initially enable the security function, you must use a key operator program to enter the
product key (password). The name of the key operator program used for this purpose is
"DATA SECURITY KIT". Please ask your dealer for the product key. (See page 13 of the
key operator's guide for the procedure for using this program.)
ページ 4年月4日 水曜日 午前時7分

12
ENGLISH
The CE mark logo label is affixed on an equipment in case that the directives
described in the above sentence are applicable to the product. (This
sentence is not applicable in any country where the above directives are not
required.)
This equipment complies with the requirements of Directive 89/336/EEC as amended by
93/68/EEC.
Dieses Gerät entspricht den Anforderungen der EG-Richtlinie 89/336/EWG mit Änderung
93/68/EWG.
Ce matériel répond aux exigences contenues dans la directive 89/336/CEE modifiée par la
directive 93/68/CEE.
Dit apparaat voldoet aan de eisen van de richtlijn 89/336/EEG, gewijzigd door 93/68/EEG.
Dette udstyr overholder kravene i direktiv nr. 89/336/EEC med tillæg nr. 93/68/EEC.
Quest’apparecchio è conforme ai requisiti della direttiva 89/336/EEC come emendata dalla
direttiva 93/68/EEC.
Este equipamento obedece às exigências da directiva 89/336/CEE na sua versão corrigida
pela directiva 93/68/CEE.
Este aparato satisface las exigencias de la Directiva 89/336/CEE, modificada por medio de la
93/68/CEE.
Denna utrustning uppfyller kraven enligt riktlinjen 89/336/EEC så som kompletteras av
93/68/EEC.
Dette produktet oppfyller betingelsene i direktivet 89/336/EEC i endringen 93/68/EEC.
Tämä laite täyttää direktiivin 89/336/EEC vaatimukset, jota on muutettu direktiivillä
93/68/EEC.
ページ 4年月4日 水曜日 午前時7分

1
ESPAÑOL
Contenido
Introducción...........................................................................................................................1
Si el kit de seguridad de datos estáinstalado.......................................................................3
●Restricciones en el copiado en tándem y la impresión en tándem .................................3
●Configuración de seguridad en la página Web................................................................4
●Acerca de la transferencia de datos copiados a la máquina...........................................4
PROGRAMAS DE OPERADOR PRINCIPAL .......................................................................5
●LISTA DE PROGRAMAS DE OPERADOR PRINCIPAL.................................................5
●Utilizar los programas de operador principal...................................................................5
●CONFIGURACION DE SEGURIDAD..............................................................................5
●CLAVE DE PRODUCTO ...............................................................................................11
Introducción
El AR-FR11 incorpora una función de seguridad a la copiadora/impresora láser digital
SHARP. Cuando se emplea la función de copiadora, de impresora, de escáner de red o de
fax de una copiadora/impresora láser digital SHARP con la función de seguridad, los datos
de imagen generados para el trabajo se cifran y, una vez finalizado el trabajo, los datos
cifrados se borran inmediatamente de la memoria y del disco duro.
Nota:
Para asegurar que la función de seguridad de datos de la máquina proporcione la máxima
seguridad, tenga en cuenta lo siguiente:
●El operador principal desempeña una función importante en el mantenimiento de la
seguridad. Designe con cuidado a la persona que ejercerála labor de operador principal.
●Asegúrese de cambiar el código del operador principal inmediatamente cada vez que una
persona nueva pase a ocupar esta función.
●Modifique el código del operador principal regularmente (al menos una vez cada 60 días).
●Durante el proceso de modificación del código del operador principal, el código actual y el
nuevo aparecen en la pantalla. Complete el procedimiento con rapidez.
●No defina un código para el operador principal que pueda adivinarse fácilmente.
●Los programas de operador principal son fundamentales para la administración de la
seguridad. El administrador de la máquina debería informar a los usuarios de que no
deben acceder a los programas de operador principal sin permiso.
●Si el administrador y los usuarios de la máquina van a ausentarse de la oficina, deberán
adoptarse medidas de seguridad, como bloquear la máquina, para evitar un acceso no
autorizado.
●El cliente asume toda la responsabilidad sobre el control de copias de documentos
efectuadas en la máquina y los faxes recibidos en la máquina.
●Aunque estéinstalado el kit de seguridad de datos, observe que los datos de fax de la
placa de memoria pública utilizada por el kit de expansión de facsímil (AR-FX8) pueden
leerse.
ページ 4年月4日 水曜日 午前時7分

2
ESPAÑOL
■
■■
■Realizar una copia de seguridad y borrar los datos
almacenados con la función de archivo de documentos
Si el kit de seguridad de datos estáinstalado, los datos almacenados anteriormente en
la máquina con la función de archivo de documentos se borran. Por este motivo, los
datos que necesite almacenar se copian a un ordenador antes de que se instale el kit de
seguridad de datos y, posteriormente, se transfieren de nuevo a la máquina una vez
finalizada la instalación y el borrado de los datos anteriores. (Esta operación suele
realizarla un técnico de servicio en el momento de la instalación).
NOTA
Algunos de los procedimientos para utilizar la máquina cambian cuando estáinstalado
el kit de seguridad de datos. El "MANUAL DE INSTRUCCIONES (información general y
funcionamiento de la copiadora)" detalla los procedimientos de funcionamiento de la
máquina cuando el kit de seguridad de datos no estáinstalado. Este manual describe
los cambios en los procedimientos cuando el kit de seguridad de datos estáinstalado.
ページ 4年月4日 水曜日 午前時7分

3
ESPAÑOL
Si el kit de seguridad de datos estáinstalado
Si el kit de seguridad de datos estáinstalado, se mostrará
el siguiente icono en el panel táctil. Pulse el icono ( )
para ver la información sobre la versión del kit de
seguridad de datos.
Si el kit de seguridad de datos estáinstalado, los datos presentes en la máquina se
borran automáticamente tras cada trabajo de copia y fax.
Cuando comienza el borrado de los datos, aparece el siguiente mensaje durante 6 segundos*.
* La duración del mensaje que aparece en
pantalla puede modificarse mediante el
programa de operador principal,
"CONFIGURACIÓN DE LA DURACIÓN
DEL MENSAJE". (Vea la página 10 del
Manual del operador principal).
Restricciones en el copiado en tándem y la
impresión en tándem
El copiado y la impresión en tándem funcionan según se describe a continuación de
acuerdo con la configuración del equipo servidor y el equipo cliente (tanto si estáinstalado
el kit de seguridad de datos como si no).
NOTA
Si la máquina se desconecta mientras se borran los datos de imagen de la unidad de
disco duro o antes de que se finalicen los trabajos, los datos no se borrarán por
completo. Si no desea que los datos queden parcialmente borrados cuando se
desconecta la alimentación, se recomienda utilizar el programa de operador principal,
"BORRAR TODA LA MEMORIA" (página 6 de este manual), para completar el borrado
de datos antes de desconectar la alimentación.
Máquina del cliente
Kit de seguridad de datos: Sí
Kit de seguridad de datos: No
Equipo
servidor
Kit de seguridad
de datos: Sí
Puede utilizarse la función
tándem. Los datos se
borran en los equipos
servidor y cliente.
No puede utilizarse la
función tándem.
Kit de seguridad
de datos: No
Puede utilizarse la función
tándem. Los datos se
borran del equipo cliente.
Puede utilizarse la función
tándem regular.
LOS DATOS SE ESTAN BORRANDO
ページ 4年月4日 水曜日 午前時7分

4
ESPAÑOL
Configuración de seguridad en la página Web
Cuando la máquina se utiliza como una impresora de red y se emplea la función Activar
impresión, el kit de seguridad de datos habilita la autenticación de usuario mediante un
"NOMBRE DE USUARIO" y una "CONTRASEÑA". (La función Activar impresión permite
imprimir directamente un archivo de un servidor FTP almacenado previamente desde el
panel operativo de la máquina sin utilizar el controlador de la impresora; consulte "Imprimir
directamente un archivo de un servidor FTP" en las páginas 3-9 del "MANUAL DE
INSTRUCCIONES (para la impresora)").
La autenticación de usuario se habilita activando la casilla de verificación "Habilitar
autenticación de usuario" en la página Web de la máquina para las opciones de la función
Activar impresión. (Esta casilla de verificación aparece cuando el kit de seguridad de datos
estáinstalado, y estáactivada de manera predeterminada).
Los requisitos del sistema y el procedimiento para acceder a la página Web que contiene esta
casilla de verificación se explican en el apartado "CONFIGURACIÓN DE LA IMPRESORA EN
RED" en las páginas 3-2 del "MANUAL DE INSTRUCCIONES (para la impresora)". La casilla
de verificación aparece en la pantalla mostrada en el paso 2 del apartado "
■
Registrar un
servidor FTP" en las páginas 3-9 del "MANUAL DE INSTRUCCIONES (para la impresora)".
■
■■
■Procedimiento para imprimir directamente un archivo de un
servidor FTP cuando la autenticación de usuario estáhabilitada
El nombre de usuario y la contraseña deben introducirse tras seleccionar el servidor
FTP que contiene el archivo que va a imprimirse desde el panel táctil de la máquina.
Cuando se selecciona el servidor FTP en el paso 3 del apartado "■ Imprimir un archivo
de un servidor FTP desde el panel de control de la impresora" en las páginas 3-9 del
"MANUAL DE INSTRUCCIONES (para la impresora)", apareceráuna pantalla que le
solicitaráque introduzca el nombre de usuario y la contraseña para el servidor FTP.
Pulse la tecla [NOMBRE USUARIO] para introducir el nombre de usuario y la tecla
[CONTRASEÑA] para introducir la contraseña. Apareceráuna pantalla de introducción
de caracteres en cada caso. Una vez haya introducido el nombre de usuario/
contraseña, pulse la tecla [OK].
Una vez introducido el nombre de usuario y la contraseña, continúe en el paso 4 en las
páginas 3-10 del "MANUAL DE INSTRUCCIONES (para la impresora)".
Acerca de la transferencia de datos copiados a la
máquina
Si el kit de seguridad de datos estáinstalado y la página Web se utiliza para copiar los
datos almacenados con la función de archivo de documentos a un equipo (páginas 3-4 del
"MANUAL DE INSTRUCCIONES (para la impresora)"), los datos copiados solamente
podrán transferirse de nuevo a la máquina original desde la que se copiaron; no podrán
transferirse a otra máquina aunque las condiciones de la máquina sean las mismas.
NOMBRE USUARIO
CONTRASEÑA
OKCANCELAR
INTRODUCIR EL NOMBRE DE USUARIO Y LA CONTRASEÑA PARA EL SERVIDOR FTP.
ページ 4年月4日 水曜日 午前時7分

5
ESPAÑOL
PROGRAMAS DE OPERADOR PRINCIPAL
En este apartado se describen los programas de operador principal relacionados con la
función de seguridad.
En las siguientes explicaciones se presupone que la máquina posee las funciones de
impresora, fax y escáner de red.
LISTA DE PROGRAMAS DE OPERADOR PRINCIPAL
Utilizar los programas de operador principal
Siga el procedimiento de las páginas 4 y 5 del Manual del operador principal para
configurar las opciones de los programas de operador principal.
Para obtener una descripción de cada una de las opciones, consulte las páginas siguientes.
CONFIGURACION DE SEGURIDAD
Si estáinstalado el kit de seguridad de datos, la tecla [CONFIGURACION DE
SEGURIDAD] se añade a la pantalla del menúdel programa de operador principal. Pulse
esta tecla para mostrar el menúde configuración de seguridad.
El menúde configuración de seguridad consta de varias pantallas.
Pulse la tecla en la esquina inferior derecha de la pantalla para desplazarse a la siguiente pantalla.
Nombre del programa
Página
Nombre del programa
Página
CONFIGURACION DE SEGURIDAD
BORRAR TODA LA MEMORIA 6 DESACTIVAR EL ARCHIVO DE
DOCUMENTOS 9
BORRAR DATOS ARCHIVO DE
DOCUMENTOS
7DESACTIVAR LA IMPRESIÓN
DEL LISTADOS 9
BORRAR TODOS LOS DATOS DE
LA LISTA DE ESTADO DE
TRABAJOS TERMINADOS
7DESACTIVAR TRABAJOS DE
IMPRESIÓN QUE DISTINTOS A
LA IMPRESIÓN EN ESPERA 10
BORRRAR DATOS LIBRETA DE
DIRECC./DATOS REGIST.
ENVIADOS
7
AJUSTES DE PANTALLA DE LA
LISTA ESTADO DE TRAB.
TERMINADOS
10
NÚMERO DE VECES QUE SE
REPITE EL BORRADO DE DATOS
8DESACTIVAR LA ENTRADA
DIRECTA DE NÚMERO DE FAX 10
BORRADO AUTOMATICO AL
ENCENDER 8DESACTIVAR LA TECLA DE
REENVÍO 11
No. VECES QUE REPITE
PROGRAMA DE BORRADO
AUTOM. AL ENCENDER 8CLAVE DE PRODUCTO
No VECES QUE REPITE BORRADO
AUTOM. AL FINALIZAR TRABAJO
9 KIT DE SEGURIDAD DE DATOS 11
BORRAR TODA LA MEMORIA
BORRAR DATOS DEL ARCHIVO
DE DOCUMENTO
BORRAR TODOS LOS DATOS DE LA LISTA
DE ESTADO DE TRABAJOS TERMINADOS
OK
PROGRAMAS DE OPERADOR PRINCIPAL
CONFIGURACION DE SEGURIDAD
ページ 4年月4日 水曜日 午前時7分

6
ESPAÑOL
BORRAR TODA LA MEMORIA
Este programa se utiliza para borrar manualmente todos los datos de la memoria y el disco
duro de la máquina.
No obstante, observe que los siguientes tipos de datos no se borran con este programa.
Utilice el programa "BORRRAR DATOS LIBRETA DE DIRECC./DATOS REGIST.
ENVIADOS" de la página 7 para borrar los siguientes tipos de datos
●BUZÓN DE EMISIÓN RELÉINDIVIDUAL/GRUPO/PROGRAMA*
●LISTA DE CONTROL DE REMITENTES
●MEMORIA POLLING/BUZÓN CONFIDENCIAL*
●DATOS DEL REMITENTE
●PERMITIR/RECHAZAR RECEPCIÓN DE DATOS DE AJUSTE (INCLUYENDO EL
NÚMERO DEL CÓDIGO DE ACCESO DE SOLICITUD DE IMPRESORA)
* Los datos de imagen almacenados en la PLACA DE LA MEMORIA se borran para
ejecutar este programa (BORRAR TODA LA MEMORIA).
Pulse la tecla [BORRAR TODA LA MEMORIA]. Aparecerála siguiente pantalla solicitando
que confirme la selección ("SÍ" o "NO").
[Pantalla de borrado 1]
●Para regresar a la pantalla del menú
"CONFIGURACION DE SEGURIDAD", pulse
la tecla [NO].
●Para borrar toda la memoria, pulse la tecla
[SÍ]. Apareceráel mensaje "ESPERE POR
FAVOR." y, a continuación, se mostrarála
siguiente pantalla.
[Pantalla de borrado 2]
●Mientras se efectúa el borrado de datos, se
muestra el porcentaje de datos borrados y el
número de repeticiones.
●
Cuando se hayan borrado los datos, la
alimentación se desconectarábrevemente y
luego se volveráa conectar automáticamente.
NOTA
Recomendamos ejecutar este programa antes de desconectar la máquina.
Si desea cancelar después de que se haya iniciado el borrado de datos
Pulse la tecla [CANCELAR]. Aparecerála pantalla de entrada del código de operador
principal. Introduzca el código de operador principal con las teclas numéricas. El
borrado de datos se detendráen cuanto se introduzca el código de operador principal
correcto. Observe que cualquier dato que se haya borrado antes de introducir el código
de operador principal no podrárestaurarse (esos datos se habrán perdido).
BORRAR TODA LA MEMORIA.
(EXCLUSIVO DE DATOS DE LIBRETA DE
DIRECCIONES/LISTA DE REMITENTES)
NO SÍ
100%50%0%
(50.0%) (1/1 tiempo)
BORRADO TOTAL DE MEMORIA.EJECUTANDO
REINICIO AUTOM. DESPUÉS DEL BORRADO
CANCELAR
ページ 4年月4日 水曜日 午前時7分
Other manuals for AR-FR11
1
Table of contents
Languages:
Other Sharp Printer Accessories manuals

Sharp
Sharp AR-S11 User manual

Sharp
Sharp AR-FR19 U User manual

Sharp
Sharp AR-NB2 User manual

Sharp
Sharp SF-A57 User manual

Sharp
Sharp AR-DU3 User manual

Sharp
Sharp AR-PB8 User manual

Sharp
Sharp ARFX13 - Fax Interface Card User manual

Sharp
Sharp AR-D15 User manual

Sharp
Sharp MX-FR46U User manual

Sharp
Sharp AR-PB9ML User manual

Sharp
Sharp AR-FN7 User manual

Sharp
Sharp MX-B201D User manual

Sharp
Sharp FO-59A4 Instruction Manual

Sharp
Sharp AR-D24 User manual

Sharp
Sharp AR-FR4 U User manual

Sharp
Sharp ARNC5J User manual

Sharp
Sharp AR-NS1 User manual

Sharp
Sharp MX-FN10 User manual

Sharp
Sharp MX-LCX5 User manual

Sharp
Sharp AR-DC1 User manual