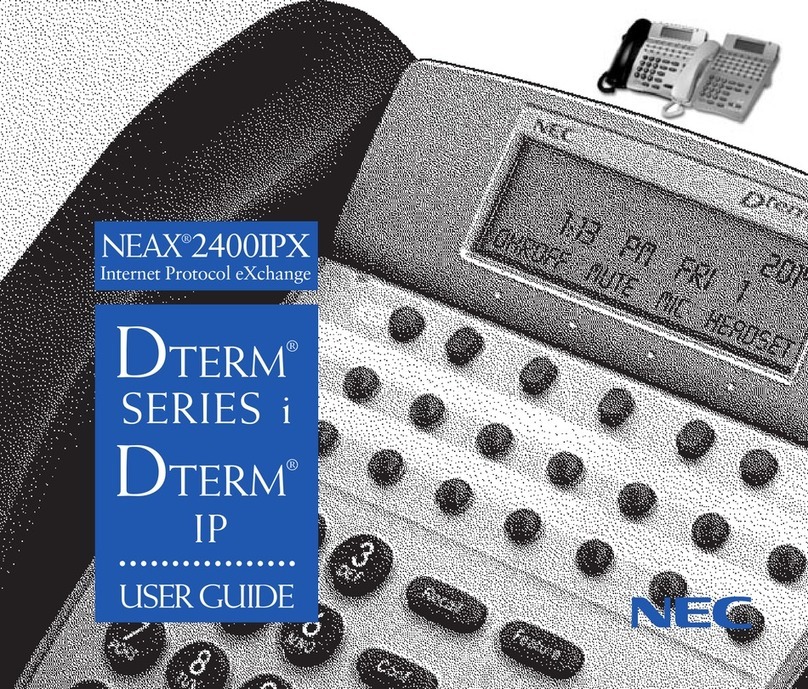
NEC D-Term IP-32 User manual

D-Term IP-32 User Guide

1
Table of Contents
Keys and Lamps ................................................................................................................... 2
Tones ........................................................................................................................................... 3
Making and Receiving Calls ....................................................................................................... 4
Hold ............................................................................................................................... 5
Transfer ................................................................................................................... 6
Conference Calls ....................................................................................................... 6
Soft Keys ............................................................................................................................... 7
Feature Keys ............................................................................................................................... 8
Security Lock .................................................................................................................. 9
Speed Dial Keys .................................................................................................... 8-9
Pickup .............................................................................................................................. 9
Forwarding .............................................................................................................. 9-10
Voice ............................................................................................................................. 10
S&R ............................................................................................................................. 10
Conference ................................................................................................................. 10
Call Back ................................................................................................................. 10
Shift ............................................................................................................................. 11
Logout ........................................................................................................................... 11
Recall ............................................................................................................................. 11
Answer ........................................................................................................................... 11
Redial ............................................................................................................................. 11
Menu ........................................................................................................................ 12-13
Other Features .......................................................................................................................... 14
Call Park ......................................................................................................................... 14
Directed Call Pickup ...................................................................................................... 14
Headsets ................................................................................................................. 15
Customizing Your Phone ...................................................................................................... 16
Ring Volume ................................................................................................................. 16
Ring Tone ................................................................................................................. 16
Lamp Color ................................................................................................................. 16
LCD Brightness ............................................................................................................... 17
2
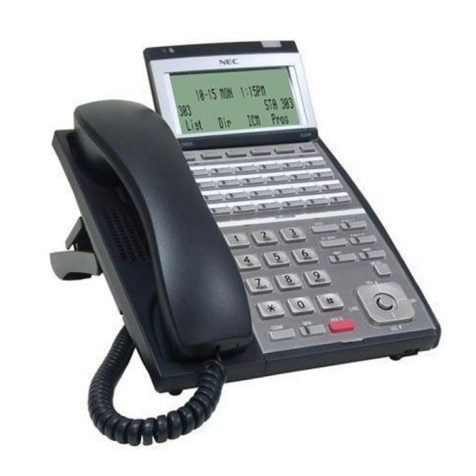
Keys and Lamps
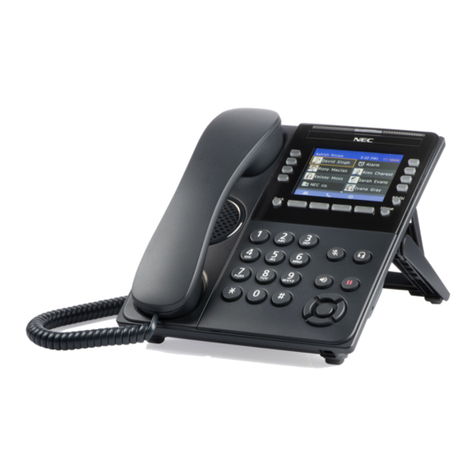
LED Some of the keys listed below have a built-in Light Emitting Diode (LED)
that lights or flashes according to the activity of that function key.
Security Button Locks your phone so you cannot make or receive calls. The Security Lock
LED will remain illuminated when this feature has been activated.
Call Waiting Lamp This light will flash when you have an incoming call. The lamp remains
steadily lit when you have a voicemail message waiting.
LCD Display Liquid Crystal Diode (LCD) display provides D-Term activity information
plus date, time, and Soft Key operation.
Exit To exit from the Menu or Help mode and go back to the time display.
Soft Keys Any feature shown at the bottom of the LCD display is available. Press
>>> for more features.
Help Explanations of the Soft Keys can be pulled up on the LCD by pressing this
key.
Feature Keys Your phones lines, as well as various other phone features, are located on
these keys.
Speed Dial Keys These keys allow you to program frequently-used phone numbers and
functions into the D-Term’s memory. You can then dial the numbers or
engage the features by pressing a single key.
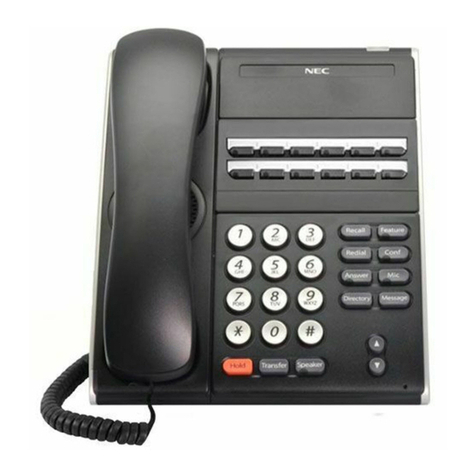
Recall Allows you to hang up a call and immediately get a dial tone.
Feature Used to program Speed Dial Keys. Also used to activate/deactivate
Answer mode (below).
Answer Allows you to automatically answer calls on your secondary lines. The LED
light on this key remains illuminated when this feature has been
activated.
Mic Turns the microphone on and off. The LED light on this key remains
illuminated when the Mic is on.

3
Menu Allows you to access local phone settings, such as the call history, ring
tones, and color of the Call Waiting Lamp. For a complete list of options,
see page 12.
Cursor Acts as the Up/Down/Left/Right/Enter buttons on the menu, as well as
the Redial button, the volume buttons, and a shortcut key.
Redial Allows you to quickly dial a number from a list of previously dialed
numbers. This key is found on the Cursor key:
Hold Press key to place an internal or external call on hold.
Transfer Allows you to transfer established calls to another number.
Speaker Controls the built in speakerphone feature. The LED light on this key
remains illuminated when the Speaker is on.
Tones
Dial Tone Steady tone you hear before you make a call.
Busy Signal Pulsing tone that indicates you dialed a number that is being used.
Reorder Tone Fast busy signal. This means that an invalid number was dialed, a service
feature was denied, or your handset has been off hook and inactive for
too long.
Special Dial Tone An interrupted dial tone. This means you may proceed to use a feature.
Service Set Tone A steady, high-pitched tone that indicates a feature was set or canceled.

4
Making and Receiving Calls
TO PLACE AN INTERNAL CALL
Lift your handset or press the Speaker key to receive a dial tone. Dial the desired 5-digit
extension. Use your handset or Microphone to converse.
TO PLACE A LOCAL CALL
Lift your handset or press the Speaker key to receive a dial tone. Dial 9 and wait for the second
dial tone. Dial the desired telephone number. Use your handset or Microphone to converse.
TO PLACE A LONG DISTANCE CALL
You will need to use your assigned V-Net code to place long distance calls. Lift your handset or
press the Speaker key to receive a dial tone. Dial #9 and listen for the interrupted dial tone.
Enter your V-Net code and listen for the service tone (solid, high-pitched tone). Dial 9-1 and the
desired telephone number, area code first. Use your handset or Microphone to converse.
Note: Users at the remote Williamson County clinics do not need to use a V-Net code. If you
wish to make a long distance call, you may follow the same instructions as placing a local call.
TO DIAL A TOLL-FREE NUMBER
Lift your handset or press the Speaker key to receive a dial tone. Dial 9 and wait for the second
dial tone. Dial the entire toll-free number, including the ‘1’ at the beginning. Use your handset
or Microphone to converse.
TO ANSWER A CALL
Your phone will ring, the Call Waiting Lamp will flash, and the LED light on the ringing line will
flash when you have an incoming call. Press the flashing line appearance key and lift the
handset or press Speaker to answer the call. Use your handset or Microphone to converse.
TO ADJUST THE CALL VOLUME
While you are on a call, press the Up/Down Cursor buttons to increase/decrease the speaker
volume.

5
Hold
You may place callers on Hold at any time during the call. A held call will flash green on your
phone, and will flash red on any other D-Term phones with the same line appearance.
You may place a call on Exclusive Hold so that it may only be retrieved from your phone. When
a call is on Exclusive Hold, your phone will flash a rapid green and will remain steadily lit red on
any other D-Term phones with the same line appearance.
TO PLACE A CALL ON HOLD
While on a call, press the Hold key. The LED light on the held line will flash green on your phone
and your display will indicate “HOLD.”
TO RETRIEVE FROM HOLD
Lift your handset or press the Speaker key. Press the held line. Use your handset or Microphone
to converse.
Note: Any D-Term with this line appearance can retrieve the call.
TO PLACE A CALL ON EXCLUSIVE HOLD
While on a call, press the Hold key twice. The LED light on the held line will rapidly flash green.
TO RETRIEVE A CALL FROM EXCLUSIVE HOLD
Lift your handset or press the Speaker key. Press the held line. Use your handset or Microphone
to converse.
Note: Only the D-Term that sets the Exclusive Hold may retrieve the call.
IF UNANSWERED
After the pre-programmed time (approximately 5-6 minutes), Automatic Recall is initiated.
Automatic Recall shows as a ring burst and rapidly flashing green LED on your phone, and solid
red LED on other phones with the same line.

6
Transfer
You may transfer calls, set up 3-way conference calls, or consult a third party by using the
Transfer key. Your caller will hear the normal music on hold while transferring, establishing a
conference call, or consulting a third party.
TO TRANSFER A CALL
While on a call, press the Transfer key and listen for the interrupted dial tone. Dial the desired
number and either hang up or wait for an answer to announce the transfer.
TO ESTABLISH A CONSULTATION CALL
You may consult a third party while on a call. While the call is in progress, ask the party to hold.
Press the Transfer key and listen for the interrupted dial tone (your caller is automatically
placed on hold). Dial the number for the person you wish to consult. Press the Transfer key at
any time during the consult to return to original caller (the third party is automatically placed
on hold). You may alternate between the calls by pressing the Transfer key.
Note: Your display indicates the connected extension or number at any given time.
TO END A CONSULTATION CALL
The third party with whom you are consulting must terminate the call; otherwise, you will end
up transferring your original call to the third party. You may either wait for the third party to
hang up while you are connected to them, or press the Transfer key to return to your original
caller.
Conference
TO INITIATE A THREE-WAY CALL
While on a call, ask the party to hold. Press the Transfer key and listen for the interrupted dial
tone. Dial the desired number. After the call is answered, press the CONF key. The LED light will
come on and a three-way call is established. If one party hangs up, the other two will remain
connected and the LED light goes out.
4-16 PARTICIPANTS
Conference calls for more than three and up to sixteen participants can be accomplished
through the Vanderbilt Operators. You may reach the Vanderbilt Operators 24/7 by dialing “0”
from your phone. Prior notice is preferred when setting up large conference calls.

7
Soft Keys
OHR (Off Hook Ringer)
This feature mutes the ringer while you are on the phone. To activate or deactivate this feature,
press the gray Soft Key directly beneath the letters “OHR” on your display.
RMUTE (Ring Mute)
This feature mutes the ringer so that the phone will not ring for any calls. To activate or
deactivate this feature, press the gray Soft Key directly beneath the letters “RMUTE” on your
display.
MIC
This feature turns the microphone on and off. To activate or deactivate this feature, press the
gray Soft Key directly beneath the letters “MIC” on your display, or just use the MIC button next
to the dial pad. The MIC LED light will illuminate when the microphone is on.
HSET
This feature will allow you to use a hands-free headset with your D-Term. In the bottom-right
corner of your display, you should see three right-pointing arrows that look like this: >>>. You
will need to press the gray Soft Key beneath >>> to scroll over to the page with the headset
feature. The letters “MUTE” and “HSET” should appear on your display. To activate or
deactivate your headset, press the gray Soft Key directly beneath the letters “HSET” on your
display. For information on using your headset, see page 15.
MUTE
This feature allows you to mute your handset. In the bottom-right corner of your display, you
should see three right-pointing arrows that look like this: >>>. You will need to press the gray
Soft Key beneath >>> to scroll over to the page with the mute feature. The letters “MUTE” and
“HSET” should appear on your display. To activate or deactivate this feature, press the gray Soft
Key directly beneath the letters “MUTE” on your display.
HELP
Press the round Help key, located just beneath the right side of your display, for helpful
information regarding the Soft Keys on your phone.
EXIT
Press the round Exit key, located just beneath the left side of your display, to exit the Help
program.

8
Feature Keys
Security Lock
The Security Lock will lock all buttons and features on your phone and prevent anyone
(including you!) from using it until it is successfully unlocked.
TO LOCK YOUR PHONE
Press the Security Lock button above your display. The display will indicate “Security Lock?”
Press OK or press the Enter key. The Security Lock LED will illuminate and the display will
indicate “Security Lock.” Your phone is now locked.
TO UNLOCK YOUR PHONE
Press the Security Lock button above your display. The display will prompt you for a password.
Enter the unlock code 6633222 and press OK. For security purposes, the phone will block the
display of the password with an asterisk (*) for each digit you enter. You will have three
attempts to enter the password. If successful, the Security Lock LED will go off and you will be
able to resume normal phone operation. After a third attempt, the display will indicate
“Incorrect security code password entered” and the phone will remained locked for 10 minutes.
You must wait 10 minutes to attempt the password again.
Speed Dial Keys
The keys in the vertical row on the right side of your phone allow you to program frequently-
used phone numbers into the D-Term’s memory. You can then dial the number by pressing a
single key. The Shift key allows you to establish 8 additional speed dials for a total of 16.
You may also save certain functions (such as Transfer or Voice) to your speed dial keys.
Note: Once a speed dial has been saved, it cannot be erased. You can, however, save over it
with a new number or feature.
TO SAVE A NUMBER TO A SPEED DIAL KEY
Press the Feature key. Press the speed dial key you wish to program. Enter the number you
wish to save. The display will indicate the digits dialed. Press the Feature key again to save the
number. Your display will indicate “Speed Set.”
TO SAVE A FUNCTION TO A SPEED DIAL KEY
Press the Feature key. Press the speed dial key you wish to program. To program a Transfer,
press the Recall key as the first digit, followed by the number to which you wish to transfer.
Your display will indicate “!” as the first digit. To program a pause, press the Recall key as any
digit other than the first digit. Your display will not indicate the pause. To program a Voice call,
enter the extension followed by the Transfer key. Your display will indicate “V” after the
extension. Press the Feature key again to save the function. Your display will indicate “Speed
Set.”

9
TO SAVE A SPEED DIAL USING THE SHIFT KEY
Press the Feature key. Press the Shift key, then press the speed dial key you wish to program.
Enter the number or function you wish to save. The display will indicate the digits dialed. Press
the Feature key again to save the number or function.
TO VERIFY YOUR SAVED SPEED DIALS
Press the Feature key. Press the desired speed dial key. Your display will indicate the number
and/or function programmed.
TO PLACE A CALL USING A SPEED DIAL KEY
Lift your handset or press the Speaker key to receive a dial tone. Press the desired speed dial
key to automatically begin dialing.
Pickup
The Pickup key on your phone allows you to answer calls in your Call Pickup Group. A Call
Pickup Group may include up to twenty numbers, but you may only be in one Call Pickup Group
at a time. This is not a standard feature and must be requested separately.
TO ANSWER A CALL FROM A CALL PICKUP GROUP
Lift your handset and press the Pickup key. The call will automatically be answered from your
phone.
Note: You may also answer a call from a Call Pickup Group by dialing #8.
Forwarding
You may send your calls to another extension, phone number, pager, or voicemail by using the
forwarding function. Fwd NA will forward your calls to another destination after three rings.
Fwd All will forward your calls immediately to another destination without ringing your phone.
Fwd Busy will forward your calls to another destination if your line is in a busy state.
Note: Different forwarding functions may be active at the same time, but each forwarding
function must be set separately. In other words, while the Fwd NA and Fwd Busy lights may be
lit up at the same time, you cannot set the Fwd NA and Fwd Busy in the same call. You must
hang up after each attempt.
TO SET FORWARDING
Lift your handset or press the Speaker key. Press the forward key you wish to set (Fwd NA, Fwd
All, or Fwd Busy), dial the desired number, and hang up. The LED will light up and your display
will indicate “Forward Set.”
Note: If you have more than one line on your phone, the LED will only light up to indicate the
forwarding settings on your prime line.

10
TO CANCEL FORWARDING
Lift your handset or press the Speaker key. Press the forward key you wish to remove (Fwd NA,
Fwd All, or Fwd Busy) and hang up. The LED light will go off and your display will indicate
“Forward Cancel.”
Voice
This feature allows you to speak directly through the handset into another person’s speaker. It
is a one-way intercom.
TO MAKE A VOICE CALL
Lift your handset, dial the desired extension, and press the Voice button. Four “pings”will be
heard on the telephone being called. The person you are calling must have the MIC button on
to speak to you without lifting the handset; otherwise, they may use their handset at any time.
S&R (Save and Redial)
This key acts as a one-time-only speed dial. While on a call, you may press the S&R button to
save the number. The LED will light up and your display will indicate “S&R.” The number will
remain saved indefinitely. To redial the number, lift your handset or press the Speaker key.
Listen for dial tone, then press the S&R key. The LED light will go off and your phone will begin
dialing automatically.
Note: Once you redial, the number is no longer saved. You may save the number again by
repeating the above steps.
Conference
This will allow you to place a 3-way conference call. For more information on conference calls,
see page 6.
Call Back
When a busy signal is received after dialing a campus number, this feature allows your D-Term
phone to notify you and automatically complete the call when the line is free.
TO ACTIVATE CALL BACK
After receiving a busy signal from an extension, press the Call Back key, and hang up. You will
be able to make and receive other calls in the meantime. When the busy extension becomes
free, your phone will ring and the display will indicate “CALL BACK.”
TO CANCEL CALL BACK
To cancel this feature after it has been activated, get a dial tone and press the Call Back key.

11
Shift
The Shift key allows you to save an additional 8 speed dial keys. For more information on speed
dial keys, see page 8.
Logout
The Logout key allows you to log out of your IP phone and disconnect it from the network. You
will not be able to make or receive calls while you are logged out. This feature is not widely
used at Vanderbilt.
IF PROMPTED TO LOGIN TO YOUR D-TERM IP PHONE
Enter your 5-digit extension as the login code and press Set. Enter your 5-digit extension as the
password and press OK. If the login code is accepted, the display will indicate “Connecting…
(VLAN)” and eventually change to normal idle status.
TO LOG OUT OF YOUR D-TERM IP PHONE
Press the Logout key. Your display will indicate “LOGOUT?”and the LED will slowly flash red.
Press the Logout key again to log out. Your display will indicate “Connecting… (VLAN)” as it
disconnects from the network.
Recall
Pressing the Recall key will immediately disconnect your current call and get a new dial tone.
Answer
This feature will allow you to automatically answer your secondary lines without selecting them
first.
TO ACTIVATE ANSWER MODE
Press the Feature key, then press the Answer key. The LED light on this key will illuminate.
TO DEACTIVATE ANSWER MODE
Press the Feature key, then press the Answer key. The LED light will go off.
Redial
This feature saves a history of previously dialed numbers, allowing you to scroll through the list
and instantly redial. To do so, press the Redial key repeatedly to scroll through the list. Once
the desired number is displayed, press the * key to dial the desired number.

12
Menu
The Menu key provides access to many customizable features. The only options used at
Vanderbilt are History (Option 1) and Settings (Option 5). Below is a full list of options available
from the Menu. For information on commonly used settings, see page 16.
Menu History
The History menu can be access by pressing the Menu key and choosing Option 1. This will
open a brief call history for your phone. You may review each entry by using the Cursor button.
You may also delete numbers from the history by using the “DEL” Soft Key. Below is a full list of
options available from the Menu History.

13
Menu Settings
The Settings menu can be accessed by pressing the Menu key and choosing Option 5. Here, you
can customize certain aspects of your phone, including the ring tone, the color of the Call
Waiting Lamp, the font size on your display, and many more. Below is a full list of options
available from the Menu Settings.

14
Other Features
Call Park
This feature allows you to “park” a call until you retrieve it from your own or another
telephone. For example: You receive a call and must go to the file room to look up some
information. You would park the call, get the information needed, and retrieve the parked call
on the telephone in the file room.
Note: A parked call must be retrieved. If the call is not retrieved, it will ring back to the original
extension.
TO PARK A CALL
Press the Transfer key and dial #6. Listen for the service set tone. Your display will indicate
“CALLPARK SET.” Hang up.
TO RETRIEVE THE CALL FROM THE ORIGINAL TELEPHONE
Lift the handset and dial #6. You are automatically reconnected with your caller. Your display
will indicate “CALLPARK” and the number.
TO RETRIEVE THE CALL FROM ANOTHER TELEPHONE
Lift the handset and dial *65, followed by the extension number of the telephone where you
parked the call. You are automatically reconnected with the caller. Your display will indicate
“CALLPARK” and the number.
Directed Call Pickup
You may pick up any ringing line from your phone. You do not need to be in a Call Pickup Group
with that line, nor do you need a separate line appearance on your phone.
TO ANSWER A RINGING CALL FROM YOUR PHONE
Lift your handset or press the Speaker key. Dial *8 plus the extension that you wish to pick up.
The call will automatically be answered from your phone.

15
Headsets
Hands-free headsets are available for purchase through Vanderbilt ITS. In order to use your
headset, ITS must add a “Release” key to your phone, which will allow you to hang up calls.
Note: When using a headset, the ring volume on your phone is automatically lowered. To adjust
the ring volume, you must come out of Headset mode. For further instructions on how to adjust
the ring volume, see page 16.
TO TURN ON YOUR HEADSET
Press the >>> Soft Key for more options. Press the “HSET” Soft Key. “HSET” will flash on your
display. You may now use your headset.
TO TURN OFF YOUR HEADSET
Press the >>> Soft Key for more options. Press the “HSET” Soft Key. “HSET” will disappear from
your display. Your headset is now off.

16
Customizing Your Phone
Ring Volume
You may adjust the volume of your ringer as needed. However, you can only adjust the ring
volume if the ringer is turned on and your phone is ringing.
TO ADJUST RING VOLUME
Have a coworker call your phone (or call yourself from a cell phone). While your phone is
ringing, press Up on the Cursor to increase the ring volume. Press Down on the Cursor to
decrease the ring volume. You may hang up after you are done adjusting the volume.
Note: If you use a headset, you must be out of Headset mode to adjust the ring volume.
Ring Tone
You can adjust the ring tone on your phone for both internal and external calls. You may access
a list of possible ring tones through the Menu.
TO CHANGE THE RINGER FOR INTERNAL CALLS
Press the Menu key. Dial 5 –1 –1 –4 –2 to access a list of 14 possible ring tones. Use the
Arrow keys to scroll through the list, and press OK when finished.
TO CHANGE THE RINGER FOR EXTERNAL CALLS
Press the Menu key to open the menu. Dial 5 –1 –1 –4 –1 to access a list of 14 possible ring
tones. Use the Arrow keys to scroll through the list, and press OK when finished.
Lamp Color
You can change the color of your Call Waiting Lamp for both internal and external calls, or
disable the lamp entirely. You may access a list of possible colors through the Menu. The
default color for the lamp is red.
Note: Even if you disable the lamp, it will still illuminate in the default color when you have a
voicemail message.
TO CHANGE THE LAMP COLOR FOR INTERNAL CALLS
Press the Menu key. Dial 5 –1 –1 –5 –2 to access a list of 8 possible colors, including a
rotation of all colors. Use the Arrow keys to scroll through the list, and press OK when finished.
TO CHANGE THE LAMP COLOR FOR EXTERNAL CALLS
Press the Menu key to open the menu. Dial 5 –1 –1 –5 –1 to access a list of 8 possible colors,
including a rotation of all colors. Use the Arrow keys to scroll through the list, and press OK
when finished.

17
LCD Display
You may adjust the brightness of your LCD display as needed. While the phone is on hook (i.e.
inactive), press Up on the Cursor to darken the display. Press Down on the Cursor to lighten the
display.
Table of contents
Other NEC IP Phone manuals

NEC
NEC Univerge SV9100 User manual

NEC
NEC DT750 Reference guide

NEC
NEC DT330 Reference guide

NEC
NEC DT310 Reference guide

NEC
NEC SV8500 User manual

NEC
NEC XEN IPK DIGITAL TELEPHONE User manual

NEC
NEC ITX-3370-1(BK)TEL User manual

NEC
NEC I766 DECT User manual

NEC
NEC UNIVERGE SL2100 User manual

NEC
NEC UNIVERGE MH240 User manual