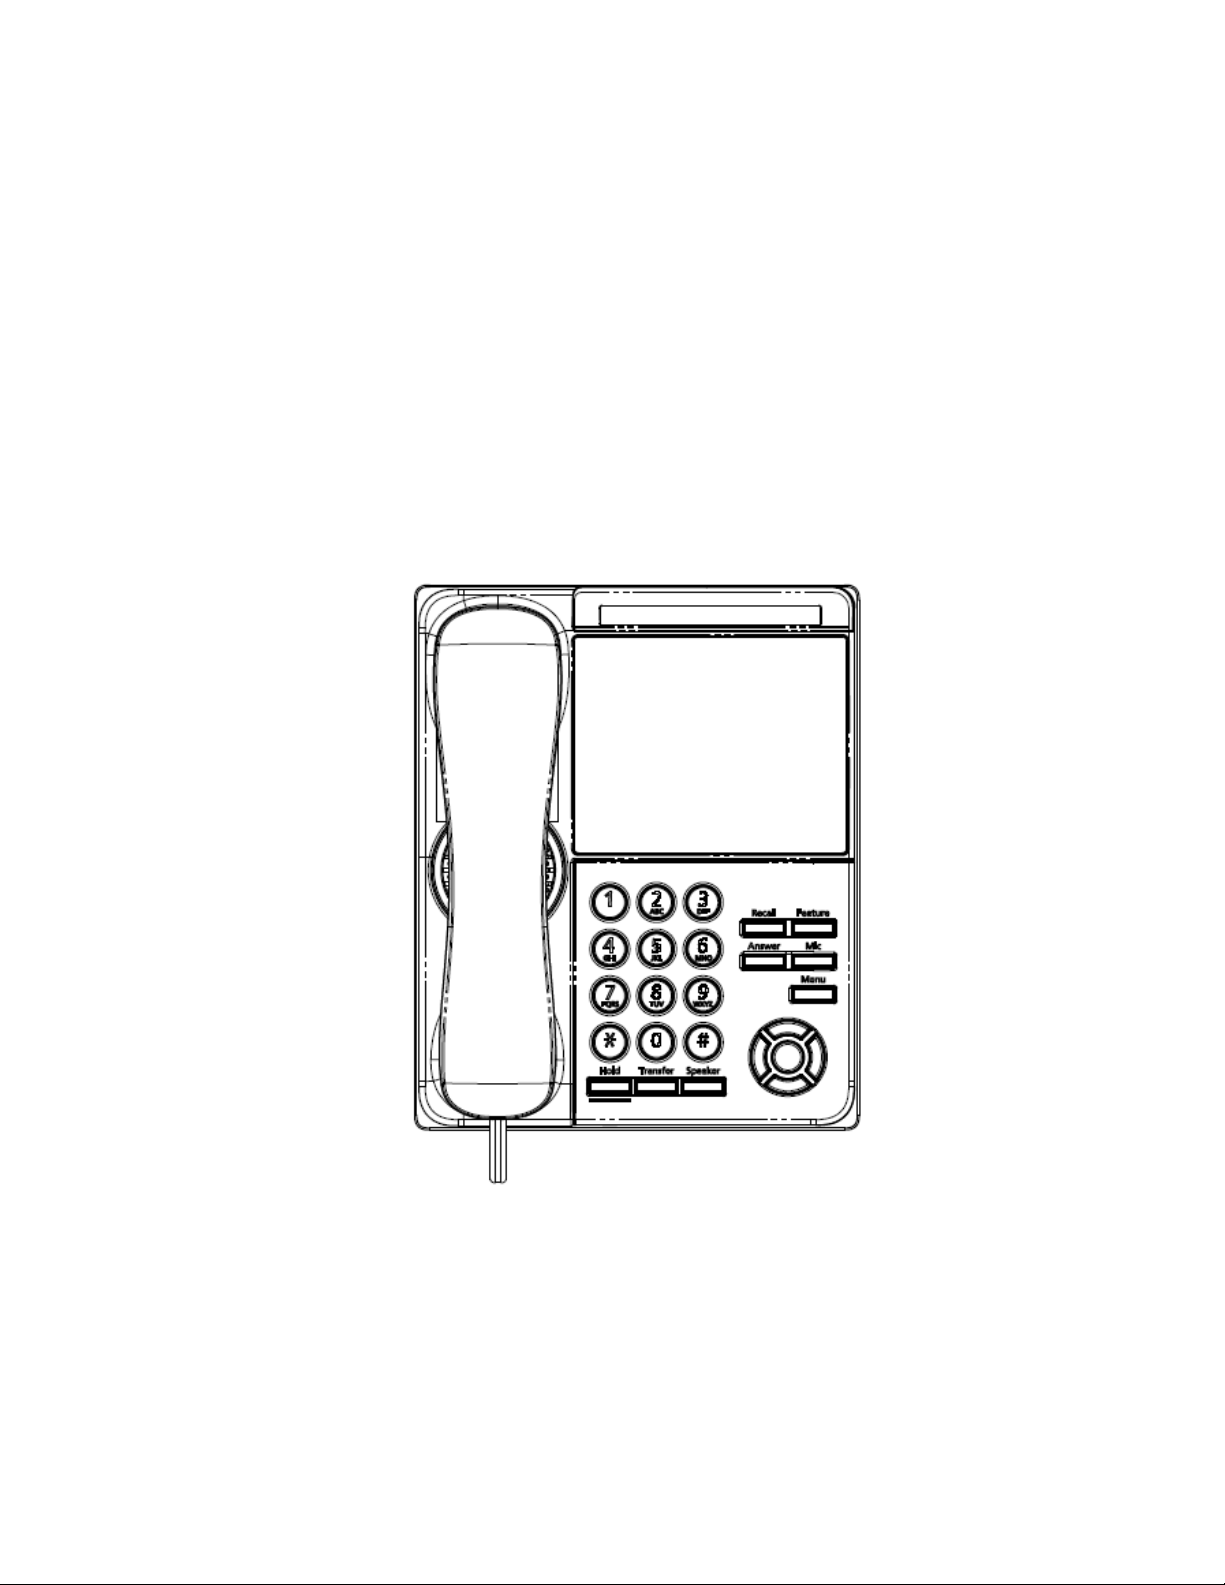
Reference Number Feature Feature Description
2 LCD and DESI-Less
Programmable Key
3
4
5Answer key
The LCD (Liquid Crystal Display) provides call status
activity information plus date, time and softkey
operation.
6
7
8
9
10
11
The LCD supports 3 lines of text.
The first programmable key is reserved as the Line
Key. Line Keys allow the user to select which line to
operate on.
Any programmable keys not used as Line Keys can
be programmed as Speed Dial Keys by the user or
system administrator, or Microbrowser keys.
Numbers up to 24 digits can be assigned to Speed
Dial Keys. The numbers may be a telephone
number or star/hash codes.
5
Press this key to get a dial tone. If you are
currently on a call, the current call will be placed
on hold and a new call will be started.
Press this key to answer an incoming call. If you
have a headset attached to the phone, the audio will
go through the headset. If you do not have a
headset attached to the phone, the audio will go
through the speaker on the phone.
You can also press this key to answer a waiting call.
Mic key
Menu key
Press key to mute the microphone. The LED on this
key flashes when the microphone is muted. Press
the key again to un-mute the microphone.
Press this key to access the features and settings
provided on the local telephone menu, such as Call
History, Personal Directory or User Settings.
Press this key to place a call on hold.
Press this key to transfer a call.
Controls the built-in speaker which can be used for
Hands Free dialing and conversations.
The LED on this key lights when the speaker is active.
Hold key
Transfer key
Speaker key
Feature key This key displays a set of menu options that provide
additional capabilities, such as speed dial key
programming and microbrowser applications.
Use this key to navigate to various features.
The up and down keys on the cursor pad can be used
to adjust the volume of the phone.
Cursor pad
Recall key
12Press this key to scroll to the next page of
Programmable Keys.
Multi (Scroll) key


 User manual")


TEL User manual")