manuals.online logo
Brands
  1. Home
  2. •
  3. Brands
  4. •
  5. ELNA
  6. •
  7. Sewing Machine Accessories
  8. •
  9. ELNA 202-084-206 User manual

ELNA 202-084-206 User manual

Elna International Corp. SA / 18.02.2022
1.
2.
3.
PIED BOURDON AVEC GUIDES
pour machine à coudre avec 9 mm de
largeur de couture
Réf: 202-084-206
Attention
Appuyez sur le bouton de verrouillage lorsque
vous remplacez le pied ou xez un dispositif.
Pour les modèles de machines sans bouton de
verrouillage, coupez le contact lorsque vous
retirez ou xez un accessoire.
Référez-vous au manuel d’instruction de votre
machine à coudre pour toutes les informations
concernant la xation et le changement d’un
accessoire.
Réglages de la machine:
Motif de point: Point déco et quilting
(voir exemple ci-dessous.)
* L’espacement des lignes rouges est idéal pour
les motifs avec 9 mm de largeur de point.
1.
2.
3.
Cousez la première rangée de motifs.
Alignez la première rangée de motifs entre
les deux lignes de guidage de droite puis,
cousez la seconde rangée.
Alignez les deux rangées sur la ligne de
guidage intérieure et cousez la troisième
entre elles.
Pour coudre:
Machine Settings
Stitch pattern: Decorative and quilting stitches
(See example below.)
* The spacing of the red lines is ideal for patterns
with a stitch width of 9 mm.
BORDER GUIDE FOOT
for 9 mm stitch width sewing machines
Ref: 202-084-206
Caution
Make sure to press the Lockout key when
replacing the foot or attaching a binder.
For models without the Lockout key, turn the
power switch o when attaching and detaching
the foot and binder.
Please refer to your machine’s instruction
manual for accessory attachment and removal
information.
1.
2.
3.
Sew the rst row of pattern.
Align the rst row of pattern between the
right guidelines, and sew the second row.
Align the two rows with the iner guidelines,
and then sew the third row between them.
The red lines on this foot ensure evenly spaced
border designs. Create original designs without
the need for any markings. Les lignes rouges sur ce pied assurent des
rangées de motifs avec un espacement régulier.
Créez des motifs originaux sans l’aide de
marquages.
To sew:
Elna International Corp. SA / 18.02.2022
1.
2.
3.
Maschineneinstellungen
Stichmuster: Zier- und Quiltstiche
(siehe Beispiel unten.)
* Die Abstände der roten Linien sind ideal für
Muster mit einer Stichbreite von 9 mm.
BORDÜRENFUß
für Maschinen mit einer Stichbreite von
9 mm
Ref: 202-084-206
Vorsicht
Achten Sie darauf, die Sperrtaste zu drücken,
wenn Sie den Fuß austauschen.
Schalten Sie bei Modellen ohne Sperrtaste den
Netzschalter aus, wenn Sie den Fuß anbringen
und abnehmen.
Informationen zum Anbringen und
Abnehmen des Zubehörteils nden Sie in der
Bedienungsanleitung Ihrer Maschine.
Die roten Linien auf diesem Fuß sorgen für Nähte mit
gleichmäßigen Abständen. Erstellen Sie einmalige
Muster, ohne dass Markierungen erforderlich sind.
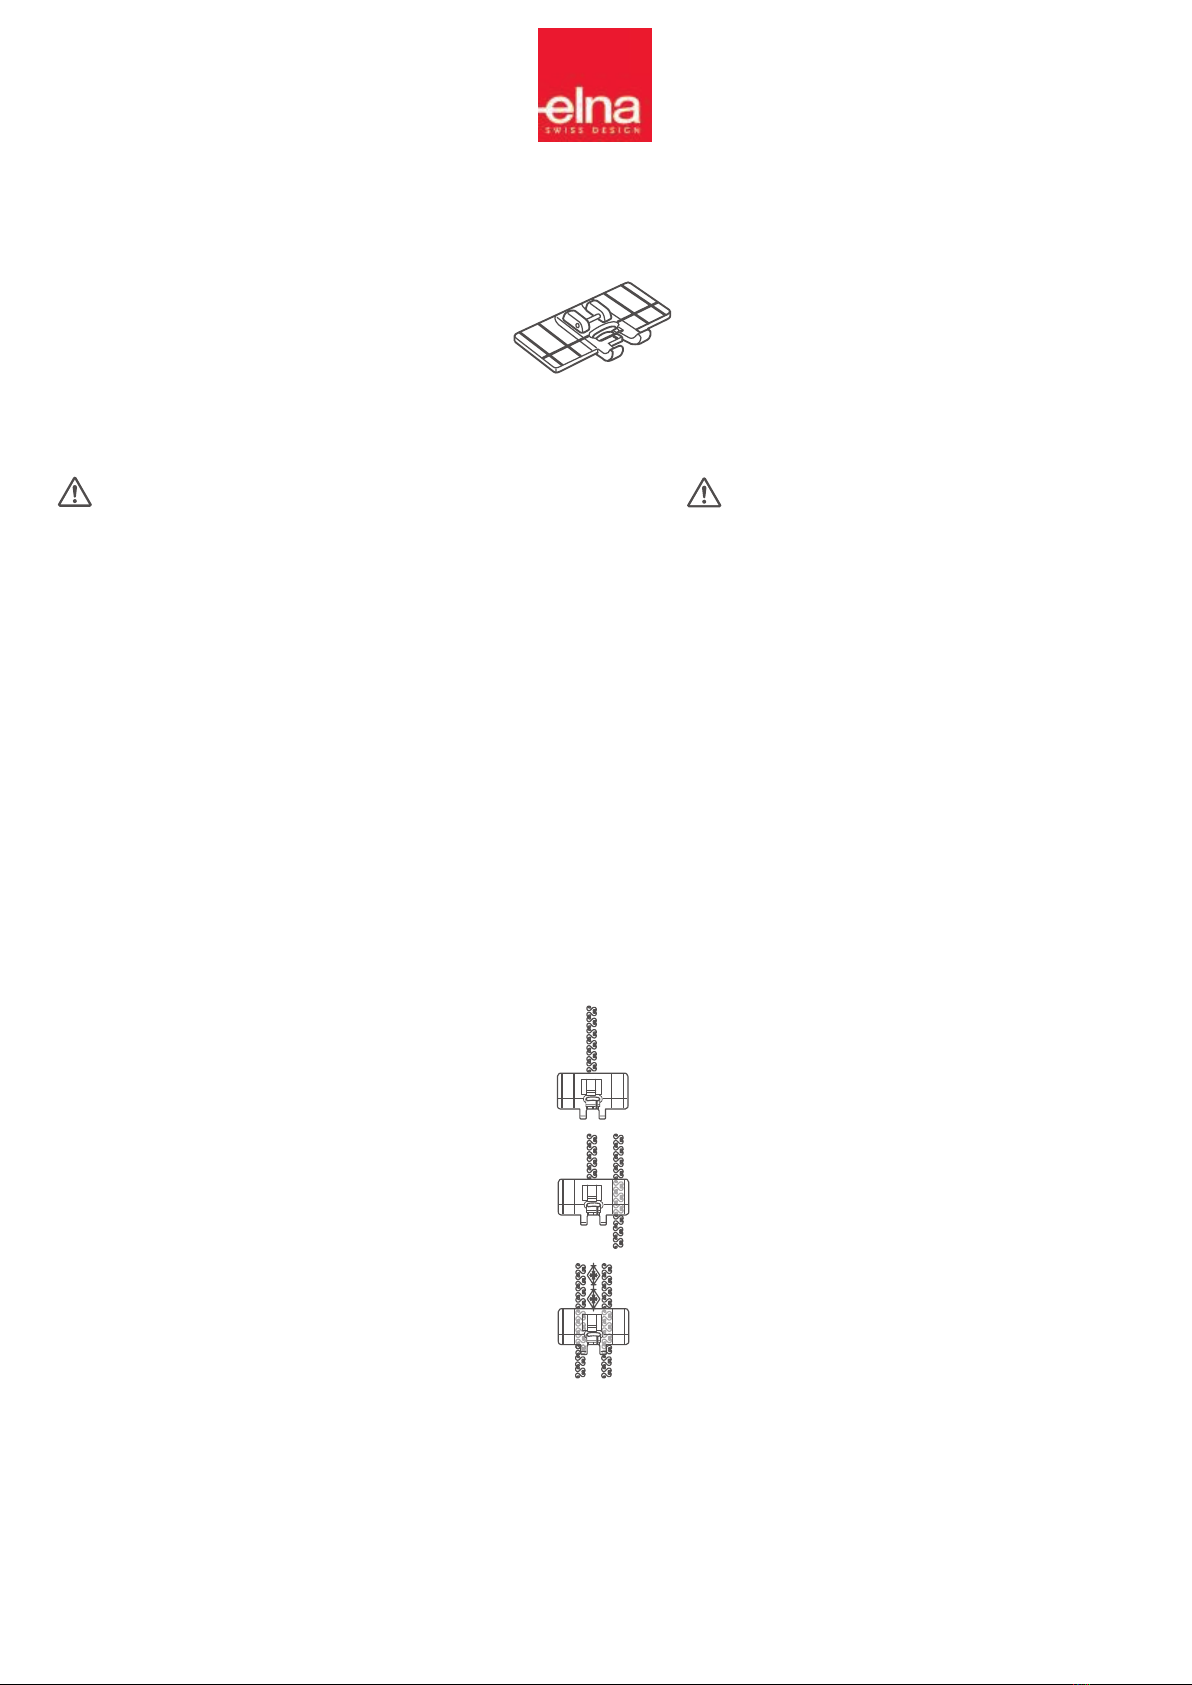
1.
2.
3.
Die erste Reihe des Musters nähen.
Die erste Reihe des Musters zwischen den
rechten Führungslinien ausrichten und die
zweite Reihe nähen.
Richten Sie die beiden Reihen an den
inneren Führungslinien aus, und nähen Sie
dann die dritte Reihe dazwischen.
Nähen:
PRENSATELAS PUNTADAS PARALELAS
Para máquinas de coser con un ancho de
puntada de 9 mm
Ref.: 202-084-206
Ajustes de la máquina
Puntada: Puntadas decorativas y de acolchado
(consulte el ejemplo a continuación).
* El espaciado de las líneas rojas es ideal para
patrones con un ancho de puntada de 9 mm.
Precaución
Asegúrese de pulsar la tecla Bloqueo cuando
reemplace el prensatelas.
Para los modelos sin tecla Bloqueo, apague el
interruptor de alimentación al montar y desmontar
el prensatelas.
Consulte el manual de instrucciones de su
máquina para obtener información sobre el
montaje y desmontaje de accesorios.
Las líneas rojas de este prensatelas aseguran
diseños con bordes espaciados uniformemente.
Cree diseños originales sin necesidad de marcas.
1.
2.
3.
Cosa la primera la del patrón.
Alinee la primera la de patrón entre las
líneas de la guía derecha y cosa la segunda
la.
Alinee las dos las con las líneas de la guía
interna y, a continuación, cosa la tercera la
entre ellas.
Costura:

Other ELNA Sewing Machine Accessories manuals

ELNA 200-314-028 User manual

ELNA

ELNA 200-314-028 User manual

ELNA 202-156-004 User manual

ELNA

ELNA 202-156-004 User manual

ELNA 202-248-004 User manual

ELNA

ELNA 202-248-004 User manual

ELNA 202-096-201 User manual

ELNA

ELNA 202-096-201 User manual

ELNA 200-050-104 User manual

ELNA

ELNA 200-050-104 User manual

ELNA 611-511-001 User manual

ELNA

ELNA 611-511-001 User manual

ELNA 202-237-000 User manual

ELNA

ELNA 202-237-000 User manual

ELNA 202-142-007 User manual

ELNA

ELNA 202-142-007 User manual

ELNA 202-238-001 User manual

ELNA

ELNA 202-238-001 User manual

ELNA 202-082-204 User manual

ELNA

ELNA 202-082-204 User manual

ELNA 434 User manual

ELNA

ELNA 434 User manual

ELNA W1 User manual

ELNA

ELNA W1 User manual

ELNA 202-091-206 User manual

ELNA

ELNA 202-091-206 User manual

ELNA 495-526-20 User manual

ELNA

ELNA 495-526-20 User manual

ELNA 580+ User manual

ELNA

ELNA 580+ User manual

ELNA 795-816-116 User manual

ELNA

ELNA 795-816-116 User manual

ELNA 202-099-204 User manual

ELNA

ELNA 202-099-204 User manual

ELNA 202-255-004 User manual

ELNA

ELNA 202-255-004 User manual

ELNA 202-490-003 User manual

ELNA

ELNA 202-490-003 User manual

ELNA 202-239-002 User manual

ELNA

ELNA 202-239-002 User manual

ELNA 202-488-008 User manual

ELNA

ELNA 202-488-008 User manual

ELNA 202-080-202 User manual

ELNA

ELNA 202-080-202 User manual

ELNA 202-098-203 User manual

ELNA

ELNA 202-098-203 User manual

ELNA 202-420-002 User manual

ELNA

ELNA 202-420-002 User manual

Popular Sewing Machine Accessories manuals by other brands

Baby Lock BLRG20ST Instruction and reference guide

Baby Lock

Baby Lock BLRG20ST Instruction and reference guide

TAJIMA USB LINKER user guide

TAJIMA

TAJIMA USB LINKER user guide

Pfaff 333-712/02 Adjustment manual

Pfaff

Pfaff 333-712/02 Adjustment manual

Brother PR-600/600C user guide

Brother

Brother PR-600/600C user guide

JUKI IP-200 Setup manual

JUKI

JUKI IP-200 Setup manual

Pegasus KH Series instructions

Pegasus

Pegasus KH Series instructions

DURKOPP ADLER H-TYPE Series Additional instructions

DURKOPP ADLER

DURKOPP ADLER H-TYPE Series Additional instructions

Minerva Boskovice 4180i 4280i quick start guide

Minerva Boskovice

Minerva Boskovice 4180i 4280i quick start guide

manuals.online logo
manuals.online logoBrands
  • About & Mission
  • Contact us
  • Privacy Policy
  • Terms and Conditions

Copyright 2025 Manuals.Online. All Rights Reserved.