5
WARNING!
Personal injury or material damage due to
overloading.
Exceeding the max. load capacity of the
bicycle carrier as well as the permissible load
on the coupling joint of the trailer coupling or
the permissible overall weight can lead to
serious accidents.
• Observe the information on the max. load
capacity, permissible coupling joint load
and permissible overall weight of your
vehicle. Never exceed these specifications.
ATTENTION!
Material damage caused by hot exhaust
gases.
Damage can be caused to the bicycle carrier
or the bicycles if the the exhaust pipe is too
close.
•If necessary, use an exhaust deflector.
ATTENTION!
Material damage due to opening tailgate.
The tailgate could hit against the bicycle
carrier and be damaged.
• Switch off the electric tailgate and operate
them manually.
• Fold down the bicycle carrier before
opening the tailgate.
WARNING!
Personal injury or material damage possible
due to protruding parts.
Parts protruding beyond the edge of the
vehicle or bicycle carrier can cause personal
injury or material damage when driving.
• Only mount parts that do not protrude
beyond the edge of the vehicle.
WARNING!
Personal injury or material damage possible
due to an unsecured/incorrectly mounted
bicycle carrier.
The moving parts of the bicycle carrier
constitute a source of danger if not properly
mounted.
• Disassemble the bicycle carrier when not in
use.
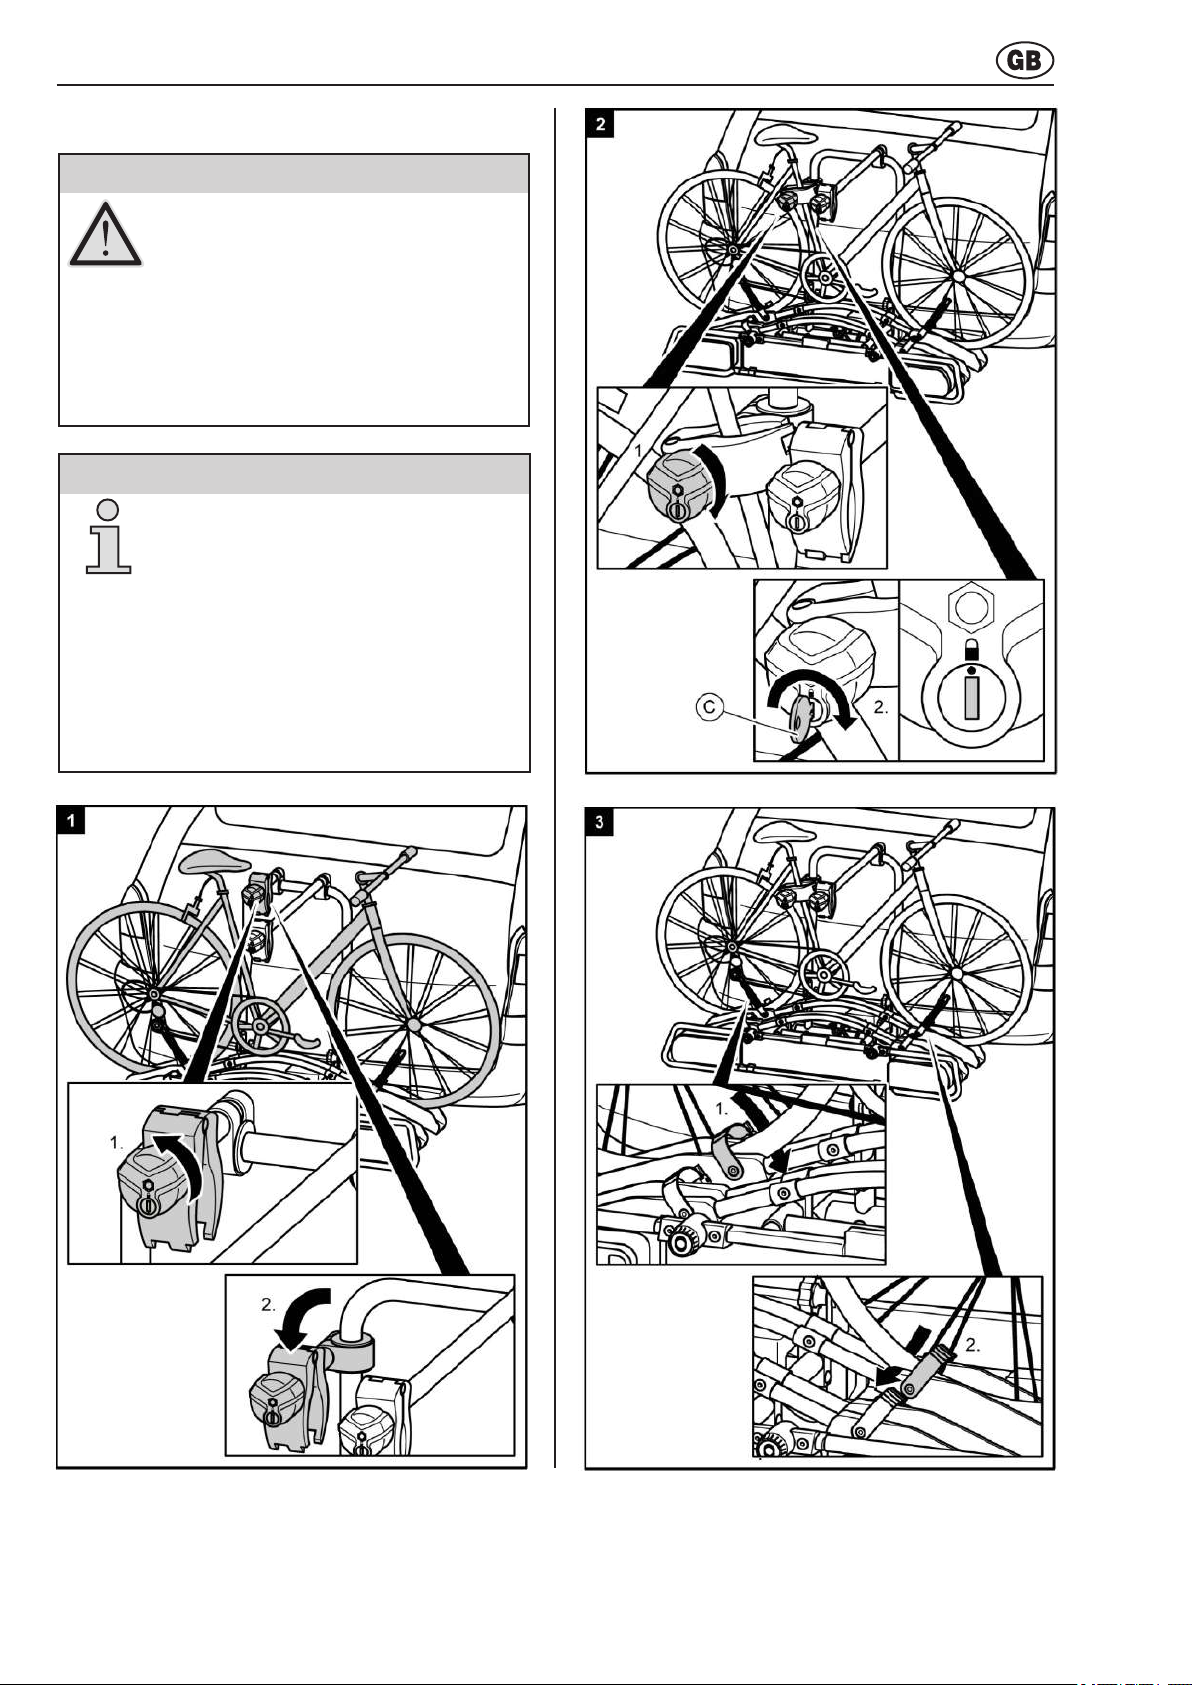
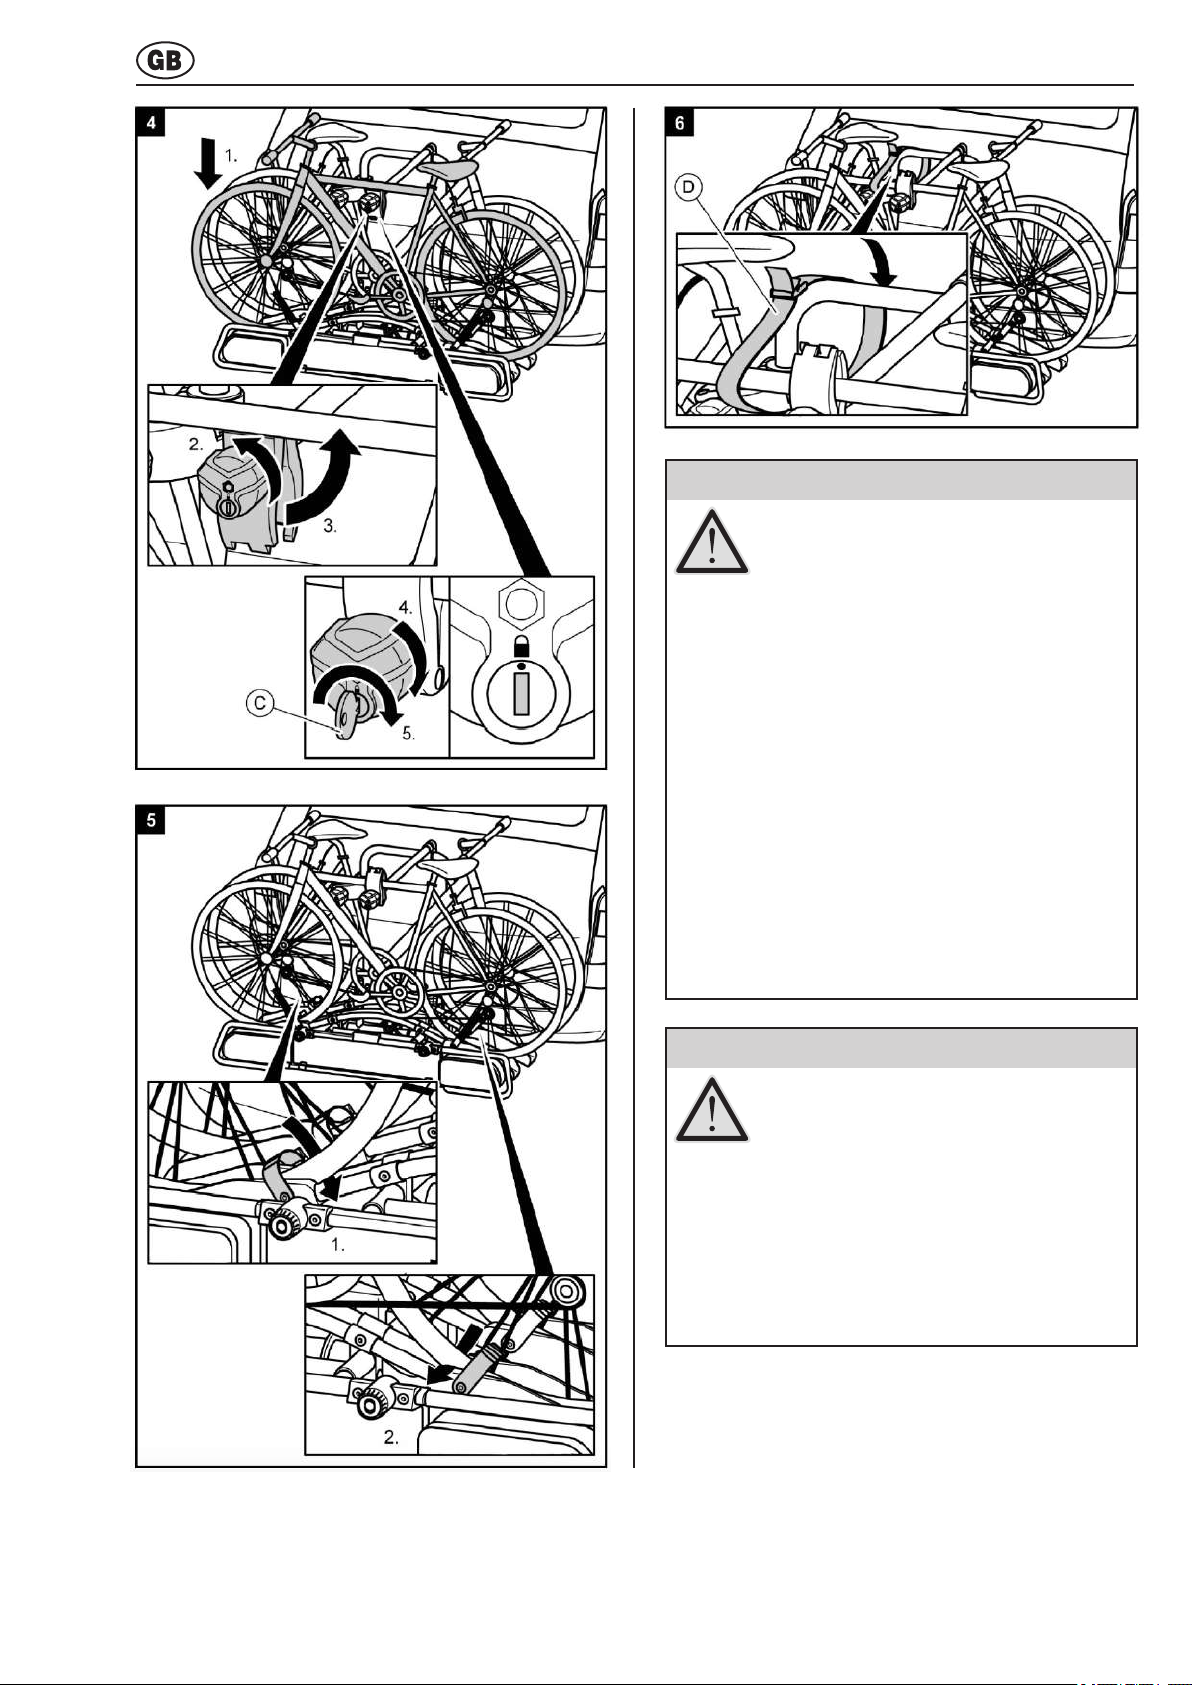
WARNING!
Personal injury or material damage due to loss
of the bicycles.
Driving without using the safety straps can
lead to accidents.
• Before the start of every trip, check correct
and secure mounting of the straps around
the bicycles and the U-bracket of the carrier
(See Step 6, Section "Mounting bicycles").
• Before the start of every trip, check to see if
the straps used are undamaged and not
worn.
• A damaged or worn strap must be replaced
with an undamaged one before driving.
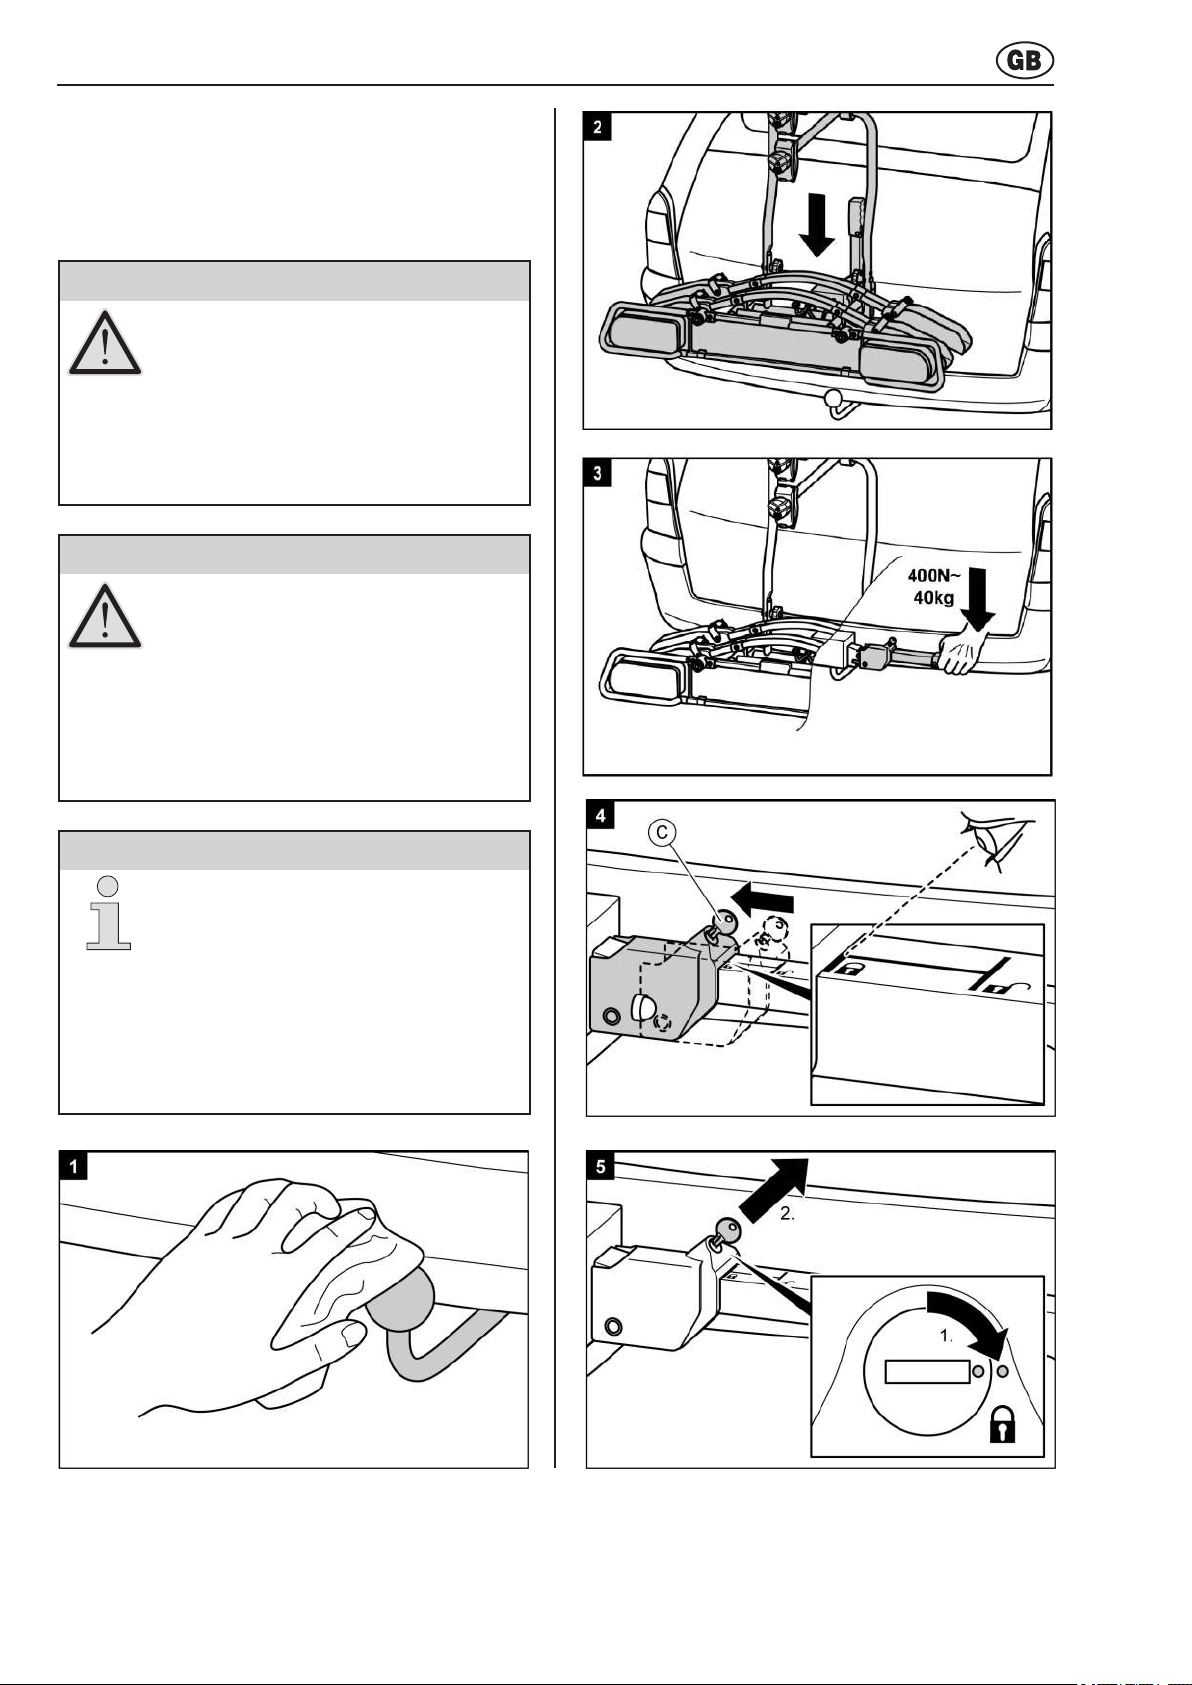
NOTE
European operating approval has been
obtained for this bicycle carrier. This is
supplied with the carrier and must be carried
when using the carrier.
WARNING!
Personal injury or material damage due to
changed vehicle driving characteristics.
Driving with the mounted bicycle carrier will
affect the driving characteristics of your
vehicle.
• Adjust your speed to the new driving
characteristics.
• Never drive faster than 130 km/h.
• Avoid sudden or jerky steering movements.
• Remember that your vehicle is longer than
usual.
Safety instructions
Follow the mounting instructions exactly. Failure to follow
the instructions may lead to personal injury and property
damage.
If you are not sure about correct mounting, ask your dealer
or the manufacturer for further information.
Neither the manufacturer nor dealer are liable for
damages which are due to improper use or mounting.
Check the bicycle carrier and the load regularly! You are
required to do so and may be held liable in case of
damage.
Safety instructions