EVBox Smart Charging User manual

1
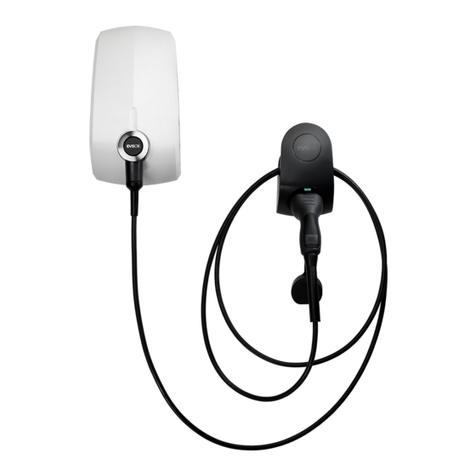
EVBox
Smart Charging
Smart Charging+
Installation manual

2
I’m home!
Let’s get started.

3
Table of contents
1. Safety instructions 4
2. EVBox Smart Charging modularity 6
3. How to install 8
4. Planning and site preparation 11
5. Physical installation 13
6. Cloud connectivity 25
7. Conguration 26
8. Validation 28
9. Finish 29
10. Troubleshooting 30
11. Bus cable specication 34
Addendum 1 / Colour code explanation 35
Addendum 2 / Wi-Fi connection properties and rewall rules 36
Addendum 3 / Components overview 37
EVBox Smart Charging CT Hub 38
EVBox Smart Charging Power Box 39
EVBox Smart Charging Genius 40
EVBox Smart Charging Wi-Fi Connect 41
EVBox Smart Charging Current Transformer (CT) 42
12. Warranty 43

4
1. Safety instructions
1.1 Safety warning
Carrying out electrical work in a home or workplace can be dangerous.
The Power Box, CT Hub, and Current Transformers are usually installed inside the distribution
board under a protective cover. The Genius can be installed both inside and outside the
distribution board. Only certied electricians may carry out the installation, which must be in
accordance with the national safety regulations.
1.2 Safety precautions
CAUTION: Risk of electric shock.
CAUTION: Refer to the accompanying instruction whenever you see this symbol.
DO NOT clamp or pull out NON-INSULATED conductors carrying DANGEROUS
VOLTAGE which could cause an electric shock, burns, or arc ash.
Please observe the following safety precautions to avoid potential electric shock, re, or personal
injury:
• Use this product only for its intended purpose.
• Use the product indoors only.
• Only mount the power cable in a sealed enclosure.
• Locate a free fuse or install an additional fuse for the protection of the Power Box. Connect
the power cable according to the connection diagram, see next pages.
• The circuit breaker acts as the disconnect device and must meet IEC 60947-2.
• Do not open the equipment or touch any of its electronic circuitry.
• Do not attempt to open, repair, or service any parts.
• Only use the bus and power cables delivered with the product. Category 5 or 6 SFTP
network cables are not supplied and must be sourced separately.
• Do not use the product if damaged.
• Do not use damaged current transformers or cables.
• Do not immerse the product in water or any other liquids.
• Do not expose the product to heat, ame, or extreme cold.
1.3 Responsibility
• Assembly, connection, and use must be carried out in accordance with the installation
standards currently in force.
• The device must be installed in accordance with the instructions given in this manual.
• Failure to observe the instructions for installing this unit may compromise the device’s intrinsic
protection.
• The device must be placed in a system that complies with the applicable standards and safety
regulations of the country of installation.
• Cables may only be replaced with cables of the correct rating.

5
1.4 Explanation of safety symbols
The table below explains the safety symbols.
Class II equipment does not require an earth connection.
IK06 This device has been tested according to IEC 62262 and complies to
impact class 6 (impact energy: 1 Joule).
1.5 Residual safety risk
• The device’s housing has IK06 impact immunity level. Therefore, it is essential that the housing
is not damaged during installation.
• When there is visible damage to the device’s housing, it is recommended to replace the device
to prevent any hazardous situation to occur.
1.6 Maintenance
• Clean the outside only with a dry, clean cloth.
• Do not use abrasive agents or solvents.
1.7 Support
Only certied electricians or equivalent may install EVBox Smart Charging. If you have any
questions, please contact your local distributor.
In case your local distributor is unable to help you, you can contact EVBox Smart Charging at:
evbox.com/support.

6
2. EVBox Smart Charging
modularity
2.1 Introduction
EVBox Smart Charging is a modular energy monitoring solution, designed to be easily installed
in existing and new installations. The modular design allows you to add additional current
transformers (CT) through the use of CT Hubs.
Smart Charging has three essential components:
1. CT Hubs: The main components of the monitoring system. You can connect up to 4 CTs or
Rogowski coils to the CT Hub to measure different currents, ranging from 0 A to 1000 A. This
allows for accurate submetering of (a group of) appliances. Serial-connect CT Hubs to measure
different appliances up to a distance of 100 meters (109 yards).
2. Power Box: This is the heart of the monitoring system as it provides power to all components.
It measures the line voltage of the different connected phases and transfers the data via
RS 485.
3. Genius / Wi-Fi Connect
Genius: The gateway between the monitoring system and the Smart Charging Cloud, ensuring
secure data storage from different components. It also interacts with third-party components.
The communication to cloud is done via Ethernet or Wi-Fi.
Wi-Fi Connect: The gateway between the monitoring system and the Smart Charging Cloud,
ensuring secure data storage from different components. The communication is via Wi-Fi only.
A typical Smart Charging setup consists of one Power Box, one Genius or Wi-Fi Connect,
CT Hubs, and CTs. The different components communicate through the Bus cable.
EVBox Smart Charging is further congured using the Smappee Energy Monitor mobile app
(available from the Apple App Store® or Google Play™ store). The real-time and historical

7
monitoring data are accessible for visualisation and analysis purposes.
EVBox Smart Charging is not only a monitoring solution but also an energy trafc controller. This
functionality allows automatic interaction with the energy trafc within the installation, which is
based on predened logic embedded in the system.
2.2 Kit overview
Smart Charging is offered in 4 versions:
• Smart Charging 1-phase
• Smart Charging+ 1-phase
• Smart Charging 3-phase
• Smart Charging+ 3-phase
2.3 Hardware pre-conguration
IMPORTANT: The components in the kit (Power Box, CT hub(s) and Wi-Fi Connect or
Genius unit) are pre-congured and are specic to one kit. These components cannot
be used with a different kit.
Typical device combinations are:
Smart charging: CT Hub - Power Box - Wi-Fi Connect
Smart charging+: CT Hub - Power Box - Genius
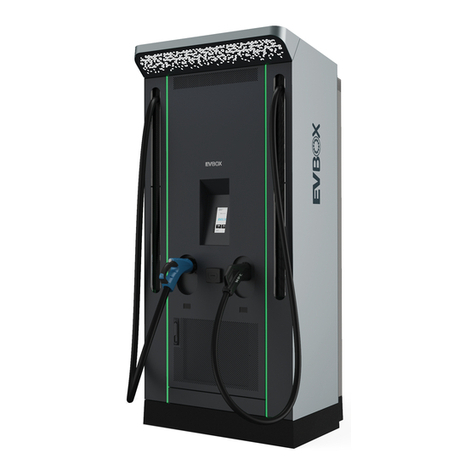
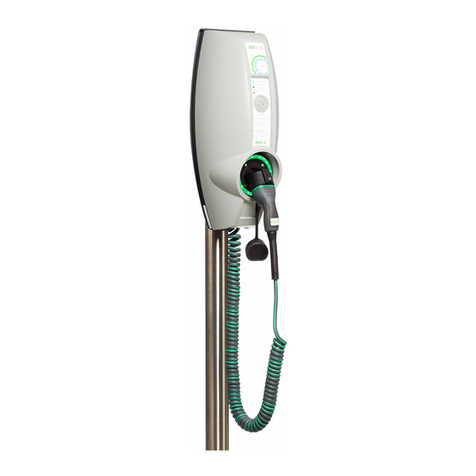
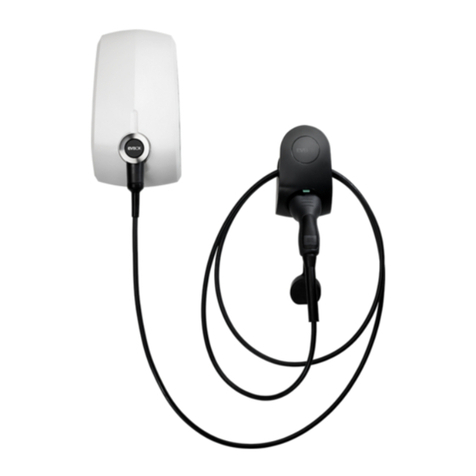
2.4 Compatibility of Smart Charging with EVBox charging
stations
Product Smart charging compatibility (July 2019)
BusinessLine
G3 onwards
Supported.
Connection via RS485 on ChargePoint PCB.
Refer to below schematic.
HomeLine
G3 onwards
Supported.
Connection via RS485 on ChargePoint PCB.
Refer to below schematic
Elvi Supported from Q4 2019 onwards.
Earlier Elvi charging stations are not compatible.

8
3. How to install
3.1 General
The installation procedure consists of the following steps:
1Planning and site preparation: determine the complete monitoring solution.
2 Physical installation: install all EV Box Smart Charging components, and connect the
Smart Charging to a charging station.
3 Conguration.
4 Validation of the installation: check the accuracy of live power values.
IMPORTANT: The components in the kit (Power Box, CT hub(s) and Wi-Fi Connect or
Genius unit) are pre-congured and are specic to one kit. These components cannot
be used with a different kit.
Note:
• Installation of the Smart Charging requires the Smappee Energy Monitor mobile app.
• The mobile app is required both for conguration of EVBox Smart Charging and the
monitoring of energy usage. We recommend that both the installer and the user install the
app.
• The username and password are specic to one kit and cannot be used with a different kit.
Store the Member Card with the username and password in a safe place.

9
3.2 Inside the box: Smart Charging 1 phase
DIN mounting
plate
Bus cable
(40 cm)
Power
Box
Wall mounting
plate
Bus cable
(150 cm)
CT Hub
Power
cable
Bus termination
plug
RJ10
connector
Wi-Fi
Connect
RS485 connector
for BusinessLine
Current
Transformer
2x
Quick Install
Guide
3.3 Inside the box: Smart Charging+ 1
DIN mounting
plate
Bus cable
(40 cm)
Power
Box
Wall mounting
plate
Bus cable
(150 cm)
CT Hub
Power
cable
Bus termination
plug
RJ10
connector
RS485 connector
for BusinessLine
Quick Install
Guide
Genius
Current
Transformer
3x
RJ10 splitter

10
3.4 Inside the box: Smart Charging 3 phase
DIN mounting
plate
Bus cable
(40 cm)
Power
Box
Wall mounting
plate
Bus cable
(150 cm)
Power
cable
Bus termination
plug
RJ10
connector
Wi-Fi
Connect
RS485 connector
for BusinessLine
Quick Install
Guide
Solid Core
3-Phase CT
2x
2x
3.5 Inside the box: Smart Charging+ 3
DIN mounting
plate
Bus cable
(40 cm)
Power
Box
Wall mounting
plate
Bus cable
(150 cm)
Power
cable
Bus termination
plug
RJ10
connector
RS485 connector
for BusinessLine
Quick Install
Guide
Genius
3x
RJ10 splitter
Solid Core
3-Phase CT
2x
CT Hub
Current
Transformer
3x

11
4. Planning and site
preparation
4.1 General
The rst step is to determine the complete monitoring solution. This consists of listing all the
loads that need to be measured, their properties, and the required hardware.
The checklist provided helps you to determine all necessary technical information for the next
steps and also to collect all the necessary hardware.
Note: If the requirements are not met, a custom package is required.
4.2 General architecture (what is to be monitored)
Single or multiple metering locations: Where are the circuit breakers or appliances to
be monitored? (Location inside the building, distances between them, etc.).
Total load (main service): yes/no?
Specic appliances? (e.g. HVAC, Heat pump, EV, Solar, etc.). Are they on separate
circuit breakers or are they powered from a wall socket?
Circuits (main sockets, lighting area, etc.).
4.3 Details
System: Verify the mains voltage – single phase (1P), three-phase 3P+N (3*400) or 3P
(3*230)
Requirements
• Wi-Fi (2.4 GHz)
• Øwire < 10 mm
• Wi-Fi (2.4 GHz)
• Øwire < 7 mm
• Wi-Fi (2.4 GHz) or Ethernet
• Øwire < 10 mm
• Wi-Fi (2.4 GHz) or Ethernet
• Øwire < 7 mm
Solar
No
Grid – 1 Phase
(1P+N)
EVBox Smart Charging
1 Phase Edition
Grid – 3 Phase
(3P+N)
EVBox Smart Charging
3 Phase Edition
Yes
Grid – 1 Phase
(1P+N)
EVBox Smart Charging +
1 Phase Solar Edition
Grid – 3 Phase
(3P+N)
EVBox Smart Charging +
3 Phase Solar Edition

12
How are the total load, solar, circuits, and/or appliances fused?
Phases of each measured load (circuits and appliances): Single-phase, three-phase,
3P+N (3*400V), voltage, frequency, power, amps.
Cross-sectional area or diameter of the wiring.
How will a stable internet connection be provided to the energy monitor: Wi-Fi,
Ethernet?
4.4 Tools (not included)
Multimeter
Screwdrivers
Wire stripper
Flashlight
Needle-nose pliers
Wire cutter
RJ10 crimping tool
Optional: drill, drill bits and screws
4.5 Supplies (not included)
Cable ties
Circuit breaker, 6 A, single-phase or three-phase (for Power Box only)
Ethernet cable if wired communication is used
External Wi-Fi antenna if there is a weak Wi-Fi signal
Category 5 or 6 SFTP network cable (for RS485 connection to charging station)
Cable gland (for BusinessLine network cable routing through base)

13
5. Physical installation
5.1 General
This procedure describes the required steps for the physical installation of EVBox Smart
Charging.
WARNING: For safety purposes, it is necessary to power off the installation before
proceeding with the physical installation.
5.2 Install components
Note: These instructions are applicable for both single phase and three phase installations.
Note: Do not switch on the power to the Power Box before all physical components are installed
and Smart Charging is connected to the EV charging station. All component must be installed
so the the Wi-Fi Connect or Genius unit can detect the components. Alternatively, you can
reboot the installation after completing the physical installation but before setting up the Wi-Fi
connection.
1 Install the Power Box on the same electrical group as the charging station.
2 Connect the power cable according to the connection diagram, see next pages.
3 Install the Wi-Fi Connect or Genius unit.
4 Mount the current transformers (CT) on the power cables. The arrow shown on the CT
(K > L) has to point in the direction of the current ow.
5 Connect the CTs to their corresponding CT Hub.
6 Make the following connections:
a. The rst CT hub to Port A of the Power Box using the supplied Bus cable.
b. Connect all the CT hubs with the supplied Bus cable or a custom twisted-pair RJ10 cable.
c. Plug the supplied bus termination plug in the free port of the last CT Hub.
d. Connect Port B of the Power Box to Port B of the Wi-Fi Connect or Genius unit using the
(longest) supplied bus cable or a custom twisted-pair RJ10 cable.
Note: DO NOT switch on the power at this time.

14
In a three-phase installation, all phases must be connected to the Power Box
according to the wiring diagram. This means that the appropriate wires of the power
cable must be connected to their respective phases (L1, L2, L3).
In a three-phase environment, the wires should run through the solid core. However, in
case of thicker wires, you must use three CTs instead of the solid core CT (available as a
three phase CT kit).
Label the current transformers
on the clamp and connector
side to enhance visualisation.
The arrow indicated on the
CT or Solid Core 3-Phase CT
(K > L) must point in the
direction of the current ow.
Mount the supplied bus
termination plug in the free
port of the last CT Hub.
You can use a custom RJ10 cable instead of the standard Bus cable. The RJ10 must
be a twisted pair cable. Pins 1 and 4 and Pins 2 and 3 must be twisted pairs. See the
Bus cable specication in section 11.

15
Brown – L1
Blue – Neutral
5.3 Connection diagram - Smart Charging 1-phase
REMARK: The above wiring and colour scheme is indicative. National regulations
must be respected. Wiring for Europe must be at least 1mm2 / 600 V and protected
by a 6 A circuit breaker.
Note: The Power Box L2 + L3 connections are connected to neutral in a single phase installation.

16
Brown – L1
Blue – Neutral
5.4 Connection diagram - Smart Charging+ 1-phase
REMARK: The above wiring and colour scheme is indicative. National regulations
must be respected. Wiring for Europe must be at least 1mm2 / 600 V and protected
by a 6 A circuit breaker.
Note: The Power Box L2 + L3 connections are connected to neutral in a single phase installation.

17
REMARK: The above wiring and colour scheme is indicative. National regulations
must be respected. Wiring for Europe must be at least 1mm2 / 600 V and protected
by a 6 A circuit breaker.
5.5 Connection diagram – Smart Charging 3-phase & Neutral
(3*400V)
Brown – L1
Black – L2
Grey – L3
Blue – Neutral

18
REMARK: The above wiring and colour scheme is indicative. National regulations
must be respected. Wiring for Europe must be at least 1mm2 / 600 V and protected
by a 6 A circuit breaker.
5.6 Connection diagram – Smart Charging+ 3-phase & Neutral
(3*400V)
Brown – L1
Black – L2
Grey – L3
Blue – Neutral

19
5.7 Connect charging station
The following sections describe the connection of EVBox Smart Charging to the following types of
charging station:
•
BusinessLine G3
•
BusinessLine G4
•
HomeLine
•
Elvi v2
For each type of charging station, refer to the related Installation Manual for instructions about
removing the cover to access the Smart Charging connection points.
WARNING: You must read and obey the safety precautions listed in the installation
manual before you remove the cover from an EVBox charging station.
Connect to EVBox Smart Charging
The Connection uses an RS485 connection between the Wi-Fi Connect or Genius unit and the
charging station.
1Install the
Category 5 or 6 SFTP
network cable along the route from the
Wi-Fi
Connect or Genius unit to the charging station.
Leave enough cable at each end to
make the connections.
2Install
the RJ10 connector (supplied) on the
the
Wi-Fi Connect or Genius unit end of
the network cable:
Note: The unused wires of the network cable cable remain unconnected.
3 When a Genius unit is used, connect the RJ10 Splitter (supplied) to the unit.
4 Connect the RJ10 connector to the
Wi-Fi Connect or the RJ10 Splitter.
5 Continue with connecting the network cable to the charging station.
1 – Do not connect
2 – RS485 – A
3 – RS485 – B
4 – Ground

20
BusinessLine G3
1 In the charging station, nd the RS485 connection on the modem board PCB.
The gures below will help you nd the connection.
2 Route the network cable into the charging station along the same route as the power cable.
When the cable enters the base of the station, drill a hole and use a cable gland.
3Connect the network cable to the modem board PCB using the gray 2-pole Phoenix plug
(supplied):
• Green > RS485 pin A
• Green/White > RS485 pin B
This manual suits for next models
1
Table of contents
Other EVBox Batteries Charger manuals

EVBox
EVBox Elvi V3.3 E3320-A555X-10.3 User manual

EVBox
EVBox Iqon Guide

EVBox
EVBox HomeLine User manual

EVBox
EVBox Troniq User manual

EVBox
EVBox Elvi User manual

EVBox
EVBox Troniq 100 User manual

EVBox
EVBox Elvi User manual

EVBox
EVBox BusinessLine series User manual

EVBox
EVBox BusinessLine User manual

EVBox
EVBox BusinessLine User manual
Popular Batteries Charger manuals by other brands

Sony
Sony BC-TRG operating instructions

Mastervolt
Mastervolt IVO Smart 12/35-3 user manual

ULTIMATE SPEED
ULTIMATE SPEED 74189 Operation and safety notes

National Railway Supply
National Railway Supply ELC-24/10-M-D Installing, operating and service instructions

OE Elsafe
OE Elsafe ARC-H LD Installation

MAXOAK
MAXOAK AC012K-HU-35 manual