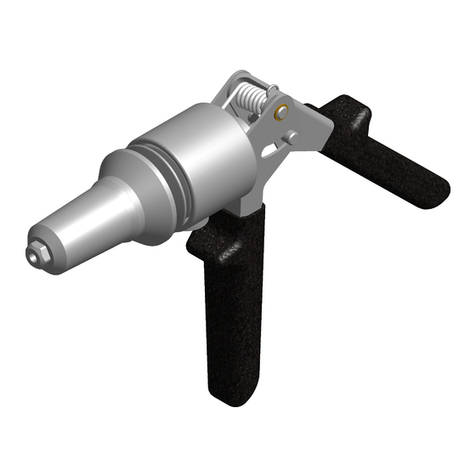
Gesipa PowerBird Pro Guide

GESIPA Blindniettechnik GmbH
Nordendstraße 13-39
64546 Mörfelden-Walldorf
Germany
PowerBird® Pro
Elektro-mechanisches
Blindniet-Setzgerät
Betriebsanleitung mit Ersatzteilliste
Battery Powered Riveting Tool
Operating Manual with Spare Parts List
Riveteuse électro-mécanique
Mode d’emploi avec pièces de
rechange
Remachadora eléctrica
Instrucciones de manejo con lista de
repuertos
Rivettatrice elettrica a batteria
Manuale per l’uso e la manuten-
zione ed elenco parti di ricambio
Elektro mechanisch
blindklinkpistool
Bedienings- en onderhouds
handleiding met onderdelenlijst
Elektro-mechanikus szegecshúzó készülék
Üzemeltetési utasítás,alkatrészlistával
Nitownica akumulatorowa
Elektro-mekanisk
blindnitteapparat
Betjeningsvejledning med reservedelsliste
Elektro-mekanisk blindnitpistol
Bruksanvisning med reservdelslista
Elektro mekaniskblindnaglepistol
Bruksanvisning med reservedelliste
Sähkömekaaninen
sokkoniittauslaite
Käyttöohje ja varaosalista
Equipamento eletromecânico
de rebitagem cega
Instrução de serviço com lista
de peças de reposição
Elektro-mechanicky
Návod k obsluze s listinou
náhradnich dilu
T +49 (0) 6105 962 0
F +49 (0) 6105 962 287
www.gesipa.com

Seite
Page
Page
Página
Pagina
Side
Sida
Side
Sivu
Página
Strona
Oldal
Strana
7-16
17-26
27-36
37-46
47-56
57-66
67-76
77-86
87-96
97-106
107-116
117-126
127-137
138-147
148-158
159-168
169-179
Zum Lesen der Bedienungsanleitung
bitte die erste Umschlagseite herausklappen.
When reading these instructions,
Mode d‘emploi:
déplier la première page de couverture.
Para leer las instrucciones de uso,
abrir la primera página de la cubierta.
Per leggere le istruzioni d’uso
aprire la prima pagina.
Voor het lezen van de gebruksaanwijzing
deze bladzijde openslaan.
Slå den første side ud for bedre at kunne lse
og forsta betjeningsvejledningen.
Vid läsning af bruksanvisning
skall första sista omslags sidorna vikasut.
Vennligst les forsiden først for å få en bedre
rettledning og forståelse av bruksanvisningen.
Lukiessasi tätä käyttöohjetta käännä
etummainen kuvasivu esiin.
Para ler as instruções de uso,
favor abrir a folha no verso da capa.
A kezelési útmutató elolvasásához kérjük


Ersatzteile
Spare Parts
Pièces détachées
Piezas de represto
Lista dei pezzi di ricambio
Onderdelen
Alkatrészek
Reservedele
Reservdelsar
Reservedeler
Varaosaluettelo
Peças sobressalentes
Náhradní díly

1
143 4975 17/32
143 4977 17/36
143 4999 17/40
143 4860 17/45
2 143 6003
3 144 6012
4 146 5392
5 143 5568
6 143 5384
7 143 5448
8 143 5412
9 152 0557
10 144 5768
11 143 5398
12 143 5406
13 143 4962
14 143 5397
15 143 5385
16 143 4970
17 144 5790
18 145 0817
19 143 5393
20 144 5990
21 143 4874
22 143 5442
23 143 4967
24 143 2608
25 144 5763
26 144 5989
27 143 5408
28 146 3584
29 143 5441
30 144 5773
31 144 5987
32 144 5772
33 143 5401
34
143 5416
35
143 5403
36
143 5016
37 143 4978
38 145 7646
39 143 5399
40 143 5396
41 145 7644
42 145 7641
43 145 7642 EU
145 7649 USA

17
GB
Table of Contents
1. Blind rivet setting tool ........................................................................18
1.1 Work capacity ..................................................................................18
1.2 Equipment/accessories ...................................................................18
1.3 Technical data .................................................................................18
1.4 Nosepiece table...............................................................................19
1.5 Safety instructions ...........................................................................20
1.6 Starting procedure ...........................................................................20
1.7 Mode of operation ...........................................................................21
1.8 Lighting ............................................................................................22
1.9 Maintenance ....................................................................................22
2. Charger and battery ............................................................................23
2.1 Technical data .................................................................................23
2.1.1 Battery charger .......................................................................23
2.1.2 Battery ....................................................................................23
2.2 Safety instructions ...........................................................................23
2.2.1 Battery charger .......................................................................23
2.2.2 Battery ....................................................................................24
2.3 Charging procedure.........................................................................24
2.3.1 Function lights .........................................................................24
2.4 Battery handling ..............................................................................24
2.5 Environmental protection.................................................................25
3. Troubleshooting ..................................................................................25
3.1 Blind rivet cannot be set ..................................................................25
3.2 No spent mandrel discharge ...........................................................25
...........................................................................25
4. Warranty ...............................................................................................26
5. Declaration of conformity ...................................................................26

18
GB
1. Blind rivet setting tool
1.1 Work capacity
Blind rivets starting from Ø2.4 mm Alu to Ø6.4 mm in all materials; blind rivets Ø8 mm Alu.
BULB-TITE® blind rivets up to a Ø of 7.7 mm for all materials. MEGA GRIP® blind rivets up to
a Ø of 6.4 mm for all materials, except G-Bulb Ø 6.4 mm.
To avoid blockages, we recommend that you use the corresponding jaw pushers
according to table 1.4!
1.2 Equipment/accessories
Nosepieces: 17/45 in working position
17/32; 17/36; 17/40 in the nosepiece holder
Wrench: SW 12 (cover for nosepiece holder)
Suspension loop: Concealed in housing
Battery (quick-change): 18.0 V
Battery charger: 100 V-240 V~/50-60 Hz
1.3 Technical data
Weight: 2.0 kg (with battery)
Stroke: 25 mm
Drive unit: Brushless direct current motor
Traction power: 15,000 N
Noise emission: LPA 78.5 dB (A), Measurement uncertainty K=3 dB
Vibrations: < 2,5 m/s², Measurement uncertainty K=1.5 m/s²

19
GB
1.4 Nosepiece table
Rivet Ø (mm) Rivet material Nosepiece Part no. Jaw pusher Part no.
2.4 Alu 17/18* 143 4976
60 143 5448
3.2 CAP®-Alu;
CAP®-Cu 17/18* 143 4976
3 and 3.2 Alu, steel,
stainless steel 17/24* 143 4955
4 Alu 17/24* 143 4955
4 Steel 17/27* 143 4973
4 Stainless steel 17/29* 143 4974
4.8 and 5 Alu 17/29* 143 4974
4.8 and 5 Steel 17/32 143 4975
4.8 and 5 Stainless steel 17/36 143 4977
6 Alu 17/36 143 4977
6 Steel 17/40 143 4965
17 145 0822
6.4 Alu 17/40 143 4965
6.4 Steel, PG steel, 17/45 143 4860
8 Alu 17/45 143 4860
BULB-TITE®
Ø (mm)
Rivet material Nosepiece Part no. Jaw pusher Part no.
4 Alu/Alu 17/26 BT* 143 4985 60 143 5448
5.2 Alu/Alu 17/32 BT* 144 5770
6.3
Alu/Alu, steel/
steel, monel/
stainless steel
17/42 BT* 143 4988 17 143 5384
7.7 Alu/Alu 17/48 BT* 143 4989
BT = BULB-TITE®; MG = MEGA-GRIP®
* available as special accessories
Elongated nosepieces and other special nosepieces are available upon request.
MEGA-GRIP®
Ø (mm)
Rivet material Nosepiece Part no. Jaw pusher Part no.
4.8
Alu/Alu, steel/
steel, stainless
steel
17/31 MG* 143 4993 60 143 5448
6.4
Alu/Alu, steel/
steel, stainless
steel
17/41 MG* 143 4865 17 143 5384

20
GB
1.5 Safety instructions
Caution:
The following safety rules must be observed for adequate protection against electric
• The blind riveting tool should be used exclusively to set blind rivets!
• Do not overload the tool; work within the prescribed work capacity.
•
substances or gases. Risk of explosion!
• Ensure that the battery is properly secured in the grip.
• Remove the battery when the blind riveting tool is not in use and for repair/servicing
operations.
• Do not use the blind riveting tool as a hammer.
• When not in use, keep the blind riveting tool in a dry, closed room and out of the reach
of children.
• When working with the tool, always wear protective goggles. Personal protection like
clothes, gloves, safety helmet, non-slip shoes, ear protection and anti-fall protection are
highly recommended.
• The air inlets for the motor should not be obstructed. Do not introduce anything into them.
• When setting the blind riveting tool down, make sure that it cannot fall.
• Use only genuine spare parts for repair.
• Repair work must be carried out by skilled workers. In case of doubt, always send the
blind riveting tool back to the manufacturer.
• Do not use the tool outside of riveting holes! The blind rivet could be ejected from the
tool! Never turn the tool towards yourself or towards another person!
• The mandrel container (n° 45) must be mounted on the blind riveting tool tool during
operation.
1.6 Starting procedure
• Insert fully charged battery in correct position into housing.
• Select correct nosepiece according to table 1.4.
• To screw in the nosepiece, activate the switch and proceed until the stop position has
been reached at the back.
• Then remove the battery. Screw in the nosepiece and tighten it using the wrench
provided. Put the battery back in and activate the switch.

21
GB
1.7 Mode of operation
The blind riveting tool features optimised operating speed. After inserting the blind rivet, the
blind riveting tool can be operated in two different modes:
a. Pressing and holding the switch:
Press and hold the switch to start riveting. The pulling process stops automatically when the
rivet reaches the rear end position. The tool automatically assumes the front starting position
when the switch is released.
b. Tapping the switch:
mandrel breaks off, the blind riveting tool stops and automatically re-assumes the front start-
ing position.
• Eject the spent mandrel by tilting to the rear into the spent mandrel container or to the
front through the nosepiece.
• The blind riveting tool is equipped with overload protection. In the event of overloading
the blind riveting tool, e.g. by setting rivets that are outside the working range, riveting
riveting tool go back to the start position and it is then ready for operation.
• The control detects a blockage on return (e.g. dirt, foreign object, etc. in the steel head
sleeve). The tool stops the return procedure and immediately assumes the rear end posi-
press the switch. The tool assumes the front end position and is again ready for use.
•
about the remaining battery time. Beeps sound to tell the user when to change the battery.
This ensures that the blind riveting tool will not switch off during a riveting operation.
The battery needs to be changed soon (about 20% battery charge remaining).
Change the battery after a few more riveting sequences in order to guarantee safe riveting
sequences (approx. 10% battery remaining).
The next riveting sequence cannot be
reliably carried out. The blind riveting tool is switched off. Change the battery.

22
GB
— Continuous light/torch function:
The lighting is switched on after a riveting sequence and stays on for
approx. 10 minutes. The LEDs then turn off automatically.
Zero position:
Lights switched off.
-- Work light:
Lights are switched on at the start of the riveting sequence. The LEDs stay
on for about 10 seconds and then switch off automatically.
The blind riveting tool is equipped with 3 LED lights to illuminate the work space. These can
be turned on by turning the black ring (n° 44) behind the LEDs. There are 3 settings, which
are displayed by an arrow cast in the housing.
1.8 Lighting
•
•
1.9 Maintenance
The maintenance of the blind riveting tool is limited to the complete claw mechanism and the
associated wearing parts:
• Remove battery (n° 45) from the blind riveting tool.
•
deposits in the top of the head!
•
• Take out the jaws (n° 5) and jaw pusher (n° 6), clean them and lubricate or grease the
sliding surfaces; replace the jaws (n° 5) if worn (blunt teeth!).
• Re-assemble in reverse order ensuring that all parts are tightened! We recommend that
you secure the screw connection using a thread adhesive (such as Loctite 222 or Loctite
243).
Regular maintenance will extend the service life of your high-quality GESIPA® tools
and they should be serviced at least every 2 years by an authorised workshop or by
GESIPA® Service. For tools that are used intensively, we recommend servicing ahead of
schedule.

23
GB
2. Charger and battery
2.1 Technical data
2.1.1 Battery charger
Input voltage: 100 V-240 V~/50-60 Hz
Output voltage: 21 VDC
Output current: 2.5 A
Weight: 0.6 kg
2.1.2 Battery
Nominal voltage: 18.0 V
Number of cells: 5
Cell/capacity: Li-Ion; 2.1 Ah
Weight: Approx. 0.42 kg
2.2 Safety instructions
2.2.1 Battery charger
Caution:
The following safety rules must be observed for adequate protection against electric
• The charger must be used exclusively to charge GESIPA® batteries.
• Check the cord, plug and charger regularly and have them repaired by Service or by an
authorised skilled specialist electrician when damaged.
• For repairs, use only genuine plugs and cords and genuine spare parts.
•
or gases. Risk of explosion!
• Take the charger out of its packaging before use. Insert the GESIPA® battery in the right
way into the charger.
• Never try to charge non-rechargeable batteries.
• Store the charger in a dry, closed room, out of the reach of children.
• Never insert metallic parts into the charging bay - danger of short circuiting.
• If the charger is wall-mounted, make sure that the inserted battery cannot fall out due to
• This battery charger should not be operated by people with physical or mental disabilities
or impairments, nor by untrained or unskilled persons. If this is the case, they should be
supervised by someone who is responsible for safety or receive instructions from them as
to how to use the device.

24
GB
2.2.2 Battery
Caution:
The following safety rules must be observed for adequate protection against electric
• Never insert metallic parts into the charging bay - danger of short circuiting.
• Never try to charge a damaged battery.
• Do not insert a dirty or wet battery into the charger.
• Never throw batteries into the waste, into fire or into water.
2.3 Charging procedure
• Charge only GESIPA® batteries and when the temperature of the environment is between
-5°C and +55°C!
• Take the charger out of its packaging and connect to the mains.
• Gently insert the GESIPA® battery in the right way into the charger.
• The charging operation starts automatically.
Charging* takes approx. 40 minutes.
* Charging times may vary according to the remaining capacity and the battery temperature.
2.4 Battery handling
• Only insert batteries into the charger once they have cooled down.
• GESIPA® batteries can be charged approx. 1000 times.
• Do not insert the battery into the charger after each use.
•
should be replaced.
• Store batteries in a dry place where there is no danger of frost. The optimum operating
temperature range is 10°C to 50°C.
GESIPA® batteries have a display showing battery life in percent. Press the button in the
display to activate the green LED lights for approx. 5 seconds.
2.3.1 Function lights
Signal Meaning
Constant green Battery is charged / top-up charging
Flashing green Charging
Constant red
Charging temperature out of range (battery too hot or too cold)
Flashing red Battery is defective or wrong battery (different manufacturer)

25
GB
*****
****
***
**
*
Battery fully charged
Battery capacity approx. 80%
Battery capacity approx. 60%
Battery capacity approx. 40%
Battery capacity max. 20%, charge soon
2.5 Environmental protection
If batteries need to be replaced, please observe the following:
• Take used GESIPA® batteries back to your agent or to GESIPA® for recycling.
• Never throw discarded batteries into the waste, into fire or into water!
3. Troubleshooting
3.1 Blind rivet cannot be set
Cause Remedy
No battery Charge battery; replace if necessary
Jaws dirty or worn Clean them and lubricate or grease the
sliding surfaces or replace them (see 1.9)
Jaw assembly (n° 4) loose Tighten (see 1.9)
3.2 No spent mandrel discharge
Cause Remedy
Nosepiece too small Exchange according to table (see 1.4)
Dirt inside head Clean (see 1.9)
Spent mandrel container full Take off and empty
Mandrel tube blocked Remove blocked mandrel and check for free
ejection (see 1.7)
Cause Remedy
No battery Change battery (see 1.7)
Blind riveting tool overloaded
Select rivet dimensions according to work
capacity (see 1.1; 1.7)
Blind riveting tool blocked on return (LED
Unscrew steel head sleeve and remove
blockage (see 1.9)

26
GB
4. Warranty
The applicable terms and conditions of guarantee shall apply and can be viewed under follow-
ing link: www.gesipa.com/agb
5. Declaration of conformity
pp Dr. Richard Gärtner
We hereby declare that the design and construction of the tool named below, as well as the
version that we have put on the market, complies with applicable fundamental health and safe-
shall render this declaration void. The safety information in the product documentation provided
must be observed. This document must be retained.
PowerBird® Pro
• DIN EN ISO 12100:2011
• DIN EN 60745-2-1:2011-01
• DIN EN ISO 82079-1:2013
• DIN EN 55014-1:2016
• DIN EN 55014-2:2016
• DIN EN 61000-4-2:2009
• DIN EN 61000-4-3:2011
• DIN EN 62233:2008
• EN 60335-1:2012
• EN 60335-2-29:2010
• DIN EN 62133:2013
• 2012/19/EU
• 2011/65/EU
Authorised documentation representative:
GESIPA Blindniettechnik GmbH
Nordendstraße 13-39
D-64546 Mörfelden-Walldorf

01/2018 - 1435444
Ihr Fachhändler
Your dealer
Cachet de revendeur
Proveedor
Rivenditore autorizzato
Uw vakhandelaar
Az Ön szaküzlete
Wasz dystrybutor
Deres forhandler
Leverantör
Deres forhandler
O vosso distribuidor
Vás obchodník
Table of contents
Other Gesipa Rivet Tools manuals

Gesipa
Gesipa GBM 95 User manual

Gesipa
Gesipa TAURUS 4 CF Guide

Gesipa
Gesipa PowerBird Pro Gold Edition Guide

Gesipa
Gesipa FireFox F User manual

Gesipa
Gesipa AccuBird Pro AV User manual

Gesipa
Gesipa taurus 1 User manual

Gesipa
Gesipa taurus 1 Guide

Gesipa
Gesipa FireBird Pro User manual

Gesipa
Gesipa AccuBird Pro User manual

Gesipa
Gesipa FireRex C-WT Guide

Gesipa
Gesipa TAUREX 1 Axial User manual

Gesipa
Gesipa FireBird Pro User manual

Gesipa
Gesipa TAURUS 3 C User manual

Gesipa
Gesipa PH 2000 Guide

Gesipa
Gesipa taurus 1 Guide

Gesipa
Gesipa 8000 User manual

Gesipa
Gesipa PowerBird Pro Gold Edition Guide

Gesipa
Gesipa AccuBird Guide

Gesipa
Gesipa FireFox 2 User manual

Gesipa
Gesipa taurus 3 Setup guide