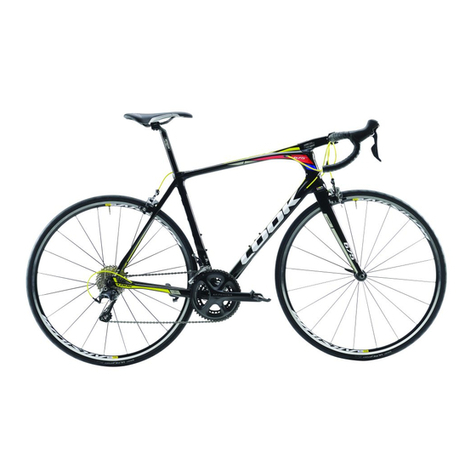
Look 785 HUEZ RS User manual

MA
NUAL

> 3-11
> 13-21
> 23-31
> 33-41
> 43-51
FR Noticed’instructions
EN Mountinginstructions
IT Istruzionidimontaggio
ES Manualdemontaje
DE Montageanleitung

FÉLICITATION!
INFORMATIONS IMPORTANTES
PRÉSENTATION DU PRODUIT
VÉRIFICATION AVANT INSTALATION
ROUTAGE COMPLET DU 785
Patte de dérailleur arrière
Congurationroutagemécanique/électrique
INSTALLATION ROUTAGE
Routagemécaniqueconguration
Routageélectriqueconguration
RoutageélectriqueWIRELESS
JEU DE DIRECTION
BOITIER DE PEDALIER
FOURCHE 785 HUEZ
MONTAGE DES FREINS
HYDRATATION
MONTAGE DES ROUES
ENTRETIEN
SERVICE APRÈS-VENTE
GARANTIE
> 4
> 4
> 5
> 5
> 5
> 5
> 5
> 6
> 6
> 7
> 8
> 9
> 10
> 10
> 10
> 10
> 11
> 11
> 11
> 11

4 5
FRFR
FÉLICITATIONS!
VousavezportévotrechoixsurleLOOK785HUEZRSou785HUEZ.
Nousvousremercionsdevotreconanceennosproduits.EnchoisissantcenouvelensembleLOOK,
vousbénéciezd’unproduitdehautetechnologie,deconceptionfrançaise.
Votre cadre et ses périphériques LOOK sont identiques à ceux fournis aux grandes équipes
professionnelles,ilssontcontrôlésduranttouteleurfabricationetvousapporterontentièresatisfaction.
Nosproduitssontconformesetmêmesupérieursauxdifférentesnormeseuropéennesetinternationales
envigueur.
Les produits LOOK sont protégés par les droits de la propriété industrielle.
Pour plus d’information, rendez-vous sur www.lookcycle.com/patents
Enregistrement de votre nouveau vélo LOOK
L’enregistrement de votre vélo LOOK vous
permettradefairepartiedenosclientsprivilégiés
et aussi de vous offrir la garantie à vie de votre
cadreetfourcheainsiqued’autresservices.
Votre ensemble 785 HUEZ RS ou 785 HUEZ a
été développé et conçu suivant les spécications
dubureaud’étudesLOOKand’offrirlameilleure
transmission de l’effort une précision de pilotage
inégaléeletoutavecundesignminimalistecomplété
parunearchitectureencarboneExtra-Light.
Ces caractéristiques sont possibles grâce à
l’optimisation des sections sur chacun des tubes
composantcekit-cadretrèshautdegamme.Tous
les tubes les raccords les rayons ont été déni
danslebutd’optimiserleratioperformance/poids,
permettantd’obtenirunrendementhorsnormede
l’ensemble pour plus de performance pour notre
équipeprofessionnelle.
Ainsi,les785intègrentplusieursinnovationsmon-
diales:unearchitecturecarboneExtra-lightàbase
denouveauxpliscarbonecombinéeàuneoptimi-
sationultimed’undesignépuré,lepédalierZED2
100%carbonemonobloc,unefourcheinédite100%
carboneultra-lightauxsectionsprivilégiantleratio
PoidsRigidité.
Votrecadreestmaintenantlivréavec:
•safourcheetsonjeudedirection.
•leroutagedeslinersdedérailleurpourlemontage
d’ungroupemécanique.
•soncollierenversioncarbonepourle785HUEZ
RS(6Nmmax),enversionaluminiumpourle785
HUEZ.
•LapochetteLookaveclesoptionsd’accastillages.
Lorsdumontagedelapattearrière,serrerlesvisau
couplede1Nm.Encasdedémontage/remontage,
remettre une goutte de frein let moyen (type
LOCTITE243™)surchaquevis.
Le785estéquipédebutéesdegainepermettantà
lafoislacompatibilitéaveclesgroupesmécaniques,
ouélectriques.SeréféreràvotredétaillantLOOK
pourlalistedesgroupescompatibles.
Pour le montage du pédalier ZED 2 merci de
vous reporter à la notice spécique du produit.
Attention:LesLOOK785HUEZRSet785
HUEZ sont conçus et optimisés pour être
utiliséspardescyclistesnedépassantpas100Kg.
Attention: LesLOOK785HUEZRSet785
HUEZnedoiventenaucuncasêtreserrés
dansunpiedd’atelier.Lorsdumontageduvéloil
fautcommencerparmettreunetigedeselleettenir
lekitcadreparlatigedeselle(serrageducollierau
couplemaximumde6Nm).
Avertissement sur les produits de
contrefacon : L’utilisation de produits
contrefaitsesttrèsdangereuseetpeutvouscauser,
ainsiqu’àdestiers,deschutesgravesprovoquant
desblessuresimportantesvoiremortelles.
PRÉSENTATION DU PRODUIT ROUTAGE COMPLET DU 785
VÉRIFICATION AVANT INSTALLATION
Patte de dérailleur arrière:
Conguration routage
mécanique / éléctrique :
INFORMATIONS IMPORTANTES
Avant toute utilisation, lisez l’intégralité de ces
instructions.Respectezl’ensembledesconseils
donnésandeproterpleinementdesatoutsde
ceproduitdehautequalité.
Nousvousconseillonspourlemontagedevous
adresseràundétaillantagrééLOOK.
LOOKse réserve lapossibilité dechanger les
spécicationsduproduitetsansavispréalable
danslebutdel’améliorer.
Note: Votre cadre 785 est routé pour un
montageenmécanique(linernoirsousleboitier
depédalier).
En complément des liners noirs qui doivent
rester dans le cadre lors du montage, votre
cadrepossèdedesguidescâblesbleusande
vousaiderauroutage.Lesguidescâblesbleus
doiventêtreretirésducadreunefoisleroutage
réalisé.
Pourplusderenseignementsurlesconditions,
lesoffresetlacouverturedel’enregistrementen
ligne,veuillezconsulternotresite
www.lookcycle.com rubrique POLITIQUE DE
GARANTIE>ENREGISTREMENTENLIGNE.
Note:Le785RSestcompatibleaveclegroupe
Campagnolo EPS V3, pour le montage de ce
groupe référez-vous aux préconisations du
fabricant.
Pourplusderenseignement,veuillezconsulter
notre site www.lookcycle.com rubrique
POLITIQUEDEGARANTIE>CONTREFACON.
Pour plus de renseignement sur les
INFORMATIONS IMPORTANTES à respecter,
veuillez consulter notre site www.lookcycle.
com rubrique POLITIQUE DE GARANTIE >
INFORMATIONSIMPORTANTES.
Si vous ne pouvez pas consultez notre
site, nous pouvons vous fournir nos
politiques de garantie sous forme papier, par
l’intermédiaire de votre revendeur.
www.lookcycle.com rubrique SERVICES >
NOTICES DE MONTAGE > 785 HUEZ RS - HUEZ
!
!
!

6 7
FRFR
INSTALLATION ROUTAGE
Routage mécanique conguration :
INSTALLATION ROUTAGE
Routage électrique conguration :
1/ Vérication de la présence des 2 liners noirs
dansletubediagonaletdes2linersbleusdansle
tube horizontal et la base arrière droite (attention
àneretirer aucun deces4 liners pour faciliterle
montage).
2/Vérierlaprésencedes2butéesdegainemétal
sous les 2 liners noirs en entrée du TD vers la
douillededirection(C1&C2).
3/Vérierlaprésencedes3autresbutéesdegaine
métaldanslesachetd’accessoiresfourni,puisles
placersurles3trousABD.
4/ Placer les 2 câbles de dérailleurs dans les 2
liners noirs. Trou gauche C1 = dérailleur avant,
Trou droit C2=dérailleur arrière. Pourcedernier
replacerledanslelinerbleupourlepassagedans
labasedroite.
1/ Vérication de la présence des 2 liners noirs
dansletubediagonaletdes2linersbleusdansle
tubehorizontaletlabasearrièredroite.
2/Retirer ces2linersnoirsavecles2butées de
gainemétal.
3/SeréféreràlaNoticeShimanoDI2.
4/TrouàgaucheC1bouchoncaoutchoucàplacer
directementdanslecadrecôtégauche.
5/ Trou à droite C2 placer le câble électrique
Shimanodeladouillejusqu’auboitierdepédalier,
puis placer le bouchon fendu Di2 côté droit
(utilisation possible de l’outil ParkTool à aimants
RefIR-I).
6/ De même dans la base à l’aide du liner bleu
passerlecâbleélectriqueShimanodelapattede
dérailleurDauboitierdepédalierF,puisplacerle
bouchonfenduDi2aupointD(utilisationpossible
del’outilParkToolàaimantsRefIR-I).
7/PlacerlecâbleélectriqueShimanodansletube
deselledupointEauboitierD.
5/ Placer le câble de frein arrière avec autour
le tube mousse fourni dans le tube horizontal
puis replacer la butée de gaine métal à chaque
extrémité.Possibilitédes’aiderdulinerbleucomme
guidepuisleretirer.
6/Vousavezlapossibilitédemettreuntensionneur
dedérailleuravantdanscecascoupervotregaine
dedérailleuravantàenviron3cmdelasortiede
douille,puisplacerletensionneur.Placerlecâble
de dérailleur avant depuis la manette et sortez-le
derrièreleboitierdepédalier.
7/Finaliserlemontage.
8/Vueduguidecâbleboitierdepédalierclipsable
etdéclipsable à l’aide d’une pinceà circlips dans
les2trousprévusàceteffet(petiteècheindiquant
l’avantducadreF).
[A] [A]
[B] [B]
[ D ] [ D ] [E]
[F] [F]
[F]
[F]
8/AprèsconnexiondeslssurleboitierShimano,
placercedernierdansleboitierFpuislerepousser
cotéTDderrièreletubecarboneajouréanqu’ilne
retombepasdansl’axeduboitierdepédalier.
9/Andesécuriseretéviterlecontactavecl’axe
du boitier de pédalier, le l du dérailleur arrière
peutpasserdansleguidecâblesmécaniqueF(si
besoinlégèrementagrandirlestrousavantarrière
audiamètre5mm).
10/Placerlecâbledefreinarrièreavecautourle
tube mousse fourni dans le tube horizontal puis
replacerlabutéedegainemétalàchaqueextrémité.
Possibilitédes’aiderdulinerbleucommeguide.
11/Vousavezlapossibilitédemettreuntensionneur
dedérailleuravantdanscecascoupervotregaine
dedérailleuravantàenviron3cmdelasortiede
douille,puisplacerletensionneur.Placerlecâble
de dérailleur avant depuis la manette et sortez-le
parlasortie.
12/Finaliserlemontage.
C1=Gauche/Left
C2=Droite/Right
C1=Gauche/Left
C2=Droite/Right

8 9
FRFR
C1=Gauche/Left
C2=Droite/Right
INSTALLATION ROUTAGE
Routage électrique WIRELESS :
1/ Vérication de la présence des 2 liners noirs
dansletubediagonaletdes2linersbleusdansle
tubehorizontaletlabasearrièredroite.
2/ Retirer les 2 liners noir avec les 2 butées de
gainemétal+linerbleudelabasedroite.
3/SeréféreràlaNoticeSRAMETAP.
4/TrouàgaucheC1bouchoncaoutchoucàplacer
directementdanslecadrecotegauche.
5/TrouàdroiteC2bouchoncaoutchoucàplacer
directementdanslecadrecotedroit.
6/Troupattededérailleurarrièrebouchonàplacer
directementdanslecadreenD.
1/ Graisser la portée supérieure de votre cadre
et placer le roulement supérieur 1p 1/8 sur cette
portée.
2/graisserlaportéeinférieuredevotrecadreetde
votre fourche placer le roulement inférieur 1p 1/2
danslecadreenprenantsoindeplacerlechanfrein
extérieur vers l’intérieur de la douille de direction
puisenlervotrefourchedansvotrecadre.
3/Glisserlabaguedecompressionsurlafourche
jusqu’auroulementsupérieur.
4/Glisserlapotence.
5/Placerlarondelleconiquesupérieurepuislekit
decompression.
6/Serragedukitdecompressiondanslepivotde
fourche(6Nmmax)puiseffectuerleréglagedujeu
dedirection.
7/VérierlaprésencedubouchonenE.
8/ Placer le câble de frein arrière avec autour le
tube mousse fourni dans le tube horizontal puis
replacerlabutéedegainemétalàchaqueextrémité.
Possibilitédes’aiderdulinerbleucommeguide.
9/Vousavezlapossibilitédemettreuntensionneur
dedérailleuravantdanscecascoupervotregaine
dedérailleuravantàenviron3cmdelasortiede
douille,puisplacerletensionneur.Placerlecâble
de dérailleur avant depuis la manette et sortez-le
parlasortie.
10/Finaliserlemontage.
JEU DE DIRECTION
Lejeudedirection785HUEZestunsystèmetraditionnelarattrapagedejeuparlaprésenced’unkitde
compression.Ilesttoujourspréférabledeplacerlarondelleconiquesupérieureau-dessusdelapotence
and’éviterleserragedelapotencesurl’extrémitédupivot.Ceciandelimitertoutrisquedessuration
delastructurecarboneàlongterme.
[1] Kitdecompression
[ 2 ] Rondelleconiquesupérieure
[3] Potencetraditionnelle
[4] RehausseJDD
[5] Baguedecompressionfendue
[6] Roulementsupérieur1"1/8
[7]
Cadreavecportéescarbone
[8]
Roulementinférieur1"1/2
[9]
Fourchemonobloc
[A]
[1]
[ 2 ]
[5]
[6]
[8]
[9]
[3]
[4]
[7]
[B]
[F]
[E][ D ]

10 11
FRFR
Fig. 28
A
B
BOITIER DE PÉDALIER
Lescadres785HUEZRS
sontdisponiblesendeuxversions:
•ShimanoPRESSFIT
(diamètre41mm*largeur86,5mm)
•LookZED(diamètre65mm*largeur63mm)
Les cadres 785 HUEZ sont livrés en boitier type
Shimano PRESSFIT diamètre 41mm* largeur
86,5mm.
Votre785HUEZRSou785HUEZestéquipéd’insertspourxerdeux
portes-bidonssurletubedeselleetletubediagonal(Fig.28).
Démonter les quatre vis M5 avec une cléAllen de 4mm. Monter les
portes-bidons (se référer à la notice produit correspondant), puis
revisserlesvisaucouplede3Nm.
Les fourches 785 HUEZ RS et 785 HUEZ sont à
déport différenciés an de satisfaire toutes les
taillesdescadresetrépondreaumieuxàlapratique
ducyclismeencompétition (XS S 50mm, M LXL
43mm).
Leproletlastructurecarboneaétéprofondément
étudier an de fournir un des meilleurs ratio
Précision,poidsetrigiditédumarché.
Suivrelesindicationsdemontagedufabricant.Nos
pattesdefourchesontconçuesavecdesergotsde
sécurité.
Malgré tout le soin apporté à nos fabrications,
si un défaut apparaît ou si une réparation est
nécessaire, adressez-vous à votre revendeur
agréeLOOKenluiapportantleproduitdéfectueux
accompagnédevotrefactured’achatetprécisez-lui
ledysfonctionnement.
Ils’agitd’unmontagedefreinstandardsurfourche
ethaubans,laseulespécicationpropreàcecadre
est la mise en place conseillé du tube mousse
noir,autourducâbledufreinarrière dans le tube
horizontal,andelimitertoutbruitdevibrationdans
lecadre(XSL500mm,SL520mm,M L550mm, L
565mm,XL580mm).
Lecontrôleetlamaintenancesontimportantspour
votresécuritéetladuréedeviedevotreproduit.
Unvéloetsescomposantsmalentretenus,peuvent
secasserouprésenterdesdysfonctionnements,ce
quipourraitentraînerunaccidentlorsduquelvous
pourriezêtretué,gravementblesséouparalysé.
FOURCHE 785 HUEZ
MONTAGE DES ROUES
SERVICE APRÈS-VENTE
MONTAGE DES FREINS
ENTRETIEN
GARANTIE
Note:Pourtoutesopérationsdemaintenance,
nousrappelonsquelafourchedoitêtreposée
suruneroueetuneusureanormaledespattes
quiseraitdueàuneabrasionsurlesolnepeut
pasêtrecouverteparlagarantieLOOK.
Attention: Les fourches ne sont pas livrées
montées sur les cadres avec un pivot d’une
longueur supérieure. Vous avez à recouper le
pivotdefourchepouratteindrevosréglages.
Attention:Utiliserdepréférencelesvislivréesd’origine.
Pour le montage des freins, vous aurez
besoin des outils suivants :
•JeudeclésAllen
•Pincecoupante
•Emboutsdegaine
•Emboutsdecâble
Pour plus de renseignements sur les obliga-
tions d’entretien, veuillez consulter notre site
www.lookcycle.comrubriquePOLITIQUEDE
GARANTIE > ENTRETIEN
Garantie légale
LOOK, à travers ses agents et distributeurs
agréés dans le pays dans lequel le produit a été
acheté, garantie ses vélos/cadres contre les non-
conformités et contre les vices cachés (1) pour
unepériodededeuxans(2)àcompterdeladate
d’achat.
(1)Lesvicescachésneconcernentquelalégislation
Française.§1641à1649ducodecivil.
(2)Certainspaysoùétatsautorisentunelimitation
deduréesupérieurepourunegarantieimplicite,et/
ou pour l’exclusion ou la limitation de dommages
directsouconsécutifs,cequiimpliquequelalimite
décrite ci-dessus ne s’appliquerait pas. Cette
garantie limitée vous donne des droits légaux
spéciques, mais aussi éventuellement d’autres
droits,quivarientselonleslégislationslocales.
Pourplusderenseignementssurcouverturede
la garantie légale, veuillez consulter notre site
www.lookcycle.com rubrique POLITIQUE DE
GARANTIE > GARANTIE LEGALE
Garantie à vie
La qualité et la abilité de nos produits que nous
maitrisonsdelaconceptionàlacommercialisation
nous permettent, à travers nos agents et
distributeursagréés,devousproposerenextension
des garanties légales, une garantie à vie gratuite
surlescadresetfourchesdesvélosLOOK.
Pourplusderenseignementssurlesconditions
etlacouverturedelagarantieàvie,veuillezcon-
sulter notre site www.lookcycle.com rubrique
POLITIQUEDEGARANTIE>GARANTIEÀVIE
HYDRATATION

CONGRATULATIONS!
IMPORTANT INFORMATION
PRODUCT PRESENTATION
VERIFICATION BEFORE INSTALLATION
COMPLETE ROUTING OF THE 785
Rearderailleurhanger
Congurationmechanical/electricalrouting
ROUTING INSTALLATION
Mechanicalroutingconguration
Electricalroutingconguration
WIRELESSelectricalrouting
HEADSET
BOTTOMBRACKET
785HUEZFORK
FITTINGTHEBRAKES
HYDRATION
FITTINGTHEWHEELS
MAINTENANCE
AFTER SALES SERVICE
GUARANTEE
> 14
> 14
> 15
> 15
> 15
> 15
> 15
> 16
> 16
> 17
> 18
> 19
> 20
> 20
> 20
> 20
> 21
> 21
> 21
> 21
EN

14 15
ENEN
CONGRATULATIONS !
VYouhavechosentheLOOK785HUEZRSor785HUEZ.
Thankyouforyourcondenceinourproducts.BychoosingthisnewLOOKset,youwillbenetfromstate-
of-the-arttechnologyandFrenchdesign.
YourLOOKframeandcomponentsareidenticaltothosesuppliedtothebiggestprofessionalteams.They
aretestedthroughoutthemanufacturingprocessandwillbringyoucompletesatisfaction.
Our products comply with, and are even superior to the various current European and international
standards.
LOOK products are protected by industrial property rights.
For further information, visit www.lookcycle.com/patents.
Registering your new LOOK bicycle
Registering your LOOK bicycle will allow you to
becomeoneofourprivilegedcustomersandalso
provideyouwithalifetimeguaranteeforyourframe
andfork,aswellasotherservices.
Your 785 HUEZ RS or 785 HUEZ set has been
developed and designed according to the
specications of the LOOK design ofce in order
toofferthebestpowertransmissionandunrivalled
manoeuvring precision, all with minimalist design
completewithanExtra-Lightcarbonframe.
This specication is made possible thanks to
the optimisation of sections in each of the tubes
containedinthishigh-endframekit.Allofthetubes,
connectors and spokes have been designed to
optimise the performance/weight ratio, making it
possibletoachieveahighefciencyfromtheset,
forimprovedperformanceforourprofessionalteam.
Assuch,the785includeseveralglobalinnovations:
Extra-light carbon architecture based on new
carbonpliescombinedwithultimateoptimisationof
asleekdesign,the100%carbonmonoblocZED2
bottombracket,apreviouslyunseen100%carbon
ultra-lightforkwithsectionsthatfavour therigidity
toweightratio.
Yourframeisdeliveredwith:
•forkandheadset.
• derailleur liner routing to mount a mechanical
groupset.
• the carbon version for the 785 HUEZ RS (6Nm
max),orthealuminiumclampforthe785HUEZ.
•theLookpouchwithriggingoptions.
Whenmountingtherearhanger,tightenthescrew
to1Nm.Incaseofdisassembly/reassembly,add
adropofthreadlock(typeLOCTITE243™)toeach
screw.
The 785 is tted with end caps that both enable
its compatibility with the mechanical or electrical
groups.Refer to your LOOKretailer for thelistof
compatiblegroups.
Please refer to the specic product instructions
to mount the ZED 2 bottom bracket.
Attention: The LOOK 785 HUEZ RS and
785HUEZaredesignedandoptimisedtobe
usedbycyclistsunder100Kg.
Attention: The LOOK 785 HUEZ RS and
785 HUEZ must never be clamped in an
assemblystand.Whenassemblingthebicycle,start
byaddingtheseatpostandholdthekitframebythe
seatpost(tightentheclamptoamaximumtorque
of6Nm).
Warning about counterfeit products :
Theuseofcounterfeitproductsisextremely
dangerousandcouldcauseyouandanythirdparty
adangerousfallleadingtosevereorfatalinjuries.
PRODUCT PRESENTATION COMPLETE ROUTING OF THE 785
CHECK BEFORE INSTALLATION
Rear derailleur hanger:
Mechanical / electrical
routing conguration :
IMPORTANT INFORMATION
Readtheseinstructionsinfullbeforeeveryuse.
Respecttheadviceprovidedtomakesureyou
can make the most of the advantages of this
highqualityproduct.
We advise you to contact an approved LOOK
retailertotyouraccessories.
With the aim of improving it, LOOK reserves
the right to change the product specications
withoutpriornotice.
Note: Your 785 frame is routed using a
mechanicalmount(blacklinerunderthebottom
bracket).
Inadditiontotheblacklinersthatmustremain
ontheframe during assembly, your framehas
bluecableguidestohelpyouwith the rigging.
The blue cable guides must be removed from
theframeoncetheriggingiscomplete.
For further information about the conditions,
offers and coverage of online registration,
please consult our website www.lookcycle.
comsectionGUARANTEEPOLICY>ONLINE
REGISTRATION.
Note: The 785 RS is compatible with the
Campagnolo EPS V3 group. Refer to the
manufacturer’sinstructionstotthisgroup.
Forfurtherinformation,pleasevisitourwebsite
www.lookcycle.com section GUARANTEE
POLICY>COUNTERFEIT.Forfurtherinforma-
tion about the IMPORTANT INFORMATION to
berespected,pleaserefertoourwebsitewww.
lookcycle.com section GUARANTEE POLICY
>IMPORTANTINFORMATION.
If you cannot refer to our website, we can
provide our guarantee policies in paper
format, via your retailer.
!
!
!
www.lookcycle.comsectionSERVICES>MOUNT-
ING INSTRUCTION > 785 HUEZ RS - HUEZ

16 17
ENEN
ROUTING INSTALLATION
Mechanical routing conguration :
ROUTING INSTALLATION
Electrical routing conguration :
1/Checkthatthereare2blacklinersinthediagonal
tubeand2bluelinersinthehorizontaltubeandthe
rearrightchainstay(becarefulnottoremoveanyof
these4linerstofacilitateassembly).
2/ Check that there are 2 metal end caps under
the2blacklinersandatthestartofthedowntube
towardstheheadtube(C1&C2).
3/Checkthatthereare3othermetalendcapsin
the bag of accessories provided, and then place
themonthe3holesABD.
4/ Place the 2 derailleur cables into the 2 black
liners.LeftholeC1=frontderailleur,RightholeC2
=rearderailleur.Forthelatter,placeitintheblue
linersoitcanpassintotherightchainstay
1/Checkthatthereare2blacklinersinthediagonal
tubeand2bluelinersinthehorizontaltubeandthe
rearrightchainstay.
2/Removethese2blacklinerswiththe2metalend
caps.
3/RefertotheShimanoDI2instructions.
4/LeftholeC1rubberstoppertobeplaceddirectly
intotheframeontheleftside.
5/RightholeC2placetheShimanoelectriccable
fromthetubethroughtothe bottombracket,then
placetheDi2splitstopperontheright(youcanuse
themagneticParkToolRefIR-1).
6/ Similarly in the chainstay use the blue liner to
pass the Shimano electric cable from derailleur
hangerDtothebottombracketF,thenplacetheDi2
splitstopperinpointD(youcanusethemagnetic
ParkToolRefIR-1).
7/PlacetheShimanoelectriccableintheseattube
frompointEtobracketD.
5/Placetherearbrakecable,wrappedinthefoam
tube provided, into the horizontal tube and then
replacethemetalcapsontoeachend.Youcanuse
thebluelinerasaguideandthenremoveit.
6/ You can use a front derailleur tensioner
beforehand.Inthiscasecutyour front housing to
approximately3cmfromtheendofthetube,then
addthetensioner.Addthefrontderailleurcableat
theleverandbringitoutbehindthebottombracket.
7/Completetheassembly.
8/ View of the bottom bracket cable guide that
can be clipped on and off using circlip pliers in
the2holesprovidedforthispurpose(smallarrow
indicatingthefrontoftheframeF).
[A] [A]
[B] [B]
[ D ] [ D ] [E]
[F] [F]
[F]
[F]
8/ After connecting the wires to the Shimano
bracket, place it into bracket F then push it back
onthesideofthedowntubebehindtheopenwork
carbontubesoitdoesnotfallbackintotheaxisof
thebottombracket.
9/ In order to secure and avoid contact with the
axisofthebottom bracket, the wire fromtherear
derailleur can be passed through the mechanical
cableguideF(ifnecessary,slightlywidenthefront
andrearholestoadiameterof5mm).
10/Placetherearbrakecable,wrappedinthefoam
tube provided, into the horizontal tube and then
replacethemetalcapsontoeachend.Youcanuse
thebluelinerasaguide.
11/ You can use a front derailleur tensioner
beforehand.Inthiscasecutyour front housing to
approximately3cmfromtheendofthetube,then
addthetensioner.Addthefrontderailleurcableat
theleverandbringitoutattheexit.
12/Completetheassembly.
C1=Gauche/Left
C2=Droite/Right
C1=Gauche/Left
C2=Droite/Right

18 19
ENEN
C1=Gauche/Left
C2=Droite/Right
ROUTING INSTALLATION
WIRELESS electrical routing :
1/Checkthatthereare2blacklinersinthediagonal
tubeand2bluelinersinthehorizontaltubeandthe
rearrightchainstay.
2/Removethe2blacklinerswiththe2metalend
caps+therightchainstayblueliner.
3/RefertotheSRAMETAPinstructions.
4/LeftholeC1rubberstoppertobeplaceddirectly
intotheframeontheleftside.
5/RightholeC2rubberstoppertobeplaceddirectly
intotheframeontherightside.
6/Rearderailleurhangerholestoppertobeplaced
directlyintotheframeatD.
1/Lubricatetheupperbearingseatofyourframe
and place the top bearing 1p 1/8 on this bearing
seat.
2/Lubricatethelowerbearingseatofyourframeand
fork,placethelowerbearing1p1/2intotheframe
takingcaretoplacetheouterchamfertowardsthe
insideoftheheadtubethenthreadyourforkonto
yourframe.
3/Slidethecompressionringonto theforkuntilit
reachesthetopbearing.
4/Slideonthebracket.
5/ Add the top conical washer and then the
compressionkit.
6/Tightenthecompressionkitontothepivotofthe
fork(6Nmmax)thenadjusttheheadset.
7/CheckthatthereisastopperinE.
8/Placetherearbrakecable,wrappedinthefoam
tube provided, into the horizontal tube and then
replacethemetalcapsontoeachend.Youcanuse
thebluelinerasaguide.
9/ You can use a front derailleur tensioner
beforehand.Inthiscasecutyour front housing to
approximately3cmfromtheendofthetube,then
addthetensioner.Addthefrontderailleurcableat
theleverandbringitoutattheexit.
10/Completetheassembly.
HEADSET
The785HUEZheadsetisatraditionalsetadjustmentsystemforuseofacompressionkit.Itisalways
preferabletoplacetheupperconicalwasherabovethebracketinordertoavoidtighteningthebracketat
theendofthepivot.Thisistolimittheriskofthecarbonstructurecrackinginthelongterm.
[1] Compressionkit
[ 2 ] Upperconicalwasher
[3] Traditionalbracket
[4] JDDlift
[5] Splitcompressionring
[6] Topbearing1"1/8
[7]
Carbonframewithbearingseats
[8]
Lowerbearing1"1/2
[9]
Monoblocfork
[A]
[1]
[ 2 ]
[5]
[6]
[8]
[9]
[3]
[4]
[7]
[B]
[F]
[E][ D ]

20 21
ENEN
Fig. 28
A
B
BOTTOM BRACKET
785HUEZRSframesareavailableintwoversions:
•ShimanoPRESSFIT
(diameter41mm*width86.5mm)
•LookZED(diameter65mm*width63mm).
785 HUEZ frames are delivered with a Shimano
PRESSFITbottombracketdiameter41mm*width
86.5mm.
Your785HUEZRSor785HUEZisequippedwithinsertstoattachtwo
bottleholdersontotheseattubeandthedowntube(Fig.28).
Usea4mmAllenkeytoremovethefourM5screws.Attachthebottle
holders(refertothecorrespondingproductinstructions),thenreattach
thescrewstoatorqueof3 Nm.
785 HUEZ RS and 785 HUEZ forks are offset in
ordertomatchallthedifferentframesizesandbe
as responsive as possible for competitive cycling
(XSS50mm,MLXL43mm).
Theproleandcarbonstructurehavebeenstudied
in-depthinordertoprovideoneof the best ratios
betweenprecision,weightandrigidityonthemarket.
Followthemanufacturer’sinstructionsforassembly.
Ourforkhangersaredesignedwithsafetyprongs.
If, in spite of the care we take during the
manufacturingprocess,afaultappearsorarepairis
required,contactyourapprovedLOOKretailerand
take with you the defective product together with
yourpurchaseinvoiceandexplainthemalfunction
tothem.
The brake mounting is standard with a fork and
cable-stays. The only specication specic to this
frame is the advised use of a black foam tube
aroundtherearbrakecableinthehorizontaltube,in
ordertolimitthenoiseofanyvibrationintheframe
(XSL500mm, S L520mm, M L550mm,L565mm,
XL580mm).
Inspectionandmaintenanceareimportantforyour
safetyandthelifespanofyourproduct.
Apoorlymaintainedbicycleandcomponentsmay
breakormalfunction,whichcanleadtoanaccident
in which you may be killed, severely injured or
paralysed.
785 HUEZ FORK
FITTING THE WHEELS
AFTER SALES SERVICE
FITTING THE BRAKES
MAINTENANCE
GUARANTEE
Note: For all maintenance activities, please
rememberthattheforkmustbeplaceonawheel
andthatabnormalwearofthehangersdueto
abrasiononthe ground cannot becoveredby
theLOOKguarantee.
Attention:Theforksarenotdeliveredmounted
on the frame with a longer length pivot. You
mustadjusttheforkpivotasdesired.
Attention:Itispreferabletousetheoriginalscrews.
You will need the following tools to mount
the brakes:
•SetofAllenkeys
•Wirecutter
•Housingcaps
•Cablecaps
For further information about maintenance
obligations,please refer toourwebsitewww.
lookcycle.comsectionGUARANTEEPOLICY
> MAINTENANCE
Legal guarantee
Throughitsapprovedagentsanddistributorsinthe
countryinwhichtheproducthasbeenpurchased,
LOOK guarantees its bikes/frames against non-
conformitiesandhiddendefects(1)foraperiodof
two(2)yearscountingfromthedateofpurchase.
(1)HiddendefectsarecoveredbyFrenchlegislation
only.§1641to1649ofthecivilcode.
(2) Certain countries or states authorise a higher
limitation of duration for an implicit guarantee,
and/or for exclusion or limitation of direct or
consequential damages, which implies that the
aforementionedlimitisnotapplicableinthiscase.
This limited guarantee grants you specic legal
rights,butpossiblyalsootherrights,whichwillvary
accordingtolocallegislation.
For further information about the coverage of
thelegalguarantee,pleaserefertoourwebsite
www.lookcycle.com section GUARANTEE
POLICY > LEGAL GUARANTEE
Lifetime guarantee
Thequality and reliability ofourproducts,thatwe
managefromdesignthroughtocommercialisation
allow us, through our approved agents and
distributors,toofferyouarangeoflegalguarantees,
a free lifetime guarantee on frames and forks for
LOOKbicycles.
Forfurtherinformationabouttheconditionsand
coverageofthelifetimeguarantee,pleasereferto
ourwebsitewww.lookcycle.comsectionGUAR-
ANTEEPOLICY>LIFETIMEGUARANTEE.
HYDRATATION

CONGRATULAZIONI !
INFORMAZIONI IMPORTANTI
PRESENTAZIONE DEL PRODOTTO
VERIFICA PRIMA DEL MONTAGGIO
ROUTING COMPLETO DELLA 785
Placchettadelderagliatoreposteriore
Congurazioneroutingmeccanico/elettrico
INSTALLAZIONE ROUTING
Routingmeccanicocongurazione
Routingelettricocongurazione
RoutingelettricoWIRELESS
SERIE STERZO
MOVIMENTO CENTRALE
FORCELLA 785 HUEZ
MONTAGGIO DEI FRENI
IDRATAZIONE
MONTAGGIO DELLE RUOTE
MANUTENZIONE
SERVIZIO POST VENDITA
GARANZIA
> 24
> 24
> 25
> 25
> 25
> 25
> 25
> 26
> 26
> 27
> 28
> 29
> 30
> 30
> 30
> 30
> 31
> 31
> 31
> 31
IT

24 25
ITIT
CONGRATULAZIONI !
VHaisceltounabiciclettaLOOK785HUEZRSo785HUEZ.
Tiringraziamoperladucianeinostriprodotti.ScegliendoquestonuovogruppoLOOK,avraiadisposizione
unprodottodialtatecnologia,diproduzionefrancese.
Il telaio e gli accessori LOOK sono identici a quelli forniti alle grandi squadre di professionisti, sono
controllatiinognifasediproduzione,persoddisfartiintuttoepertutto.
Inostriprodottisonoconformieaddiritturasuperioriairequisitistabilitidallediversenormeeuropeee
internazionaliinvigore.
I prodotti LOOK sono protetti dai diritti di proprietà industriale.
Per maggiori informazioni, consulta il sito www.lookcycle.com/patents.
Registrazione della tua nuova bici LOOK
LaregistrazionedellatuabiciLOOKticonsentirà
difarpartedeinostriclientiprivilegiatiequindidi
averedirittoallagaranziaavitasutelaioeforcella,
oltreadaltriservizi.
L’insieme 785 HUEZ RS o 785 HUEZ è stato
progettato e concepito seguendo le speciche
dell’ufcio progettazione LOOK, al ne di offrire la
miglioretrasmissione dello sforzoe una precisione
diguidasenzapari,iltuttoconundesignminimalista
completatodaun’architetturaincarbonioExtra-Light.
Queste caratteristiche sono possibili grazie
all’ottimizzazione delle sezioni su ciascuno dei
tubi che compongono questo kit-telaio di altissima
gamma. Tutti i tubi di raccordo dei raggi sono
stati deniti nell’ottica di ottimizzare il rapporto
performance/peso, consentendo di ottenere un
rendimento eccezionale dell’insieme, per offrire
una maggiore performance al nostro team di
professionisti.
Pertanto, le 785 integrano diverse innovazioni a
livello mondiale: un’architettura in carbonio Extra-
lightallabasedeinuovispessoriincarbonioabbinata
ad un’ottimizzazione esclusiva dal design pulito,
con scatola movimento ZED 2 100% carbonio
monoblocco, una forcella inedita 100% carbonio
ultra-light con sezioni che privilegiano il rapporto
Peso/Rigidità.
Iltelaioèconsegnatocon:
•forcellaeseriesterzo.
•routingdeirivestimentidelderagliatoreperilmon-
taggiodiungruppomeccanico.
•collarinoinversionecarbonioperla785HUEZRS
(6Nmmax),inversionealluminioperla785HUEZ.
•LavaligettaLookcongliaccessoriopzionali.
Durante il montaggio della placchetta posteriore,
serrare le viti alla coppia di 1Nm. In caso di
smontaggio/rimontaggio, aggiungere una goccia
di frenaletto medio (tipo LOCTITE 243™) su
ciascunavite.
La785èdotatadiriscontridiguainecheconsentono
la compatibilità con gruppi sia meccanici che
elettrici. Fare riferimento al rivenditore LOOK per
l’elencodeigruppicompatibili.
Per il montaggio della scatola movimento ZED
2, fai riferimento alle istruzioni speciche del
prodotto.
Attenzione :IprodottiLOOK785HUEZRS
e785HUEZsonoprogettatieottimizzatiper
essereutilizzatidaciclistidipesononsuperiorea
100Kg.
Attenzione : I prodotti LOOK 785 RS
HUEZ e 785 HUEZ non devono in nessun
caso essere serrati su di un supporto di ofcina.
Almomentodelmontaggiodellabiciclettaoccorre
iniziare posizionando un reggisella e mantenendo
il kit telaio dal reggisella (serrare il collarino alla
coppiamassimadi6Nm).
Avvertenza sui prodotti contraffatti :L’utilizzo
di prodotti contraffatti è molto pericoloso e
puòcausareateeaterzicadutegravichepossono
provocareferimentigravioanchemortali.
PRESENTAZIONE DEL PRODOTTO ROUTING COMPLETO DELLA 785
VERIFICA PRIMA DEL MONTAGGIO
Placchetta deragliatore posteriore:
Congurazione routing
meccanico / elettrico :
INFORMAZIONI IMPORTANTI
Prima di ogni utilizzo, leggi per intero queste
istruzioni.Rispettatuttiiconsiglichetiforniamo,
inmododapotersfruttarealmassimoivantaggi
diquestoprodottodialtaqualità.
Perilmontaggio,ti consigliamo dirivolgertiad
unrivenditoreautorizzatoLOOK.
LOOK si riserva la possibilità di modicare le
caratteristiche tecniche del prodotto senza
preavvisonell’otticadiunsuomiglioramento.
Nota: Il tuo telaio 785 è predisposto per un
routing meccanico (rivestimento nero sotto il
movimentocentrale).
Acomplementodeirivestimentinerichedevono
rimanereneltelaioalmomento delmontaggio,
il telaio possiede delle guide cavi blu, al ne
di aiutare durante il routing. Le guide cavi blu
devono essere estratte dal telaio una volta
eseguitoilrouting.
Per maggiori informazioni sulle condizioni,
le offerte e la copertura della registrazione
online, consulta il nostro sito www.lookcycle.
com sezione POLITICA DI GARANZIA >
REGISTRAZIONEONLINE.
Nota: La 785 RS è compatibile con il gruppo
CampagnoloEPSV3;perilmontaggiodiquesto
gruppo, fare riferimento alle raccomandazioni
delproduttore.
Per maggiori informazioni, consulta il nostro
sito www.lookcycle.com sezione POLITICA
DI GARANZIA > CONTRAFFAZIONE. Per
maggiori informazioni sulle INFORMAZIONI
IMPORTANTI da rispettare, consulta il nostro
sito www.lookcycle.com sezione POLITICA DI
GARANZIA>INFORMAZIONIIMPORTANTI.
Se non puoi consultare il nostro sito,
possiamo fornirti una copia delle nostre
politiche di garanzia in forma cartacea
tramite il tuo rivenditore.
!
!
!
www.lookcycle.com sezione SERVIZI > ISTRUZI-
ONI PER IL MONTAGGIO > 785 HUEZ RS - HUEZ

26 27
ITIT
INSTALLAZIONE ROUTING
Routing meccanico congurazione :
INSTALLAZIONE ROUTING
Routing elettrico congurazione :
1/ Vericare la presenza di due rivestimenti neri
nel tubo diagonale e di 2 rivestimenti blu nel
tubo orizzontale e nella base posteriore destra
(attenzioneanonestrarrealcunodei4rivestimenti
perfacilitareilmontaggio).
2/Vericarelapresenzadei2riscontridellaguaina
inmetallosottoidue2rivestimentineriiningresso
dalTDversolaseriesterzo(C1eC2).
3/Vericarelapresenzadeglialtri3riscontridella
guainain metallonel sacchettodegli accessoriin
dotazione,poiposizionarlisuiforiABD.
4/ Posizionare i 2 cavi dei deragliatori nei 2
rivestimenti neri. Foro sinistro C1 = deragliatore
anteriore,ForodestroC2=deragliatoreposteriore.
Perquest’ultimo,sostituirlonelrivestimentobluper
ilpassaggionellabasedestra.
1/ Vericare la presenza di due rivestimenti neri
nel tubo diagonale e di 2 rivestimenti blu nel tubo
orizzontaleenellabaseposterioredestra.
2/Estrarrequesti 2 rivestimentineri con i2 riscontri
dellaguainainmetallo.
3/FareriferimentoalleIstruzioniShimanoDI2.
4/ForoasinistraC1tappoingommadaposizionare
direttamenteneltelaiolatosinistro.
5/ Foro a destra C2 posizionare il cavo elettrico
Shimanodellaboccolanoalmovimentocentrale,poi
posizionareiltappospaccatoDi2latodestro(utilizzo
possibiledell’utensileParkToolmagneticoRifIR-I).
6/Sempresullabase,conl’aiutodelrivestimentoblu,
passare il cavo elettrico Shimano della placchetta
deragliatoreDalmovimentocentraleF,poiposizionare
il tappo spaccato Di2 sul punto D (utilizzo possibile
dell’utensileParkToolmagneticoRifIR-I).
7/PosizionareilcavoelettricoShimanonelcanottodal
puntoEalmovimentoD.
5/Posizionareilcavodelfrenoposterioreavvolto
neltuboinschiumaindotazioneneltuboorizzontale,
poiriposizionareilriscontrodellaguainadimetallo
su ciascuna estremità. È possibile aiutarsi con il
rivestimentoblucomeguidaperestrarlo.
6/ È possibile mettere un tensionatore del
deragliatore anteriore; in questo caso tagliare
la guaina del deragliatore anteriore a circa 3
cm dall’uscita della boccola, poi posizionare il
tensionatore. Posizionare il cavo del deragliatore
anterioredopo larotella efarlo uscire da dietro il
movimentocentrale.
7/Concludereilmontaggio.
8/ Vista della guida cavo del movimento centrale
ssabile e staccabile con fermaglio con l’aiuto di
una pinza a becchi nei due fori previsti a tal ne
(piccola freccia che indica la parte anteriore del
telaioF).
[A] [A]
[B] [B]
[ D ] [ D ] [E]
[F] [F]
[F]
[F]
8/DopoavercollegatoilisulmovimentoShimano,
posizionarequest’ultimosulmovimentoF,poispingerlo
sullatoTDdietroaltuboincarboniotraforatoafnché
nonricadanell’assedelmovimentocentrale.
9/Alnedissareedevitareilcontattoconl’assedel
movimentocentrale, il lodel deragliatore posteriore
può passare nella guida cavi meccanica F (se
necessario, ingrandire leggermente i fori anteriore e
posteriorealdiametrodi5mm).
10/ Posizionare il cavo del freno posteriore avvolto
neltuboinschiumaindotazioneneltuboorizzontale,
poi riposizionare il riscontro della guaina di metallo
su ciascuna estremità. Possibilità di aiutarsi con il
rivestimentoblucomeguida.
11/ È possibile mettere un tensionatore del
deragliatoreanteriore;inquestocasotagliarelaguaina
delderagliatoreanterioreacirca3cmdall’uscitadella
boccola,poiposizionareiltensionatore.Posizionareil
cavodelderagliatoreanterioredopolarotellaefarlo
usciredall’uscita.
12/Concludereilmontaggio.
C1=Gauche/Left
C2=Droite/Right
C1=Gauche/Left
C2=Droite/Right

28 29
ITIT
C1=Gauche/Left
C2=Droite/Right
INSTALLAZIONE ROUTING
Routing elettrico WIRELESS :
1/ Vericare la presenza di due rivestimenti neri
neltubodiagonaleedi2rivestimentibluneltubo
orizzontaleenellabaseposterioredestra.
2/Estrarrequesti2rivestimentinericoni2riscontri
dellaguainainmetallo+rivestimentobludellabase
destra.
3/FareriferimentoalleIstruzioniSRAMETAP.
4/ForoasinistraC1tappoingommadaposizionare
direttamenteneltelaiolatosinistro.
5/ForoadestraC2tappoingommadaposizionare
direttamenteneltelaiolatodestro.
6/Foroplacchettaderagliatoreposterioretappoda
posizionaredirettamentesultelaioinD.
1/ Lubricare la sede superiore del telaio e
posizionareilcuscinettosuperiore1p1/8suquesta
sede.
2/ Lubricare la sede inferiore del telaio e della
forcella; posizionare il cuscinetto inferiore 1p 1/2
neltelaiofacendoattenzioneanonporrelosmusso
esterno verso l’interno dello sterzo, poi inlare la
forcellaneltelaio.
3/ Far scorrere l’anello di compressione sulla
forcellanoalcuscinettosuperiore.
4/Farscorrerel’attacco.
5/Posizionarelarondellaconicasuperioreepoiil
kitdicompressione.
6/ Serrare il kit di compressione nel perno della
forcella (6Nm max), poi effettuare la regolazione
dellaseriesterzo.
7/VericarelapresenzadiuntappoinE.
8/Posizionareilcavodelfrenoposterioreavvolto
neltuboinschiumaindotazioneneltuboorizzontale,
poiriposizionareilriscontrodellaguainadimetallo
su ciascuna estremità. È possibile aiutarsi con il
rivestimentoblucomeguida.
9/ È possibile mettere un tensionatore del
deragliatore anteriore; in questo caso tagliare
la guaina del deragliatore anteriore a circa 3
cm dall’uscita della boccola, poi posizionare il
tensionatore. Posizionare il cavo del deragliatore
anterioredopolarotellaefarlousciredall’uscita.
10/Concludereilmontaggio.
SERIE STERZO
Laseriesterzo785HUEZèunsistematradizionalearecuperodigiocotramitelapresenzadiunkitdi
compressione.Èsempreconsigliabileposizionarelarondellaconicasuperiorealdisopradell’attacco,onde
evitareilserraggiodell’attaccosull’estremitàdelperno.Ciòalnedilimitareognirischiodifessurazione
dellastrutturaincarbonionellungotermine.
[1] Kitdicompressione
[ 2 ] Rondellaconicasuperiore
[3] Attaccotradizionale
[4] Rialzo serie sterzo
[5] Anellodicompressionespaccato
[6] Cuscinettosuperiore1"1/8
[7]
Telaioconsediincarbonio
[8]
Cuscinettoinferiore1"1/2
[9]
Forcellamonoblocco
[A]
[1]
[ 2 ]
[5]
[6]
[8]
[9]
[3]
[4]
[7]
[B]
[F]
[E][ D ]

30 31
ITIT
Fig. 28
A
B
MOVIMENTO CENTRALE
I telai 785 HUEZ RS
Sonodisponibiliindueversioni:
•ShimanoPRESSFIT
(diametro41mm*larghezza86,5mm)
•LookZED(diametro65mm*larghezza63mm)
Itelai785HUEZsonoconsegnaticonmovimento
centrale tipo Shimano PRESSFIT diametro da
41mm*larghezza86,5mm.
Latua785HUEZRSo785HUEZèdotatadiinsertiperilssaggiodi
dueportaborracciasulcanottoesultubodiagonale(Fig.28).
Smontare le quattro viti M5 con una chiave a brugola da 4mm.
Montare i porta borraccia (fare riferimento alle istruzioni del prodotto
corrispondente),poiriavvitarelevitiallacoppiadi3Nm.
Le forcelle 785 HUEZ RS e 785 HUEZ sono a
compensazionedifferenziata,inmododasoddisfare
tuttelemisureditelaioerisponderealmeglioalla
praticadelciclismodagara(XSS50mm,MLXL
43mm).
Ilproloelastrutturaincarboniosonostatistudiati
a fondo per offrire uno dei migliori rapporti di
precisione,pesoerigiditàpresentisulmercato.
Seguire le indicazioni di montaggio fornite dal
produttore. I nostri forcellini sono progettati con
sporgenzedisicurezza.
Nonostante tutta la cura che mettiamo in fase
di produzione, se insorge un’anomalia o se
è necessaria una riparazione, rivolgiti al tuo
rivenditore riconosciuto LOOK, riportandogli il
prodotto difettoso accompagnato dalla fattura
d’acquistoeprecisandoiltipodimalfunzionamento.
Sitrattadelmontaggiodifrenistandardsuforcella
efoderi,lasolaspecicaesclusivadiquestotelaio
è l’installazione consigliata del tubo in schiuma
nero, attorno al cavo del freno posteriore nel
tubo orizzontale, al ne di limitare ogni rumore di
vibrazioneneltelaio(XSL500mm,SL520mm,M
L550mm,L565mm,XL580mm).
Ilcontrolloelamanutenzionesonoimportantiperla
tuasicurezzaeladuratadellabicicletta.
Una bici e componenti senza adeguata manuten-
zione possono rompersi o presentare anomalie, il
chepotrebbecomportareunincidentenelcorsodel
quale potresti perire, essere gravemente ferito o
rimanereparalizzato.
FORCELLA 785 HUEZ
MONTAGGIO DELLE RUOTE
SERVIZIO POST VENDITA
MONTAGGIO DEI FRENI
MANUTENZIONE
GARANZIA
Nota:Pertutteleoperazionidimanutenzione,
ricordiamo che la forcella deve essere
posizionatasudiunaruotaeun’usuraanomala
deideragliatori,dovutaadun’abrasionealsuolo
nonpuòesserecopertadallagaranziaLOOK.
Attenzione :Leforcellesonofornitemontatesui
telaiconpernodilunghezzasuperiore.Occorre
tagliare il perno della forcella per ottenere le
regolazionidesiderate.
Attenzione :Utilizzaredipreferenzalevitioriginali.
Per il montaggio dei freni, occorrono i
seguenti strumenti :
•Seriedichiaviabrugola
•Tronchesina
•Attacchiperguaina
•Attacchipercavo
Per maggiori informazioni sugli obblighi di
manutenzione, consulta il nostro sito www.
lookcycle.com sezione POLITICA DI
GARANZIA > MANUTENZIONE
Garanzia legale
LOOK, attraverso questi agenti e distributori
autorizzati nel paese in cui il prodotto è stato
acquistato,garantisce le sue biciclette/telaicontro
non-conformitàevizi occulti (1)perun periodo di
dueanniapartiredalladatadiacquisto.
(1) I vizi occulti riguardano solo la legislazione
francese.Paragrada1641a1649delcodicecivile.
(2) Alcuni paesi o stati non autorizzano una
limitazione di durata superiore per una garanzia
implicita e/o per l’esclusione o la limitazione di
danni diretti o conseguenti, il che implica che
il limite summenzionato non si applicherebbe.
Questagaranzialimitataoffredirittilegalispecici,
maeventualmenteanchealtridiritti,chevarianoin
baseallelegislazionilocali.
Per maggiori informazioni sulla copertura
della garanzia legale, consulta il nostro sito
www.lookcycle.com sezione POLITICA DI
GARANZIA > GARANZIA LEGALE
Garanzia a vita
Laqualitàel’afdabilitàdeinostriprodotti,chereal-
izziamodallaprogettazione alla commercializzazi-
one,cipermettono,attraversoinostriagentiedis-
tributoriautorizzati,diproporviatitolodiestensione
dellegaranzielegali,unagaranziaavitasuitelaie
forcelledellebicicletteLOOK.
Per maggiori informazioni sulla copertura
della garanzia a vita, consulta il nostro sito
www.lookcycle.com sezione POLITICA DI
GARANZIA>GARANZIAAVITA.
IDRATAZIONE

¡ENHORABUENA!
INFORMACIÓN IMPORTANTE
PRESENTACIÓN DEL PRODUCTO
VERIFICACIÓN PREVIA A LA INSTALACIÓN
ENRUTAMIENTO COMPLETO DE LA 785
Pata de desviador trasera
Conguracióndelenrutamientomecánico/eléctrico
INSTALACIÓN DEL ENRUTAMIENTO
Enrutamientomecánicoconguración
Enrutamientoeléctricoconguración
EnrutamientoeléctricoWIRELESS
JUEGO DE DIRECCIÓN
CAJA DE PEDALIER
HORQUILLA785HUEZ
MONTAJE DE LOS FRENOS
HIDRATACIÓN
MONTAJE DE LAS RUEDAS
MANTENIMIENTO
SERVICIO POSVENTA
GARANTÍA
> 34
> 34
> 35
> 35
> 35
> 35
> 35
> 36
> 36
> 37
> 38
> 39
> 40
> 40
> 40
> 40
> 41
> 41
> 41
> 41
ES

35
ES
34
ES
¡ENHORABUENA!
UstedhaelegidolaLOOK785HUEZRSo785HUEZ.
Leagradecemossuconanzaennuestrosproductos.AlelegirestenuevoconjuntoLOOKustedadquiere
unproductodealtatecnologíadediseñofrancés.
Sucuadroysusaccesorios LOOK son idénticos alosquellevanlosgrandes equipos profesionales.
Pasancontrolesdurantetodalafabricaciónyleofreceránunatotalsatisfacción.
Nuestrosproductoscumplenconlasdiversasnormaseuropeaseinternacionalesenvigorylassuperan.
Los productos LOOK están protegidos por los derechos de la propiedad industrial.
Para más información, visite www.lookcycle.com/patents.
Registro de su nueva bicicleta LOOK
El registro de su bicicleta LOOK le permitirá
formar parte de nuestros clientes privilegiados y
lepodremosofrecerlagarantíadeporvidadesu
cuadroysuhorquillaademásdeotrosservicios.
Su785HUEZRSo785HUEZhasidodesarrollada
ydiseñadasegúnlasespecicacionesdelaocina
deproyectosLOOKparaofrecerlamejortransmis-
ióndeesfuerzoyunaprecisióndepilotajesinigual,
todoconundiseñominimalistacompletadoporuna
estructuradecarbonoExtra-Light.
Estascaracterísticassonposiblesgraciasalaopti-
mizacióndelasseccionesencadaunodelostubos
que componen este kit-cuadro de tope de gama.
Todoslostubos,losracoresylosradioshansido
denidos para optimizar la relación rendimiento/
peso,permitiendoobtenerunrendimientoporen-
cimadelanormadelconjuntoparaunmejordes-
empeñodenuestroequipoprofesional.
Por eso, las 785 incorporan varias novedades
mundiales:unaestructuradecarbonoExtra-lighta
basedenuevascapasdecarbonocombinadacon
una optimización total de un diseño depurado, el
pedalierZED2100%carbonomonobloque,yuna
horquillainédita100%carbonoultra-lightqueprivi-
legialarelaciónpeso-rigidez.
Sucuadroseentregaahoracon:
•suhorquillaysujuegodedirección.
•elenrutamientodelosrevestimientosdedesviador
paraelmontajedeungrupomecánico.
• su abrazadera en versión carbono para la 785
HUEZRS (6 Nmmáx.), en versiónaluminio para
la785HUEZ.
•elpaqueteLookconlasopcionesdeequipamiento.
Cuandomontelapatatrasera,aprietelostornillosa
unparde1Nm.Encasodedesmontaje/remontaje,
vuelva a aplicar una gota de jador de roscas
mediano(tipoLOCTITE243™)encadatornillo.
La 785 está equipada con topes de vaina que
permiten compatibilizar grupos mecánicos y
eléctricos.ConsulteconsutiendaLOOKhabitualla
listadegruposcompatibles.
Para el montaje del pedalier ZED 2, consulte el
manual especíco del producto.
¡Atención!LasLOOK785HUEZRSy785
HUEZ están diseñadas y optimizadas para
suusoporciclistasquenosuperenlos100kg.
¡Atención! LasLOOK785HUEZRSy785
HUEZ no deben colocarse jamás en un
soportedetaller.Enelmontajedelabicicletahay
queempezarporinstalarlatijadesillínysujetarel
kitdecuadroporlatija(aprietedelaabrazaderaa
unparmáximode6Nm).
Advertencia sobre productos falsica-
dos: El uso de productos falsicados es
muy peligroso y puede causarle a usted y a ter-
ceros caídas graves que podrían provocar daños
importantes,inclusomortales.
PRESENTACIÓN DEL PRODUCTO ENRUTAMIENTO COMPLETO DE LA 785
VERIFICACIÓN PREVIA A LA INSTALACIÓN
Pata de desviador trasera :
Conguración de enrutamiento
mecánico / eléctrico :
INFORMACIÓN IMPORTANTE
Antes de usarlo lea todas estas instrucciones.
Respete los consejos para aprovechar al
máximo las ventajas de este producto de alta
calidad.
Leaconsejamosqueparaelmontajesedirijaa
unatiendaautorizadaLOOK.
LOOKsereservalaposibilidaddecambiarsin
previo aviso las especicaciones del producto
conelndemejorarlo.
Nota: Su cuadro 785 está enrutado para un
montajeenmecánico(revestimientonegrobajo
lacajadepedalier).
Como complemento de los revestimientos
negros que deben quedarse en el cuadro
duranteelmontaje,su cuadro posee guíasde
cableazulesparaayudarleenelenrutado.Las
guíasdecableazulesdebenretirarsedelcuadro
unaveznalizadoelenrutamiento.
Para más información sobre las condiciones,
lasofertasylacoberturadelregistroenlínea,
visite nuestra página web www.lookcycle.
com, sección POLÍTICA DE GARANTÍA >
REGISTROENLÍNEA.
Nota: La 785 RS es compatible con el grupo
Campagnolo EPS V3. Para el montaje de
estegrupo, consulte las recomendaciones del
fabricante.
Paramásinformación,consultenuestrapágina
web www.lookcycle.com, sección POLÍTICA
DE GARANTÍA > FALSIFICACIÓN Para
más información sobre la INFORMACIÓN
IMPORTANTE, consulte nuestra página web
www.lookcycle.com, sección POLÍTICA DE
GARANTÍA>INFORMACIÓNIMPORTANTE.
Si no puede consultar nuestra página web,
podemos proporcionarle nuestras políticas
de garantía en papel a través de su distri-
buidor.
!
!
!
www.lookcycle.comsecciónSERVICIOS>INSTRUC-
CIONES DE MONTAJE > 785 HUEZ RS - HUEZ

37
ES
36
ES
INSTALACIÓN DEL ENRUTAMIENTO
Enrutamiento mecánico conguración :
INSTALACIÓN DEL ENRUTAMIENTO
Enrutamiento eléctrico conguración :
1/ Comprobación de la presencia de los 2
revestimientosnegroseneltubodiagonalydelos
2revestimientos azules en el tubohorizontal y la
basetraseraderecha(tengacuidadodenoretirar
ninguno de los 4 revestimientos para facilitar el
montaje).
2/Compruebelapresenciadelos2topesdevaina
de metal bajo los 2 revestimientos negros a la
entradadelTDhaciaelcasquillodedirección(C1
yC2).
3/ Compruebe la presencia de los otros 3 topes
de vaina de metal en el paquete de accesorios
suministrado,luegocolóquelosenlosoriciosA,B
yD.
4/ Coloque los 2 cables de desviadores en
los 2 revestimientos negros. Oricio izquierdo
C1= desviador delantero, oricio derecho C2=
desviador trasero. Para este último, recolóquelo
enelrevestimientoazul para el paso porlabase
derecha.
1/ Comprobación de la presencia de los 2
revestimientosnegroseneltubodiagonalydelos2
revestimientosazuleseneltubohorizontalylabase
traseraderecha.
2/Retireestos2revestimientosnegrosconlos2topes
devainademetal.
3/ConsulteelManualShimanoDI2.
4/ Oricio a la izquierda C1. Tapón de caucho que
debe colocarse directamente en el cuadro al lado
izquierdo.
5/OricioaladerechaC2.Coloqueelcableeléctrico
Shimanodelcasquillohastalacajadepedalier,luego
coloque el tapón roscado Di2 al lado derecho (uso
posibledelaherramientaParkToolaimanesRefIR-I).
6/ De la misma forma, en la base, con ayuda del
revestimiento azul, pase el cable eléctrico Shimano
delapatadedesviadorDhastalacajadepedalierF,
luegocoloqueeltapónroscadoDi2enelpuntoD(uso
posibledelaherramientaParkToolaimanesRefIR-I).
7/ColoqueelcableeléctricoShimanoeneltubode
sillíndelpuntoEalacajaD.
5/Coloqueelcabledefrenotraseroconeltubode
espumasuministradoeneltubohorizontalyluego
vuelvaacolocareltopedevainaencadaextremo.
Existelaposibilidaddeguiarseporelrevestimiento
azulyluegoretirarlo.
6/ Tiene la posibilidad de poner un tensor de
desviadordelantero.Enestecaso,cortesuvaina
de desviador delantero a unos 3 cm de la salida
delcasquilloyluegocoloqueeltensor.Coloqueel
cable del desviador delantero desde la maneta y
sáquelopordetrásdelacajadepedalier.
7/Finaliceelmontaje.
8/Vistadelaguíadecabledelacajadepedalier
enganchable y desenganchable con una pinza
de circlips en los 2 oricios previstos al efecto
(pequeña echa indicadora en la parte delantera
delcuadroF).
[A] [A]
[B] [B]
[ D ] [ D ] [E]
[F] [F]
[F]
[F]
8/ Después de la conexión de los cables en la
cajaShimano, coloque estaúltimaen la cajaF y
empújelaenelTDdetrásdeltubodecarbonopara
quenoseinterpongaenelejedelacajadepedalier.
9/Paraaseguraryevitarelcontactoconelejede
lacajadepedalier,elcabledeldesviadortrasero
puedepasarporlaguíadecablesmecánicaF(en
caso necesario, agrande ligeramente los oricios
delanterosytraserosaldiámetrode5mm).
10/Coloqueelcabledefrenotraseroconeltubode
espumasuministradoeneltubohorizontalyluego
vuelvaacolocareltopedevainaencadaextremo.
Existelaposibilidaddeguiarseporelrevestimiento
azul.
11 / Tiene la posibilidad de poner un tensor de
desviadordelantero.Enestecaso,cortesuvaina
de desviador delantero a unos 3 cm de la salida
delcasquilloyluegocoloqueeltensor.Coloqueel
cable del desviador delantero desde la maneta y
sáqueloporlasalida.
12/Finaliceelmontaje
C1=Gauche/Left
C2=Droite/Right
C1=Gauche/Left
C2=Droite/Right
Table of contents
Languages:
Other Look Bicycle Accessories manuals

Look
Look E POST 2 User manual

Look
Look RSP User manual

Look
Look 675 User manual

Look
Look CARBON SEATPOST User manual

Look
Look Aero Design User manual

Look
Look TRAIL ROC User manual

Look
Look E Post 2 Evo User manual

Look
Look Keo Blade Track User manual

Look
Look AERO DESIGN HANDLEBAR 2 User manual

Look
Look CARBON FORK User manual

Look
Look GEO CITY GRIP VISION User manual

Look
Look ZED 2 User manual

Look
Look KEO CLASSIC User manual

Look
Look KEO BLADE User manual

Look
Look GEO TREKKING User manual

Look
Look ZED 3 User manual

Look
Look 796 MONOBLADE RS User manual

Look
Look 987 User manual

Look
Look X-TRACK User manual

Look
Look 796 MONOBLADE RS User manual