EUFAB 21014 User manual

1
Art.-Nr.: 21014
Ölabsaugpumpe
Bedienungsanleitung ............... 2
Art. No. 21014
Oil extraction pump
Operating instructions .............. 4
Réf. 21014
Pompe d‘aspiration d‘huile
Manuel de l‘opérateur .............. 6
Cod. art. 21014
Pompa di aspirazione olio
Istruzioni per l‘uso .................. 10
Art.nr. 21014
Olieafzuigpomp
Gebruiksaanwijzing ............... 8
© EAL GmbH, 21014 05.2022

2
• Kontrollieren Sie die Ölabsaugpumpe, die Schläuche
und Anschlusskabel vor Gebrauch auf einwandfreien
Zustand. Beschädigte, gerissene oder gebrochene
Bauteile dürfen ausschließlich durch qualizierte
Techniker instandgesetzt werden!
• Kinder dürfen nicht mit dem Gerät spielen.
• Reinigung und Benutzerwartung dürfen nicht von
Kindern ohne Beaufsichtigung durchgeführt werden
• Manipulieren oder zerlegen Sie die Ölabsaugpumpe
nicht.
• Stellen Sie sicher, dass Schlauch und Kabel keinen
scharfen Kanten oder zu heißen Gegenständen
ausgesetzt werden!
• Kein Benzin, Petroleum oder sonstige leicht
entzündliche Flüssigkeiten pumpen!
• Schlagen Sie im Handbuch Ihres Fahrzeugs nach, ob
der Hersteller das Absaugen des Motoröls zulässt.
EXPLOSIONSGEFAHR!
• Kein Wasser und Getriebeöl absaugen; Pumpe kann
dadurch beschädigt werden.
• Beim Anschluss der Batterieklemmen auf richtige
Polarität achten!
• Motor beim Absaugen immer abstellen.
• Motoröl vor dem Absaugen immer erwärmen!
• Pumpe niemals „Trockenlaufen“ lassen. Wenn der
Öluss abbricht, Pumpe sofort abschalten.
• Altöl in einem ausreichend großen Behälter
auffangen. Nicht in das Erdreich oder in die
Kanalisation ablassen! Entsorgen Sie das Altöl in der
Altölsammelstelle!!!
3. SICHERHEITSHINWEISE
2. SPEZIFIKATIONEN
Spannung: 12V DC
Stromaufnahme: ca. 5 A
Max. Benutzungszeit: 30 min
Lautstärke: ca. 70 dB (A)
Temperaturbereich(Umwelt): -10°C – +40°C
Max. Öltemperatur: 60 °C
Max. Dieseltemperatur: 45 °C
Fördergeschwindigkeit: 0,2 – 1,5 l/min abhängig
von Flüssigkeit und
Temperatur
Max. Förderhöhe: 0,7 m
Max. Druck: 3 bar
Abmessungen: ca. 13 x 9 x 9 cm
Gewicht: ca. 975 g
1. BESTIMMUNGSGEMÄßER GEBRAUCH
Die Ölabsaugpumpe ist für einen sauberen Ölwechsel
bzw. für das Abpumpen von Motor-, Diesel-, und Heizöl
geeignet.
1. Saugschlauch ø 6 mm
2. Ölabsaugpumpe
3. Ablass-Schlauch ø 12 mm
4. Ein – Ausschalter
5. 12V Anschlusskabel mit Batterieklemmen
WARNUNG!
Lesen Sie die Bedienungsanleitung
vor Inbetriebnahme sorgfältig
durch und beachten Sie alle
Sicherheitshinweise! Nichtbeachtung
kann zu Personenschäden, Schäden
am Gerät oder Ihrem Eigentum führen!
Bewahren Sie die Originalverpackung,
den Kaufbeleg sowie diese Anleitung
zum späteren Nachschlagen auf! Bei
der Weitergabe des Produkts geben Sie
auch diese Anleitung weiter. Prüfen
Sie vor Inbetriebnahme den Inhalt der
Verpackung auf Unversehrtheit und
Vollständigkeit!
INHALT
Ölabsaugpumpe
1. BESTIMMUNGSGEMÄßER GEBRAUCH______ 2
2. SPEZIFIKATIONEN__________________ 2
3. SICHERHEITSHINWEISE ______________ 2
4. WICHTIGER HINWEIS________________ 3
5. BEDIENUNG DER ÖLABSAUGPUMPE_______ 3
6. HINWEISE ZUM UMWELTSCHUTZ ________ 3
7. KONTAKTINFORMATIONEN ____________ 3
1
5
3
2
4

3
7. KONTAKTINFORMATIONEN
6.HINWEISE ZUM UMWELTSCHUTZ
5. BEDIENUNG DER ÖLABSAUGPUMPE
1. Vor dem Ölwechsel lassen Sie den Motor
warmlaufen, bis die Öltemperatur ca. 40-60° C
erreicht hat.
2. Stellen Sie den Motor ab!!
3. Entfernen Sie die Schutzkappen von den Schlauch-
anschlüssen der Ölabsaugpumpe. Stecken Sie den
Saugschlauch (1) auf den Ansaugstutzen sowie den
Ablass-Schlauch (3) auf den Abussstutzen der
Pumpe, beachten Sie dabei die Förderrichtung auf
dem Typenschild. Um ein Lösen der Schläuche zu
verhindern, werden diese mit den beigelegten
Schlauchklemmen xiert.
4. Absaugschlauch (1) in das Ölmessstabrohr einführen
und bis zum tiefsten Punkt der Ölwanne schieben.
5. Ablass-Schlauch (3) in einen geeigneten und
ausreichend großen Behälter stecken
(die Füllmenge können Sie im Handbuch Ihres
Fahrzeugs nachschlagen).
6. Schließen Sie nun die Öl-Absaugpumpe an die
Batterie an. AUF RICHTIGE POLARITÄT ACHTEN!!!
(schwarze Klemme auf Minus-Pol, rote Klemme auf
Plus-Pol der Batterie)
7. Pumpe einschalten (4) und absaugen.
8. Nach Beendigung des Absaugvorganges schalten Sie
die Pumpe wieder ab. Lassen Sie die Pumpe niemals
„Trockenlaufen“.
9. Füllen Sie lt. Kfz-Hersteller neues Motoröl in Ihr
Fahrzeug ein. Danach kontrollieren Sie mit dem
Öl- Messstab den Ölstand.
4. WICHTIGER HINWEIS
Die Ölabsaugpumpe ist für eine Betriebszeit von
max. 15 Minuten ausgelegt. Danach müssen Sie das
Gerät abkühlen lassen. Die Ölabsaugpumpe nicht länger
als 30 sek. Leer laufen lassen.
HINWEIS
Nach Beendigung der Arbeit Pumpe
samt Zubehör sorgfältig reinigen und
staubgeschützt lagern.
EAL GmbH
Otto-Hausmann-Ring 107
42115Wuppertal, Deutschland
+49 (0)202 42 92 83 0
+49 (0) 202 42 92 83 – 160
info@eal-vertrieb.com
Entsorgen Sie Elektrogeräte nicht
mit dem Hausmüll! Elektro- und
Elektronik-Altgeräte müssen getrennt
gesammelt und einer umweltgerechten
Wiederverwertung zugeführt werden. Über
Entsorgungsmöglichkeiten für Elektro- und
Elektronik-Altgeräte informieren Sie sich bei
Ihrer Gemeinde- oder Stadtverwaltung. Die
Materialien sind recycelbar. Durch Recycling,
stoffliche Verwertung oder andere Formen
der Wiederverwendung von Altgeräten
leisten Sie einen wichtigen Beitrag zum
Schutz unserer Umwelt!
www.eal-vertrieb.com

4
• Before use make sure that the pump, the hoses and the
cable are in perfect condition.
• Damaged cables or connections should be replaced
only by authorized qualied persons.
• Children must not play with the appliance. Cleaning
and user maintenance tasks must not be carried out by
children unless they are supervised.
• Do not perform any modication or dismount the
device by yourself.
• Ensure that the hoses and cables can not be damaged
by sharp edges and can not get in contact with hot
surfaces.
• Do not pump gasoline, kerosene or other highly
ammable liquids! EXPLOSION HAZARD!
• Do not pump water or gear oil: this may cause damage
to the pump.
• When connecting the battery clips, keep correct
polarity!
• Always switch the engine off when pumping.
• Always heat engine oil up before pumping!
• Never let the pump ”running idle”When oil pumping is
interrupted, switch the pump off immediately.
3. SAFETY WARNINGS
2. SPECIFICATIONS
Voltage: 12V DC
Current consumption: approx. 5 A
Max.Time of use: 30 min
Volume: approx. 70 dB (A)
Temperature range (environment): -10°C - +40°C
Max. Oil temperature: 60 °C
Max. Diesel temperature: 45 °C
Conveying speed: 0.2 - 1.5 l/min
depending on liquid
and temperature
Max. Head: 0.7 m
Max. Pressure: 3 bar
Dimensions: approx.13 x 9 x 9 cm
Weight: approx. 975 g
1. PRODUCT DESCRIPTION
This oil pump is designed for clean replacing of oil and/or
draining engine oil, diesel or fuel oil.
1. Pumping hose ø 6 mm
2. Oil pump
3. Outlet hose ø 12 mm
4. ON/OFF switch
5. Power cord with battery clips 12V
WARNING!
Please read the operating instructions
carefully prior to use and observe all
safety instructions. Non-compliance
can lead to personal injury, damage to
the device or to your property. Keep the
original packaging, the purchase receipt
as well as these instructions for future
reference. When passing on this product,
pass on these instructions as well. Before
operating, check that the contents of the
package are intact and complete.
CONTENTS
Oil extraction pump
1. PRODUCT DESCRIPTION ______________ 4
2. SPECIFICATIONS___________________ 4
3. SAFETY WARNINGS _________________ 4
4. CAUTION _______________________ 5
5. OIL PUMP USE INSTRUCTIONS __________ 5
6. NOTES REGARDING ENVIRONMENTAL _____
PROTECTION _____________________ 5
7. CONTACT _______________________ 5
1
5
3
2
4

5
6.NOTES REGARDING ENVIRONMENTAL
PROTECTION
5.OIL PUMP USE INSTRUCTIONS
1. Before replacing oil, heat the engine up until the
temperature reaches approx. 40 - 60°C.
2. Switch off the engine!!
3. Remove the protection caps from the sockets.
Insert the pumping hose (1) in the suction neck
and insert the outlet hose in the outlet neck of the
pump. To make sure that the hoses do not let loose,
fasten them using the clips supplied.
4. Insert the pumping well (1) into the oil-gauge hole
down to the deepest point of the engine sump.
5. Put the outlet hose (2) into a suitable container. (You
can look up the ll-up capacity in your car´s manual)
6. Now, connect the oil pump to the battery. KEEP
CORRECT POLARITY!!! (black clip to the negative
pole, red clip to the positive pole)
7. Switch the oil pump on (5) and start pumping.
8. When pumping is nished, switch the pump off.
Never let the pump ”running idle”
9. Rell the engine with new oil according to the car
manufacturer’s instructions. Next, check the oil level
using the oil gauge.
4. CAUTION
The oil pump is designed to run for approx. 15 minutes.
After that, let the pump cool down. Do not let the oil
suction pump run empty for more than 30 sec.
CAUTION
After nishing the job, clean the pump
and its accessories properly; keep it in a
dustproof place.
Do not dispose of electrical devices with
household waste. Electrical devices
and electronic scrap must be collected
separately and disposed of in an
environmentally responsible manner for
recycling. Please contact your community
or city administration regarding disposal
options for electrical and electronic scrap.
The materials are recyclable. You make
an important contribution to protecting
our environment by recycling, material
utilisation or other forms of reusing waste
equipment.
7. CONTACT
EAL GmbH
Otto-Hausmann-Ring 107
42115Wuppertal, Germany
+49 (0)202 42 92 83 0
+49 (0) 202 42 92 83 – 160
info@eal-vertrieb.com
www.eal-vertrieb.com

6
• Contrôlez le bon état de la pompe d‘aspiration
d‘huile, des tuyaux et des câbles de raccordement
avant utilisation. Les composants endommagés,
ssurés ou cassés ne doivent être réparés que par des
techniciens qualiés !
• Les enfants ne doivent pas jouer avec l‘appareil.
• Le nettoyage et l‘entretien par l‘utilisateur ne doivent
pas être effectués par des enfants sans surveillance.
• Ne manipulez pas et ne démontez pas la pompe
d‘aspiration d‘huile.
• Veillez à ce que le tuyau et le câble ne soient pas
exposés à des arêtes vives ou à des objets trop chauds !
• Ne pas pomper d‘essence, de pétrole ou d‘autres
produits inammables. liquides inammables !
• Consultez le manuel de votre véhicule pour savoir si
le constructeur autorise l‘aspiration de l‘huile moteur.
RISQUE D‘EXPLOSION !
• Ne pas aspirer d‘eau ni d‘huile de transmission ; la
pompe pourrait être endommagée.
• Veiller à la bonne polarité lors du raccordement des
bornes de la batterie !
• Toujours arrêter le moteur lors de l‘aspiration.
• Toujours réchauffer l‘huile moteur avant l‘aspiration !
• Ne jamais laisser la pompe„tourner à sec“. Si la pompe
écoulement d‘huile s‘interrompt, arrêter immédiate-
ment la pompe.
• Récupérer l‘huile usagée dans un récipient
suffisamment grand récupérer l‘huile usagée. Ne
pas déverser dans la terre ou dans les Vider les
canalisations ! Déposer l‘huile usagée dans le centre de
collecte des huiles usagées !!!
3.LES AVERTISSMENT DE SÉCURITÉ
2. SPÉCIFICATIONS
Tension : 12 V DC
Consommation de courant : env. 5 A
Max.Temps d‘utilisation : 30 min
Volume : env. 70 dB (A)
Plage de température (environnement) : -10°C - +40°C
Max.Température de l‘huile : 60 °C
Max.Température du gazole : 45 °C
Vitesse de transport : 0,2 - 1,5 l/min selon le
liquide et la température
Max. Hauteur manométrique : 0,7 m
Max. Pression : 3 bar
Dimensions : env.13 x 9 x 9 x 9 cm
Poids : env. 975 g
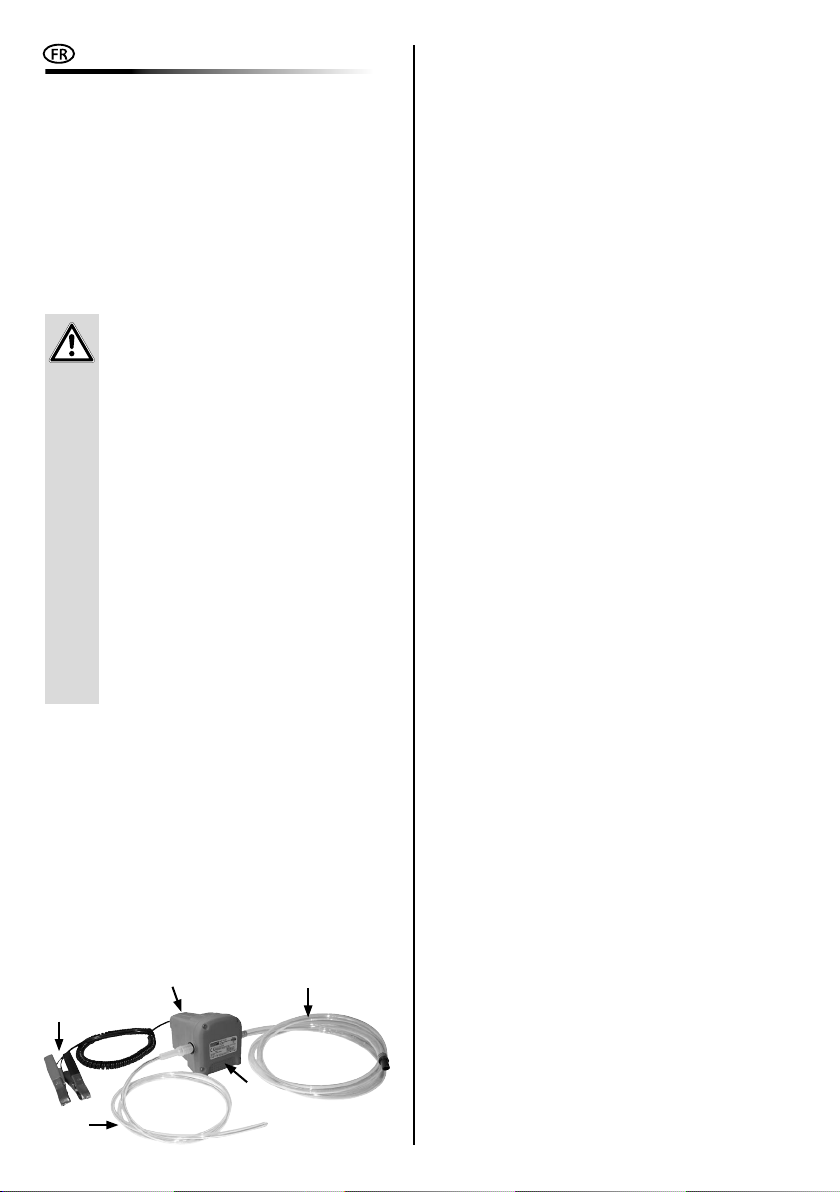
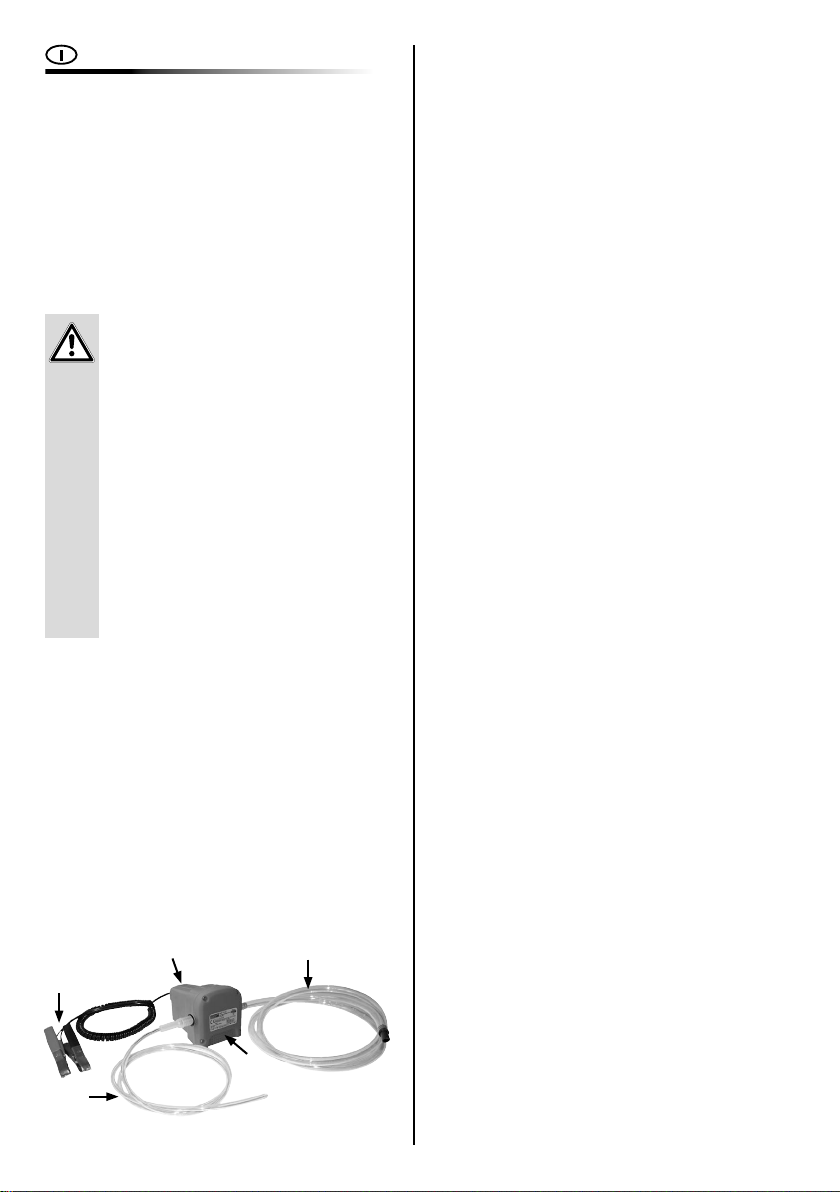
1.LA DÉSCRIPTION DE L‘ARTICLE
Cette pompe à huile convient au vidange propre d’huile
ou bien à l’épuisement d’huile moteur, de gazole et de
mazout.
1. La sonde aspirante ø 6 mm
2. Pompe d‘aspiration d‘huile
3. Le tuyau aspirant ø 12 mm
4. L‘interrupteur MARCHE/ARRET
5. Câble de raccordement de 12V avec pinces pour batterie
AVERTISSEMENT!
Lisez attentivement la notice
d‘utilisation avant la mise en service
et respectez toutes les consignes de
sécurité ! Tout non-respect de ces
consignes peut entraîner des dommages
corporels, endommager l‘appareil
ou vos biens ! Conservez l‘emballage
d‘origine, le justicatif d‘achat et la
présente notice pour vous y référer
ultérieurement ! Si vous revendez
ou remettez l‘appareil à des tiers,
veuillez également leur remettre cette
notice d‘utilisation. Avant la mise en
service, veuillez contrôler le contenu
de l‘emballage quant à l‘absence de
dommages et vérier si toutes les pièces
sont présentes !
SOMMAIRE
1
5
3
2
4
Pompe d‘aspiration d‘huile
1. LA DÉSCRIPTION DE L‘ARTICLE __________ 6
2. SPÉCIFICATIONS___________________ 6
3. LES AVERTISSMENT DE SÉCURITÉ ________ 6
4. L‘AVERTISSMENT __________________ 7
5. MODE D’EMPLOI DE LA POMPE À L‘HUILE ___ 7
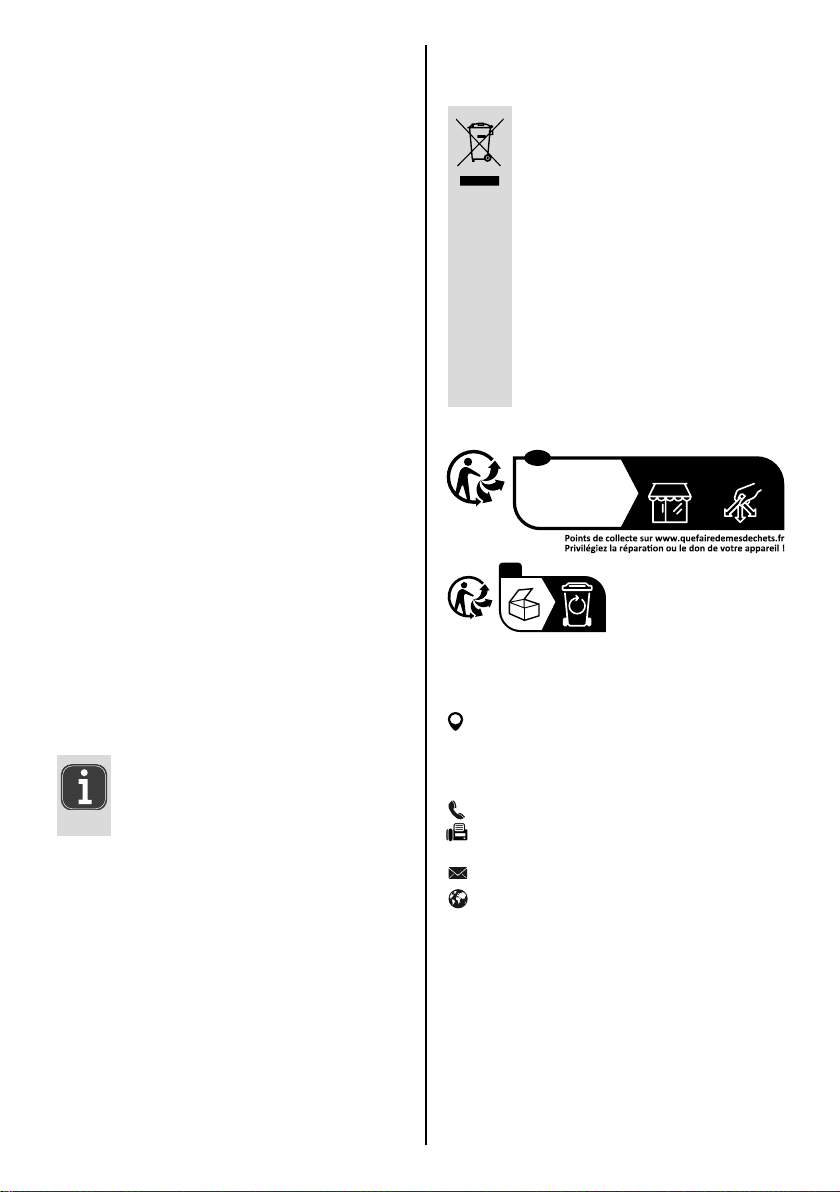
6. REMARQUES RELATIVES À LA PROTECTION DE
L‘ENVIRONNEMENT_________________ 7
7. RENSEIGNEMENTS DE CONTACT _________ 7

7
7. RENSEIGNEMENTS DE CONTACT
6.REMARQUES RELATIVES À LA PROTECTION DE
L‘ENVIRONNEMENT
5.MODE D’EMPLOI DE LA POMPE À L‘HUILE
1. Avant de changer l’huile faites chauffer le moteur
jusqu’à la température de l’huile 40 - 60°C environ.
2. Coupez le moteur !!
3. Insérez la sonde aspirante (1) avec le tuyau aspirant
(2) dans la buse d’aspiration et le tuyau de vidange
(4) insérez dans la buse d’écoulement de la pompe.
Pour que les tuyaux ne se desserrent pas, xezles à
l’aide des agrafes à tuyaux jointes.
4. Insérez la sonde aspirante (1) dans l’orice de jauge à
l’huile et introduisez la sonde le plus bas dans le bac
d’huile.
5. Insérez le tuyau de vidange (4) dans le récipient
convenable.
6. Maintenant branchez la pompe à l’huile avec la
baterie. RÉSPECTEZ LA MEME POLARITÉ !!!
( la borne noire au pôle noir, la borne rouge au pôle
rouge)
7. Allumez la pompe (5) et commencez pomper.
8. Avoir ni le pompage mettez la pompe hors circuit.
Ne laissez jamais la pompe„tourner à vide“.
9. Remplisez la nouvelle l’huile moteur selon les
instructions de fabricant de véhicule. Ensuite vériez
l’huile à l’aide de jauge à huiel.
4. L‘AVERTISSMENT
La pompe à l’huile est dimensionnée pour la durée de
service 15 min environ. Après il faut laissez l’appareil
refroidir. Ne pas laisser la pompe d‘aspiration d‘huile
tourner à vide pendant plus de 30 secondes.
L‘AVERTISSMENT
Après avoir ni le travail nettoyez la
pompe y compris les accessoires et entre
posez en étanche aux poussières.
EAL GmbH
Otto-Hausmann-Ring 107
42115Wuppertal, Allemagne
+49 (0)202 42 92 83 0
+49 (0) 202 42 92 83 – 160
info@eal-vertrieb.com
Ne jetez pas les appareils électriques dans
les ordures ménagères ! Les appareils
électriques et électroniques usagés doivent
être collectés séparément et être remis
aux services de recyclage. Renseignez-
vous quant aux possibilités d‘élimination
d‘appareils électriques et électroniques
usagés auprès de votre administration
communale ou municipale. Les matériaux
sont recyclables. Par le recyclage, la
récupération des matières ou d’autres
formes de réutilisation d’appareils usagés,
vous contribuez activement à la protection
de notre environnement !
F
R
À DÉPOSER
EN MAGASIN À DÉPOSER
EN DÉCHÈTERIE
OU
FR
Cet appareil
et ses accessoires
se recyclent
www.eal-vertrieb.com

8
• Controleer de olieafzuigpomp, de slangen en de
aansluitkabel vóór gebruik op een correcte toestand.
Beschadigde, gescheurde of gebroken componenten
mogen uitsluitend door gekwaliceerde technici
gerepareerd worden!
• Houd kinderen op een veilige afstand en laat kinderen
dit apparaat niet bedienen.
• Manipuleer of demonteer de olieafzuigpomp niet.
• Vergewis u ervan dat slang en kabel niet blootgesteld
worden aan scherpe kanten of te hete voorwerpen!
• Geen benzine, petroleum of andere licht ontvlambare
vloeistoffen pompen! EXPLOSIEGEVAAR!
• Ga in het handboek van uw voertuig na, of de
fabrikant het afzuigen van motorolie toelaat.
• Geen water en transmissieolie afzuigen; pomp kan
daardoor beschadigd worden.
• Bij de aansluiting van de batterijklemmen op correcte
polariteit letten!
• Motor bij het afzuigen altijd uitzetten.
• Motorolie altijd verwarmen vóór het afzuigen!
• Pomp nooit laten „droog lopen“. Wanneer de
oliestroming afbreekt, pomp onmiddellijk
uitschakelen.
• Verontreinigde olie opvangen in een reservoir dat
groot genoeg is. Niet in de bodem of in de riolering
laten wegvloeien! Voer verontreinigde olie af op het
voor verontreinigde olie geschikte inzamelpunt!!!
3. VEILIGHEIDSINSTRUCTIES
2. SPECIFICATIES
Spanning: 12V DC
Stroomopname: ca. 5 A
Max. gebruikstijd: 15 min
Geluidsniveau: ca. 70dB(A)
Temperatuurbereik (milieu): -10°C – +40°C
Max. olietemperatuur: 60°C
Max. dieseltemperatuur: 45°C
Transportsnelheid: 0,2 – 1,5l/min afhankelijk
van vloeistof en temperatuur
Max. opvoerhoogte: 0,7 m
Max. druk: 3 bar
Afmetingen: ca. 13 x 9 x 9 cm
Gewicht: ca. 975g
1. GEBRUIKSDOELEINDE
De olieafzuigpomp is geschikt voor het zuiver verversen
van olie resp. voor het wegpompen van motor-, diesel-,
en stookolie.
1. Afzuigslang Ø 6 mm
2. Olieafzuigpomp
3. Afvoerslang Ø 12 mm
4. Schakelaar“Aan/uit”
5. 12 V aansluitkabel met batterijklemmen
ONDERHOUD!
Lees de handleiding voor
ingebruikname aandachtig en neem
alle veiligheidsvoorschriften in acht!
Bewaar de oorspronkelijke verpakking,
het aankoopbewijs en deze handleiding
voor latere raadpleging! Niet-naleving
kan lichamelijke letsels, schade aan
het apparaat of aan uw eigendom
veroorzaken! Controleer voor de
ingebruikneming de inhoud van de
verpakking op beschadigingen en
volledigheid!
OVERZICHT
Olieafzuigpomp
1. GEBRUIKSDOELEINDE _______________ 8
2. SPECIFICATIES ____________________ 8
3. VEILIGHEIDSINSTRUCTIES_____________ 8
4. OPMERKING _____________________ 9
5. BEDIENINGVAN DE OLIEAFZUIGPOMP _____ 9
6. AANWIJZINGEN VOOR DE AFVALVERWIJDERING 9
7. CONTACTINFORMATIE _______________ 9
1
5
3
2
4

9
7. CONTACTINFORMATIE
6.AANWIJZINGEN VOOR DE AFVALVERWIJDERING
5. BEDIENING VAN DE OLIEAFZUIGPOMP
1. Vooraleer de olie te verversen, laat u de motor warm
draaien tot de olietemperatuur ca. 40-60°C bereikt
heeft.
2. Zet de motor uit!!
3. Verwijder de beschermdoppen van de slangaanslui-
tingen van de olieafzuigpomp. Speld de zuigslang
(1) op de aanzuigmof en de afvoerslang (3) op de
afvoermof van de pomp. Let daarbij op de transport-
richting op het typeplaatje. Om te verhinderen dat de
slangen loskomen, worden deze met de bijgevoegde
slangklemmen vastgezet.
4. Afzuigslang (1) in de oliepeilstokbuis inbrengen en
tot aan het diepste punt van de oliebak schuiven.
5. Afvoerslang (3) in een reservoir steken dat geschikt
en groot genoeg is (de vulhoeveelheid kunt u in het
handboek van uw voertuig achterhalen).
6. Sluit nu de olieafzuigpomp op de batterij aan. LET OP
CORRECTE POLARITEIT!!! (Zwarte klem op minpool,
rode klem op pluspool van de batterij).
7. Pomp inschakelen (4) en afzuigen.
8. Na beëindiging van de afzuiging schakelt u de pomp
weer uit. Laat de pomp nooit„droog lopen“.
9. Giet in overeenstemming met de fabrikant van het
voertuig nieuwe motorolie in uw voertuig. Daarna
controleert u met de oliepeilstok het oliepeil.
4. OPMERKING
De olieafzuigpomp is voorzien voor een inschakelduur
van max. 15 minuten. Daarna moet u het apparaat laten
afkoelen. Laat de olie-extractie pomp niet langer dan
30 sec. leeg lopen.
OPMERKING
Na beëindiging van het werk pomp
samen met toebehoren zorgvuldig
reinigen en beschermd tegen stof
opbergen.
EAL GmbH
Otto-Hausmann-Ring 107
42115Wuppertal, Duitsland
+49 (0)202 42 92 83 0
+49 (0) 202 42 92 83 – 160
info@eal-vertrieb.com
Gooielektrischeapparatenniet weg met het
gewone huishoudelijke afval! Afgedankte
elektrische en elektronische apparaten
moeten gescheiden worden ingezameld
en op milieuvriendelijke wijze worden
gerecycled. U kunt informatie inwinnen
bij uw gemeente- of stadsbestuur over
de afvoermogelijkheden voor afgedankte
elektrische- en elektronische apparaten. De
materialen kunnen worden gerecycled. Door
recycling of andere vormen van hergebruik
van oude producten levert u een belangrijke
bijdrage aan de bescherming van ons milieu!
www.eal-vertrieb.com

10
• Controllare che la pompa di estrazione dell‘olio, i tubi
e i cavi di collegamento siano in perfette condizioni
prima dell‘uso. I componenti danneggiati, incrinati o
rotti possono essere riparati solo da tecnici qualicati!
• I bambini non devono giocare con l‘apparecchio.
• La pulizia e la manutenzione dell‘utente non devono
essere eseguite dai bambini senza supervisione.
• Non manomettere o smontare la pompa di estrazione
dell‘olio.
• Assicuratevi che il tubo e il cavo non siano esposti a
bordi taglienti o a oggetti troppo caldi!
• Non pompare benzina, paraffina o altri liquidi
altamente inammabili!
• Fate riferimento al manuale del vostro veicolo per
vedere se il produttore permette l‘estrazione dell‘olio
motore. PERICOLO DI ESPLOSIONE!
• Non travasare l‘acqua o l‘olio della trasmissione; la
pompa potrebbe essere danneggiata.
• Assicurarsi della corretta polarità quando si collegano i
terminali della batteria!
• Spegnere sempre il motore durante l‘aspirazione.
• Riscaldare sempre l‘olio del motore prima di aspirare!
• Non lasciare mai la pompa a secco. Se il usso dell‘olio
si ferma, spegnere immediatamente la pompa.
• Raccogliere l‘olio usato in un contenitore sufficien-
temente grande. Non scaricare nel terreno o nella
rete fognaria! Smaltire l‘olio usato presso il punto di
raccolta dell‘olio usato!!!
3.AVVERTENZE DI SICUREZZA
2. SPECIFICAZIONI
Tensione: 12V DC
Consumo di corrente: ca. 5 A
Max.Tempo di utilizzo: 30 min
Volume: ca. 70 dB (A)
Intervallo di temperatura (ambiente): -10°C - +40°C
Max.Temperatura dell‘olio: 60 °C
Max.Temperatura del gasolio: 45 °C
Velocità di trasporto: 0,2 - 1,5 l/min a seconda
del liquido e della
temperatura
Max.Testa: 0,7 m
Max. Pressione: 3 bar
Dimensioni: ca. 13 x 9 x 9 x 9 cm
Peso: ca. 975 g
1. DESCRIZIONE DEL PRODOTTO
La pompa per aspirazione olio è adatta al puro
cambio dell’olio, eventualmente all’aspirazione dell’olio
da motore, del gasolio e dell’olio combustibile.
1. Sonda di aspirazione ø 6 mm
2. POMPA DI ASPIRAZIONE OLIO
3. Tubo di aspirazione in gomma ø 12 mm
4. Interruttore on - off
5. Cavo di collegamento da 12V con morsetti per batteria
AVVERTENZA!
Leggere attentamente le istruzioni
per l‘uso prima della messa in funzione
e osservare tutte le avvertenze di
sicurezza! La mancata osservanza
di queste istruzioni può provocare
lesioni personali, danni al prodotto
o alla vostra proprietà! Conservare la
confezione originale, la prova d‘acquisto
e queste istruzioni come riferimento
futuro! In caso di cessione del prodotto,
consegnare anche le presenti istruzioni.
Vericare l‘integrità e la completezza
del contenuto della confezione prima di
utilizzare il prodotto!
INDICE
Pompa di aspirazione olio
1. DESCRIZIONE DEL PRODOTTO___________ 10
2. SPECIFICAZIONI ___________________ 10
3. AVVERTENZE DI SICUREZZA ____________ 10
4. AVVERTENZA_____________________ 11
5. ISTRUZIONI PER IL SERVIZIO DELLA POMPA __ 11
PER ASPIRAZIONE OLIO ______________ 11
6. AVVERTENZE SULLATUTELA AMBIENTALE ___ 11
7. COME CONTATTARCI ________________ 11
1
5
3
2
4

11
7. COME CONTATTARCI
6.AVVERTENZE SULLA TUTELA AMBIENTALE
5.ISTRUZIONI PER IL SERVIZIO DELLA POMPA
PER ASPIRAZIONE OLIO
1. 1. Prima del cambio dell’olio bisogna lasciare
scaldare il motore nché la temperatura dell’olio non
raggiunge circa 40 - 60°C.
2. Spegnere il motore!!
3. Mettete la sonda di aspirazione (1) con il tubo di
aspirazione in gomma (2) nel collo di aspirazione
e mettete il tubo di scarico in gomma (4) nel collo
di deusso della pompa. Per evitare la liberazione
dei tubi, bisogna ssarli tramite le graffe di tubi in
dotazione.
4. Inserite la sonda di aspirazione (1) nel foro per il
misuratore di livello d’olio e dopo la inserite nel punto
più profondo della vasca d’olio.
5. Mettere il tubo di scarico (4) nel recipiente adatto.
6. Adesso collegate la pompa per aspirazione olio con
la batteria. OSSERVARE LA POLARITÀ CORRETTA!!!
(morsetto nero sul polo negativo, morsetto rosso sul
polo positivo della batteria)
7. Accendere la pompa (5) e cominciare ad aspirare.
8. Terminata l’aspirazione, spegnere la pompa. Non
lasciate mai andare la pompa a vuoto.
9. Riempire con olio nuovo da motore secondo i dati
riportati dal produttore dell’automobile. Dopo
controllare tramite il misuratore di livello d’olio lo
stato di olio.
4. AVVERTENZA
La pompa per aspirazione olio è dimensionata per il
tempo di servizio di circa 15 min. Dopo è necessario
lasciare raffreddare l’apparecchio. Non lasciare che la
pompa di estrazione dell‘olio funzioni a vuoto per più di
30 secondi.
AVVERTENZA
Terminato il lavoro, pulite con cura la
pompa inclusi gli accessori e depositate
in modo che la pompa non si impolveri.
EAL GmbH
Otto-Hausmann-Ring 107
42115Wuppertal, Germania
+49 (0)202 42 92 83 0
+49 (0) 202 42 92 83 – 160
info@eal-vertrieb.com
Non smaltire gli apparecchi elettrici insieme
ai riuti domestici! I dispositivi elettrici
ed elettronici devono essere separati e
destinati al riciclaggio. Per le possibilità
di smaltimento delle apparecchiature
elettriche ed elettroniche, informarsi presso
il proprio comune I materiali sono riciclabili.
Con il riciclo, il recupero del materiale e altre
forme di riutilizzo di prodotti usati si fornisce
un contributo importante per la protezione
dell‘ambiente!
www.eal-vertrieb.com

12
Other manuals for 21014
2
Table of contents
Languages:
Other EUFAB Automobile Accessories manuals

EUFAB
EUFAB 11400 User manual

EUFAB
EUFAB 11563 User manual

EUFAB
EUFAB 21069 User manual

EUFAB
EUFAB 16501 User manual

EUFAB
EUFAB AMBER III User manual

EUFAB
EUFAB PROBC2 / FG2 User manual

EUFAB
EUFAB AMBER PLUS User manual

EUFAB
EUFAB 16420 User manual

EUFAB
EUFAB 11408 User manual

EUFAB
EUFAB Carlo Plus User manual
Popular Automobile Accessories manuals by other brands

Quadratec
Quadratec 12061.010 Series installation manual

Roadmaster
Roadmaster 751428 installation instructions

Mercedes-Benz
Mercedes-Benz Wallbox Home operating manual

Webasto
Webasto thermo top evo Installation documentation

NavLinkz
NavLinkz RL3-MIB-TT manual

Atwood
Atwood Lippert Components LEVELEGS MPD 66385 manual